
Multipla Hamster Crystal - Cage pour petit animal Ferplast - Notice d'utilisation et mode d'emploi gratuit
Retrouvez gratuitement la notice de l'appareil Multipla Hamster Crystal Ferplast au format PDF.
| Type de produit | Cage pour hamster et petits rongeurs |
| Marque | Ferplast |
| Modèle | Multipla Hamster Crystal |
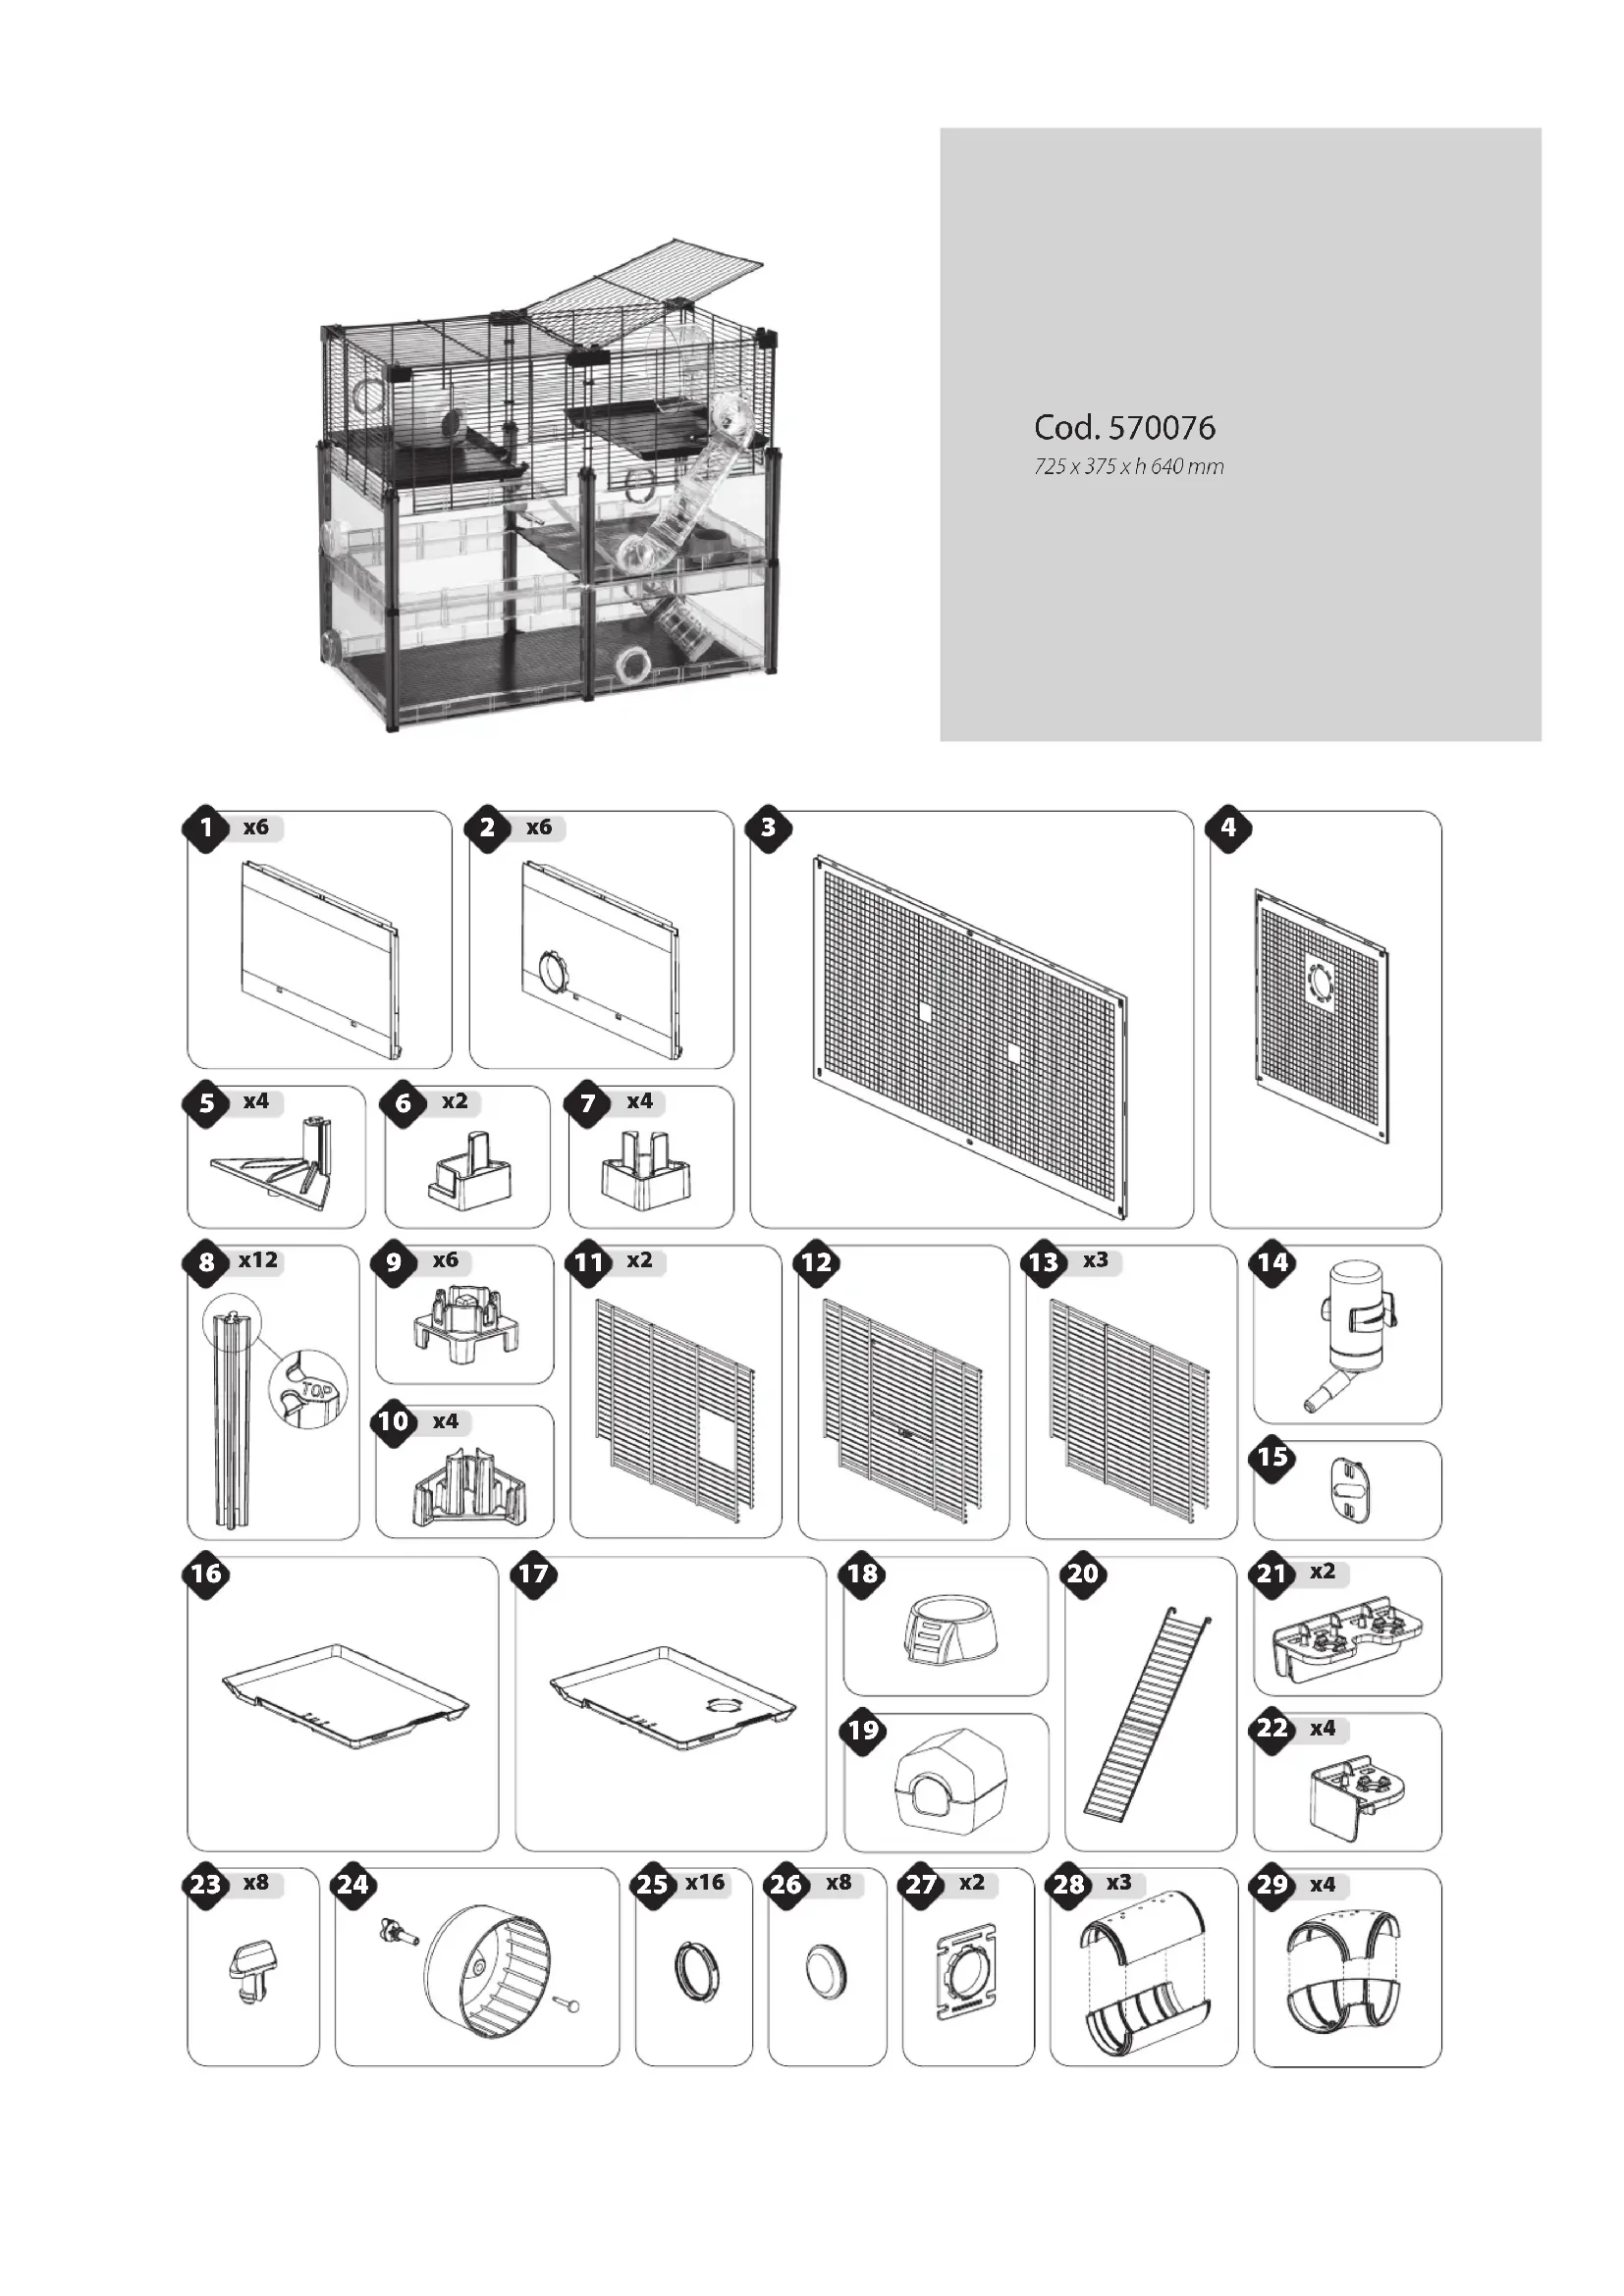
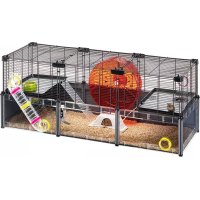
| Dimensions (L x l x H) | 725 x 375 x 640 mm |
| Poids approximatif | Environ 4 kg |
| Matériau principal | Plastique transparent et grille métallique |
| Couleur | Transparent (Crystal) |
| Capacité | Convient aux hamsters, souris et petits rongeurs |
| Alimentation | Aucune (cage non électrique) |
| Fonctions principales | Structure modulable avec plateformes, grille extérieure amovible, fond amovible, accès facile via portes |
| Entretien et nettoyage | Nettoyer avec un chiffon humide et doux. Ne pas utiliser de produits abrasifs |
| Sécurité | Barres verticales à l'extérieur pour éviter les blessures, vis de fixation pour la stabilité, avertissements inclus |
| Pièces détachées et réparabilité | Pièces de rechange disponibles auprès du fabricant |
| Contenu de l'emballage | Cage, grilles, vis, accessoires (plateformes, etc.) |
| Garantie | 2 ans |
| Informations générales | Notice d'utilisation incluse (12 pages) |
FOIRE AUX QUESTIONS - Multipla Hamster Crystal Ferplast
Questions des utilisateurs sur Multipla Hamster Crystal Ferplast
0 question sur cet appareil. Repondez a celles que vous connaissez ou posez la votre.
Poser une nouvelle question sur cet appareil
Téléchargez la notice de votre Cage pour petit animal au format PDF gratuitement ! Retrouvez votre notice Multipla Hamster Crystal - Ferplast et reprennez votre appareil électronique en main. Sur cette page sont publiés tous les documents nécessaires à l'utilisation de votre appareil Multipla Hamster Crystal de la marque Ferplast.
MODE D'EMPLOI Multipla Hamster Crystal Ferplast
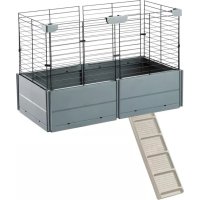
natural_image
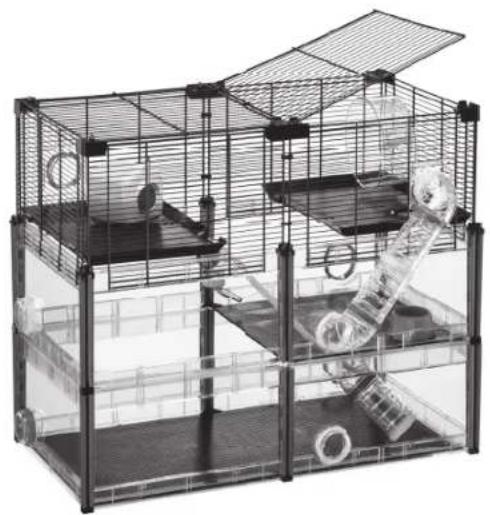
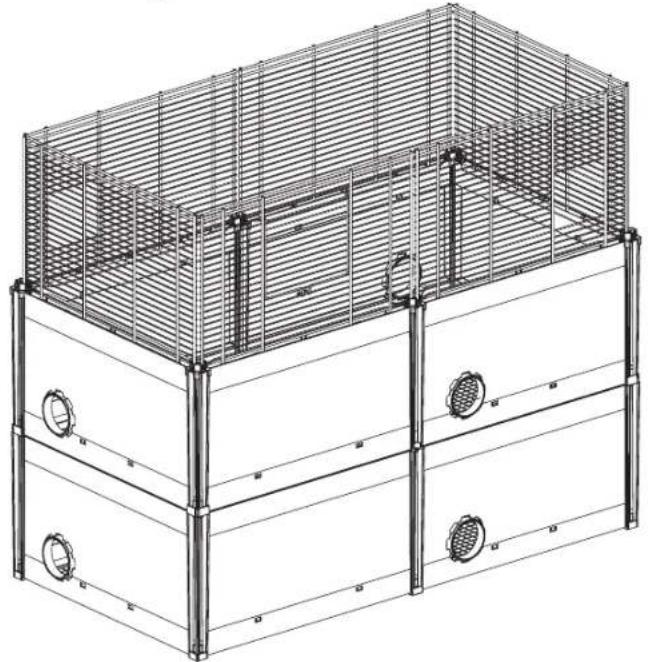
Exterior view of a modern catchairs with transparent cages and internal compartments (no text or symbols visible)Cod. 570076
725×375×h 640 mm
natural_image
Simple line drawing of a mechanical component with no text or symbols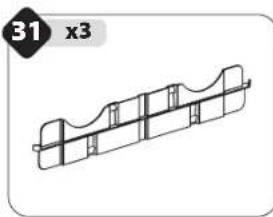
natural_image
Technical line drawing of a mechanical bracket or housing (no text or symbols)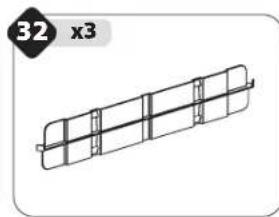
natural_image
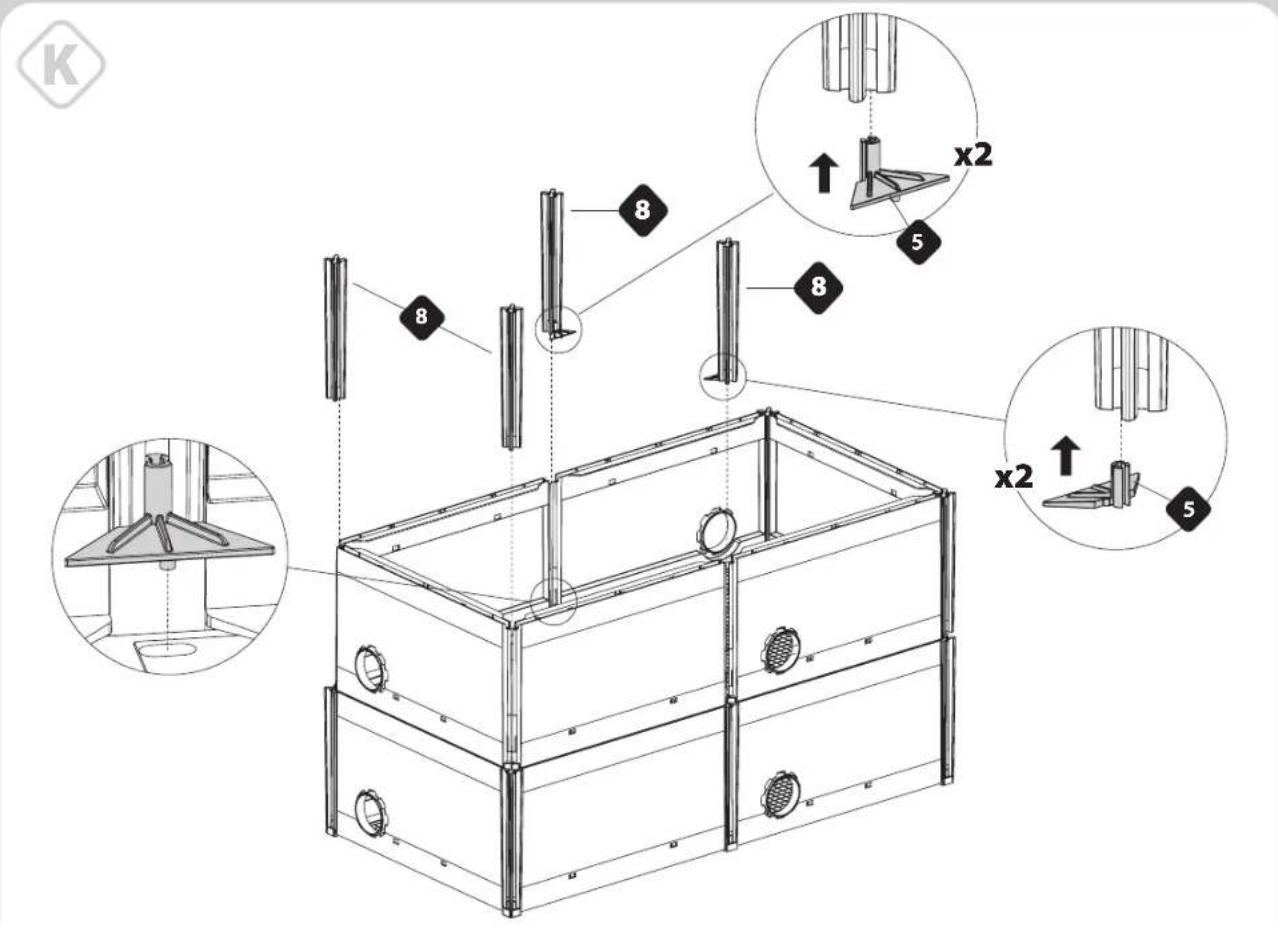
Pure technical line drawing of a rectangular frame with internal supports, no text or symbols present
natural_image
Isometric view of a grid-like structure with no text or symbols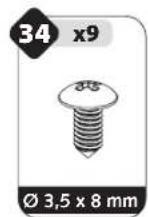

natural_image
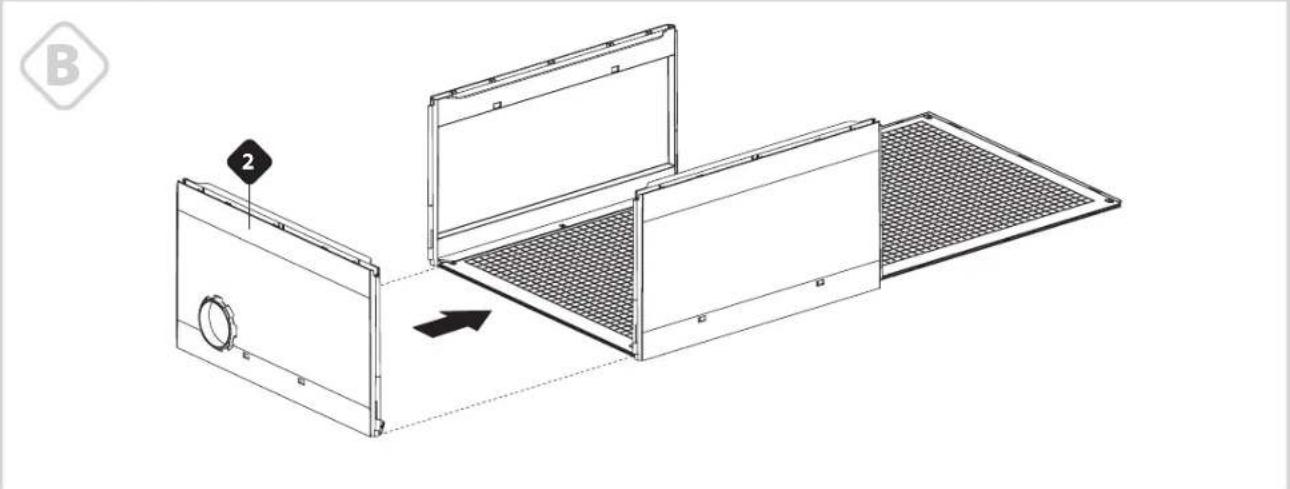
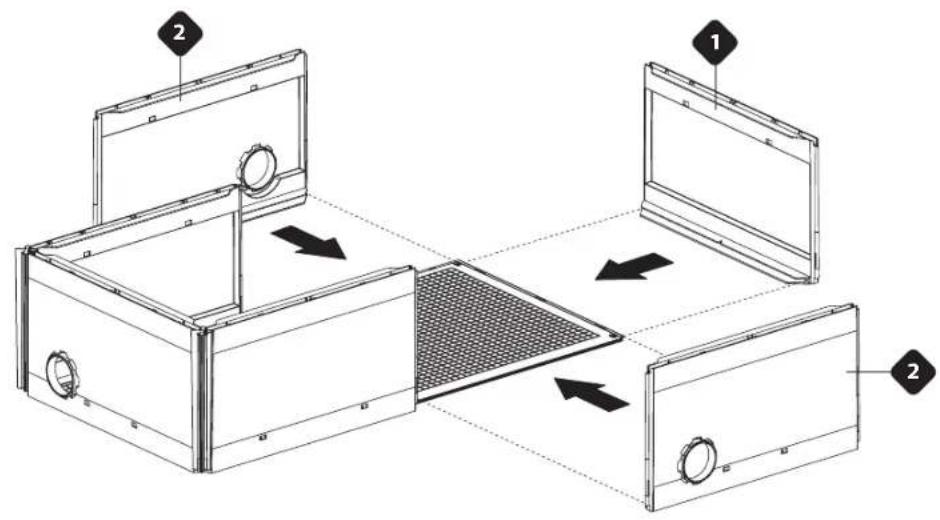
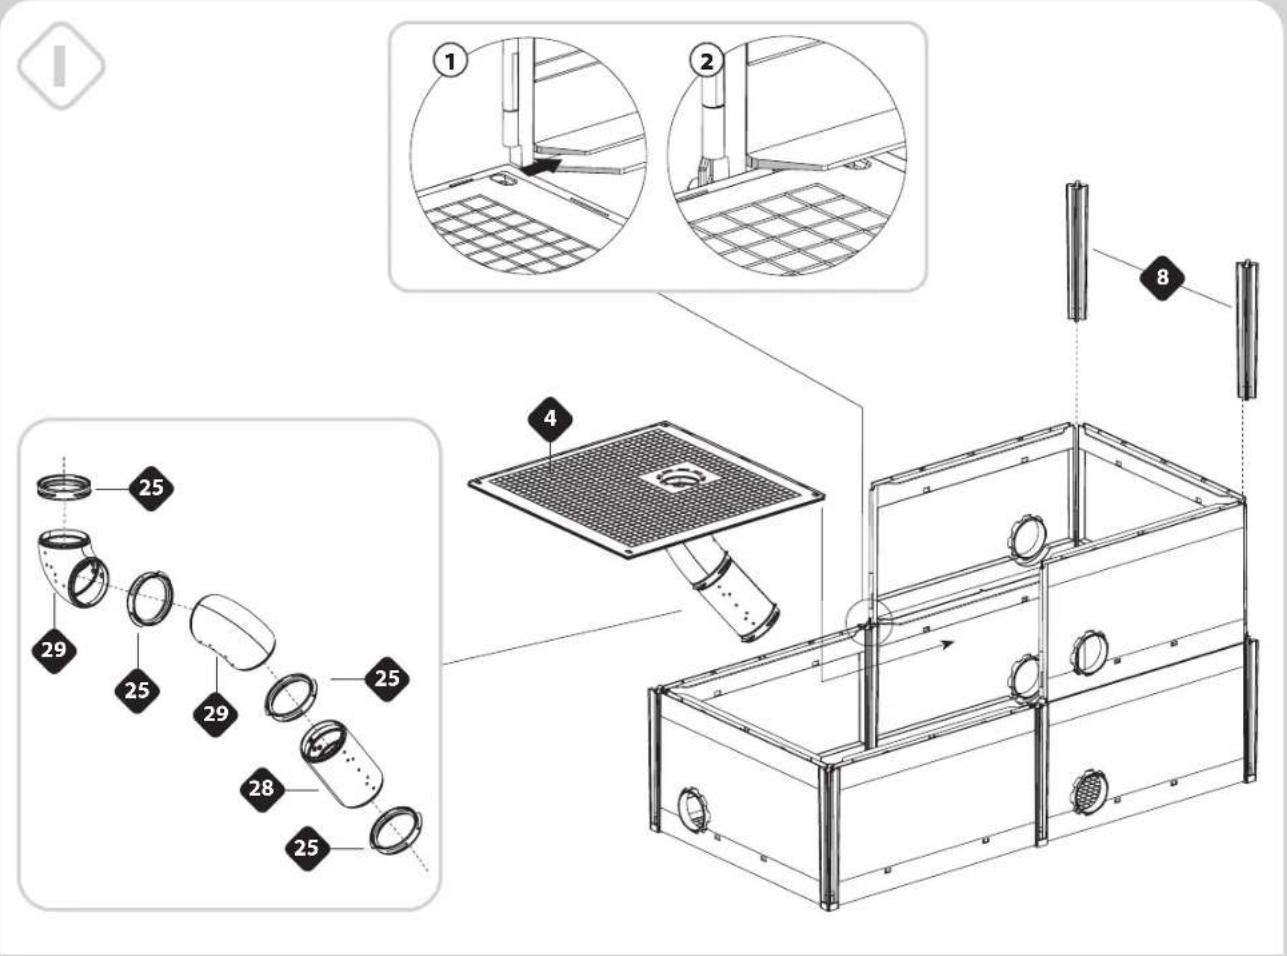
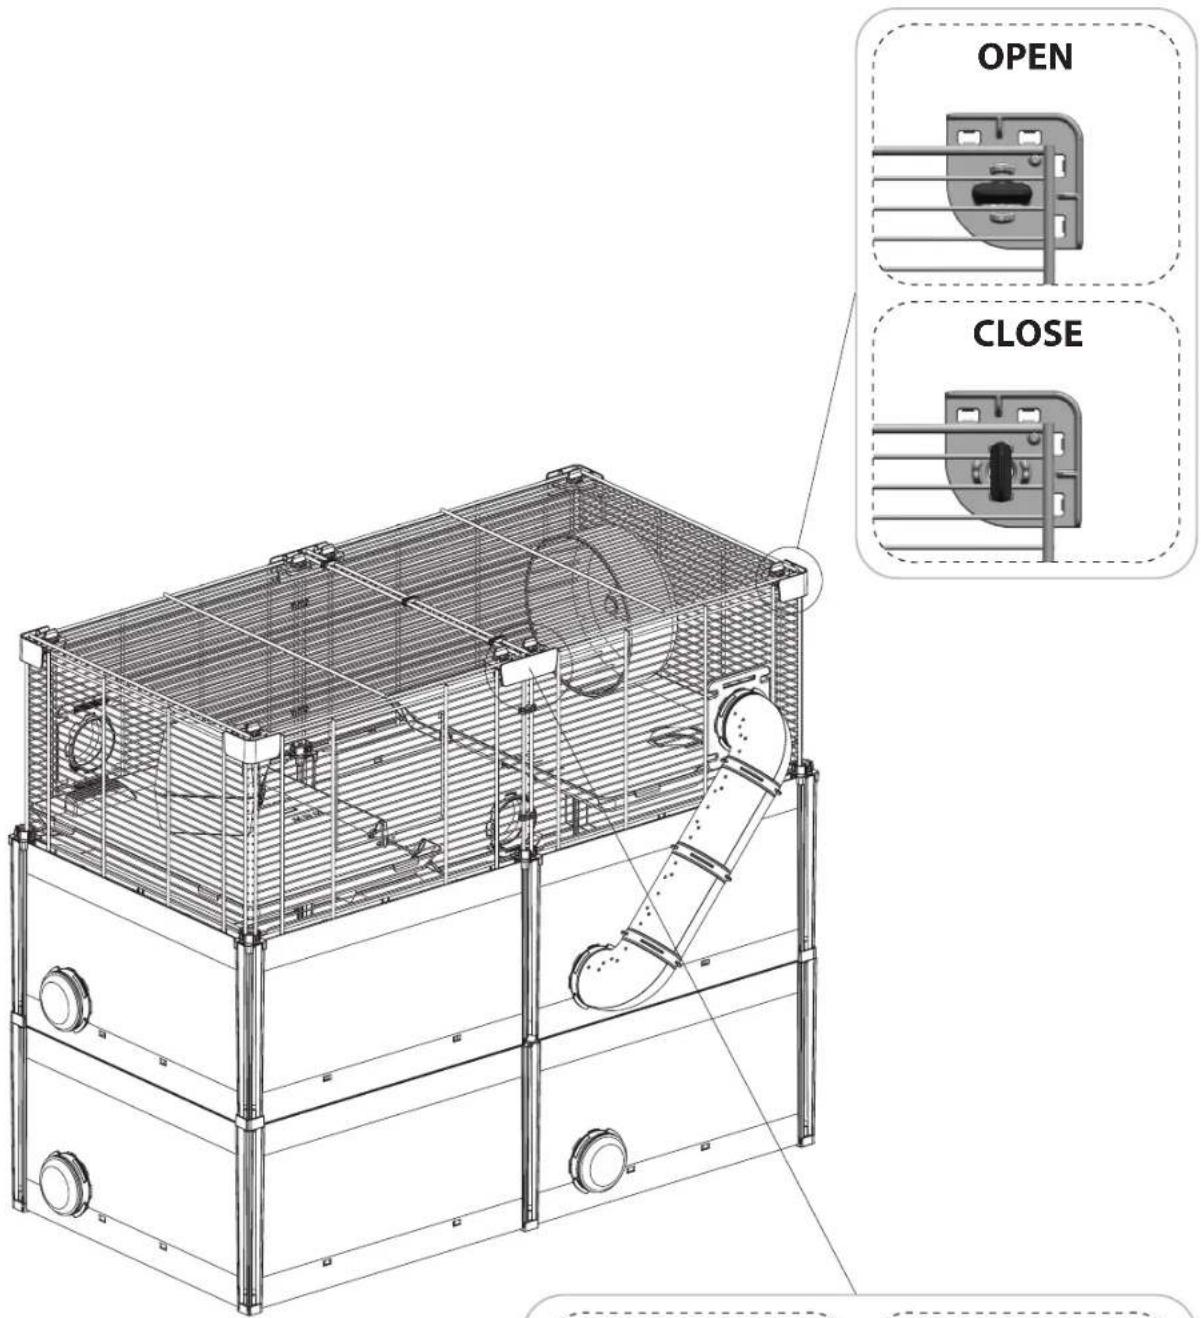
Technical line drawing of a modular device with two panels, one showing internal structure and the other showing mesh pattern (no text or symbols)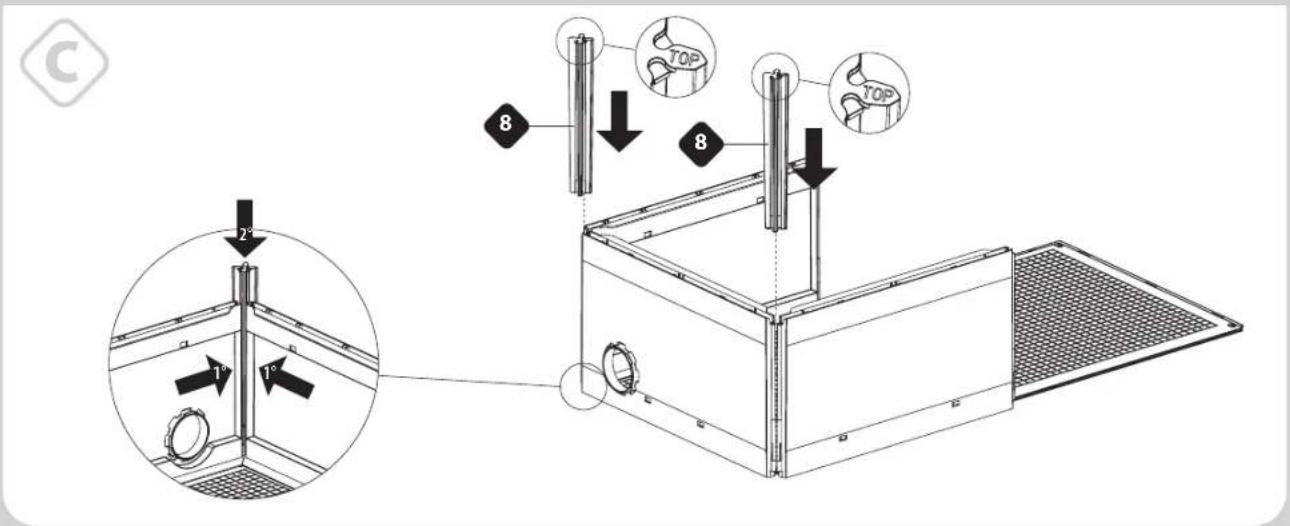


F
G
H


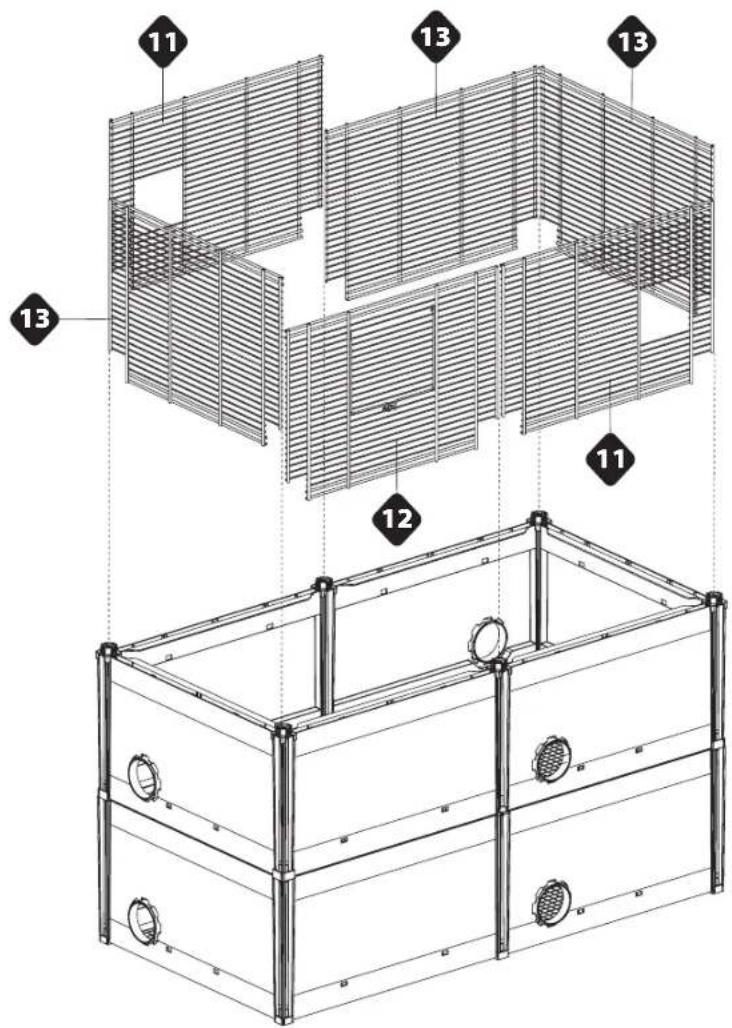
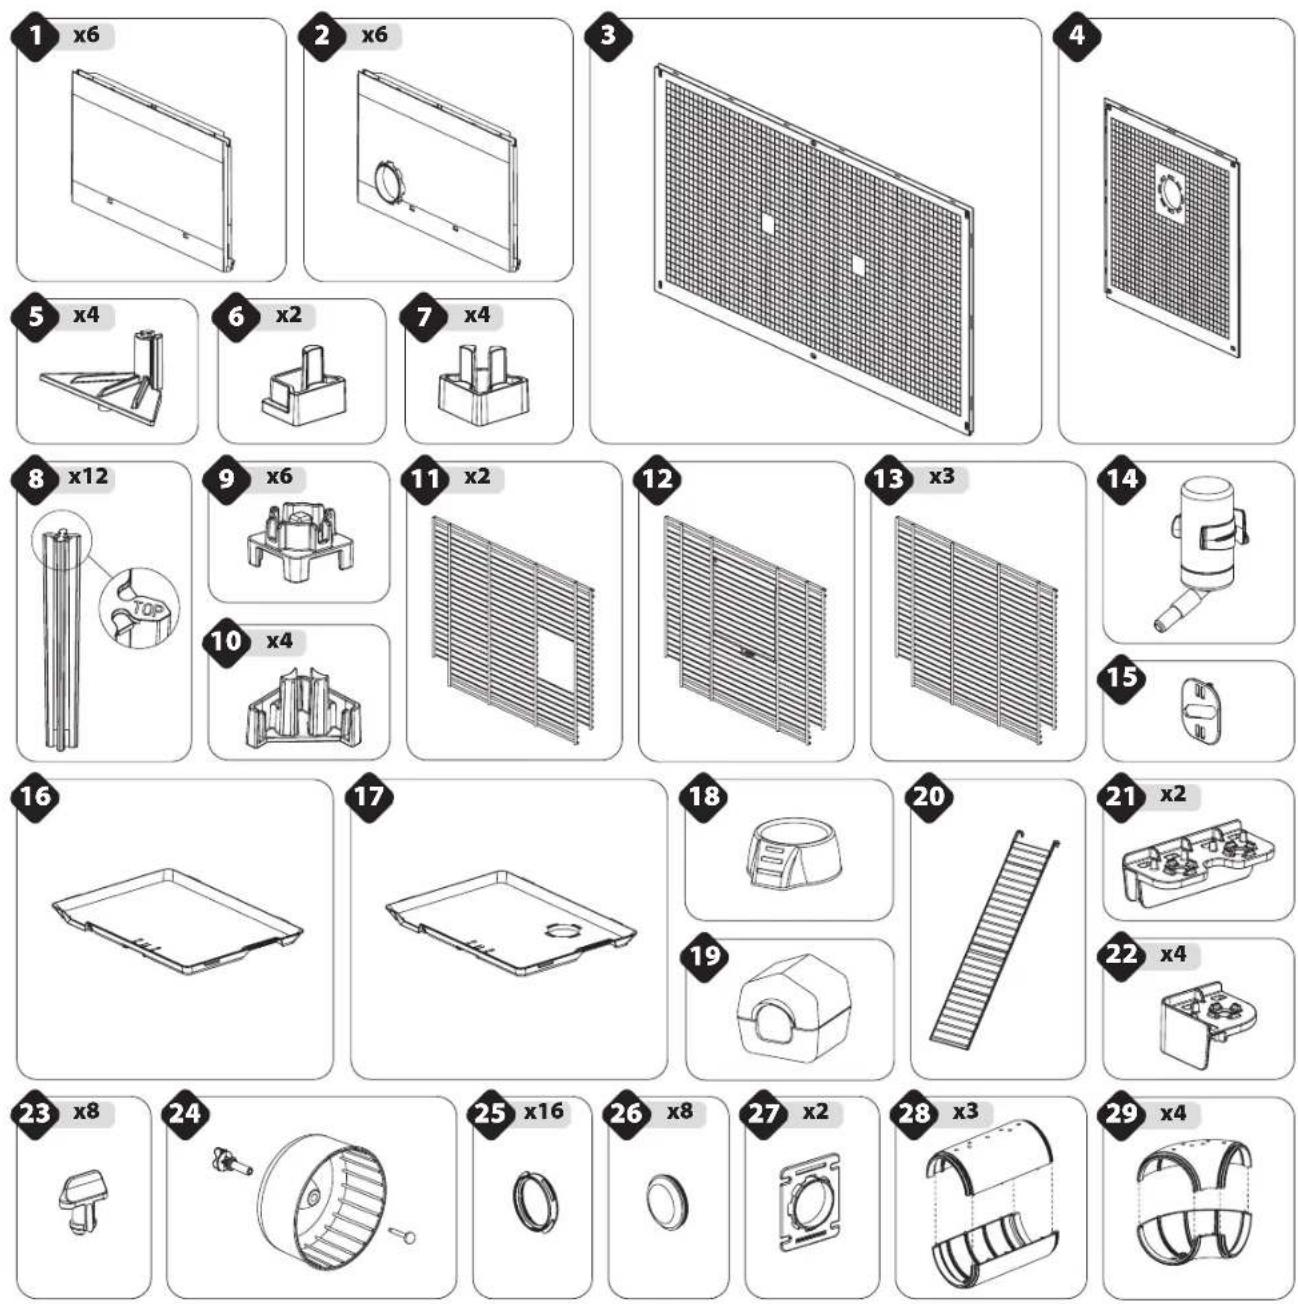
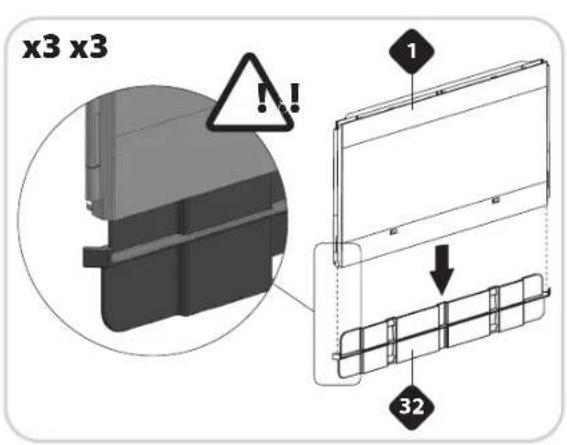
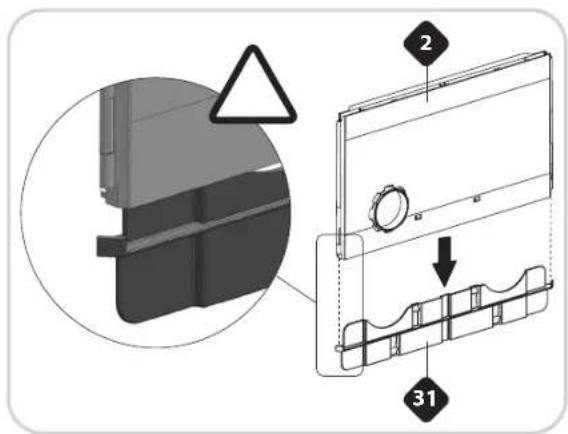
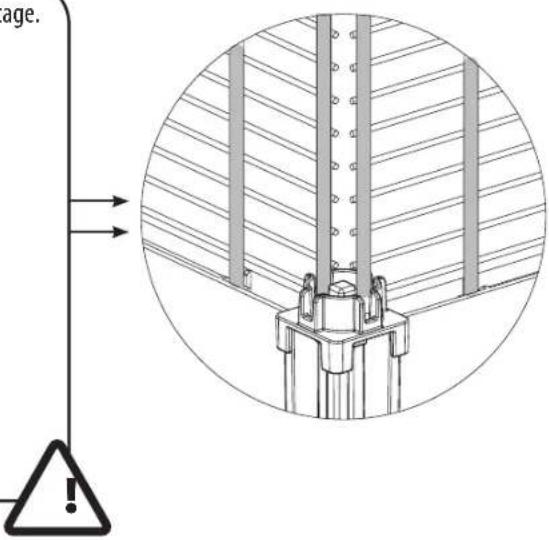
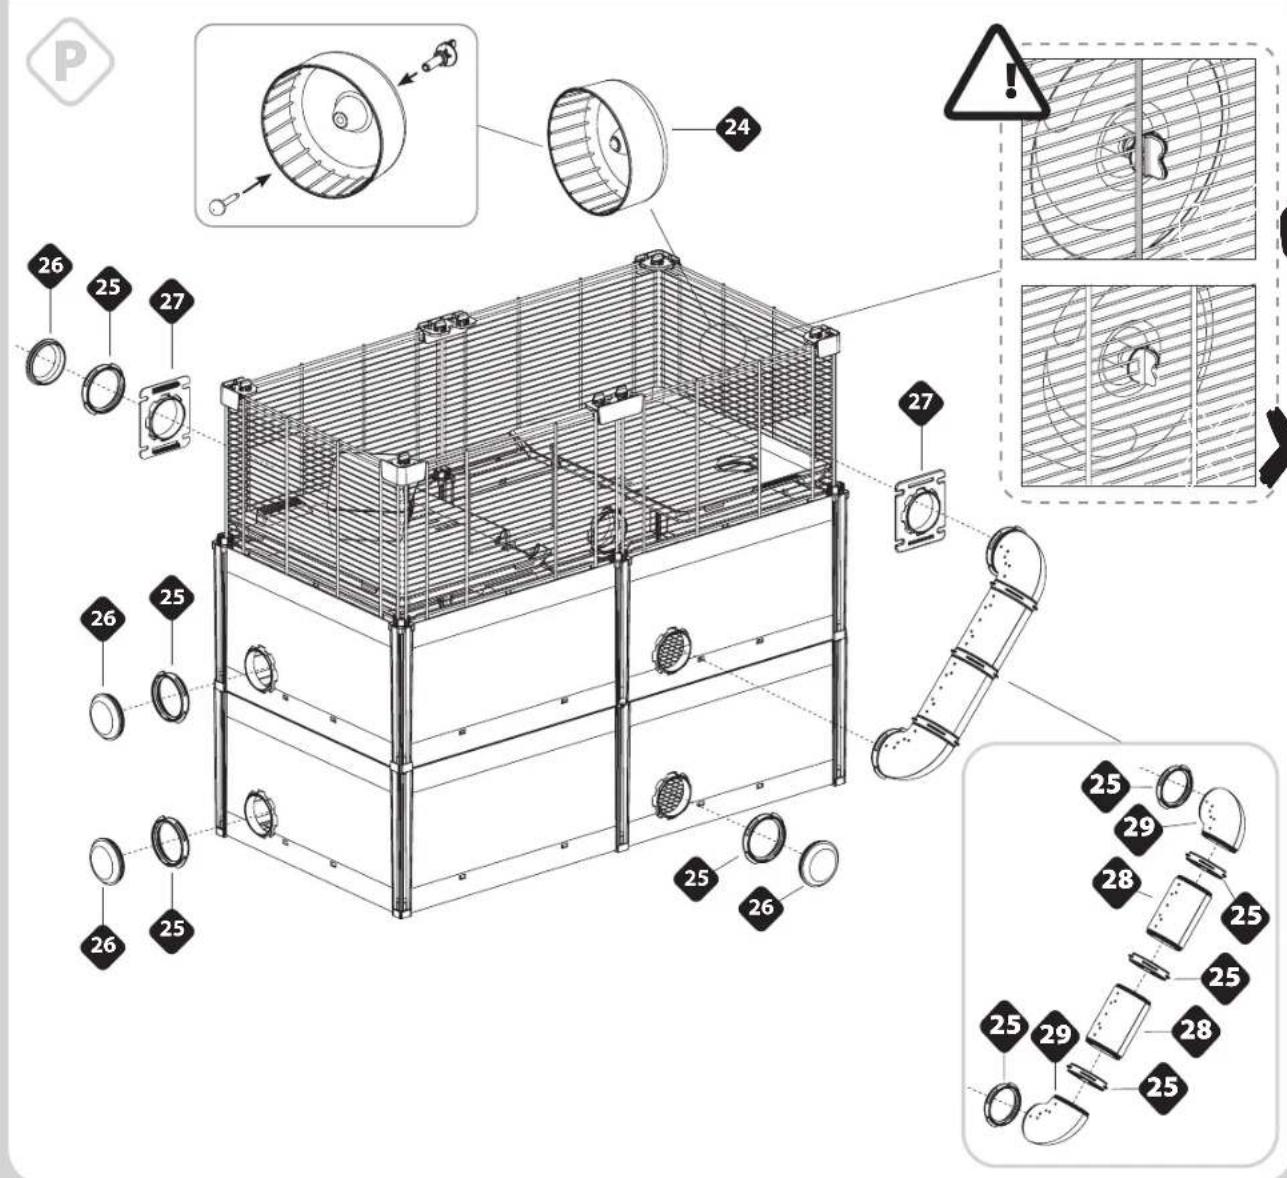
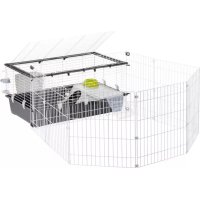
- Place the net so that the vertical bars are in the outer side of the cage.
- Posizionare la rete in modo tale che le barre verticali siano sul lato esterno della gabbia.
- Positionner la grille afin que les barres verticales soient sur le côté extérieur de la cage.
- Bringen Sie das Netz so an, dass sich die vertikalen Stäbe auf der äußeren Seite des Käfigs befinden.
- Plaats het gaas op zo'n manier dat de verticale spijlen aan de buitenkant van de kooi zitten.
- Posicionar la red de modo que las barras verticales estén en el lado externo de la jaula.
- Posicione a grade de modo que as barras verticais fiquem para o lado externo da gaiola.
- Поместите решетку так, чтобы вертикальные стержни находились на внешней стороне клетки.

Option 1
Option 2
natural_image
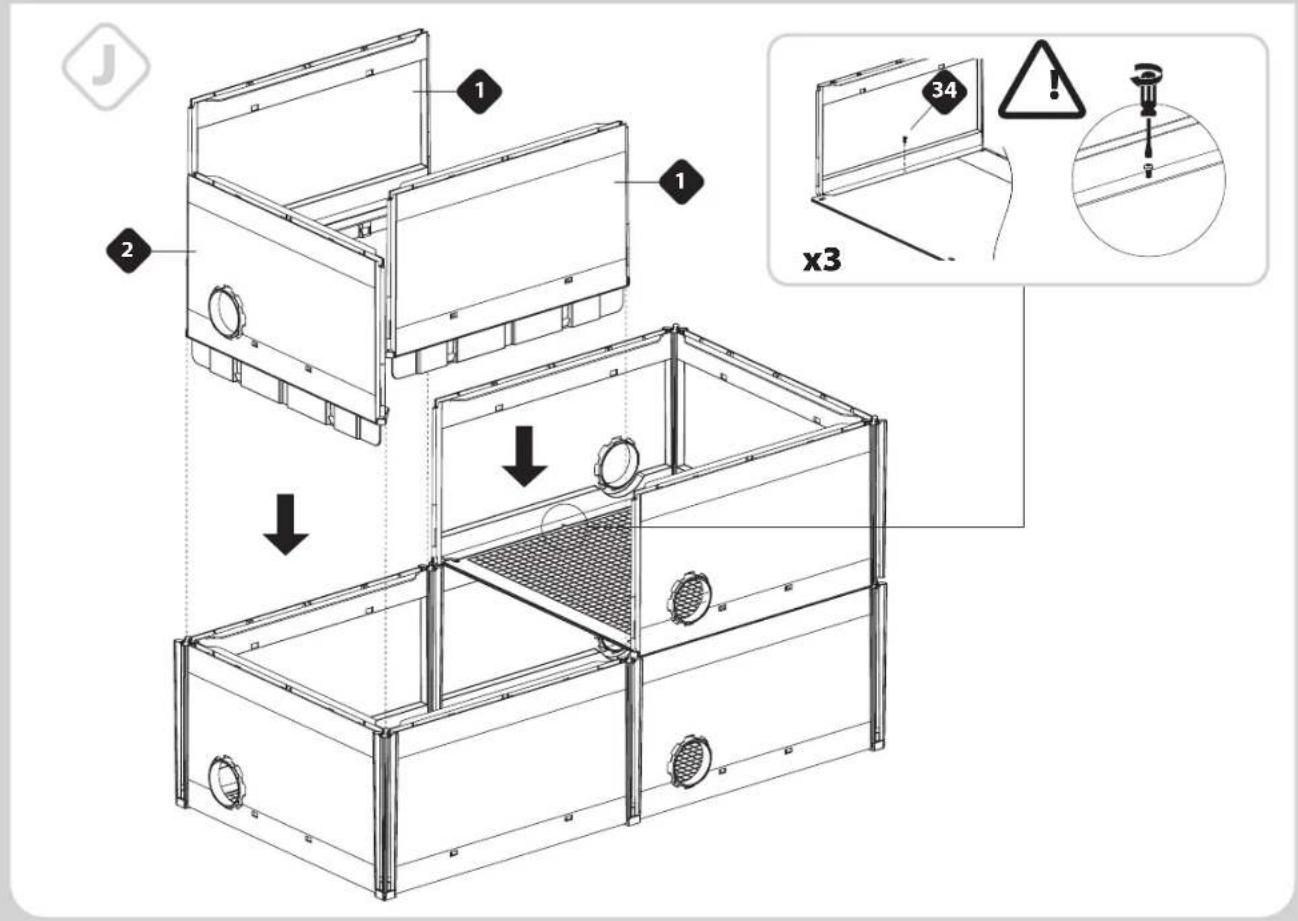
Technical line drawing of a multi-level industrial or laboratory enclosure with ventilation grilles and fans (no text or symbols)

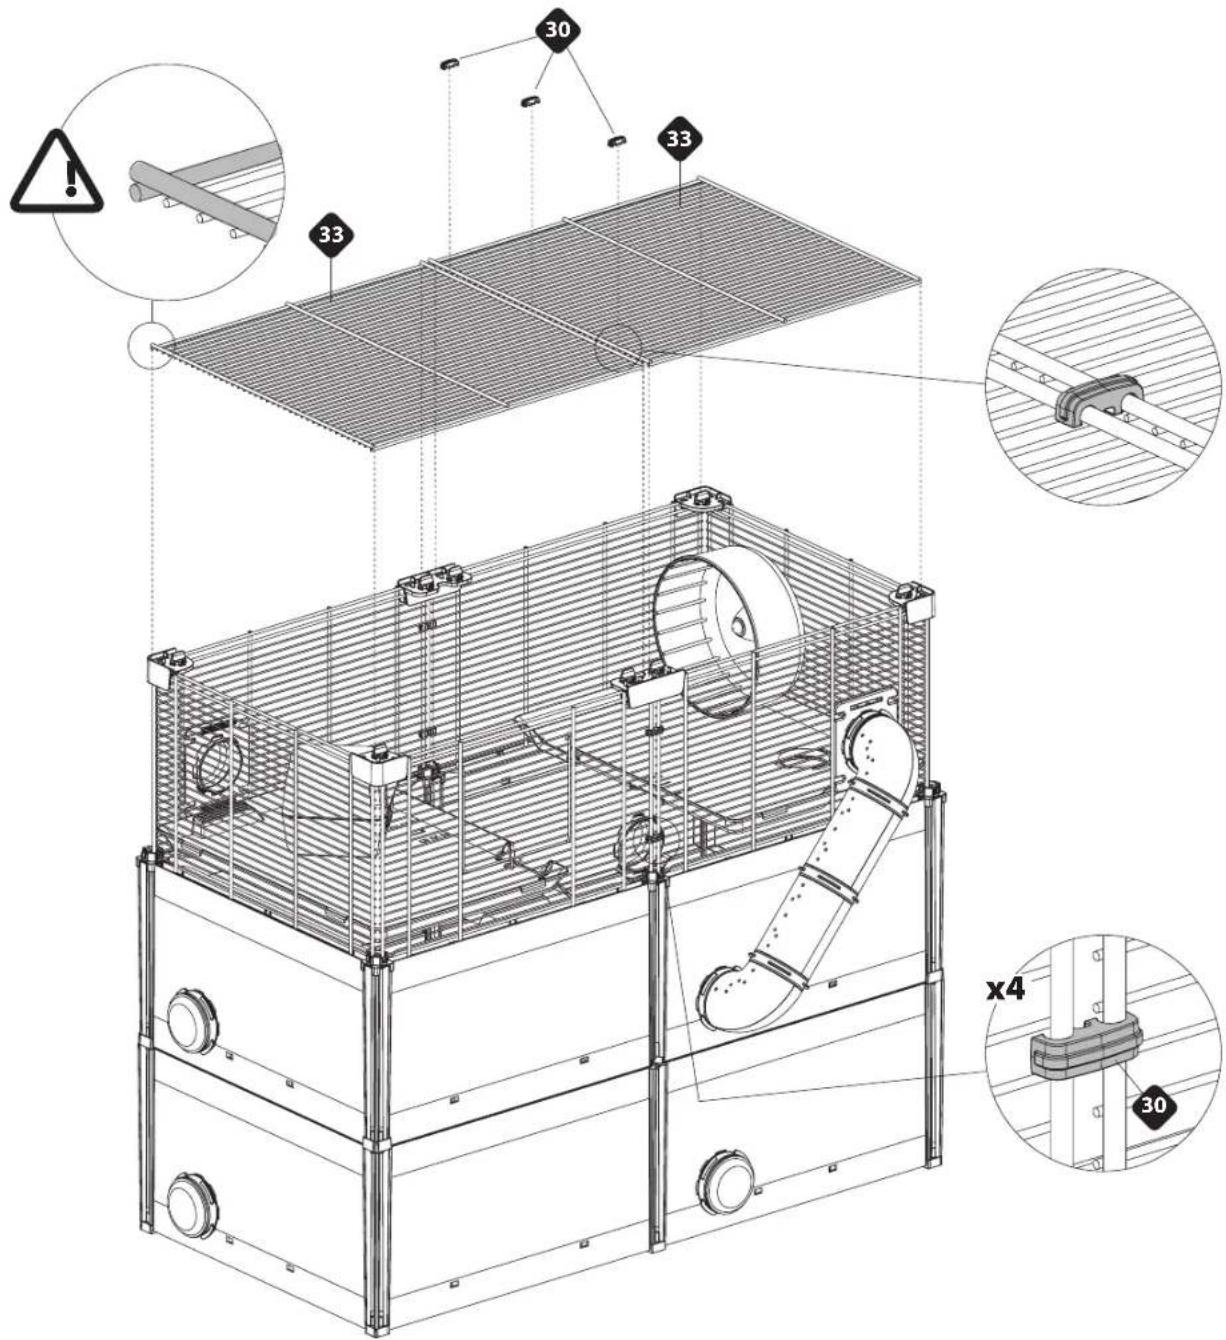


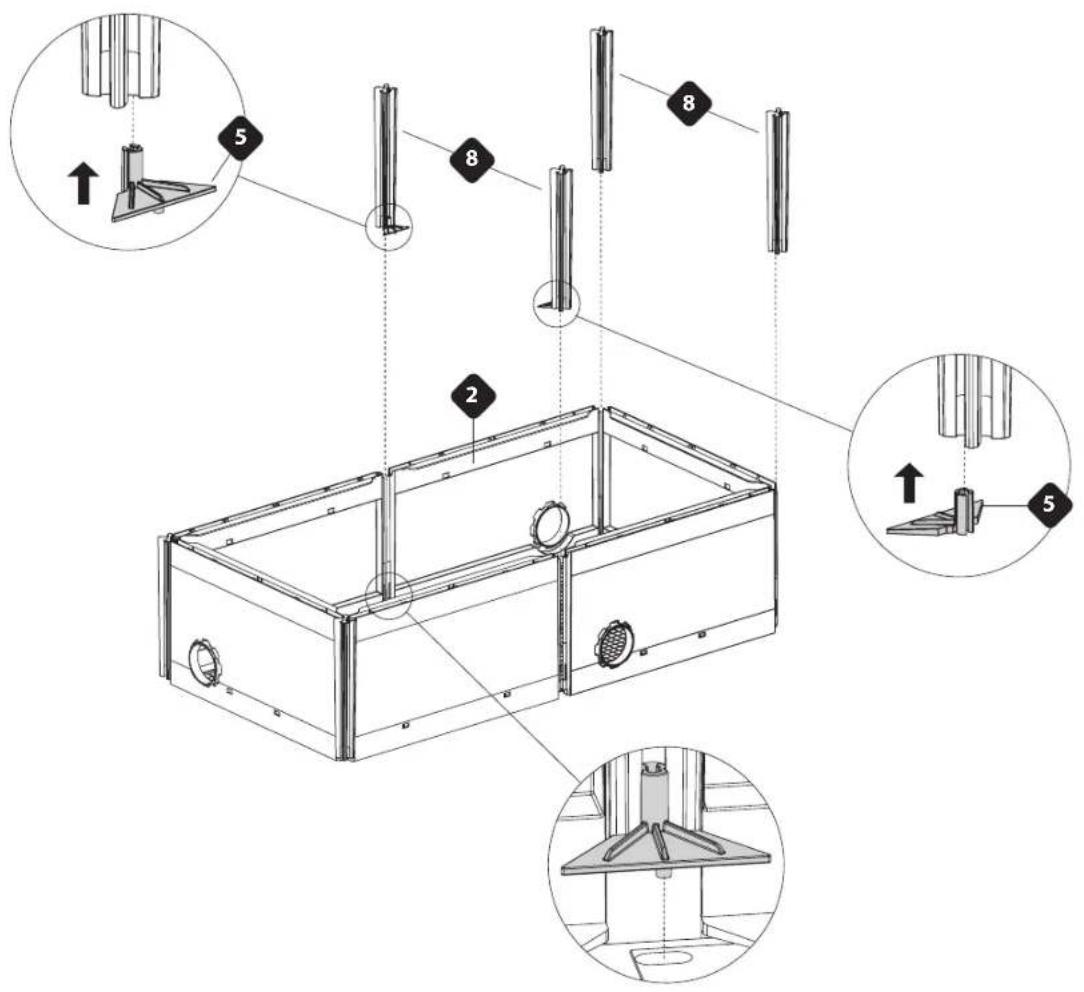
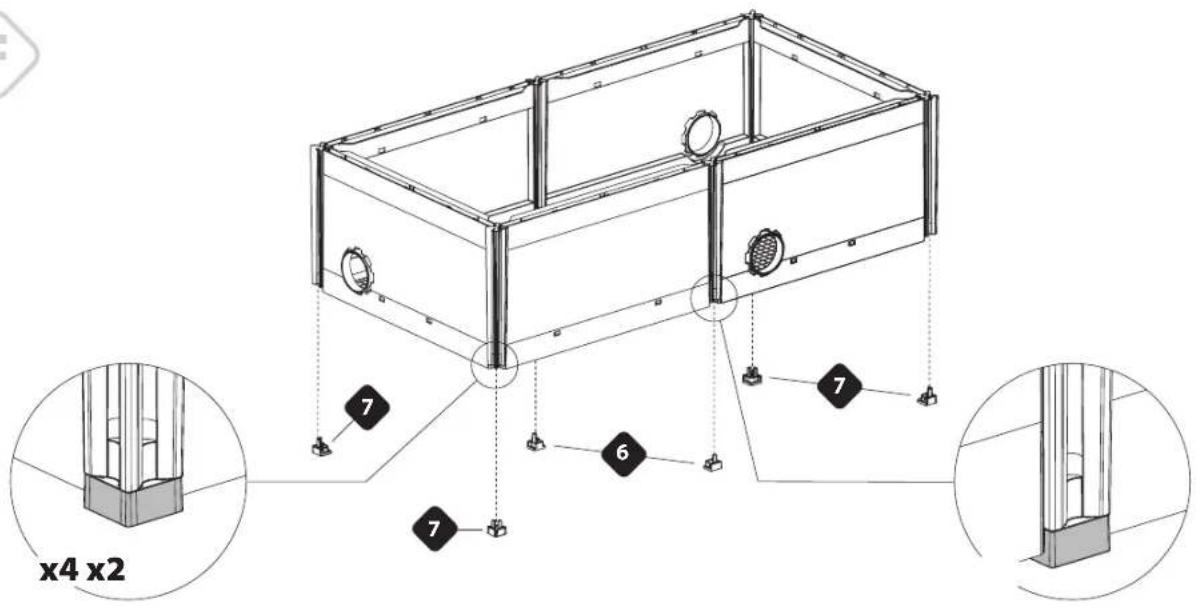
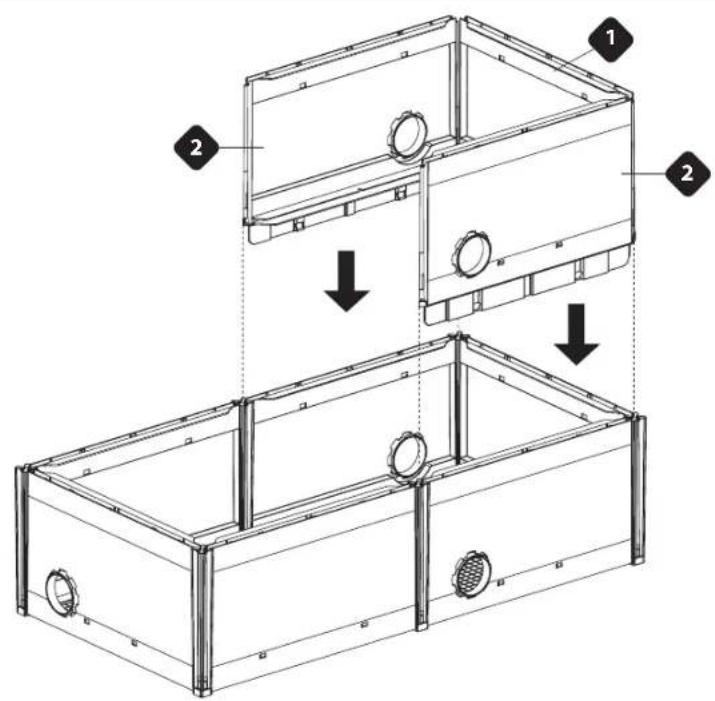
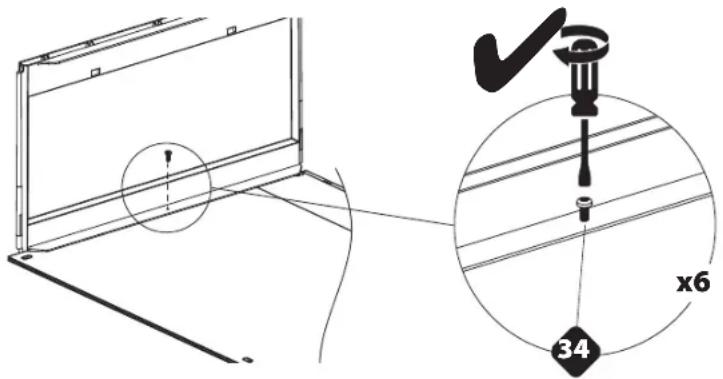
- For better stability and solidity of the cage, fix the walls to the bottom with the supplied screws.
- Per una migliore stabilità e solidità della gabbia fissare le pareti al fondo con le viti in dotazione.
- Pour une meilleure stabilité et solidité de la cage fixer les parois au fond avec les vis fournies.
-
Für mehr Stabilität und Festigkeit kann man die Wände mit den mitgelieferten Schrauben am Boden befestigen.
-
Voor een goede stabiliteit en stevigheid van de kooi, bevestigt u het beste de wanden aan de bodem met de meegeleverde schroeven.
- Para una mejor estabilidad y solidez de la jaula, fije las paredes al fondo con los tornillos suministrados.
- Para melhor estabilidade e solidez da gaiola, fixe as paredes ao fundo com os parafusos fornecidos.
- Для лучшей устойчивости и прочности каркаса закрепите стенки на дне с помощью прилагаемых винтов.
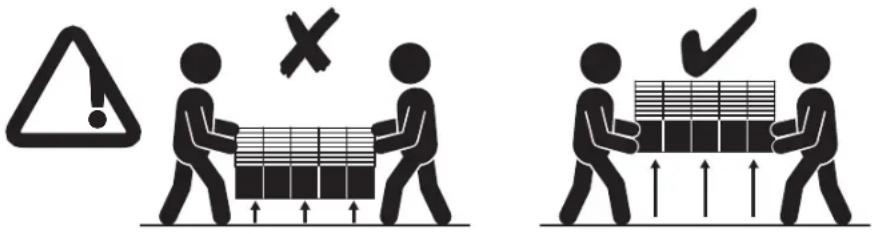
WARNING • ATTENZIONE • AVERTISSEMENT • WARNHINWEISE
WAARSCHUWING • ADVERTENCIAS • AVISO • ПРЕДУПРЕЖДЕНИЕ


Marque : Ferplast
Modèle : Multipla Hamster Crystal
Catégorie : Cage pour petit animal