Ekeby - Meuble TV MIO - Notice d'utilisation et mode d'emploi gratuit
Retrouvez gratuitement la notice de l'appareil Ekeby MIO au format PDF.
| Type de produit | Meuble TV |
| Marque | Mio |
| Modèle | Ekeby |
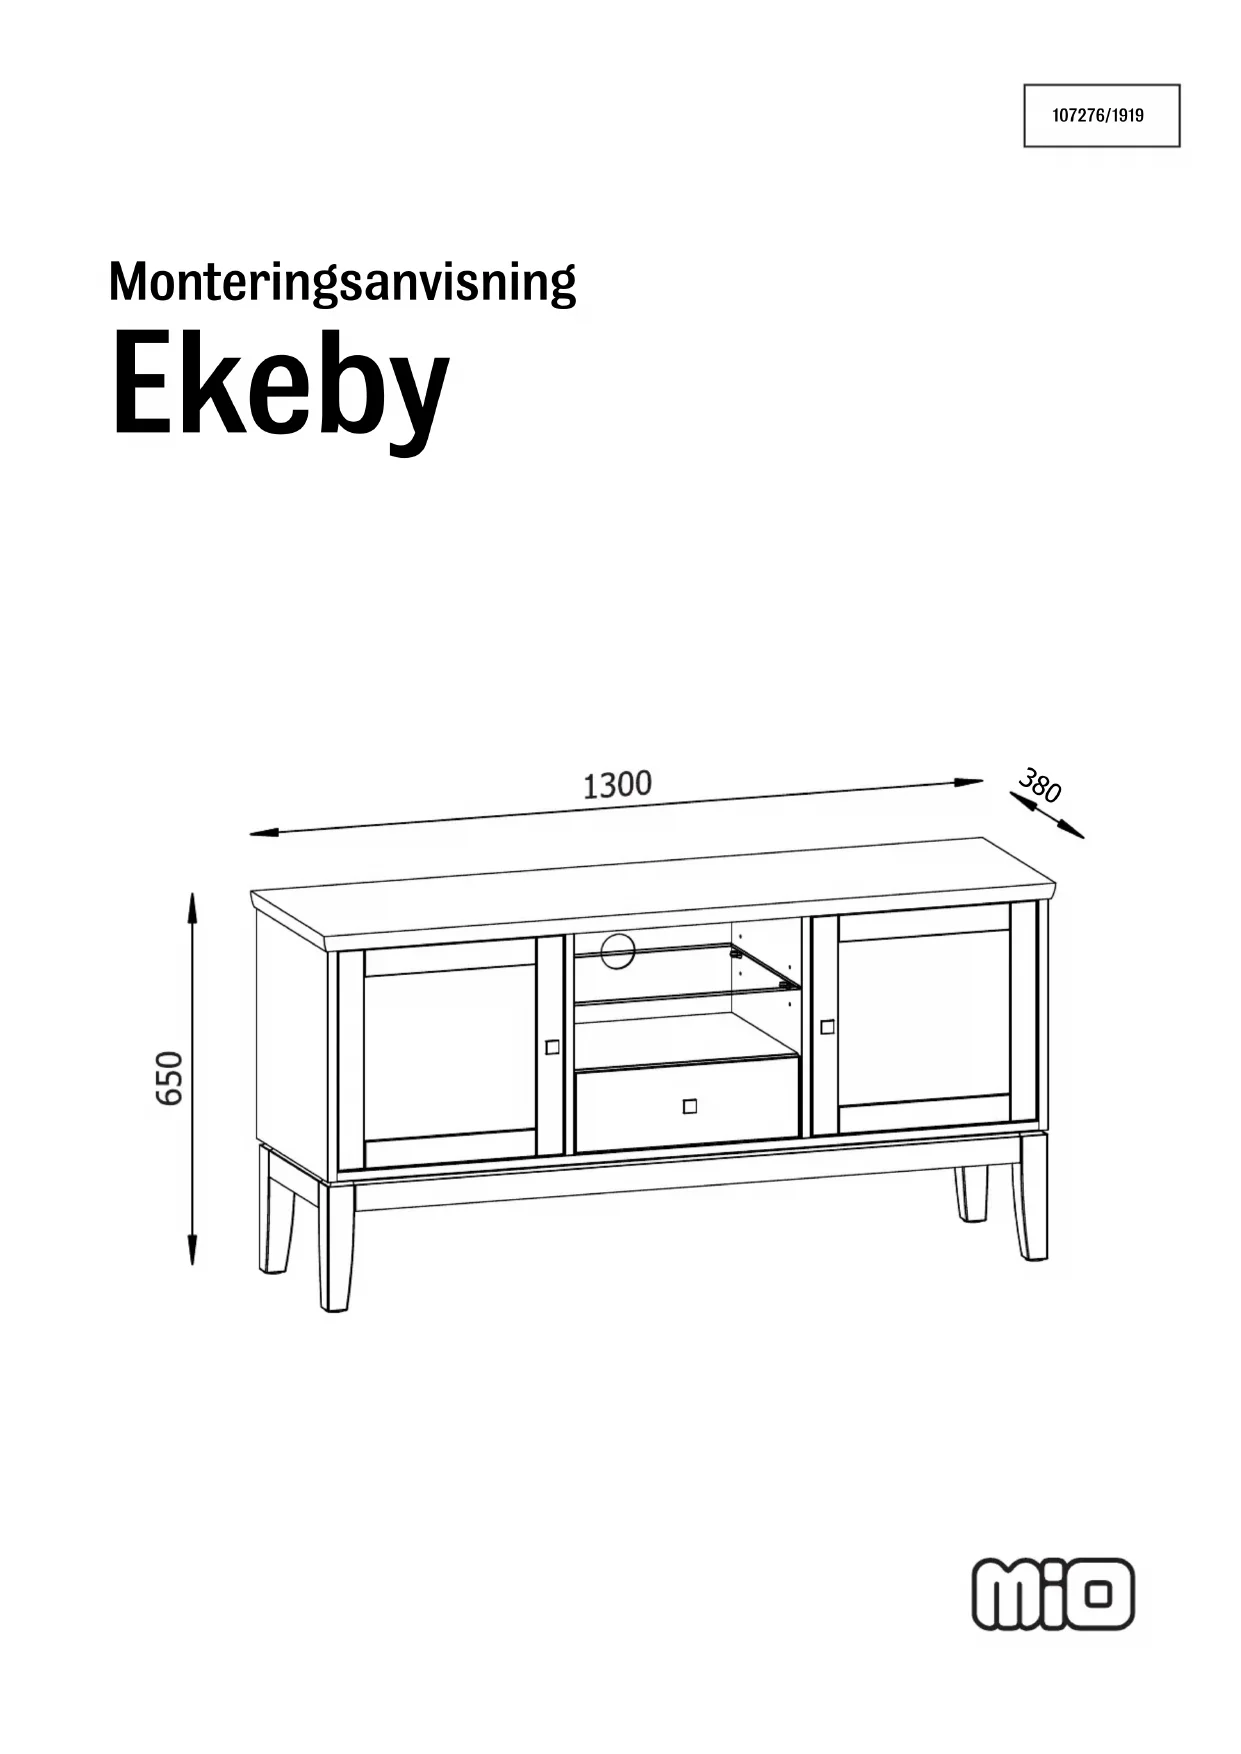
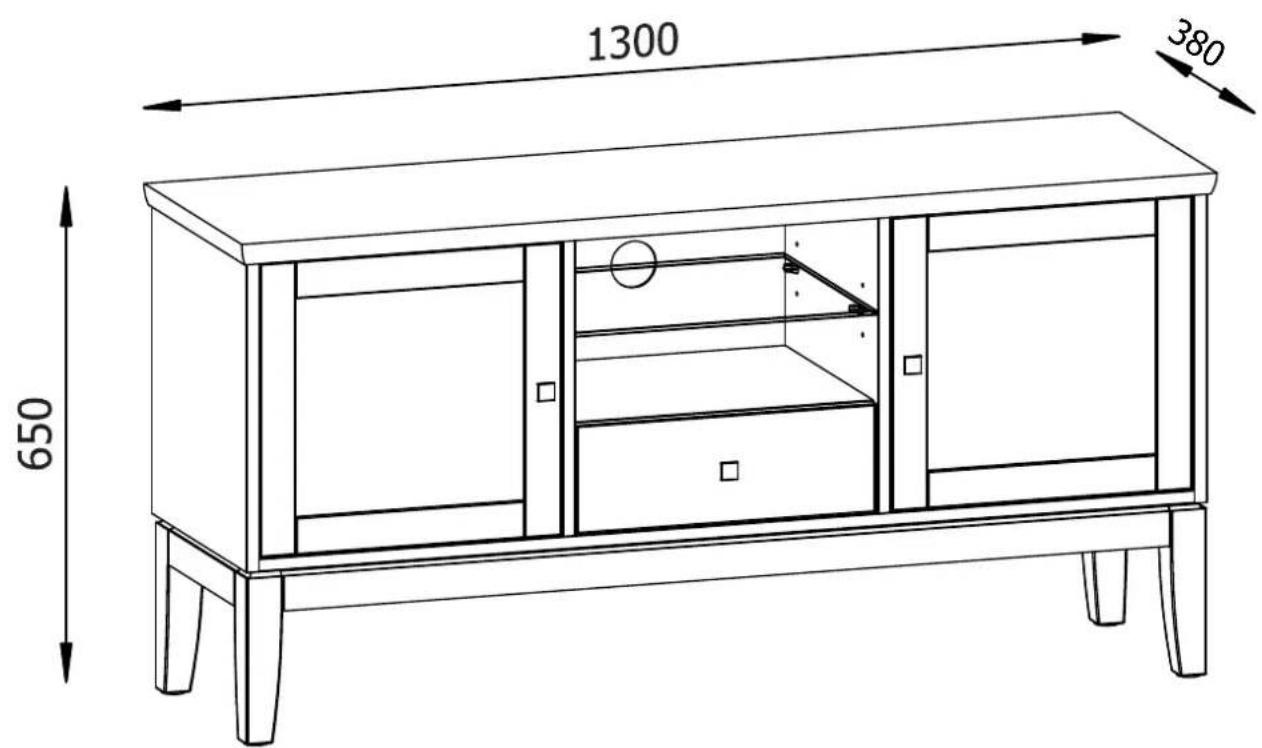
| Dimensions principales | 1300 x 380 x 480 mm |
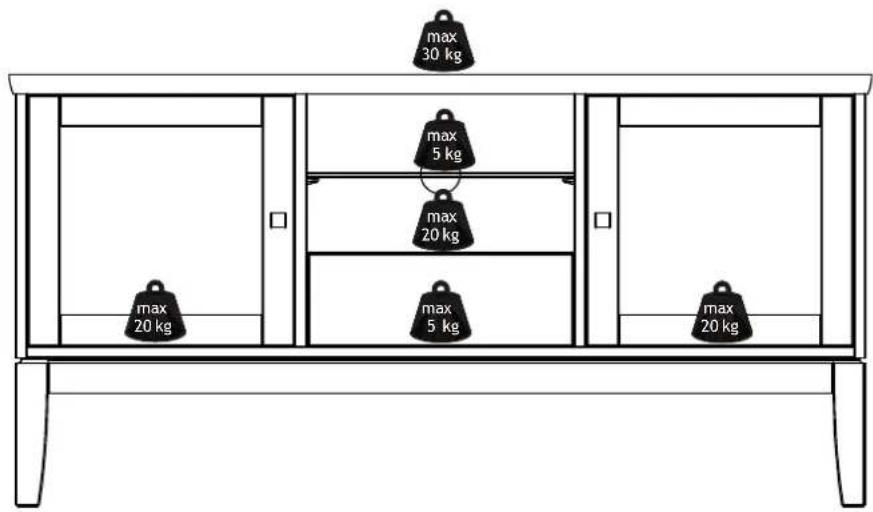
| Poids maximum sur le dessus | 30 kg |
| Poids maximum par étagère | 5 kg |
| Poids maximum sur les tablettes | 20 kg |
| Matériau principal | Panneau de particules |
| Nombre de personnes recommandé pour le montage | 2 |
| Temps de montage estimé | 2,5 heures |
| Contenu du colis | Panneaux, visserie, chevilles, outil de montage |
| Sécurité | Kit anti-basculement inclus |
| Entretien | Nettoyer avec un chiffon doux et sec |
| Réparabilité | Pièces détachées disponibles en magasin Mio |
| Garantie | 2 ans (selon conditions) |
FOIRE AUX QUESTIONS - Ekeby MIO
Questions des utilisateurs sur Ekeby MIO
0 question sur cet appareil. Repondez a celles que vous connaissez ou posez la votre.
Poser une nouvelle question sur cet appareil
Téléchargez la notice de votre Meuble TV au format PDF gratuitement ! Retrouvez votre notice Ekeby - MIO et reprennez votre appareil électronique en main. Sur cette page sont publiés tous les documents nécessaires à l'utilisation de votre appareil Ekeby de la marque MIO.
MODE D'EMPLOI Ekeby MIO
Monteringsanvisning
Ekeby
text_image
1300 650 380Du behöver

natural_image
Simple black-and-white line drawing of an analog clock face (no numbers or text)ca 2,5 timmar
natural_image
Simple line drawing of two stylized human figures (no text or symbols)2 personer
natural_image
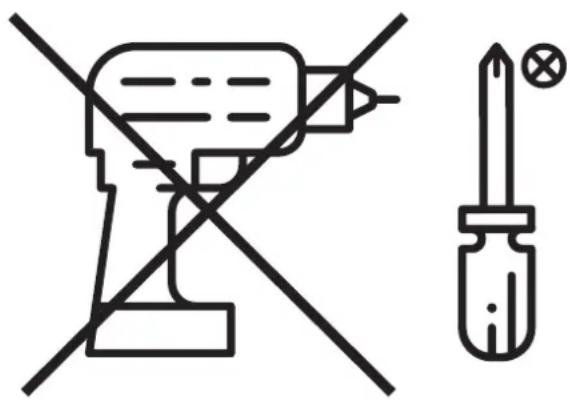
Pure electrical circuit lines without any symbols
natural_image
Pure geometric pattern with vertical lines and decorative border (no text or symbols)Lägg din produkt på ett mjukt underlag när du monterar

Har du frågor om monteringen av dina möbler?
Hör av dig till din Mio-butik eller ring till vår kundservice 020 66 44 00
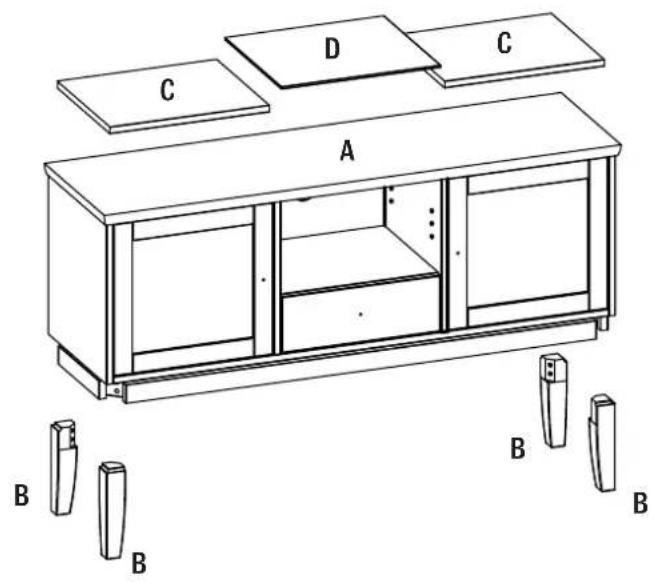
Ingående delar
text_image
C D C A B B B B| QTYmm | ||
| A | 1 | 1300x380x480 |
| B | 4 | 223x48x48 |
| C | 2 | 401x335x18 |
| D | 1 | 401x360x6 |
text_image
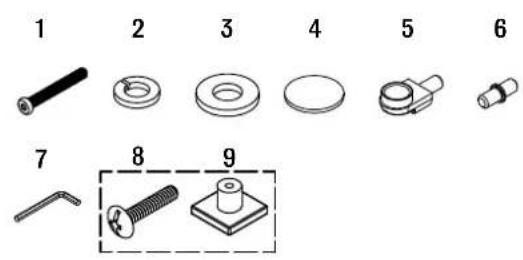
1 2 3 4 5 6 7 8 9| NrQTYmm | ||
| 1 | 8 | M8x50 |
| 2 | 8 | ∅8 |
| 3 | 8 | ∅8/16 |
| 4 | 4 | ∅30 |
| 5 | 4 | ∅5x27x15 |
| 6 | 8 | ∅5/16 |
| 7 | 1 | N5 |
| 8 | 3 | M4x22 |
| 9 | 3 | 22x22x14 |
Montering
Följ instruktionerna steg för steg
text_image
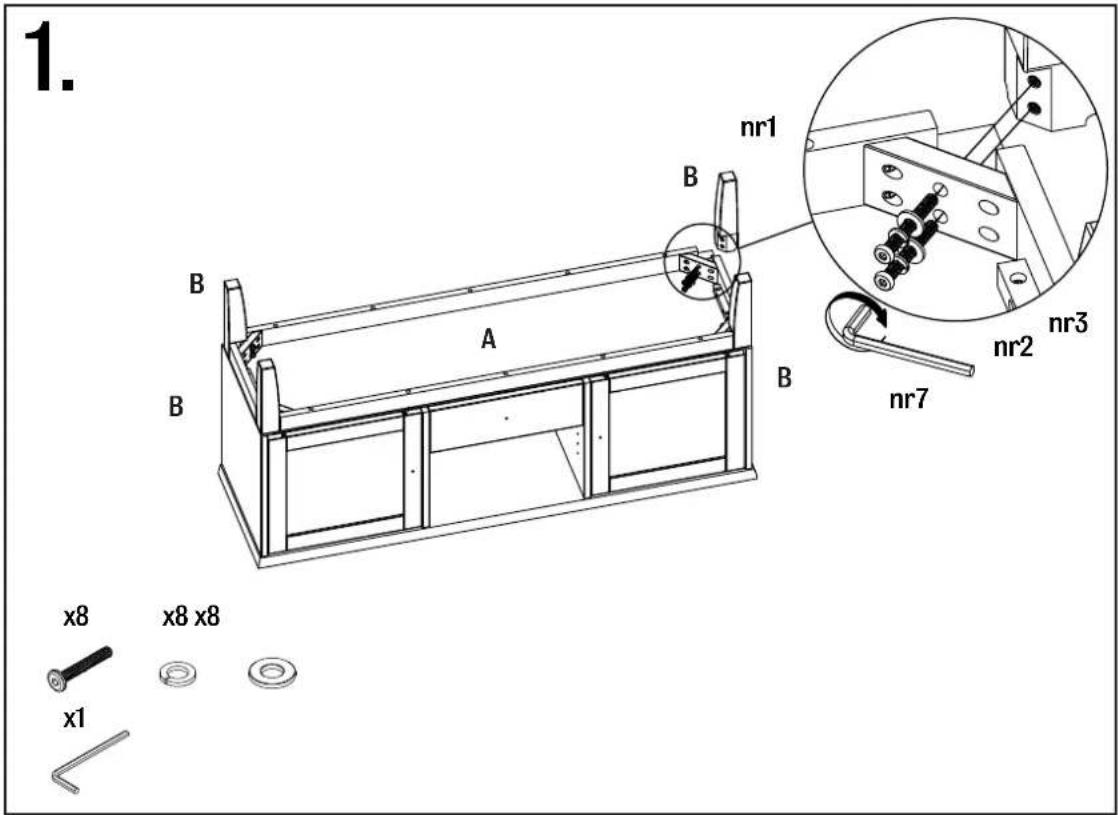
1. nr1 nr2 nr3 nr7 A B B B x8 x8 x1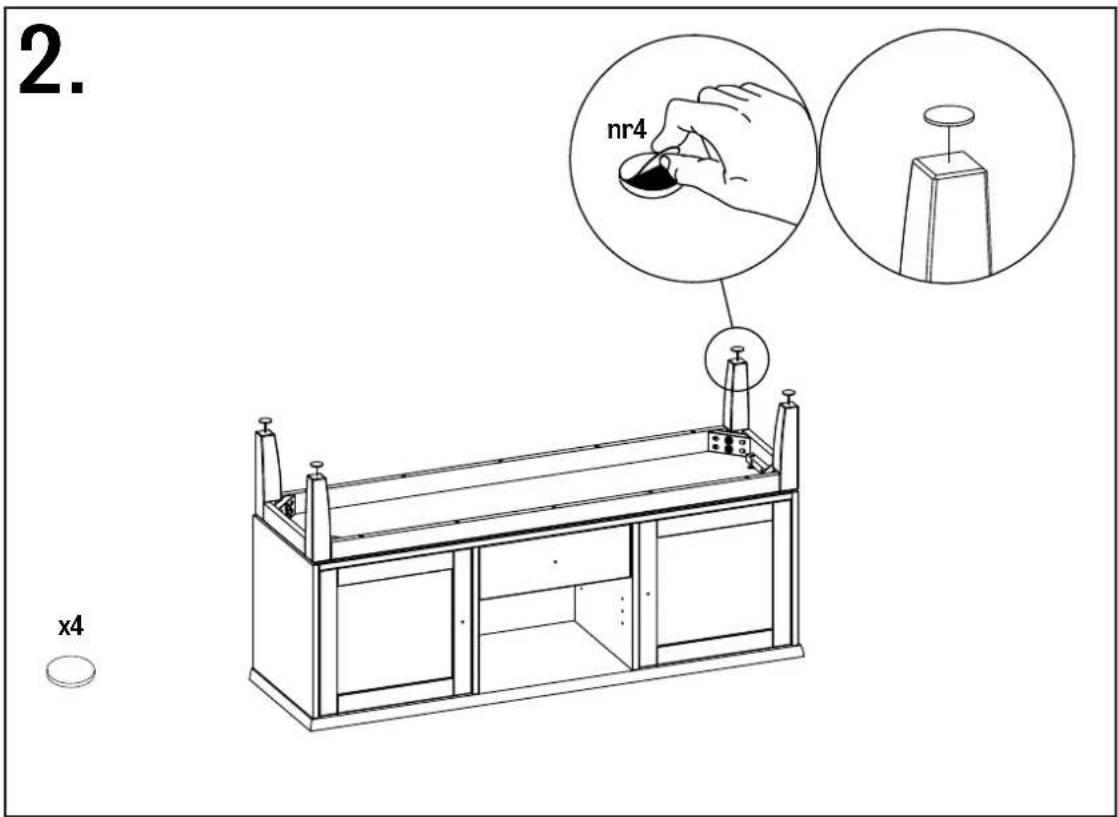
text_image
2. nr4 x4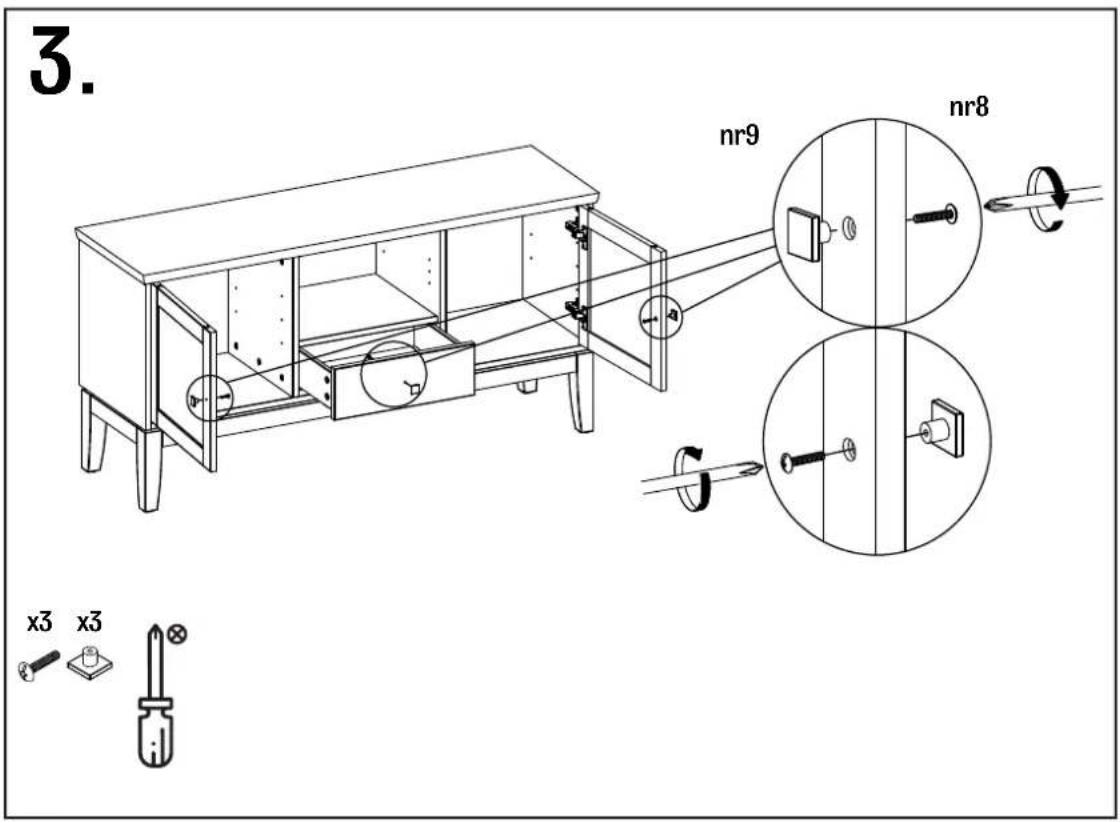
text_image
3. nr9 nr8 x3 x3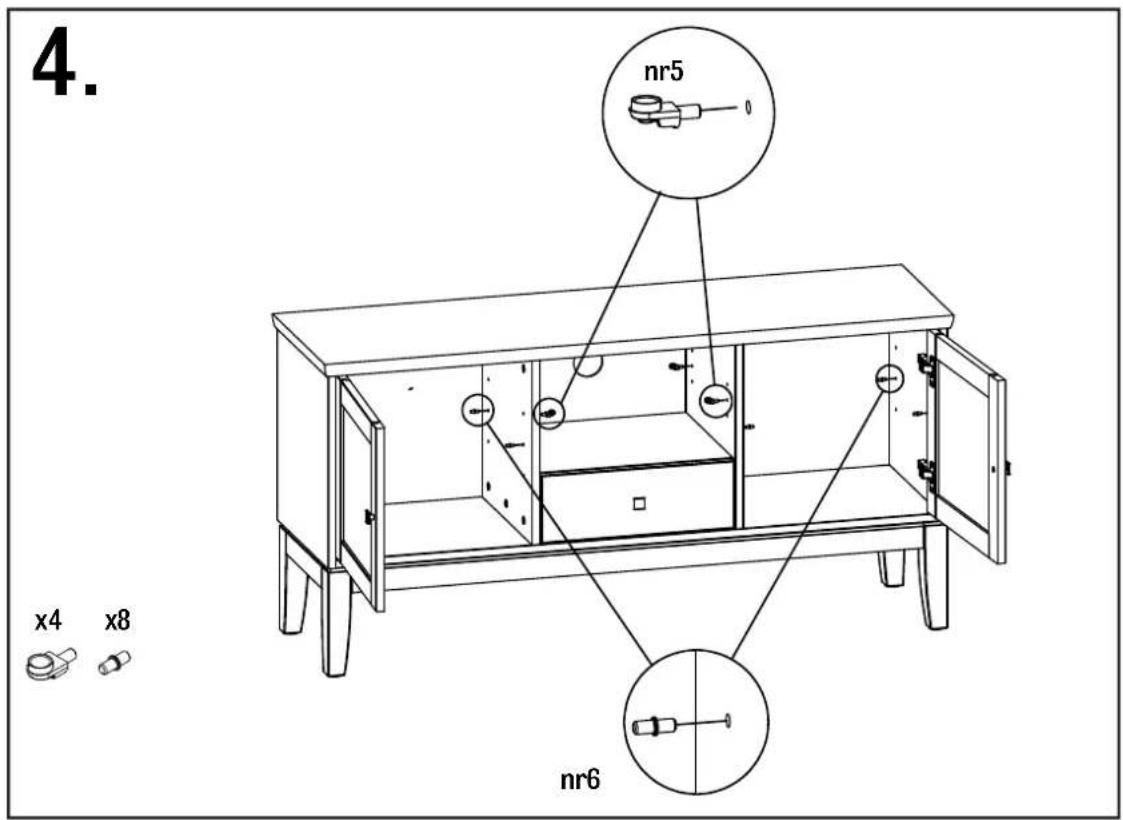
text_image
4. nr5 nr6 x4 x8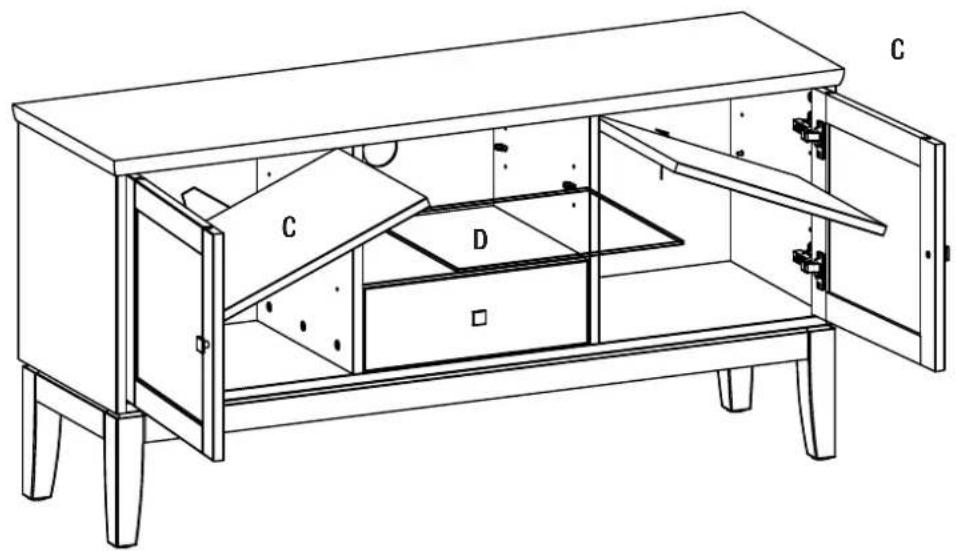
text_image
Technical line drawing of a cabinet with labeled parts C, D, and an open door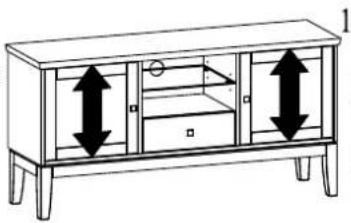
natural_image
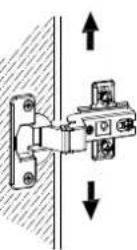
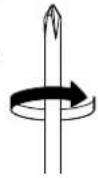
Line drawing of a wooden cabinet with double-headed arrows indicating vertical and horizontal movement (no text or symbols)1.
text_image
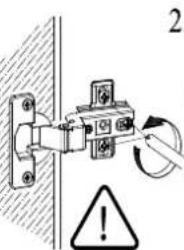
2. !2.
3.
natural_image
Technical line drawing of a mechanical clamp or bracket assembly (no text or symbols)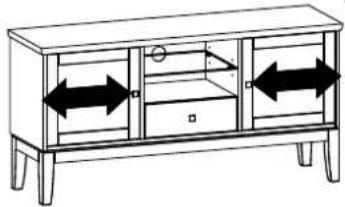
natural_image
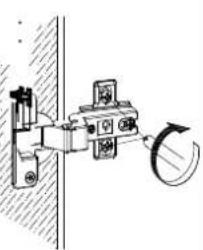
Line drawing of a wooden cabinet with two doors and an open drawer, showing bidirectional arrows indicating movement (no text or symbols)1.
text_image
2. !2.
3.
natural_image
Technical diagram of a mechanical latch or switch assembly with a curved handle (no text or symbols)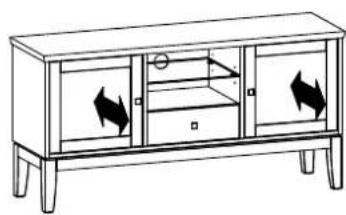
natural_image
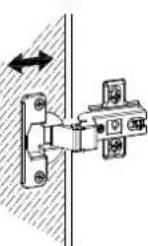
Line drawing of a cabinet with doors, drawers, and directional arrows indicating airflow or movement (no text or symbols)1.
natural_image
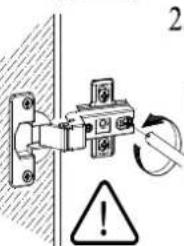
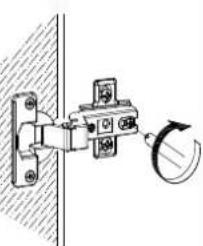
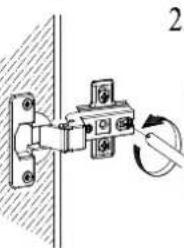
Technical diagram of a mechanical hinge assembly with a tool, no visible text or symbols2.
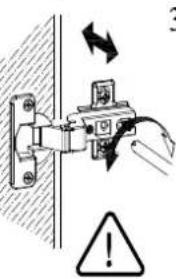
text_image
Diagram showing a switch mechanism with directional arrows and warning symbol3.
natural_image
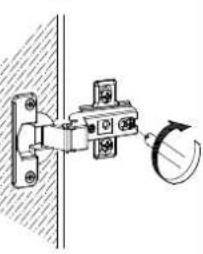
Technical line drawing of a door latch mechanism with a curved dial indicator (no text or symbols)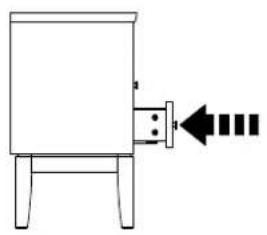
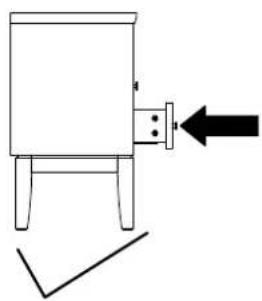
natural_image
Simple line drawing of a cabinet with an arrow pointing to the front panel (no text or symbols)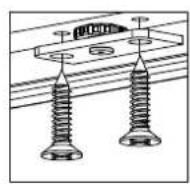
text_image
Technical diagram showing a mechanical assembly with two circular components and directional arrows indicating movement or force.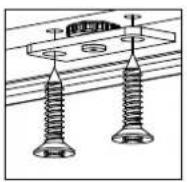
natural_image
Simple line drawing of a mechanical device with a right-angle arrow indicating direction (no text or symbols)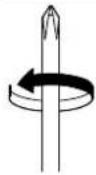

Maxvik
text_image
max 30 kg max 5 kg max 20 kg max 20 kg max 5 kg max 20 kgINRED SNYGGT OCH TRYGGT!
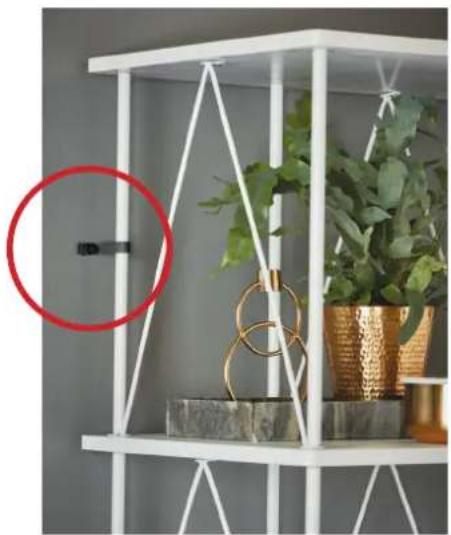
Det är viktigt att känna sig trygg i sitt hem, särskilt när man har barn. Varje är sker många olyckor orsakade av vältande möbler – olyckor som enkelt hade kunnat undvikas. Här är några sätt att säkra din nya möbel från att tippa:
natural_image
White metal shelving unit with white frame and potted plants, one highlighted by a red circle (no text or symbols visible)En form av tippskydd; band som skruvas fast i väggen
Förankra
alltid möbeln i väggen. Använd tippskyddet som följer med möbeln (alla möbler som är mer än 75 cm höga bör levereras med tippskydd). Se monteringsanvisningen och utgå från den typ av vägg du har.
Förhindra
att ett barn klättrar på möbeln, eller på annat sätt hänger på den.
Förvara
tunga föremål så långt ner som möjligt, aldrig i möbelns övre delar. Tänk på att alla möbler inte är gjorda för att bära upp t ex tunga teveapparater – för dessa finns speciella mediamöbler.
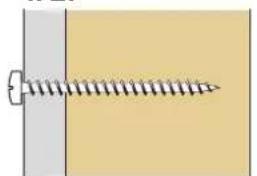
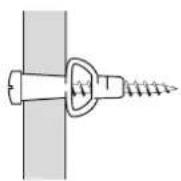
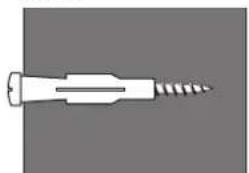
VILKEN SKRUV SKA ANVÄNDAS?
- Gipsvägg med träreglar: Fäst skruven direkt i regeln.
- Gipsvägg utan träreglar: Använd plugg med skruv.
- Massiv betongvägg: Använd plugg med skruv.
- Ihålig betongvägg: Använd vikplugg/expander.
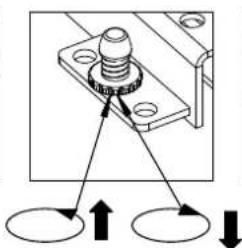
1.2.
natural_image
Diagram of a screw fastening inside a rectangular frame (no text or symbols)Träskruv Plugg med skruv
3.4.
natural_image
Simple line drawing of a screw with threaded shaft (no text or symbols)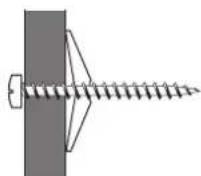
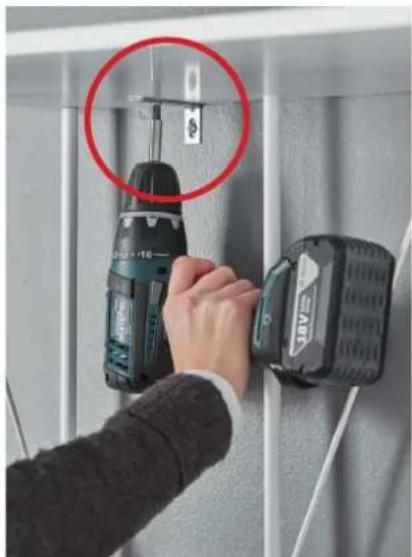
natural_image
Close-up of a hand using a power drill into a wall-mounted battery, with a red circle highlighting the drill area (no text or symbols visible)Vikplugg/expander med skruvPlugg med skrform av tippskydd; vinkeljärn