
PMB728L751 - Moniteur PRESTIGIO - Notice d'utilisation et mode d'emploi gratuit
Retrouvez gratuitement la notice de l'appareil PMB728L751 PRESTIGIO au format PDF.
| Type de produit | Moniteur interactif (MultiBoard) |
| Marque | Prestigio |
| Modèle | PMB728L751 |
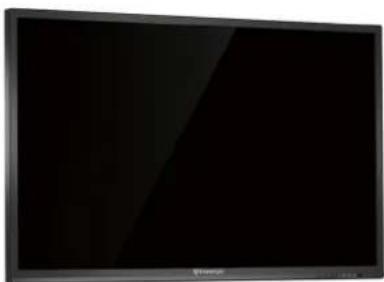
| Taille de l'écran | 75 pouces (diagonale) |
| Résolution | 3840 x 2160 pixels (4K UHD) |
| Technologie tactile | IR 20 points (10 points d'écriture) |
| Temps de réponse | 8 ms |
| Angle de vision | 178° horizontal / 178° vertical |
| Processeur intégré | Intel Core i7-8700 (8e génération) |
| Mémoire RAM | 8 Go DDR4 |
| Stockage | 256 Go SSD |
| Système d'exploitation | Android intégré + Windows 10 (via PC interne) |
| Connectivité | HDMI (x3 entrées, x1 sortie), VGA, USB 2.0/3.0, LAN RJ45, RS232, audio entrée/sortie, coaxial |
| Réseau | Wi-Fi 802.11ac (2,4/5 GHz), Bluetooth 4.2 |
| Haut-parleurs | 2 x 12 W stéréo |
| Alimentation | 100-240 V AC, 50/60 Hz ; consommation 600 W (max), < 0,5 W en veille |
| Dimensions (emballage) | 1913 x 1225 x 280 mm |
| Entretien | Nettoyer avec un chiffon doux légèrement humide ; ne pas utiliser de solvants |
| Sécurité | Installation par personnel qualifié ; ne pas ouvrir le boîtier ; débrancher avant nettoyage |
| Pièces détachées | Contacter le service après-vente Prestigio |
| Réparabilité | Ne pas tenter de réparer soi-même ; confier à un professionnel |
| Informations générales | Notice d'utilisation disponible en PDF ; marque déposée Prestigio Plaza Ltd |
FOIRE AUX QUESTIONS - PMB728L751 PRESTIGIO
Questions des utilisateurs sur PMB728L751 PRESTIGIO
0 question sur cet appareil. Repondez a celles que vous connaissez ou posez la votre.
Poser une nouvelle question sur cet appareil
Téléchargez la notice de votre Moniteur au format PDF gratuitement ! Retrouvez votre notice PMB728L751 - PRESTIGIO et reprennez votre appareil électronique en main. Sur cette page sont publiés tous les documents nécessaires à l'utilisation de votre appareil PMB728L751 de la marque PRESTIGIO.
MODE D'EMPLOI PMB728L751 PRESTIGIO
Prestigio
MULTIBoard
Quick Start Guide
2019
Contents
- Safety instructions 1
2.Preparing for operation 4
Wall installation 4
Using a stand 4
- The stand kit 5
Kit 5
Overview of your MultiBoard 6
Remote control 8
- Getting started 12
Using the internal PC 12
Connecting to an external computer 13
Connecting to other devices 14
- Network connections 16
Network connection 16
Connecting with a cable 16
Connecting wirelessly 17
- General settings 18
MultiBoard settings 18
Input settings 18
Brightness settings 19
Volume settings 19
VGA channel settings 20
Screen settings 21
- Daily care and tech servicing 22
- Technical specifications 23
-
Troubleshooting 25
-
Protection of trademarks and intellectual property 27
1. Safety instructions
Study the safety instructions carefully before using the MultiBoard device. Adhere to all the recommendations on how to use the device.

E
WARNING
To avoid an electric shock, do not attempt to open up the device. In the event of a fault, go to the Prestigio service center to have your device repaired.
Installation and relocation
- The device should only be installed and relocated by qualified tech support staff.
- Ensure the device is installed in a stable way, with no risk of it overturning.
- Do not lean against the device's screen or the device itself (especially the lower part of it), even if the device is wall-mounted.
- To avoid the risk of an electric shock, do not switch the device on or off when your hands are wet.
- Do not let liquids drop onto the device or the screen, and avoid placing heavy objects on top of it.
- Do not place heavy objects on the device's top panel.
- Avoid using the device in dusty spaces or in conditions of heightened humidity.
- Protect the device from direct sunlight, flames, and other heat sources.
- Do not expose the device to strong electromagnetic fields.
- Only use the device at room temperature: avoid exposing it to temperatures that would be too hot or too cold to be comfortable for a human being.
- Disconnect the device if you do not intend to use it for an extended period of time.
- If you do not intend to use the device for an extended period of time, make sure it is in a stable position or remove it to ensure it cannot fall down.
Power cord and power supply
- Ensure the voltage of your network corresponds to the device specifications.
- During electrical storms, disconnect the device and unplug the power cord.
Prestigio
User manual
Prestigio Multiboard
2
- Use the power cord supplied only with this device. It should not be used with other devices.
- Do not place the power cord or the device near a heat source.
- Do not disconnect the power cord when the device is in use.
- Protect the power cord from physical or mechanical damage. Do not use physical force to bend or stretch the power cord. Do not place heavy objects on top of the power cord.
- When connecting, ensure that the power supply is earthed.
- Always unplug the power cord from the wall socket if you are not intending to use the device for an extended period of time.
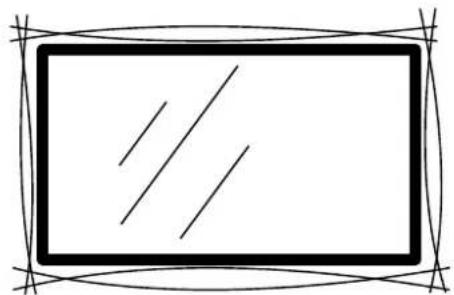
The screen
- Do not write on the panel using sharp or hard objects.
- Disconnect the device prior to cleaning the panel.
- Clean the panel using a soft, dry cloth.
- Do not use water to clean the screen. Do not spray detergents of any kind directly onto the screen.
If a thorough clean is required, contact the service center. - Do not have the screen excessively bright for an extended period of time.
Distance from the screen
- The optimum distance for viewing images is 5-7 times the diagonal size of the screen.
- The optimum angle for viewing images is no more than 178 degrees.
Temperature
- Do not place the device near to heaters or central heating radiators.
- When moving the device from a cold room to a warm one, do not connect the device at once: wait for the temperature to reach equilibrium, to avoid condensation of moisture.
- The device can be used at temperatures between 0 and 40 degrees Celsius and stored at temperatures between -20 and 60 degrees Celsius.
Moisture
- Do not allow the device to be rained on or place it near water.
- Ensure the device is used in cool and dry conditions. The device can be used or stored in humidity between 10% and 90% .
User manual Prestigio Multiboard
Prestigio
Ventilation
The ventilation and other openings on the device are for ventilation.
2
- Do not cover the ventilation openings: inadequate ventilation may lead the device to overheat, shortening its service life.
- Ensure that sufficient space for ventilation is left when the device is installed: at least 10cm to the left, to the right, and below, and at least 20cm above.
- The device is not intended for built-in installation. Installation of the device in an enclosed space, e.g. on a shelf, is only possible if sufficient ventilation is provided or in accordance with the manufacturer's instructions.
The battery
Incorrect handling of the battery may cause it to leak, risking corrosion of the device or even an explosion. Always follow the instructions in this section to avoid battery faults:
- Dispose of batteries after use in accordance with local law.
Children should only come into contact with batteries under adult supervision. - Do not throw the battery into fire or water.
- Always remove the batteries from the remote control if you are not intending to use it for an extended period of time.
- Always use batteries of the same type. Do not use different types of battery at once.
- Do not mix old and new batteries.
- Always fit batteries in the correct orientation as shown on the remote control.
- If the remote control stops working because the batteries have become depleted, remove the old batteries and dispose of them.
- Do not leave empty batteries in the remote control, because they could leak.
- Alkaline batteries are not rechargeable. Never attempt to recharge alkaline batteries.
The headphones

To avoid damage to your hearing, do not listen to music on headphones at a loud volume for an extended period of time.


Since Prestigio is always improving and modernizing its
products, the device's external appearance and also its functionality may differ in minor ways.
from the descriptions in this guide.
Prestigio declares that this Prestigio device meets the requirements of directive 2014/30/EU. Complete
information about the declaration of compliance may be found online at: www.prestigio.com
Prestigio
User manual
Prestigio Multiboard
2
2. Preparing for operation Wall installation
You can fix the device to the wall using the wall mounting kit.
2
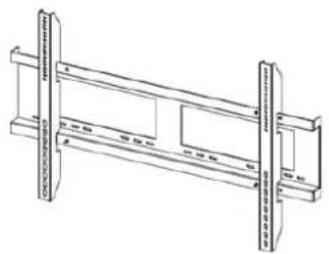
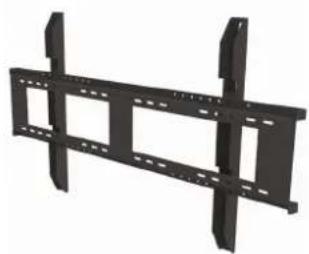

- This MultiBoard multimedia panel can only be attached to the wall using the wall mounting kit recommended by Prestigio. Use of other wall mounting equipment may lead to unstable installation and risk causing serious injury.
- Installing the MultiBoard multimedia panel requires specialist skills and should only be attempted by qualified technical staff. Clients should not try to fix the device to the wall themselves. Prestigio bears no liability for incorrect installation or fitting that results in accident or injury.

Make sure that a qualified technical specialist uses the Prestigio-recommended wall mounting kit to attach the device to a wall.
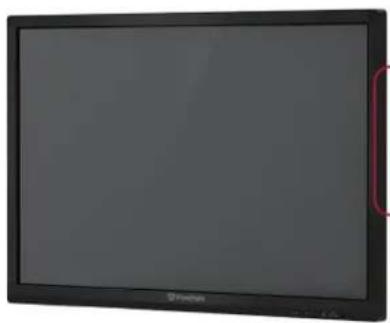
Using a stand
You can install the MultiBoard multimedia panel on a stand.*
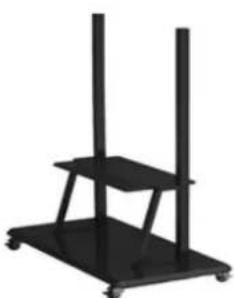
The model illustrated can be used with 43-98. However, you need to be careful when fitting it at an angle greater than 7 degrees. Make sure the stand is stable and cannot fall over.
User manual
Prestigio Multiboard
Prestigio
3. The stand kit
Kit
- Prestigio MultiBoard multimedia panel
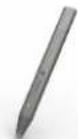
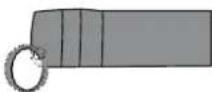
- 6 writing pens + 1 interactive*
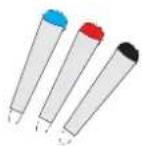

VGA cable
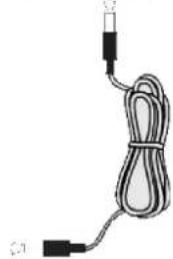
USB cable
- USB key

Remote control*
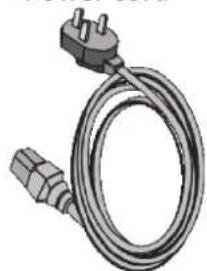
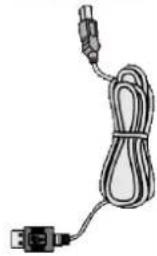
Power cord
Audio cable

- Brief user guide
- Attention! Illustrations for Multiboard L-series are approximate. The set of accessories may change depending on the model.
For additional information see: www.prestigio.com
2
Prestigio
User manual
Prestigio Multiboard
2
Additional accessories
The additional accessories listed below are available for this series of MultiBoard models. You can get them from the store.
The list of additional accessories is always being updated: check in stores for new releases.
| Number | EAN code | Description |
| PMBST02E | 8595248140493 | electronically controlled MultiBoard stand |
| PMBST03E | 8595248140561 | electronically controlled MultiBoard stand |
| PMBST04E | 8595248145535 | electronically controlled MultiBoard stand |
| PMBST01 | 8595248119543 | MultiBoard stand |
| PMBWMK | 8595248119550 | MultiBoard wall mounting kit |
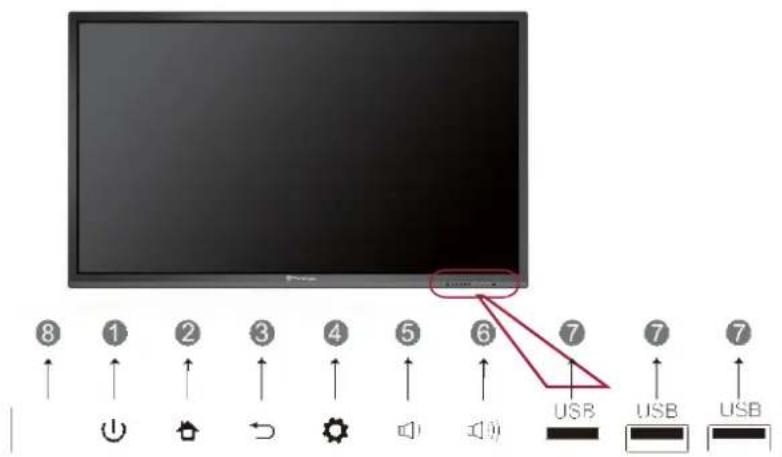
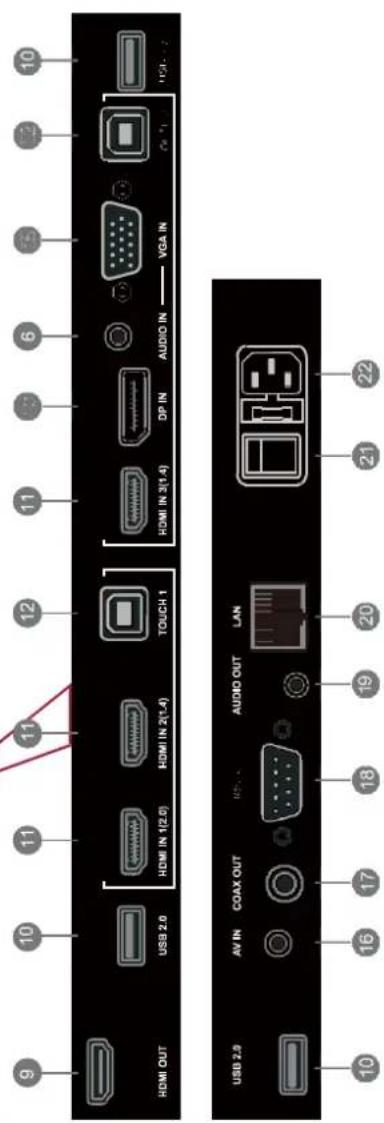
Overview of your MultiBoard
User manual Prestigio Multiboard
Prestigio
| Number | Specification | Number | Specification |
| 1 | Energy saving/standby mode. | 12 | PC touch signal in |
| 2 | Main screen exit button | 13 | DisplayPort connector |
| 3 | Back button | 14 | Audio in |
| 4 | Menu button | 15 | VGA connector |
| 5 | Reduce volume | 16 | Video in |
| 6 | Increase volume | 17 | Coaxial port |
| 7 | PC and Android USB port | 18 | RS232 port |
| 8 | Receiver for remote control signal | 19 | Audio out |
| 9 | HDMI out | 20 | RJ45 net interface |
| 10 | USB port | 21 | Switch |
| 11 | HDMI in | 22 | AC cord connector |
Attention! Image relates to the interface of Prestigio MultiBoard L series models and is provided for illustrative purposes. The outward appearance of your panel may differ from the picture, depending on the model.
For additional product information see: www.prestigio.com
Prestigio
User manual stigo Multiboard
艺
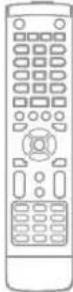
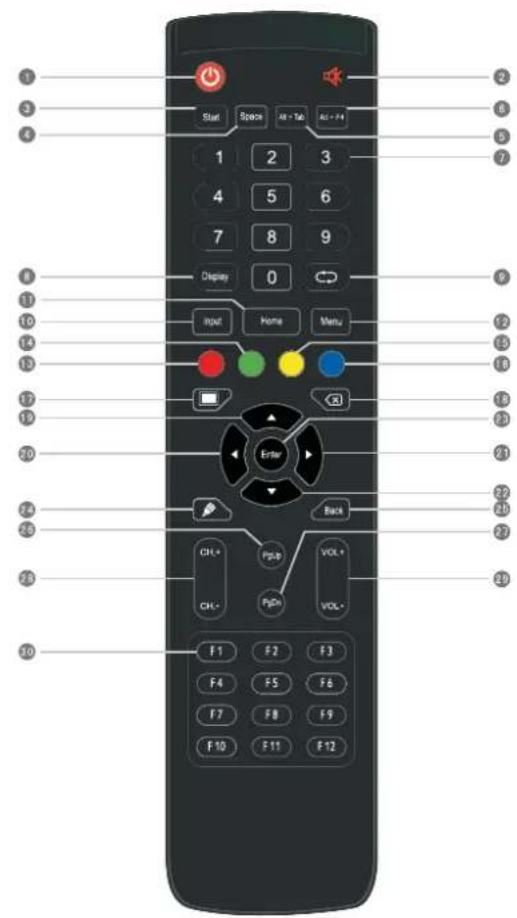
Remote control
| Number | Button | Description |
| 1 | On/standby | On/off or standby mode |
| 2 | Sound on/off | Turn off the sound |
| 3 | Start | Windows button |
| 4 | Space | Space |
| 5 | ALT+Tab | Button to switch between PC's internal programs |
| 6 | ALT+F4 | Close PC internal program window |
| 7 | Number buttons | Enter numbers |
EN-8
User manual Prestigio Multiboard
Prestigio
| 8 | The screen | Input source information |
| 9 | Back button | |
| 10 | Input | Confirm source selection |
| 11 | Home | Android system home screen |
| 12 | Menu | Menu button |
| 13 | Red button | Function button |
| 14 | Green button | Function button |
| 15 | Yellow button | Function button |
| 16 | Blue button | Function button |
| 17 | Blank screen button | |
| 18 | Erase button | |
| 19 | ▲ | Navigation button: up |
| 20 | Navigation button: left | |
| 21 | Navigation button: right | |
| 22 | Navigation button: down | |
| 23 | Start writing program | |
| 24 | Enter | Press to confirm selection |
| 25 | Back | Go back |
| 26 | PgUp | Previous page |
| 27 | PgDn | Next page |
| 28 | CH.+/CH.- | Change channel |
| 29 | VOL+/VOL- | Volume control button |
| 30 | Function button | F1-F12 |
艺
Prestigio
User manual
Prestigio Multiboard
艺
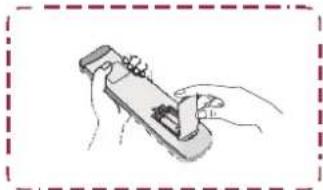
Battery installation
- Remove the back cover of the remote control.
- Insert two AAA batteries, taking care to orient the + and - poles correctly. Do not insert batteries into the remote control the wrong way around.
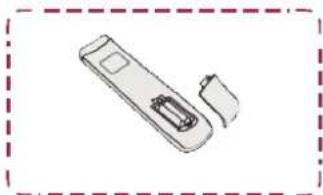
- Press the back cover of the remote control back into place.

User manual
Prestigio Multiboard
Prestigio
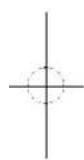
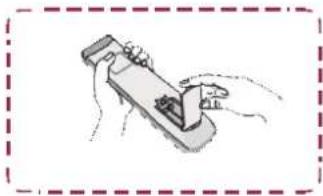
Remote control operating radius
The remote control operating radius is shown in the illustration.
2
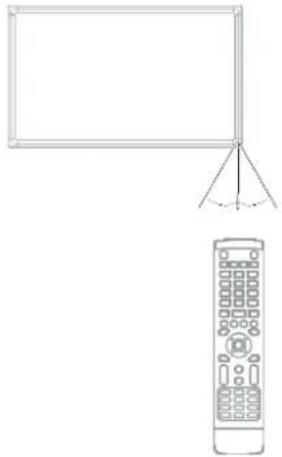
Attention! Remote control and description are provided for illustrative purposes. The version supplied with your model may differ.
Prestigio
User manual
Prestigio Multiboard
2
4. Getting started
Using the internal PC
4
- Connect the MultiBoard to the electric power supply using the power cord.
- Switch the power control on the back panel of the MultiBoard to ON
- Turn the MultiBoard multimedia panel on, using either the remote control or the on/off button on the touchpad.
- Use the INPUT button on the remote control to display a list of input sources on the screen.
- Press to select PC or Android as the input source.
- Press ENTER to confirm your selection.
Attention! Images refer to the Prestigio MultiBoard L series interface and are provided for illustrative purposes only. The outward appearance of your panel may differ from the picture. For additional product information see: www.prestigio.com
User manual
Prestigio Multiboard
Prestigio
Connecting to an external computer
2


- Use the VGA cable (15 contacts) to connect the VGA port to an external PC. At the same time, connect the PC to the audio connector using the audio cable.
- Use the USB cable to connect the external PC to the USB terminal. 3. Insert the power cable into the socket and turn on he power
- Start the external PC (set up the driver).
- Press to switch on the power.
- Use the INPUT button to switch the source to PC/Android.

- The optimal screen resolution for the external PC is 1920x1080.
The device can also connect to an external PC via HDMI.
Prestigio
User manual
Prestigio Multiboard
2
Connecting to other devices
Connecting to audio/video devices
Audio/video input
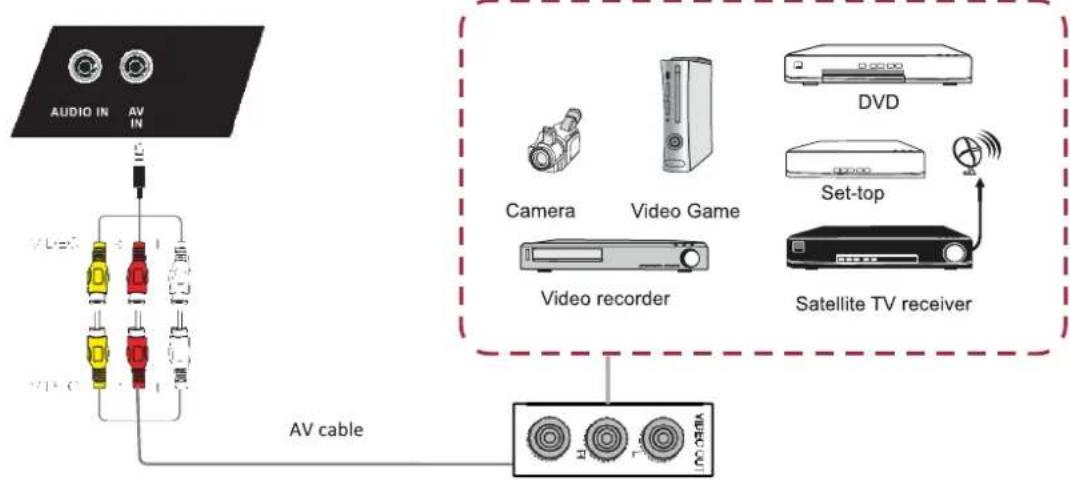
- Use the audio input/audio cable to an external device with an audio in/out port (yellow: video, red: audio R, white: audio L).
- Connect the power cord and switch the device on.
- Press to turn on the power.
- Use the INPUT button to switch the source to PC/Android.
HDMI1/HDMI2
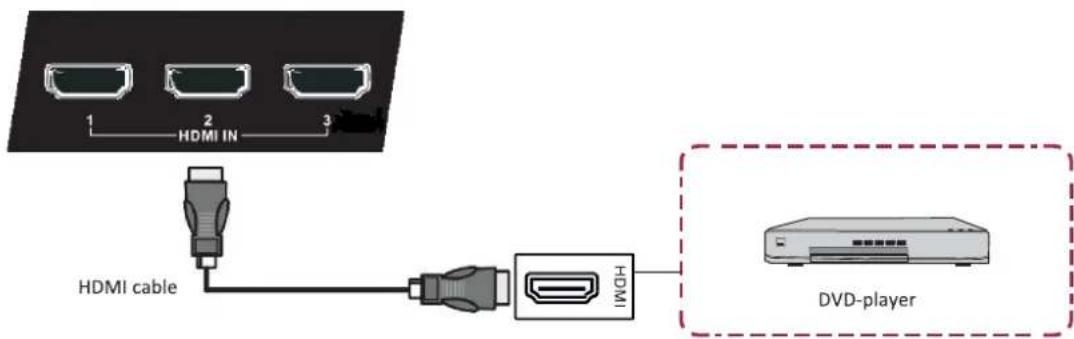
- Use the HDMI cable to connect the device to the HDMI jack.
- Connect the power cord and turn the device on.
- Press to turn on the power.
- Use the INPUT button to switch the source to HDMI.
EN-14
User manual Prestigio Multiboard
Prestigio
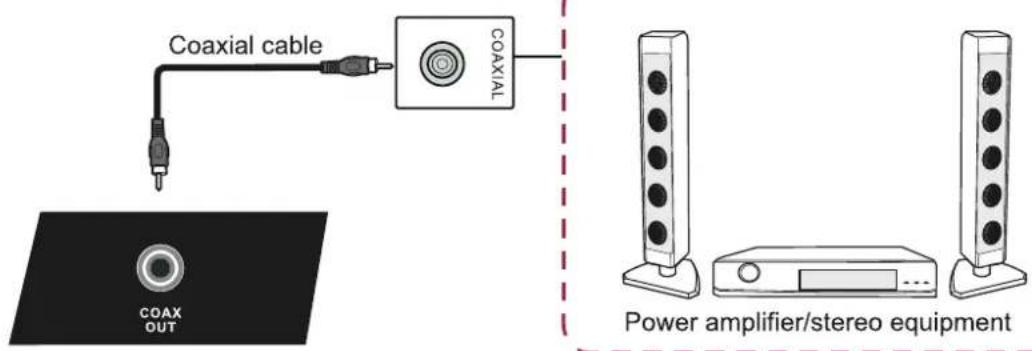
Coaxial connection
E
- Use the coaxial cable to connect the device to the coaxial connection.
- Connect the power cord and turn the device on.
- Press to turn on the power.
VGA-OUT

Connecting to the video output
- Use the VGA cable to connect the device to the VGA OUT jack. Connect the headphones to the Audio OUT jack.
- Connect the power cord and turn the device on.
- Press to turn on the power.

VGA-OUT can only be used with images from the onboard computer.
Prestigio
User manual
Prestigio Multiboard
2
5. Network connections Network connection
To access the device's network functions, you can connect your multimedia panel to a router to obtain high-speed Internet access.
You can also connect the multimedia panel to your home network's server using a router or an access point.
5
The multimedia panel can be connected to a router either using a cable or wirelessly.

- If you are using a cable to connect to the router, you will need to use a network LAN cable (supplied separately).
- If you do not have broadband Internet access, ask for more information from your phone or internet service provider.
- The device cannot use cable and wireless network connection at once.
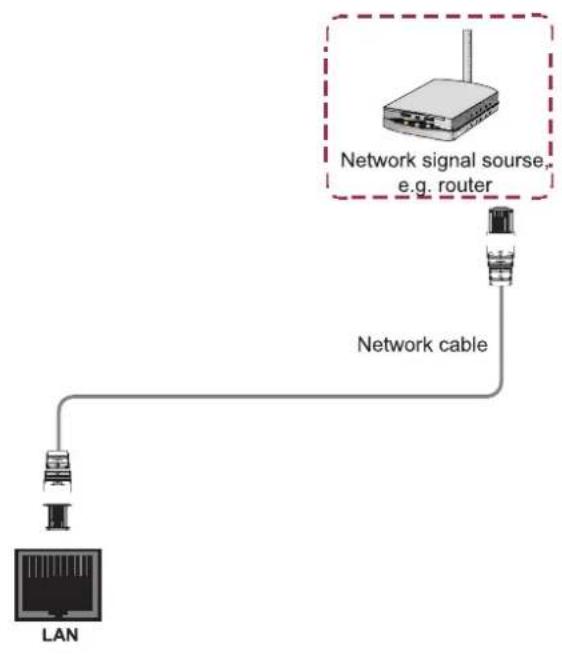
Connecting with a cable
- Turn on the router. For more information see the router's user instructions.
- Connect the network cable to the multimedia panel's LAN port and to the router (cable supplied separately).
User manual
Prestigio Multiboard
Prestigio
Connecting wirelessly
- Turn on the router before you start setting up the network.
-
Plug in the network cable and switch on the power to the device
-
Press the power on button.
- Use the INPUT button to switch the source to PC/Android.
- Discoverable WiFi networks will be displayed in the WiFi networks section on the right of the status bar.
-
Select a network to join.
-
If the network you select is password-protected, enter the password.

-
Wireless connection and its reliability cannot be guaranteed in all locations, due to a weak signal or low connection speed. A weak signal or no signal, or a low data transfer rate, are possible in the following circumstances:
-
When using the device in a building made using concrete, structural steel, or metallic construction;
- When using the device near to objects that block the signal;
- When using the device simultaneously with other wireless equipment on the same frequency;
-
When using the device near microwave ovens or other equipment that is a source of magnetic fields, electrostatic charges, or electromagnetic waves
-
Make sure your network's firewall settings allow the multimedia panel to connect wirelessly.
- Wireless connection and its reliability cannot be guaranteed if you are using access points without a Wi-Fi® certificate
- Wireless LAN connection between the multimedia panel and the Internet requires a wireless LAN access point. For more information see the user instructions for your access point.
- Streaming from the Internet requires stable, high-speed data transfer. If the speed and stability of the wireless LAN connection are insufficient, connect to the Internet using a cable.
- Since Internet video can use various different compression formats, some elements of content may fail to appear on the multimedia panel.
Prestigio
User manual
Prestigio Multiboard
Z
6. General settings
MultiBoard settings
Go through the following steps:
- Connect the power cord and turn the device on.
- Press INPUT on the remote control to enter settings. 3.
Press or to select the settings item.
- Press ENTER to confirm.
- Select parameters using the buttons marked or
- Press ENTER to confirm.
- Press INPUT again to go back to viewing mode.
6
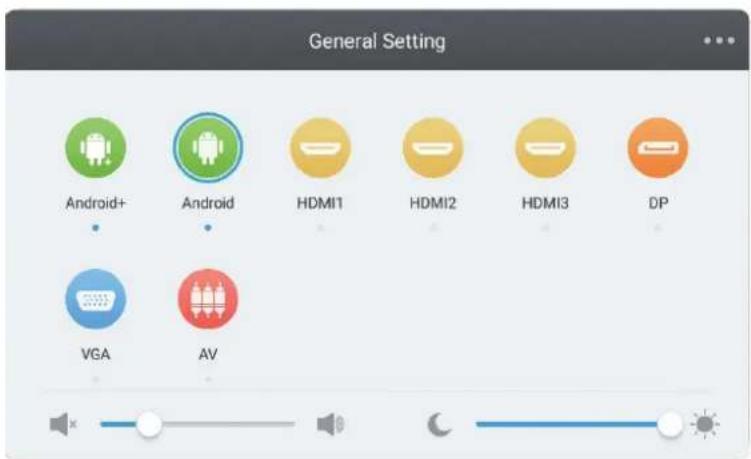
Input settings
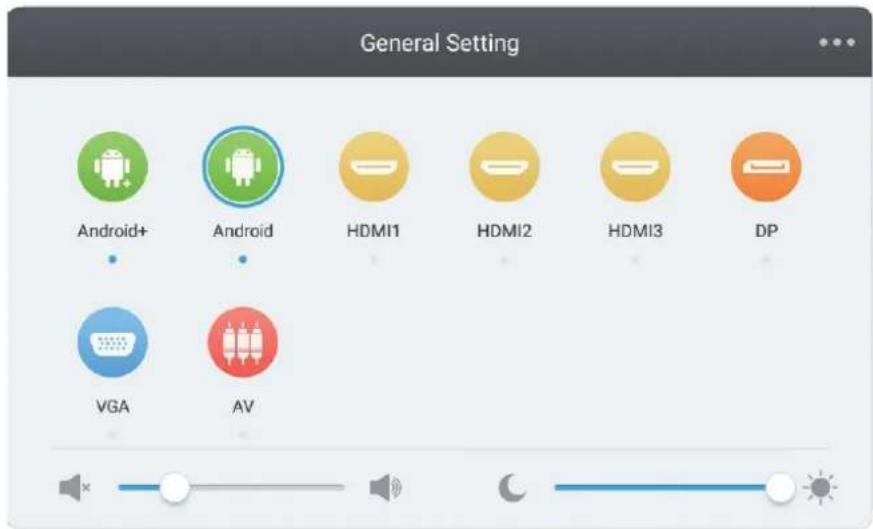
- Press INPUT on the remote control to enter the input settings menu.
- Use the buttons marked , , on the remote control to select the input source
- Press the Enter button on the remote control to confirm the input source.
- Press the Back button to exit the menu.
Attention! Images relate to the Prestigio MultiBoard L series interface and are provided for illustrative purposes only. The outward appearance of your panel may differ from the picture.
For additional product information see: www.prestigio.com
User manual
Prestigio Multiboard
Prestigio
Brightness settings
2
- Press INPUT on the remote control to enter the input settings menu.
- Press on the remote control to enter brightness settings.
- Use the Vol+/Vol- buttons to set the brightness.
- Press the Back button to exit the menu.
Volume settings
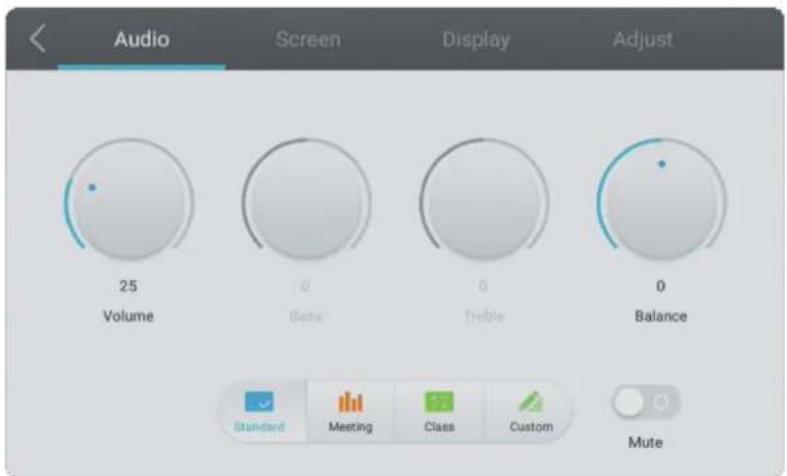
- Press INPUT on the remote control to enter the input settings menu.
- Press on the remote control to enter volume settings.
- Use the Vol+/Vol- buttons to set the volume.
- Press the Back button to exit the menu.
2
VGA channel settings
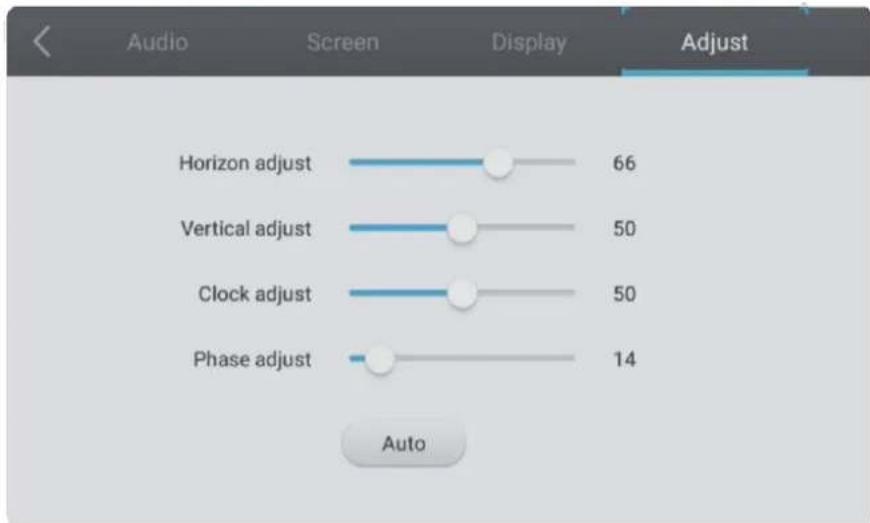
- While in VGA mode, press INPUT on the remote control to enter the settings menu.
- Press on the remote control to enter the advanced settings menu.
- Use the Vol+/Vol- buttons to set parameters.
- Press the Back button to exit the menu.
H position
Use the Vol+/Vol- buttons on the remote control to set the horizontal position of the image.
V position
Use the Vol+/Vol- buttons on the remote control to set the vertical position of the image.
Phase
Use the Vol+/Vol- buttons on the remote control to set the phase of the image position.
Clock
Use the Vol+/Vol- buttons on the remote control to set the clock.
Aspect ratio
Use the Vol+/Vol- buttons on the remote control to set the aspect ratio.
Auto fit
Press the Enter button to set the H position, V position, phase, and clock automatically.
User manual
Prestigio Multiboard
Prestigio
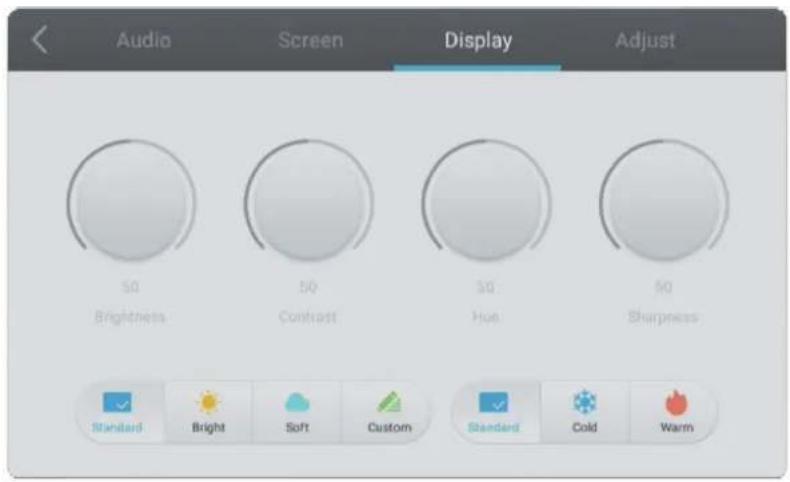
Screen settings
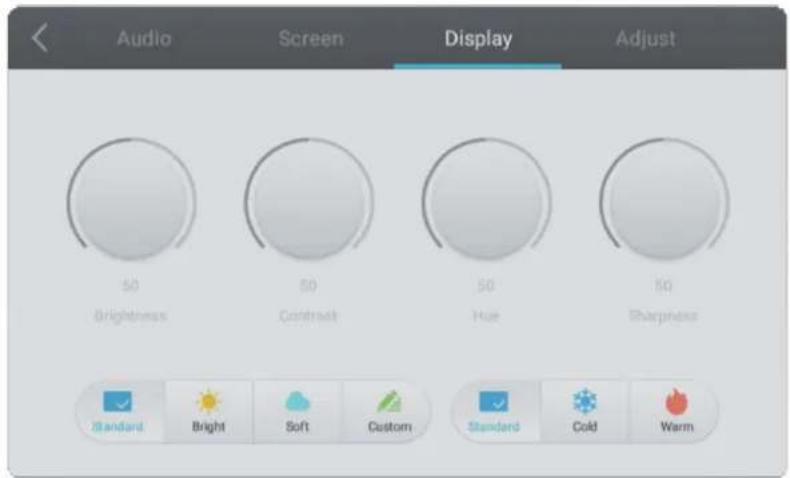
2
- While in Android mode, press INPUT to go to the settings menu.
- Press on the remote control to enter the advanced settings menu.
- Use the Vol+/Vol- buttons to set parameters.
- Press the Back button to exit the menu.
Brightness
Use the / buttons on the remote control to set the brightness of the image.
Contrast
Use the / on the remote control to set the contrast of the image.
Color temperature
Use the / on the remote control to set the color temperature of the image (cool colors/warm colors/auto).
Prestigio
艺
7. Daily care and tech servicing
7

WARNING
Always unplug the device before you start cleaning it
Cleaning
Cleaning the screen and the device
- Carefully wipe the screen and the device with a slightly moistened cloth that has been well squeezed out.

- Do not use solvents, benzine, or cleaning products including abrasive substances, as these may damage the surface.
- Do not wipe the screen with a dry cloth, as this may lead to a static electrical charge.
- Do not clean the screen with cleaning products including alcohol, solvents, or surfactants.
- Do not spray water or cleaning products onto the screen or the device.
Storing the device
Do not leave the device switched on for long periods of time. Always unplug it if you do not intend to use it for an extended period. To avoid the risk of a short circuit, use a surge protecting filter.
User manual
Prestigio Multiboard
Prestigio
8. Technical specifications
8

ARTICLE
Screen size, inch
Screen resolution
Response time
Viewing angle
Screen/sensor technology
PMB432D435/ PMB528L551/ PMB528L651/ PMB000D435 PMB000L550 PMB000L650*
43" (UHD) 55" (UHD) 65" (UHD) 65" (UHD) 70" (UHD) 75" (UHD) 86" (UHD) 98" (UHD)
3840x2160 3840x2160 3840x2160 3840x2160 3840x2160 3840x2160
9ms 9ms 8ms 6ms 8ms 8ms 8ms 8ms
178/178
LED/IR20point LED/IR20 point touch,10 point touch,10 point writing writing
LED/IR20point LED/IR20 point touch,10 point touch,10 point writing writing
LED/IR 20 point touch,10 point writing
Brightness/contrast
Frequency
Power consumption:
| 96W / ≤0.5W 250W / ≤1.35W 300W / ≤0.5W 300W / ≤1.35W 400W / ≤1.35W 500W / ≤1.35W 600W / ≤0.5W | ||||||||
| HDMI Out x1; | HDMI Out x1; | HDMI Out x1; | HDMI Out x1; | HDMI Out x1; | HDMI Out x1; | HDMI IN x 3; | ||
| USB 2.0x2 (+2 in front); | USB 2.0x2(+2 in front); | VGA IN x 1; | USB 2.0x2(+2 in front); | USB 2.0x2(+2 in front); | USB 2.0x2(+2 in front); | USB 2.0x2(+2 in front); | USB 2.0x3 (2 in front); | |
| USB 3.0x1 (+1 in front); | USB 3.0x1(+1 in front); | HDMI OUT x 1; | USB 3.0x1(+1 in front); | USB 3.0x1(+1 in front); | USB 3.0x1(+1 in front); | USB 3.0x1(+1 in front); | USB 3.0x3 (2 in front); | |
| USB 3.0 x 1; | TP out x 2; | TP out x 2; | AUDIO IN x 1; | TP out x 2; | TP out x 2; | TP out x 2; | TP out x 2; | USB 3.0 x 3; |
| 1.3MP camera | HDMI In x 3; | HDMI In x 3; | AUDIO OUT x 1; | HDMI In x 3; | HDMI In x 3; | HDMI In x 3; | HDMI In x 3; | Touch x 2; |
| VGA-in x 1; | VGA-in x 1; | USB2.0 x 4; | VGA-in x 1; | VGA-in x 1; | VGA-in x 1; | VGA-in x 1; | VGA In x 1; | |
| Audio-In x 1; AV-In | Audio-In x 1; AV-In | USB3.0 x 1; | Audio-In x 1; AV-In | Audio-In x 1; AV-In | Audio-In x 1; AV-In | Audio-In x 1; AV-In | AUDIO IN x 1; | |
| x 1; RS232 x 1; | x 1; RS232 x 1; | Touch ports x 2; | x 1; RS232 x 1; | x 1; RS232 x 1; | x 1; RS232 x 1; | x 1; RS232 x 1; | AUDIO OUT x 1; | |
| Audio Out x 1; | Audio Out x 1; | LAN x 1; | Audio Out x 1; | Audio Out x 1; | Audio Out x 1; | Audio Out x 1; | LAN x 1; | |
| LAN x 1; | LAN x 1; | RS232 x 1 | LAN x 1; | LAN x 1; | LAN x 1; | LAN x 1; | RS232 x 1; | |
| COAX Out x 1; | COAX Out x 1; | COAX Out x 1; | COAX Out x 1; | COAX Out x 1; | COAX Out x 1; | |||
| ARM Cortex | Intel® Core™ i5 | Intel® Core™ i5 | Intel® Core™ i7 | Intel® Core™ i5 | Intel® Core™ i7 | Intel® Core™ i7 | Intel® Core™ i7 | Intel® Core™ i7 |
| A53 Quad Core | (8th gen 8400) | (8th gen 8400) | (8th gen 8700) | (8th gen 8400) | (8th gen 8700) | (8th gen 8700) | (8th gen 8700) | (8th gen 8700) |
| 2GB DDR4 / 32GB | / 8GB DDR4 / | / 8GB DDR4 / | / 8GB DDR4 / | / 8GB DDR4 / | / 8GB DDR4 / | / 8GB DDR4 / | / 8GB DDR4 / | / 16GB DDR4 / |
| ROM | 256GB SSD | 256GB SSD | 256GB SSD | 256GB SSD | 256GB SSD | 256GB SSD | 256GB SSD | 512GB SSD |
Display interfaces
PC*
ARM Cortex A53 Quad Core /2GB DDR4 / 32GB
Independent Graphic Card GeForce GT1030
Independent Graphic Card
Graphics card
Wi-Fi
802.11 a,b,g,n
802.11ac
(2.4GHz/5GHz)
USB 2.0× 2 USB 3.0× 4
802.11ac
(2.4GHz/5GHz)
USB2.0x2; USB3.0x4;
802.11ac
(2.4GHz/5GHz)
USB 2.0× 2 USB3.0×4;
B 3.1 Type-C x1; USB 3.1 Type-C x1;
802.11ac
(2.4GHz/5GHz) (2.4GHz/5GHz)
USB 2.0× 2 USB 3.0× 4
USB2.0x2; USB3.0x4;
802.11ac
2.4GHz/5GHz
USB 2.0× 2 USB 3.0× 4
PC interfaces
m : x = 1 或 3x + 4y + 1 = 0
BT4.2x1:LANx1;BT4.3x1:LANx1
RT4.2:LANx1; RT4.3x1:LANx1;
53.02x1:LANx1;BT4.3x1:LANx1;
BTA2:LANx1;
Audio
8W x 2 Stereo speakers
12W x 2 Stereo speakers
12W x 2 Stereo speakers
2.1: 10W× 2 ar 15W× 1
12W x 2 Stereo 12W x 2 Stereo speakers speakers
12W x 2 Stereo speakers
12W x 2 Stereo speakers
Dimensions of package (mm)
1215x710x165 1458x932x220 1697x1071x220 1697x1039x220 1803x1160x243 1913x1225x280 2211x1370x280 2483x1493x376
Weight (kg)
19.5: panel
324441566078
101,5
ht in package (kg)
17.1:rtand
36.6total
4055516878
105
138,75
Prestigio
User manual
Prestigio Multiboard
- Models with no PC
Attention! The panel's description and interface may be altered in connection with updates to the series of models. For additional product information see: www.prestigio.com
User manual
Prestigio Multiboard
Prestigio
9. Troubleshooting
In the event of any fault in the device's functioning, follow the recommendations in the table below.
If you do not manage to fix the fault, contact the manufacturer's local dealer.

The problems described in this guide may not always be the cause of a fault. Check several times to make sure the MultiBoard is not working properly before contacting the service centre.
| Problem | Possible solution |
| Remote control not working | ·Make sure there is nothing in between the remote control and the receiver on the device. ·Make sure the batteries are fitted correctly and the right way round. ·Make sure the batteries have not gone flat. |
| Device shuts down automatically | ·Automatic shutdown mode is on. ·Make sure there is electric power ·Make sure there is a signal. |
| PC mode | |
| No signal | ·Check the display settings. ·Check settings for the installed resolution. ·Check H and V position settings (phase) in the menu. |
| Wavy background | ·Activate automatic image adjustment mode. ·Check frequency and phase settings. |
| Color distortions | ·Check VGA cable connection. ·Check image brightness and contrast settings. |
| Unsupported format | ·Activate automatic image adjustment mode. ·Check frequency and phase settings. |
| Touch control | |
Prestigio
User manual
Prestigio Multiboard
2
| Touch control error | ·Check device drivers are installed correctly. ·Reinstall driver. |
| Touch control not working | ·Check settings and change them if necessary. ·Reinstall driver. ·Make sure touch stylus is working properly. |
| Video distortions | |
| No image/No signal | ·Check the power is on. ·Make sure signal cables are connected properly. ·Check connection to the onboard PC module. |
| "Downloading" image | ·Make sure signal cables are connected properly. ·Make sure there are no electromagnetic waves. |
| Poor image quality | ·Check image brightness and contrast settings. ·Make sure signal cables are connected properly. |
| Audio distortions | |
| No sound | ·Make sure sound isn't off in the menu. ·Increase the volume. ·Check audio cable connection. |
| Sound only from one speaker | ·Set sound balance in the menu. ·Check sound menu settings in the external sound source. ·Check audio cable connection. |
| No sound when connected to VGA OUT port | ·Check headphone connection. |
10. Protection of trademarks and intellectual property
This document, the contents of the device, and also any data uploaded including types, graphic images, sound files, video, text, design elements, software and documentation (user guides, illustrations, etc) constitute intellectual property and may not be copied, altered or distributed in whole or in part without the owner's permission.
The Prestigio trademark and logo are the property of Prestigio Plaza Limited. "Prestigio" is a registered trademark belonging to the Prestigio company. Applicable law: this document is drawn up in accordance with the law of Cyprus. Any questions concerning this document should be addressed to the company at: Prestigio Plaza Ltd, Cyprus, Zinas Kanther&Origenous, P.C. 3035 Limassol.
This information may change from time to time. For more information see www.prestigio.com
EN:
Manufacturer: Prestigio Plaza Ltd, Cyprus, Zinas Kanther&Origenous, P.C. 3035 Limassol.
Made in China
Importer to the Russian Federation: LLC Asbis 129512 Moscow, ul. Akademika Korolyova, 13, 1. Tel. +7 (495) 775-0641
Date of manufacture is shown on a sticker under the serial number on the individual package.
- Prestigio
- MULTIBoard
- Contents
- Safety instructions
- WARNING
- Installation and relocation
- Power cord and power supply
- The screen
- Distance from the screen
- Temperature
- Moisture
- User manual Prestigio Multiboard
- Ventilation
- The battery
- The headphones
- 2
- Preparing for operation Wall installation
- Using a stand
- The stand kit
- Kit
- Additional accessories
- Overview of your MultiBoard
- Remote control
- Battery installation
- Remote control operating radius
- Getting started
- Using the internal PC
- Connecting to an external computer
- Connecting to other devices
- Connecting to audio/video devices
- Network connections Network connection
- 5
- Connecting with a cable
- Connecting wirelessly
- General settings
- MultiBoard settings
- Input settings
- Brightness settings
- Volume settings
- VGA channel settings
- H position
- V position
- Phase
- Clock
- Aspect ratio
- Auto fit
- Screen settings
- Brightness
- Contrast
- Color temperature
- Daily care and tech servicing
- Cleaning
- Cleaning the screen and the device
- Storing the device
- Technical specifications
- ARTICLE
- 178/178
- Brightness/contrast
- Display interfaces
- Graphics card
- Wi-Fi
- PC interfaces
- Audio
- Dimensions of package (mm)
- Weight (kg)
- ht in package (kg)
- Troubleshooting
- Protection of trademarks and intellectual property
Marque : PRESTIGIO
Modèle : PMB728L751
Catégorie : Moniteur