
HACX114 - Lecteur/enregistreur de cd Hamilton Buhl - Notice d'utilisation et mode d'emploi gratuit
Retrouvez gratuitement la notice de l'appareil HACX114 Hamilton Buhl au format PDF.
| Type de produit | Lecteur de CD portable |
| Marque | Hamilton Buhl |
| Modèle | HACX114 |
| Alimentation | 2 piles AA (non incluses) ou adaptateur secteur 4,5V DC 700mA (non inclus) |
| Formats de disque supportés | CD audio, CD-R, CD-RW |
| Modes de lecture | Normal, Aléatoire, Répéter 1, Répéter tout, Intro, Programmé (jusqu'à 20 pistes) |
| Booster de basses | Oui (interrupteur BBS) |
| Affichage | Écran LCD |
| Sortie audio | Prise casque 3,5 mm (écouteurs fournis) |
| Dimensions approximatives | 140 x 140 x 25 mm |
| Poids approximatif | 200 g (sans piles) |
| Accessoires inclus | Écouteurs, manuel d'utilisation |
| Entretien | Nettoyer avec un chiffon doux et humide (jamais mouillé). Ne pas utiliser de solvants. |
| Sécurité | Ne pas exposer à la chaleur, ne pas obstruer la ventilation, retirer les piles en cas de non-utilisation prolongée. |
| Conformité | FCC Part 15 (Classe B) |
| Fabricant | Hamilton Buhl, Fairfield, NJ, USA |
FOIRE AUX QUESTIONS - HACX114 Hamilton Buhl
Questions des utilisateurs sur HACX114 Hamilton Buhl
0 question sur cet appareil. Repondez a celles que vous connaissez ou posez la votre.
Poser une nouvelle question sur cet appareil
Téléchargez la notice de votre Lecteur/enregistreur de cd au format PDF gratuitement ! Retrouvez votre notice HACX114 - Hamilton Buhl et reprennez votre appareil électronique en main. Sur cette page sont publiés tous les documents nécessaires à l'utilisation de votre appareil HACX114 de la marque Hamilton Buhl.
MODE D'EMPLOI HACX114 Hamilton Buhl
13 Hamilton Buhl™
Never Ending Learning Innovation
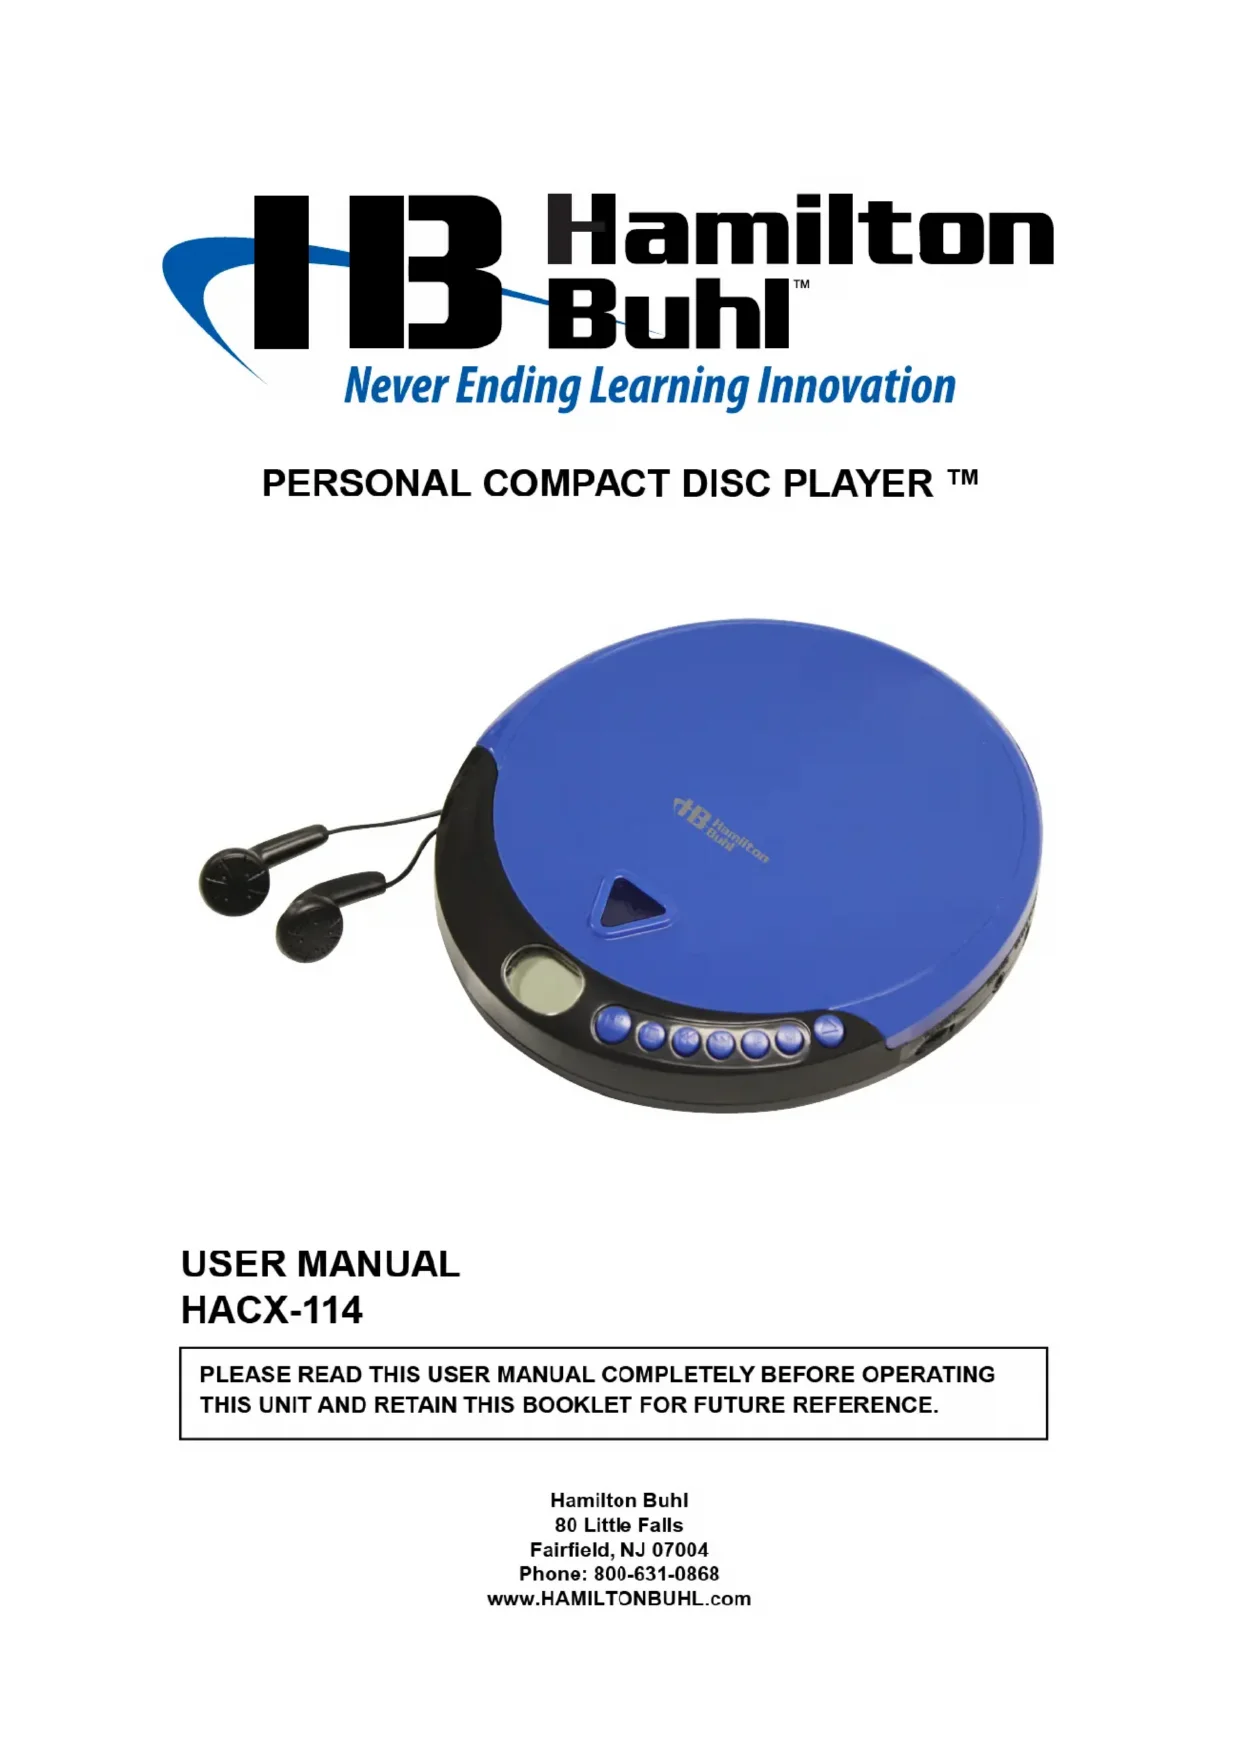
PERSONAL COMPACT DISC PLAYER ™
natural_image
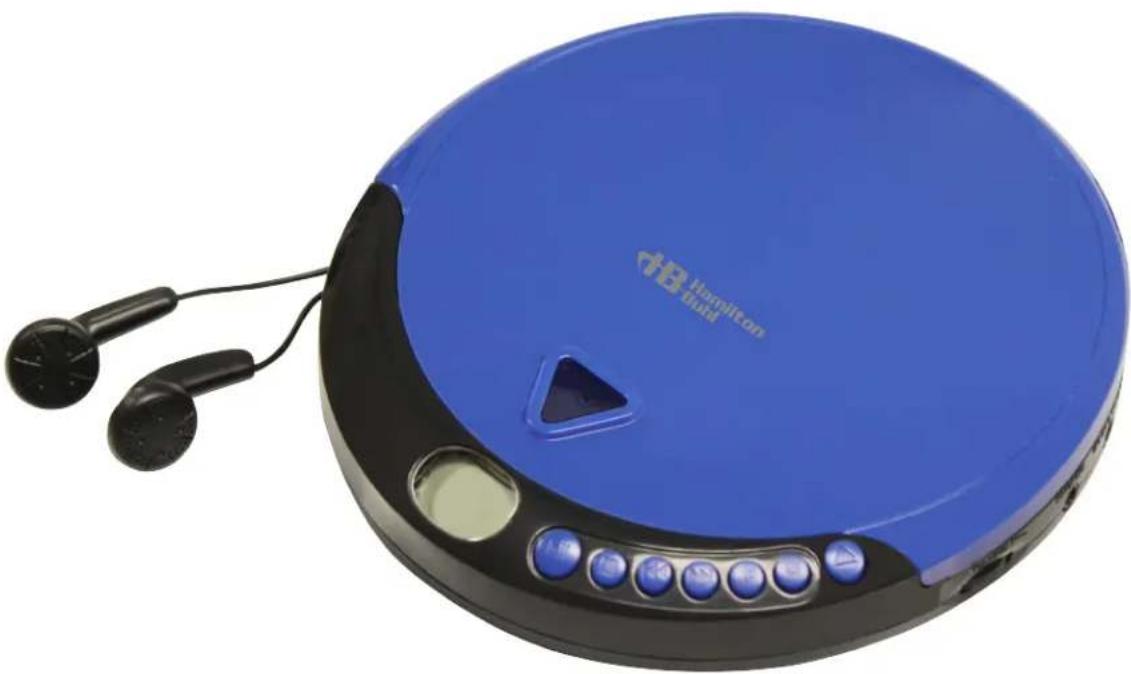
Blue Hamilton board computer with black earphones and control buttons (no visible text or symbols on body)USER MANUAL HACX-114
PLEASE READ THIS USER MANUAL COMPLETELY BEFORE OPERATING THIS UNIT AND RETAIN THIS BOOKLET FOR FUTURE REFERENCE.
Hamilton Buhl
80 Little Falls
Fairfield, NJ 07004
Phone: 800-631-0868
www.HAMILTONBUHL.com
CAUTION
Follow the advice below for safe operations.
● To reduce the risk of fire, do not place any heating or cooking appliance beneath this unit.
- Stop operation immediately if any liquid or solid object should fall into the cabinet.
- If the unit is not to be used for a long period of time, make sure that all power sources are disconnected from the unit. Remove all batteries from the battery compartment, and unplug the AC-DC adaptor from the wall outlet. Make it a practice to remove the AC-DC adaptor by grasping the plug and not by pulling the cord.
●
ON PLACEMENT
● Do not use the unit in places, which are extremely hot, cold, dusty or humid.
● Install the HACX-114 as far as possible from a source of noise. (for example, refrigerator, microwave oven, fluorescent lamp, etc.)
- Do not restrict the airflow of the unit by placing it in a place with poor ventilation, by covering it with a cloth or by placing it on a carpet.
Should any trouble occur, remove the power source and refer servicing to qualified personnel.
COMPLIANCE WITH FCC REGULATIONS
This device complies with Part 15 of the FCC Rules. Operation is subject to the following two conditions:
(1) this device may not cause harmful interference, and
(2) this device must accept any interference received, including interference that may cause undesired operation.
NOTE: This equipment has been tested and found to comply with the limits for a Class B digital device, pursuant to Part 15 of the FCC Rules. These limits are designed to provide reasonable protection against harmful interference in a residential installation. This equipment generates, uses and can radiate radio frequency energy and, if not installed and used in accordance with the instructions, may cause harmful interference to radio communications. However, there is no guarantee that interference will not occur in a particular installation. If this equipment does cause harmful interference to radio or television reception, which can be determined by turning the equipment off and on, the user is encouraged to try to correct the interference by one or more of the following measures:
- Reorient or relocate the receiving antenna.
- Increase the separation between the equipment and receiver.
- Connect the equipment into an outlet on a circuit different from that to which the receiver is connected.
- Consult the dealer or an experienced radio/TV technician for help.
CAUTION: Changes or modifications not expressly approved by the party responsible for compliance could void the user's authority to operate the equipment.
PREPARATION FOR USE
Unpack the unit carefully to remove all the accessories from the packing. Verify that the following accessories are present before setting up the unit.
Accessories:
- Main Unit X 1
- Earbud X 1
- User Manual X 1
LOCATION OF CONTROLS
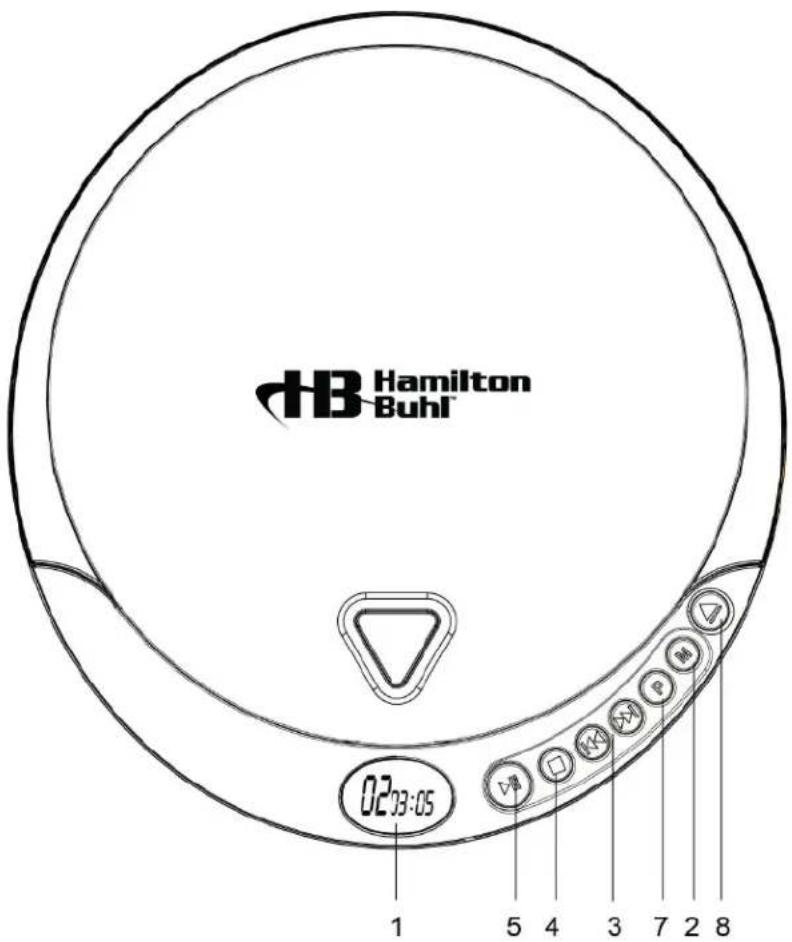
- LCD Display
Use the LCD Display to view CD information and battery life.
- Program Button
Press the Program Button to program a loaded CD to play specified tracks in a specific order.
- Skip/Search Button
Press the Skip/Search Buttons to skip from one track to the next or previous track. Press and hold the Skip/Search Buttons to search through an individual track on a loaded CD.
- Stop Button
Press the Stop Button to stop a loaded CD during play.
- Play/Pause Button
Press the Play/Pause Button to play or pause a loaded CD
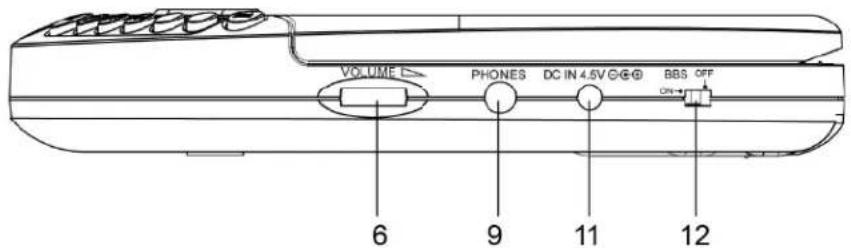
- Volume Knob
Turn the Volume Knob to adjust the volume of audio output from the unit.
- Mode Button
Press the Mode Button to switch the unit's play mode from
Random, Repeat, Repeat All and Intro modes.
8. Open Switch
Use the open switch to open the unit when loading or unloading a CD.
9. Headphone Jack
Use the Headphone Jack to connect a set of earbud (Included) to the unit.
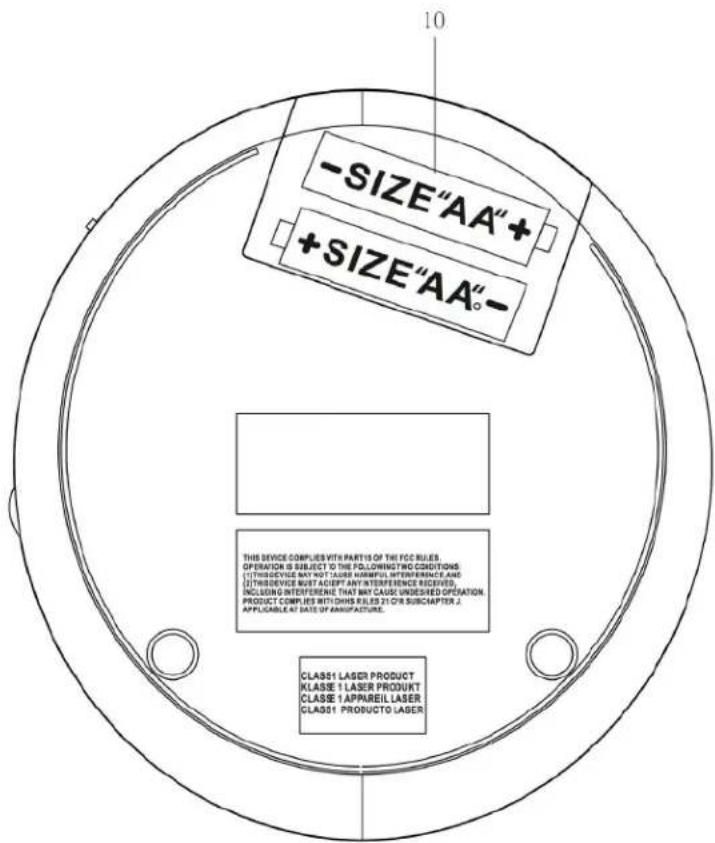
10. Batteries Compartment
Requires 2 x "AA" batteries (Not Included) to power the unit.
11. DC Jack
DC jack for 4.5V DC 700mA adaptor (Not Included) to power the unit.
12. BBS Switch
To switch BBS ON or OFF
POWER SOURCE
This CD player operates on two 1.5V DC “AA” size (UM-3) alkaline batteries (Not Included) or with an AC adaptor with an output of 4.5V DC 700mA (Not Included).
To install batteries into the player
- Open the battery compartment cover located on bottom of cabinet.
-
Insert two 1.5V DC “AA” size (UM-3) alkaline batteries (Not included) into the Battery compartment following the polarity markings as indicated in the compartment.
-
Close the battery door.
BATTERY WARNING
- Be sure that the batteries are installed correctly. Wrong polarity may damage the unit.
- Use only the size and type of batteries specified.
- Do not mix old and new batteries.
-
Do not mix alkaline, standard (carbon-zinc) or rechargeable (nickel-cadmium) batteries.
-
For better performance and longer operating time, we recommend the use of alkaline-type batteries.
- If the unit is not to be used for an extended period of time, remove the batteries. Old or leaking batteries can cause damage to the unit and may void the warranty.
- Do not try to recharge batteries not intended to be recharged; they can overheat and rupture. (Follow battery manufacturer's directions).
- Do not dispose of batteries in fire, batteries may leak or explode.
Using an adaptor (not included) to power the unit
- Before connecting the adaptor to the player, make sure that the AC voltage of the adaptor corresponds to you local AC outlet voltage. The polarity of the adaptor must match to the polarity markings next to the DC jack on the player.
- Plug the 4.5V DC 700mA AC-DC adaptor into an AC outlet.
- Insert the DC plug into the jack on the player.
PLAYING CD
Turning Power On and Off
To turn ON and OFF, press the following buttons after a disc is inserted into the player.
To Turn ON: Press PLAY/PAUSE button ( playback starts)
To Turn OFF: Press STOP button once for standby mode.
Press STOP button twice to turn off the power.
NOTE: When the unit is stopped (Standby mode) for approximately 30 seconds, the power is automatically turned off.
To Playback:
1: Open the CD door, and place a CD or CD-R/RW into the player.
2: Press PLAY/PAUSE to start playing.
To Enhance the Bass Sound
Set the BBS switch to the ON position.
NOTE: The bass boost performance will be increase or decrease depending on the volume level.
PLAY MODE
Every time the MODE button is pressed, the corresponding mode appears in the display window, in the following sequence:
REPEAT 1:
When shown on the LCD display, the current track on the disc will be repeated.
REPEAT ALL:
When shown on the LCD display, all tracks on the disc will be repeated.
To cancel the Repeat function, press the MODE button repeatedly until the icon disappears.
INTRO:
To play the first 10 seconds of each track on the disc.
RANDOM:
Enables all the tracks on the disc to be played in a random sequence.
To cancel INTRO & RANDOM function, press the MODE button repeatedly until the icon disappears.
PROGRAMMED PLAY
- Press the PROG button once, PROG No. 01 appears. PROG and Track NO.00 start flashing in the display.
- Press SEARCH/SKIP button to select the desired track.
- When the desired track is displayed, press the PROG button to register. The PROG No. changes to 02. Track No. returns to 00 and flashes together with PROG.
- Repeat steps 2 and 3 to program more tracks.
Up to 20 tracks can be programmed into the memory. - Press PLAY/PAUSE to start the programmed play.
- To erase the program, in STOP mode simply press the STOP button.
CARE AND MAINTENANCE
- Clean the unit with a soft, damp (never wet) cloth. Solvent or detergent should never be used.
- Avoid operating your unit under direct sunlight or in hot, humid or dusty places to reduce the risk of fire or electric shock.
- Keep your unit away from heating appliances and sources of electrical noise such as fluorescent lamps or motors.
- For better Clock Display clarity, avoid operating the unit under direct sunlight or in strong room illumination.
- Unplug the unit from the electrical power outlet immediately in case of malfunction.
CAUTION: Never allow any water or other liquids to get inside the unit while cleaning.
SPECIFICATIONS
Power Adaptor (Not Included): DC input 120V\~60Hz 5W DC Output 4.5V 0.7A
Battery Operate: 2 x "AA" Size batteries (not included)
TROUBLESHOOTING GUIDE
| PROBLEM | POINTS TO CHECK |
| Player fails to function | Disc may be inserted upside downDisc not mounted correctly on chuckDirty or defective discDirty pick up lensPlayer lid not closedMoisture/Condensation, allow player to warm up to room temperature for 60 minutesAC power to adaptor switched offWeak batteriesAuto switch off has occurred |
| No sound from Headphones | Headphone plug is not firmly inserted into the Phones socket. |
| Intermittent sound | Dirty or defective discDirty pick up lensPlayer is subject to excessive vibration or shockLow battery powerPoor headphone connection |
Product Registration Instructions
Visit: www.HamiltonBuhl.com

natural_image
Silhouette of a person with headband and computer monitor, emitting arrows (no text or symbols)- Click on Customer Support
- Click on Product Registration Form
- Please fill out all field marked with * to register your product
Our Mission:
Since our founding in 1993, HamiltonBuhl continues to evolve as a leader in technology products for education and industry. Our products are embraced by educators, corporate trainers, presenters, governments agencies and hospitals for their daily presentation, from classrooms to the boardroom.
More HamiltonBuhl products:
• Headphones and Headsets
- Bluetooth Speaker and Keyboards
• Mobile Device Accessories
- Boombox and CD Players
• Listening Centers and Lab Packs
• Early Learning Products
- Projectors and Screens
• Charging Stations and Carts
• Assistive Listening Center
13 Hamilton Buhl™
Never Ending Learning Innovation
80 Little Falls Road
Fairfield, NJ 07004
1-800-631-0868
www.HamiltonBuhl.com
- Hamilton Buhl™
- USER MANUAL HACX-114
- CAUTION
- Follow the advice below for safe operations.
- ON PLACEMENT
- COMPLIANCE WITH FCC REGULATIONS
- PREPARATION FOR USE
- Accessories:
- Open Switch
- Headphone Jack
- Batteries Compartment
- DC Jack
- BBS Switch
- POWER SOURCE
- To install batteries into the player
- BATTERY WARNING
- Using an adaptor (not included) to power the unit
- PLAYING CD
- Turning Power On and Off
- To Playback:
- To Enhance the Bass Sound
- PLAY MODE
- REPEAT 1:
- REPEAT ALL:
- INTRO:
- RANDOM:
- PROGRAMMED PLAY
- CARE AND MAINTENANCE
- SPECIFICATIONS
- Product Registration Instructions
- Visit: www.HamiltonBuhl.com
- Our Mission:
- More HamiltonBuhl products:
Marque : Hamilton Buhl
Modèle : HACX114
Catégorie : Lecteur/enregistreur de cd