
PAL200CHF - Congélateur Palsonic - Notice d'utilisation et mode d'emploi gratuit
Retrouvez gratuitement la notice de l'appareil PAL200CHF Palsonic au format PDF.
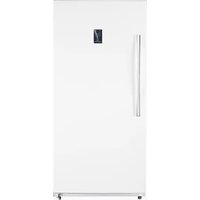
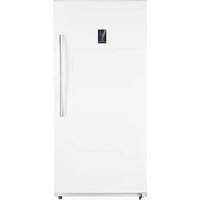
| Type de produit | Congélateur coffre |
| Marque | Palsonic |
| Modèle | PAL200CHF |
| Capacité | 200 litres |
| Dimensions (approx.) | 100 x 60 x 85 cm (L x P x H) |
| Alimentation | 220-240 V ~50 Hz, prise avec terre |
| Consommation énergétique | Non spécifiée, mais conforme aux normes |
| Réglage de température | Thermostat de 1 (chaud) à 5 (froid), position recommandée 3 |
| Fonction congélation rapide | Oui, interrupteur Fast Freeze (voyant ambre) |
| Dégivrage | Manuel, recommandé lorsque le givre atteint 6 à 13 mm |
| Accessoires inclus | 1 panier de rangement, 1 séparateur, 1 racloir en plastique, manuel d'instructions |
| Poids (approx.) | Environ 35 kg (à vide) |
| Niveau sonore | Non spécifié, fonctionnement silencieux |
| Classe climatique | Non spécifiée, adapté pour un usage domestique |
| Réfrigérant | R600a (estimation d'après les normes récentes) |
| Installation | Appareil libre, ne pas encastrer ; espace de 13 cm autour pour la circulation d'air |
| Entretien et nettoyage | Nettoyer l'intérieur avec une solution d'eau et de bicarbonate de soude ; aspirer les serpentins du condenseur |
| Sécurité | Prise avec terre, ne pas utiliser de rallonge ; risque d'enfouissement : retirer la porte avant mise au rebut |
| Pièces détachées et réparabilité | Contacter le service client Palsonic au 1300 657 888 (Australie) ; pièces disponibles via les centres agréés |
| Garantie | Non spécifiée, se référer au manuel ou au revendeur |
FOIRE AUX QUESTIONS - PAL200CHF Palsonic
Questions des utilisateurs sur PAL200CHF Palsonic
0 question sur cet appareil. Repondez a celles que vous connaissez ou posez la votre.
Poser une nouvelle question sur cet appareil
Téléchargez la notice de votre Congélateur au format PDF gratuitement ! Retrouvez votre notice PAL200CHF - Palsonic et reprennez votre appareil électronique en main. Sur cette page sont publiés tous les documents nécessaires à l'utilisation de votre appareil PAL200CHF de la marque Palsonic.
MODE D'EMPLOI PAL200CHF Palsonic
Palsonic
The AUSTRALIAN Company
User's Manual
PAL150CHF
PAL200CHF
150 / 200 Litre Chest Freezer

Airmaster
natural_image
Blank white image with a horizontal gray bar at the top (no text or symbols)TABLE OF CONTENTS
Parts & Features 3
Important Safety Instructions 4
Installation Instructions 4
Before Using Your Freezer 4
Installing Your Freezer 4
Electrical Connection 5
Operating Your Freezer 5
Temperature Control 5
The Fast Freeze Switch (Amber) 6
Defrosting Your Freezer 6
The Freezer Compartment 6
Care And Maintenance 7
Cleaning Your Freezer 7
Holiday Time 7
Moving Your Freezer 7
Energy Saving Tips 7
Troubleshooting Guide 7-8
Wiring Diagram 9
PARTS & FEATURES
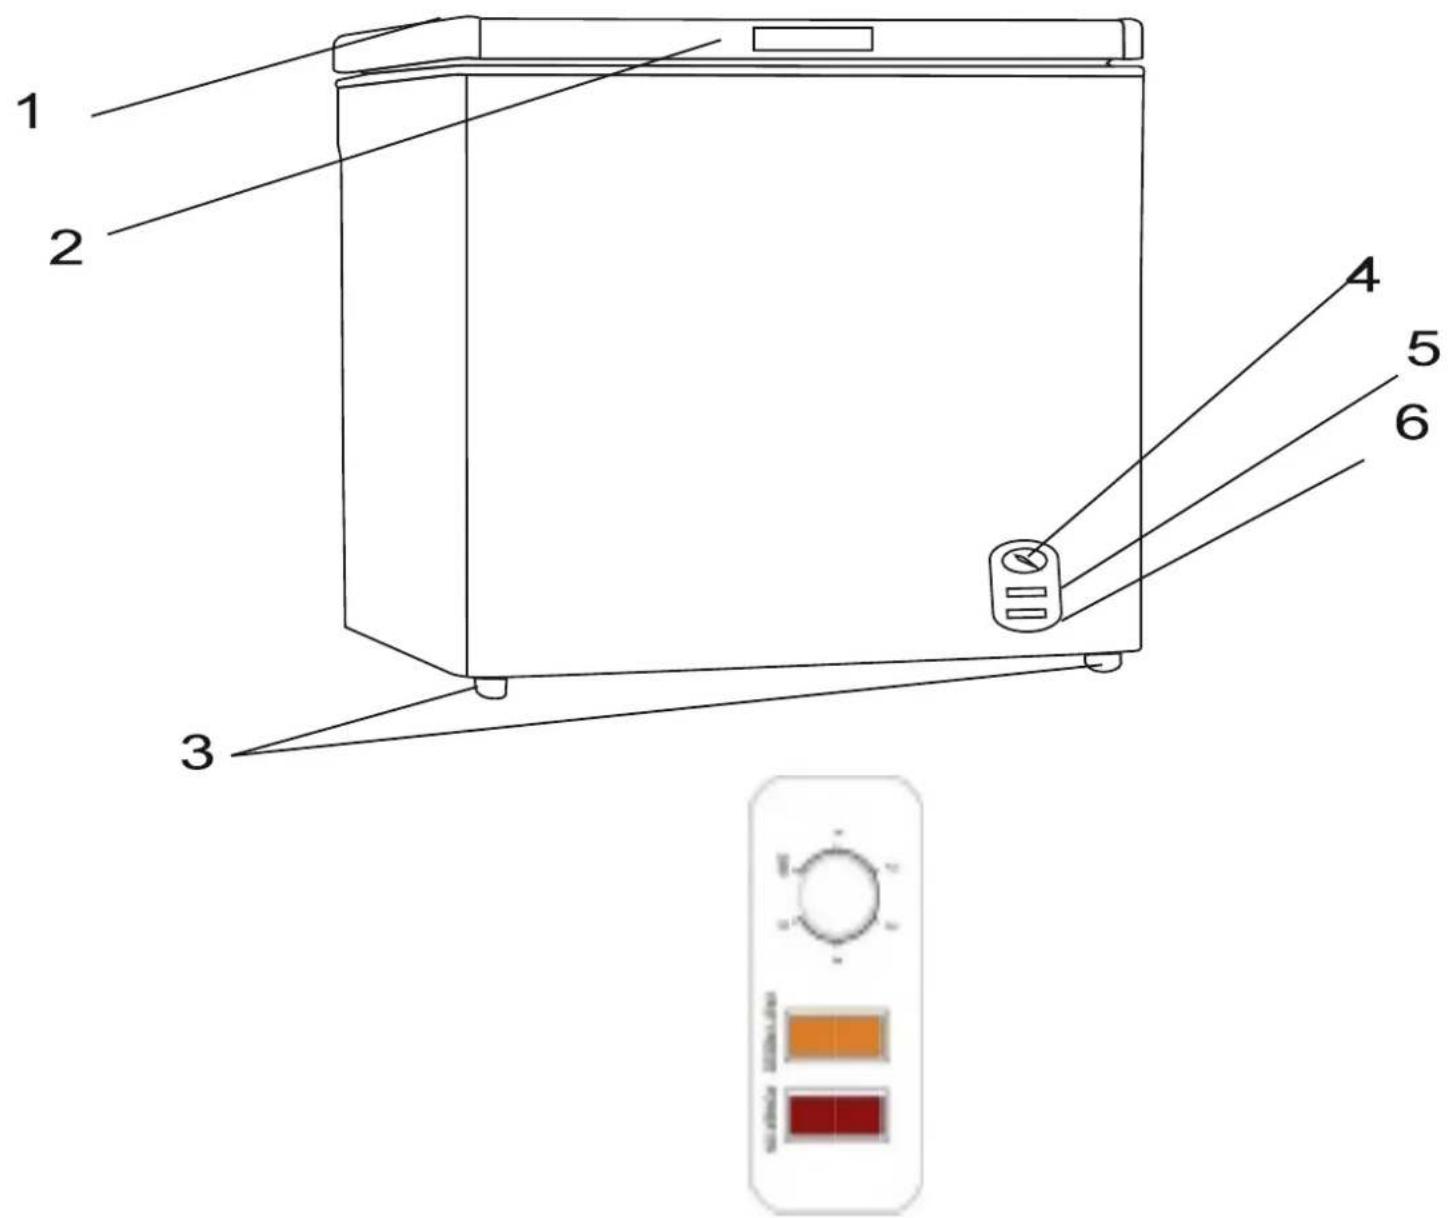
1 COUNTER BALANCED LID
2 HANDLE
3 ROLLERS
4 THERMOSTAT CONTROL
5 FAST FREEZE SWITCH
6 POWER INDICATOR LIGHT
IMPORTANT SAFETY INSTRUCTIONS
| WARNING | To reduce the risk of fire, electrical shock, or injury when using your freezer, follow these basic precautions: |
| Read all instructions before using the freezer.DANGER or WARNING: Risk of child entrapment.Child entrapment and suffocation are not problems of the past. Junked or abandoned freezers are still dangerous, even if they will “just sit in the garage a few days.”Before you throw away your old freezer: Take off the doors. Leave the shelves in place so that children may not easily climb inside.Never allow children to operate, play with, or crawl inside the freezer.Never clean freezer parts with flammable fluids. The fumes can create a fire hazard or explosion.Do not store or use gasoline or any other flammable vapors and liquids in the vicinity of this or any other freezer. The fumes can create a fire hazard or explosion.The appliance is not intended for use by young children or infirm persons without supervision. Young children should be supervised to ensure that they do not play with the appliance.-Save these instructions- | |
INSTALLATION INSTRUCTIONS
Before Using Your Freezer
- Remove the exterior and interior packing.
-
Check to be sure you have all of the following parts:
1 Storage Basket
1 Divider
1 Instruction Manual
1 Plastic Scraper -
Before connecting the freezer to the power source, let it stand upright for approximately 2 hours. This will reduce the possibility of a malfunction in the cooling system from handling during transportation.
- Clean the interior surface with lukewarm water using a soft cloth.
Installing Your Freezer
• This appliance is designed to be free standing only, and should not be recessed or built-in.
- Place your freezer on a floor that is strong enough to support the freezer when it is fully loaded.
- Allow 13 cm of space between the back and sides of the freezer, which allows the proper air circulation.
- Locate the freezer away from direct sunlight and sources of heat (stove, heater, radiator, etc.). Direct sunlight may affect the acrylic coating and heat sources may increase electrical consumption. Extreme cold ambient temperatures may also cause the freezer not to perform properly.
- Avoid locating the freezer in moist areas.
- Plug the freezer into an exclusive, properly installed-grounded wall outlet. Do not under any circumstances cut or remove the third (ground) prong from the power cord. Any questions concerning power and/or grounding should be directed toward a certified electrician or an authorized TCL service center.
- After plugging the appliance into a wall outlet, allow the unit to cool down for 2\~3 hours before placing food in the freezer compartment.
Electrical Connection
Warning
Improper use of the grounded plug can result in the risk of electrical shock. If the power cord is damaged, have it replaced by an authorized service center or licensed electrician.
This freezer should be properly grounded for your safety. The power cord of this freezer is equipped with a three-prong plug which mates with standard three prong wall outlets to minimize the possibility of electrical shock.
Do not under any circumstances cut or remove the third ground prong from the power cord supplied.
This freezer requires a standard 220/240Volt\~50Hz electrical outlet with three-prong ground.
The cord should be secured behind the freezer and not left exposed or dangling to prevent accidental injury.
Never unplug the freezer by pulling the power cord. Always grip the plug firmly and pull straight out from the receptacle.
Do not use an extension cord with this appliance. If the power cord is too short, have a licensed electrician install an outlet near the appliance.
The "Green" light indicates that the freezer is properly connected to the electrical power. The light indicates power supply, and will glow even if the temperature control dial is turned to "OFF", or the compressor has failed to work and the compartment is not being cooled.
The "Compressor On" light indicates that the compressor is on and running. The compressor should not, under normal conditions, be running continuously unless the unit is in "Fast Freeze" mode.
OPERATING YOUR FREEZER
Temperature Control
- Your freezer has one control for regulating the temperature. The temperature control is located on the lower right hand corner.
- The first time you turn the unit on, switch on the Fast Freeze switch (amber light) and run for at least 2 hours before putting frozen foods inside. This will ensure the cabinet is thoroughly chilled before food is put in.
• Turn off the Fast Freeze switch. - The range of the temperature control is from position" OFF", "1" the warmest to "5" the coldest. Adjust the temperature control to the setting that best suits your needs. The setting of "3" should be appropriate for home or office freezer use.
• To turn the freezer off, turn the power switch to "OFF".
NOTE:
- Turning the temperature control to "OFF" position stops the cooling cycle but does not shut off the power to the freezer.
- If the unit is unplugged, lost power, or turned off; you must wait 3 to 5 minutes before restarting the unit. If you attempt to restart before this time delay, the freezer will not start.
• Large amounts of food will lower the cooling efficiency of the appliance. - If you choose to change the thermostat setting, adjust thermostat control by one numerical increment at a time. Allow several hours for temperature to stabilize between adjustments.
The Fast Freeze Switch (Amber)
- The light glows while the Fast Freeze switch is in the 'ON' position.
- The switch overrides the thermostat and will make the compressor operate continuously, lowering the cabinet temperature still further than the thermostat setting.
• This switch is used to freeze unfrozen food in appreciable quantities. - When loading the freezer, freeze only 1.4Kg of fresh food per 0.3 cubic meters of freezer space at one time.
• Distribute packages to be frozen evenly throughout the freezer. - It is not necessary to adjust the thermostat setting when using the Fast Freeze switch.
Defrosting Your Freezer
- When? For the most efficient operation and minimum energy consumption, defrost the freezer when the frost on the freezer walls is excessive or 6mm to 13mm thick.
- Choose a time when the stock of frozen food is low.
CAUTION
Do not use boiling water because it may damage the plastic parts. In addition, never use a sharp or metallic instrument to remove frost as it may damage the cooling coils and will void the warranty. We recommend using the plastic scraper provided with your unit.
- Remove the frozen food from the freezer and place it in a cooler to protect the food.
- Turn the thermostat knob to "OFF".
• Unplug the freezer. The Power Supply light should be off (red light out).
• During defrosting, the ice melts into the cabinet. - Remove the drain plug on the inside floor of the freezer by pulling straight out.
- Place a shallow pan outside drain outlet. The defrost water will drain out.
- Check the pan occasionally so the water does not overflow.
• Clean the interior of the freezer. - Replace the plug on the inside floor.
- Reset the thermostat to desired setting.
- Allow the cabinet to cool for one hour.
- Switch on the Fast Freeze for a minimum of 2 hours.
• Return food to the freezer.
HELPFUL HINT:
Defrosting usually takes a few hours. Leaving the door open will help speed the process. Also, pouring warm water (not boiling) on the ice/frost will help speed melting. If you must use a scraper- please use caution - it is very easy to damage the freezer compartment and void your warranty.
The Freezer Compartment
- This compartment is designed for the long-term storage of frozen food. Storage time is up to three months.
- The storage life of frozen foods varies and the recommended storage time should not be exceeded. The instructions regarding the care of frozen foods should be followed when defrosting the freezer.
- Pre-packed commercially frozen food should be stored in accordance with the frozen foods manufacturer's instructions for a three star frozen food storage compartment or home freezer.
- Place frozen food into the freezer as quickly as possible after purchase. If there are instructions on the packet, carefully follow these instructions regarding storage times.
- The freezer door is susceptible to breaking due to excessive ice build up. Be sure to defrost when the ice reaches 6mm to 13mm thick.
- A storage basket is provided for the organization of odd-shaped items. To reach other packages in the freezer, just slide the basket to one side, or lift it out.
CARE AND MAINTENANCE
Cleaning Your Freezer
- Upon installation of your new appliance, it is recommended that it be cleaned thoroughly.
• Turn the temperature control to "OFF", unplug the freezer, remove the food and storage basket. - Wash the inside with a damp warm cloth containing a water and baking soda solution. The solution should be about 2 tablespoons of baking soda to a litre of water.
- Wash the storage basket with a mild detergent solution.
- Be sure to keep the door gasket (seal) clean to keep the unit running efficiently.
• The outside of the freezer should be cleaned with mild detergent and warm water.
• Dry the interior and exterior with a soft cloth.
• The condenser coils should be vacuumed when they are dusty or dirty. - It is recommended that the unit be cleaned each time it is defrosted to help keep the unit odor free and running efficiently.
Holiday Time
- Remove all the food.
• Unplug the freezer. - Clean the freezer.
- Leave the door open slightly to avoid possible formation of condensation, mold, or odors.
- Use extreme caution in the case of children. The unit should not be accessible to child's play.
• Short Holidays: Leave the freezer operating during vacations of less than three weeks. - Long Holidays: If the appliance will not be used for several months, remove all food and unplug the power cord. Clean and dry the interior thoroughly. To prevent odor and mold growth, leave the door open slightly: blocking it open if necessary or have the door removed.
Moving Your Freezer
- Remove all the food.
- Securely tape down all loose items inside your freezer.
- Remove the rollers to prevent damage.
- Tape the doors shut.
- Be sure the freezer stays in the upright position during transportation.
Energy Saving Tips
- The freezer should be located in the coolest area of the room, away from heat producing appliances or heating ducts, and out of the direct sunlight.
- Let hot foods cool to room temperature before placing in the freezer. Overloading the freezer forces the compressor to run longer. Foods that freeze too slowly may lose quality, or spoil.
- Be sure to wrap foods properly, and wipe containers dry before placing them in the freezer. This cuts down on frost build-up inside the freezer.
- Freezer storage bin should not be lined with aluminum foil, wax paper, or paper toweling. Liners interfere with cold air circulation, making the freezer less efficient.
- Organize and label food to reduce door openings and extended searches. Remove as many items as needed at one time, and close the door as soon as possible.
PROBLEMS WITH YOUR FREEZER
You can solve many common freezer problems easily, saving you the cost of a possible service call. Try the suggestions below to see if you can solve the problem before calling the servicer.
TROUBLESHOOTING GUIDE
| PROBLEM | POSSIBLE CAUSE |
| Freezer does not operate. | Not plugged in.The circuit breaker tripped or a blown fuse.The freezer temperature control is set at "OFF". |
| Compressor turns on and off frequently. | The room temperature is hotter than normal.A large amount of food has been added to the freezer.The door is open too often.The door is not closed completely.The temperature control is not set correctly.The door gasket does not seal properly.The freezer does not have the correct clearances.The freezer has recently been disconnected for a period of time.Four hours are required for the freezer to cool down completely. |
| Temperature inside the freezer is too warm. | Temperature control is set too warm. Turn the control to a cooler setting and allow several hours for the temperature to stabilize.Door is kept open too long or is opened too frequently. Warm air enters the freezer every time the door is opened. Open the door less often.The door is not closed completely.The door gasket does not seal properly.A large amount of warm or hot food might have been stored recently. Wait until the freezer has had a chance to reach its selected temperature.The freezer has recently been disconnected for a period of time.Four hours are required for the freezer to cool down completely. |
| Temperature inside the freezer is too cold. | Temperature control is set too cold. Turn the control to a warmer setting and allow several hours for the temperature to stabilize.Fast Freeze switch is turned on. This causes continuous running of the compressor and bypasses the temperature control. |
| Popping or cracking sound when compressor comes on. | Metal parts undergo expansion and contraction, as in hot water pipes. This is normal. Sound will level off or disappear as freezer continues to run. |
| Bubbling or gurgling sound, like water boiling. | Refrigerant (used to cool freezer) is circulating throughout the system. This is normal. |
| Vibrations. | Check to assure that the freezer is on a level surface.Floor is uneven or weak. Freezer rocks on the floor when it is moved slightly. Be sure floor can adequately support freezer.Level the freezer by putting wood or metal shims under part of the freezer.The freezer is touching the wall. Re-level the freezer and move it from the wall.See "Installation Instructions". |
| The door will not close properly. | The freezer is not on a level surface.The gasket is dirty.The storage basket is out of position. |
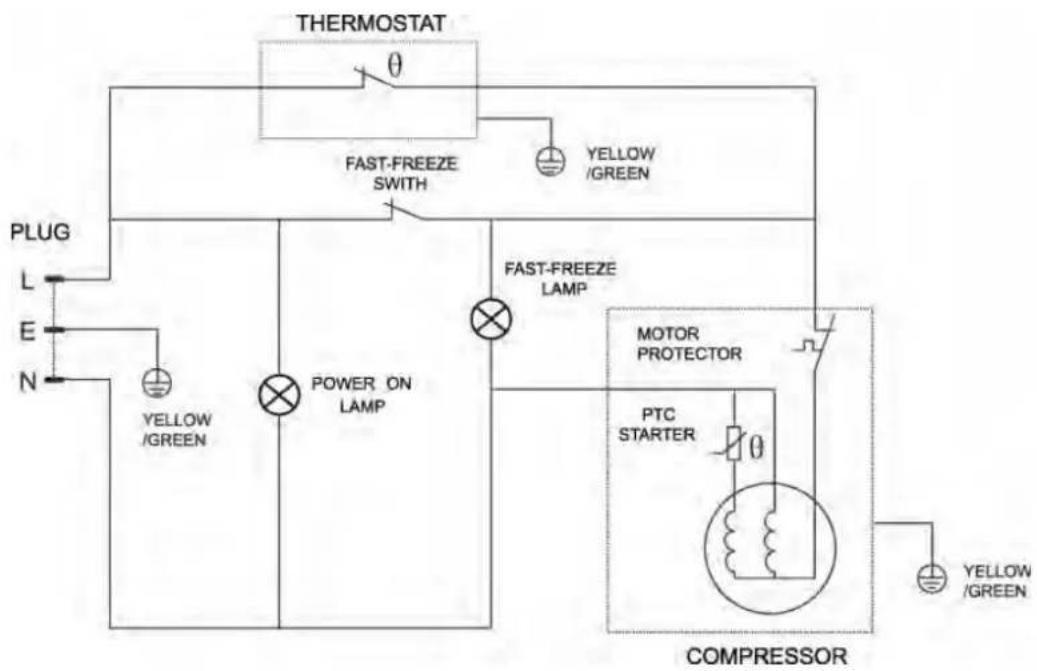
WIRING DIAGRAM
flowchart
graph TD
    A["PLUG"] --> B["L"]
    B --> C["E"]
    C --> D["N"]
    D --> E["POWER ON LAMP"]
    E --> F["FAST-FREEZE LAMP"]
    F --> G["MOTOR PROTECTOR"]
    G --> H["PTC STARTER"]
    H --> I["COMPRESSOR"]
    I --> J["YELLOW /GREEN"]
    K["THERMOSTAT"] --> L["θ"]
    L --> M["FAST-FREEZE SWITCH"]
    M --> N["YELLOW /GREEN"]
    O["COMPRESSOR"] --> P["YELLOW /GREEN"]
Palsonic
The AUSTRALIAN Company
Palsonic Customer Service
Telephone (Australia) 1300 657 888
Palsonic Corporation Pty Ltd ABN 34 000 474 108
1 Joynton Avenue, Waterloo NSW 2017 Australia
Telephone (02) 9313 7111 Facsimile (02) 9697 0655
www.palsonic.com.au
- Palsonic
- The AUSTRALIAN Company
- PAL150CHF
- PAL200CHF
- TABLE OF CONTENTS
- PARTS & FEATURES
- IMPORTANT SAFETY INSTRUCTIONS
- INSTALLATION INSTRUCTIONS
- Before Using Your Freezer
- Installing Your Freezer
- Electrical Connection
- Warning
- OPERATING YOUR FREEZER
- Temperature Control
- NOTE:
- The Fast Freeze Switch (Amber)
- Defrosting Your Freezer
- CAUTION
- HELPFUL HINT:
- The Freezer Compartment
- CARE AND MAINTENANCE
- Cleaning Your Freezer
- Holiday Time
- Moving Your Freezer
- Energy Saving Tips
- PROBLEMS WITH YOUR FREEZER
Marque : Palsonic
Modèle : PAL200CHF
Catégorie : Congélateur