UCCAM10PRO1 - Caméra informatique IIYAMA - Notice d'utilisation et mode d'emploi gratuit
Retrouvez gratuitement la notice de l'appareil UCCAM10PRO1 IIYAMA au format PDF.


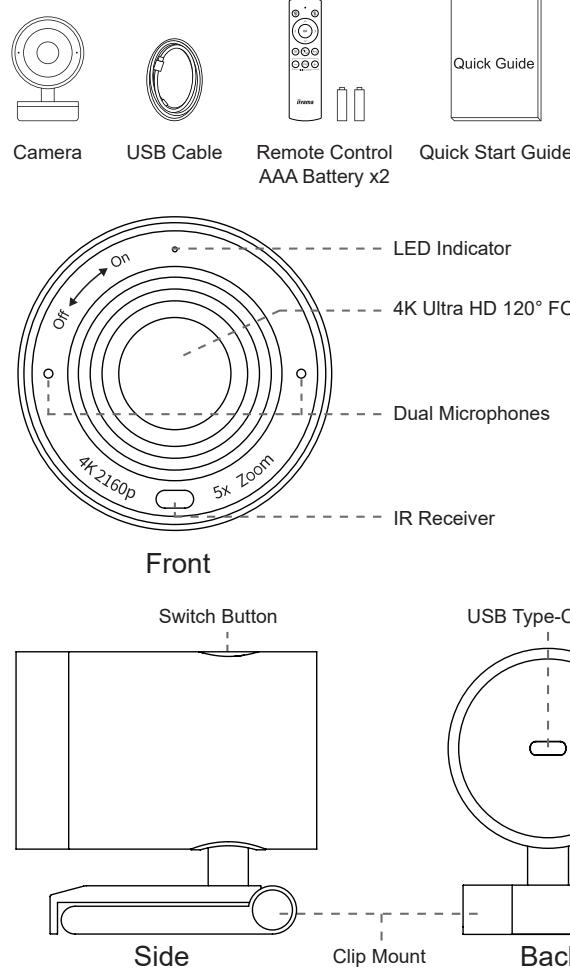
| Type de produit | Caméra de conférence avec microphone intégré |
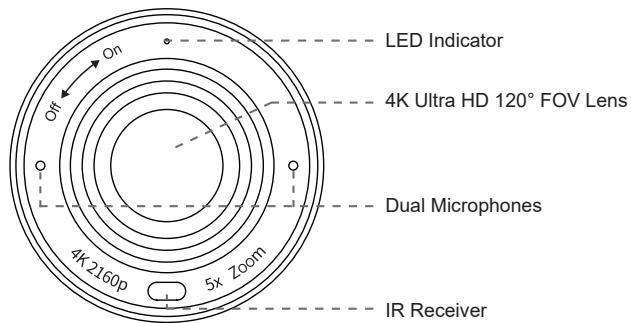
| Résolution maximale | 4K Ultra HD (2160p) via USB 3.0, 1080p via USB 2.0 |
| Angle de vue | 120° (champ de vision) |
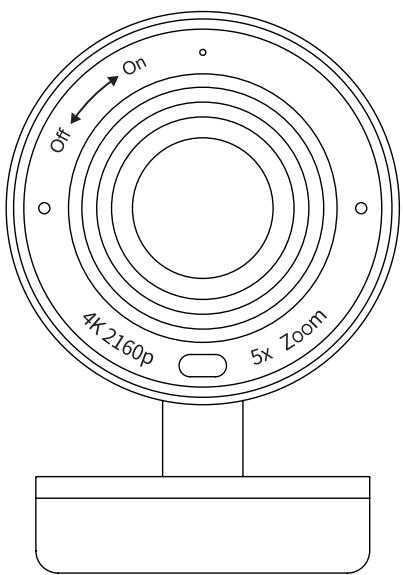
| Zoom numérique | 5x (pas de 1x, 2x, 3x, 4x, 5x) |
| Microphone | Double micro intégré |
| Indicateur LED | Vert (utilisation), Rouge (inactif), Orange (micro coupé), clignotements divers |
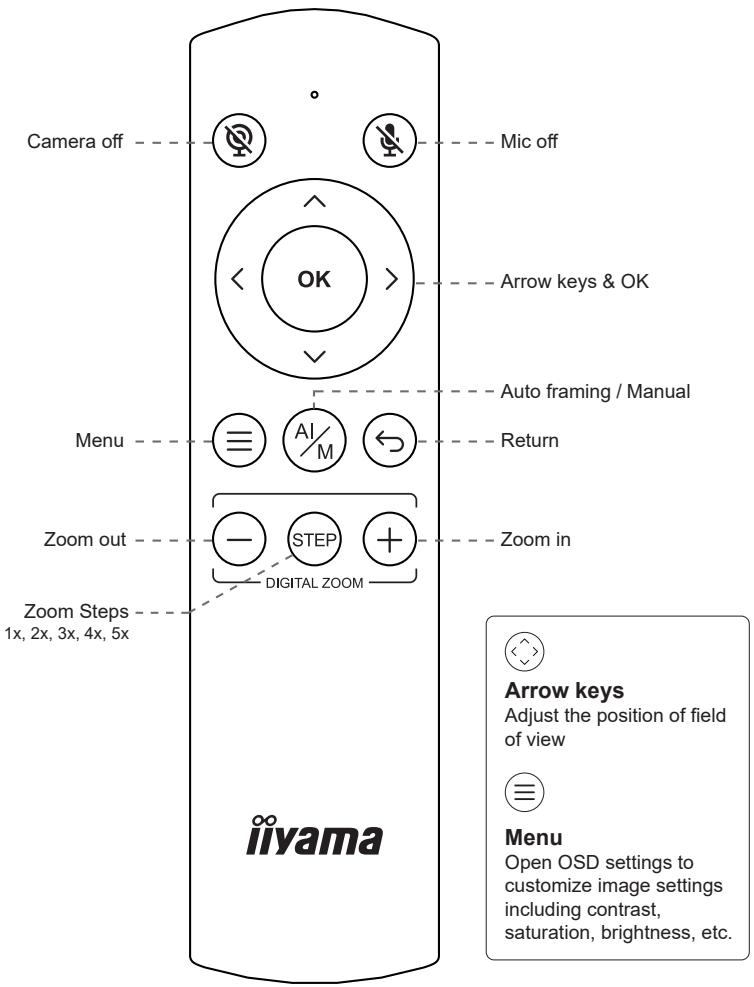
| Télécommande | Infrarouge avec fonctions : zoom, muet, auto-framing, menu OSD |
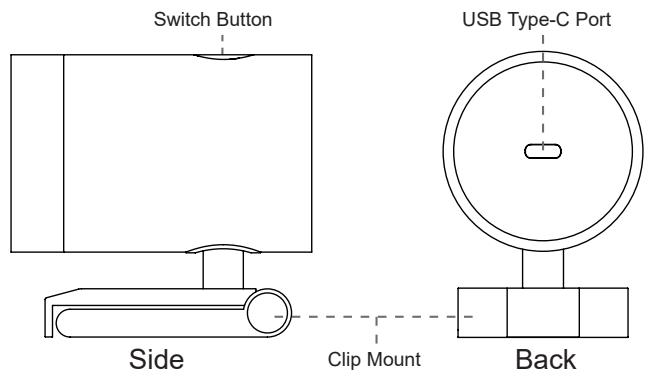
| Montage | Clip intégré pour écran (jusqu'à épaisseur standard) et pas de vis trépied 1/4" |
| Cache de confidentialité | Rotatif mécanique sur le côté de l'objectif |
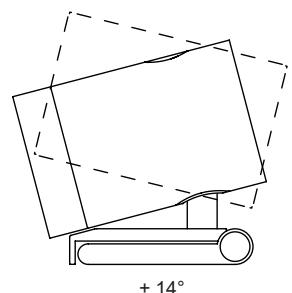
| Orientation | Inclinaison ±14°, rotation manuelle |
| Connectique | Port USB Type-C (arrière), câble USB 3.0 Type-C vers Type-A inclus |
| Alimentation | Bus USB (alimentation par le port USB) |
| Poids (estimé) | Environ 300 g |
| Dimensions (estimées) | Environ 10 × 5 × 5 cm |
| Compatibilité | Windows, macOS, Chrome OS, Linux (plug-and-play) |
| Logiciel | Compatibilité avec les applications de visioconférence (Zoom, Teams, etc.) |
| Réglages OSD | Contraste, saturation, luminosité, fréquence (50/60 Hz) via télécommande |
| Auto-framing | Oui, activable par télécommande ou bouton |
| Sécurité | Ne pas ouvrir, usage par personnes de plus de 14 ans, ne pas exposer à l'humidité |
| Entretien | Nettoyer avec un chiffon doux et sec, éviter les solvants |
| Pièces détachées et réparabilité | Contacter le revendeur agréé pour toute réparation ; pas de pièces détachées disponibles pour l'utilisateur |
| Marque et modèle | IIYAMA UCCAM10PRO1 |
FOIRE AUX QUESTIONS - UCCAM10PRO1 IIYAMA
Questions des utilisateurs sur UCCAM10PRO1 IIYAMA
0 question sur cet appareil. Repondez a celles que vous connaissez ou posez la votre.
Poser une nouvelle question sur cet appareil
Téléchargez la notice de votre Caméra informatique au format PDF gratuitement ! Retrouvez votre notice UCCAM10PRO1 - IIYAMA et reprennez votre appareil électronique en main. Sur cette page sont publiés tous les documents nécessaires à l'utilisation de votre appareil UCCAM10PRO1 de la marque IIYAMA.
MODE D'EMPLOI UCCAM10PRO1 IIYAMA
UC-CAM10PRO-1
CONFERENCE CAMERA WITH MIC
Quick Start Guide
CHECKING THE CONTENTS OF THE PACKAGE
REMOTE CONTROL
LED INDICATOR STATUS
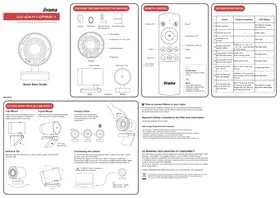
| Event | Camera response | LED Status | |
| 1 | Plug-in power | / | Red light & orange light flashing |
| 2 | Camera is in use | / | Green light |
| 3 | Camera is not in use | / | Red light |
| 4 | Single press the switch button | Switch to 1x→2x→3x→4x→5x→auto framing by each press | Red light blink |
| 5 | Long press (>2 sec) the function button | Enter / Exit auto framing mode | Red light blink |
| 6 | Long press (>5 sec) the function button | Reboot the C570 | Red light blink |
| 7 | Use remote and turn off mic | Mic is mute, mute icon pop up | Orange light blink |
| 8 | Use remote and turn off camera | Camera is off, pop up a black image with camera off icon | Red light blink |
| 9 | Use remote and turn off both mic and camera | Mic is mute and camera is off, pop up a black image with mic off icon and camera off icon | Red light & orange light blink alternately |
M314A16
GETTING START WITH UC-CAM10PRO-1
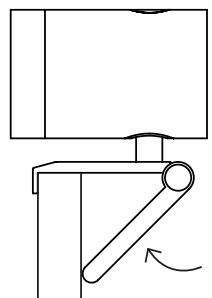
Clip Mount
Easily mount onto any displays such as laptop monitor, television or interactive display using its built-in clip mount.
Tripod Mount
Tripod screw hole is located at the bottom of the clip mount for tripod mounting.

Privacy Cover
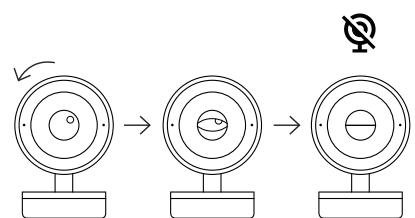
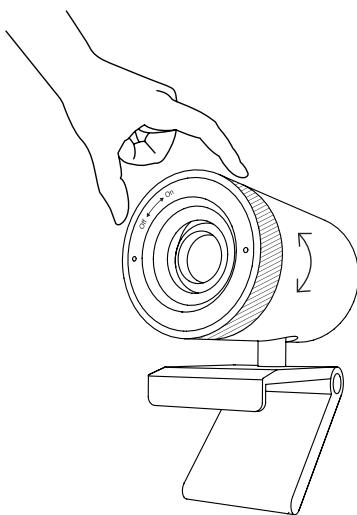
On the side of the camera lens, rotate the privacy shutter adjuster counterclockwise to cover the camera lens.
flowchart
graph LR
    A["Circle object"] --> B["Cross-section with eye icon"]
    B --> C["Cross-section with circle and symbol"]
natural_image
Line drawing of a hand adjusting a camera lens mounted on a stand (no text or symbols)Swivel & Tilt
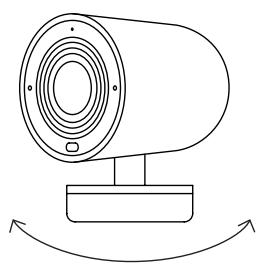
Manually adjust the webcam tilt up / down or swivel right / left to the best shooting angle.
Connecting the camera
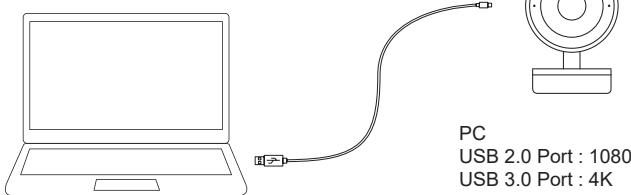
1) Connect the type C end of the bundled USB 3.0 cable to the Type C port at the back of the UC-CAM10PRO-1.
2) Connect the Type A end of the same cable to a laptop or workstation.
If connecting to USB 2.0 port of PC, the maximum available resolution will be 1080P.
If connecting to USB 3.0 port of PC, the maximum available resolution will be 4K.
A USB 3.0 cable is required to deliver 4K resolution.

How to prevent flicker in your video
The default camera frequency setting is 50Hz, if you encounter the flicker problem, simply use the remote control, get into Menu to adjust camera frequency that match the electrical frequency of your region.
Important Safety, Compliance and Warranty Information
*Read Manual Before Product Use*
Safe Usage Guidelines for Products
- Do not open or modify the product except for battery removal and replacement.
- Do not disassemble or attempt to service this product.
- This product is safe under normal and reasonably foreseeable misuse operating conditions.
- If product is operating improperly, contact the authorized reseller.
- Product must be returned to the authorized reseller for any service or repair.
• This is not a Children's Product and is not intended for use by children under 14 years old.
CE MARKING DECLARATION OF CONFORMITY
This USB Camera complies with the requirements of the EC/EU Directive 2014/30/EU “EMC Directive”, 2014/35/EU “Low Voltage Directive”, and 2011/65/EU “RoHS Directive”.
The electro-magnetic susceptibility has been chosen at a level that gives correct operation in residential areas, business and light industrial premises and small-scale enterprises, inside as well as outside of the buildings.
All places of operation are characterized by their connection to the public low voltage power supply system.
IIYAMA CORPORATION: Wijkermeerstraat 8, 2131 HA Hoofddorp, The Netherlands

We recommend recycling of used product. Please contact your dealer or iiyama service center. Recycle information is obtained via the Internet, using the address: https://iiyama.com You can access the Web page of different countries from there.
Marque : IIYAMA
Modèle : UCCAM10PRO1
Catégorie : Caméra informatique