CCUN6172WH, CCUN6172XH - Réfrigérateur-congélateur CANDY - Notice d'utilisation et mode d'emploi gratuit
Retrouvez gratuitement la notice de l'appareil CCUN6172WH, CCUN6172XH CANDY au format PDF.

| Type d'appareil | Congélateur armoire pose libre |
| Capacité nette | 235 L |
| Technologie de froid | No Frost Plus (ventilé) |
| Modèle CCUN6172WH - Couleur | Blanc |
| Modèle CCUN6172XH - Couleur | Inox |
| Dégivrage manuel | Non (dégivrage automatique) |
| Porte réversible | Oui |
FOIRE AUX QUESTIONS - CCUN6172WH, CCUN6172XH CANDY
Questions des utilisateurs sur CCUN6172WH, CCUN6172XH CANDY
0 question sur cet appareil. Repondez a celles que vous connaissez ou posez la votre.
Poser une nouvelle question sur cet appareil
Téléchargez la notice de votre Réfrigérateur-congélateur au format PDF gratuitement ! Retrouvez votre notice CCUN6172WH, CCUN6172XH - CANDY et reprennez votre appareil électronique en main. Sur cette page sont publiés tous les documents nécessaires à l'utilisation de votre appareil CCUN6172WH, CCUN6172XH de la marque CANDY.
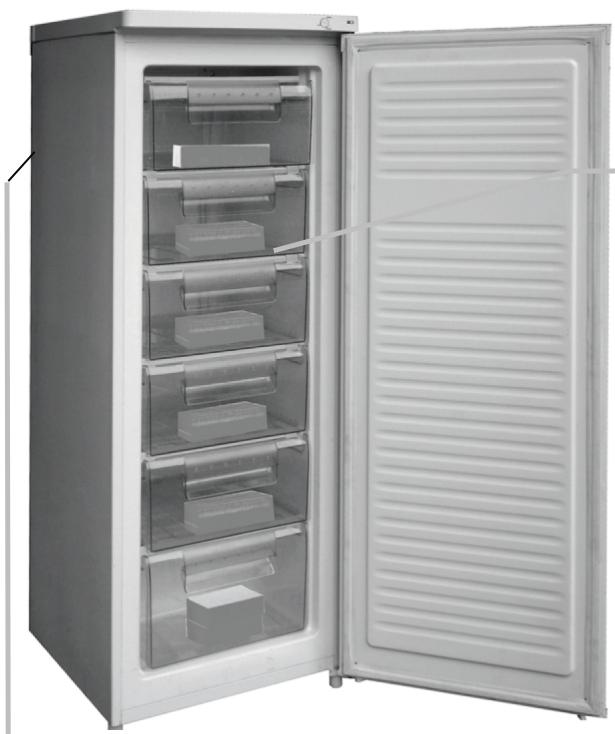
MODE D'EMPLOI CCUN6172WH, CCUN6172XH CANDY
REFRIGERATOR
CONGELATER 1\~2
CONGELATER 3\~4
GB
IT
Wait at least two hours before switching the appliance on, in order to ensure that the refrigerant circuit is fully efficient.
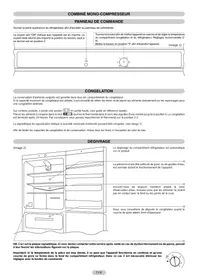
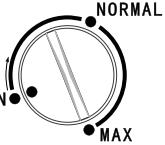
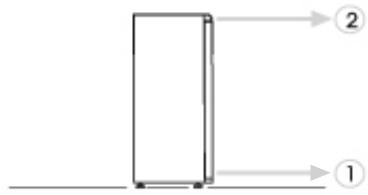
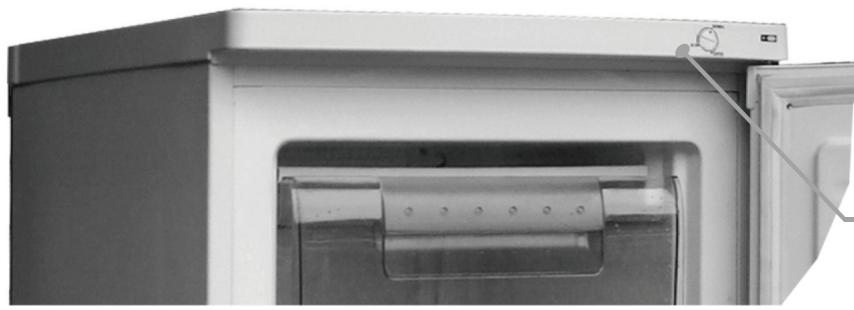
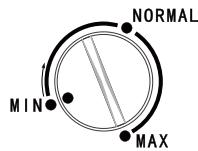
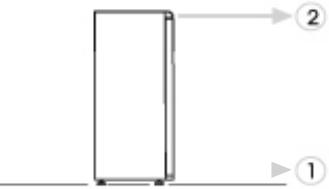
CONTROL PANEL
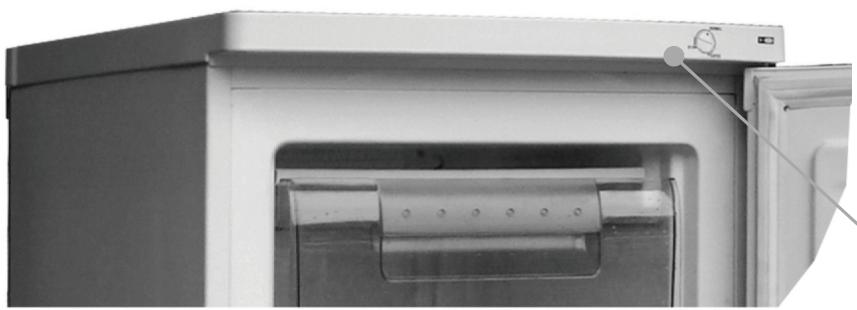
The thermostat unit to control the appliance is located on the right of the top cover.
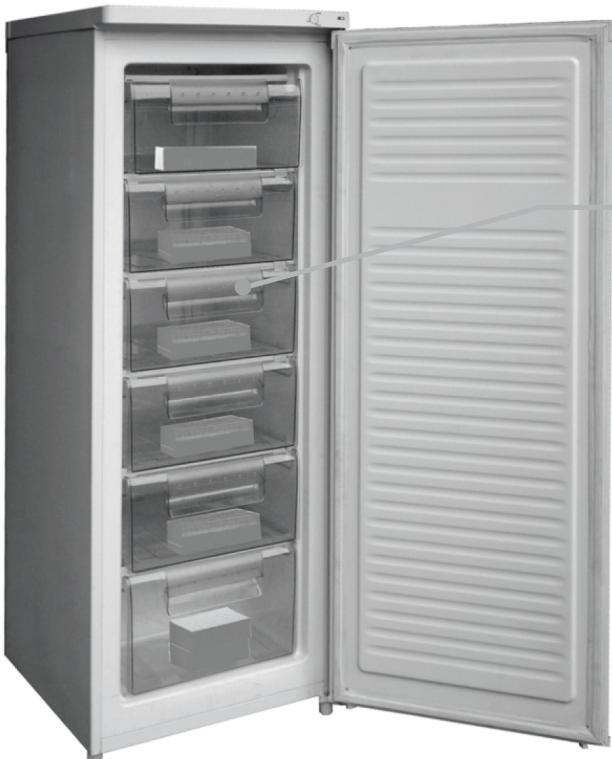
DEFROSTING and FREEZING
The rating plate states the maximum quantity of foods that can be frozen, (see "gure 2).
Correct freezing: activate the Super function 24h before to introduce the foods for freezing. After 24h put the foods inside the freezer and after 24h you can turn again on the normal setting.
(Figure 2)
We recommend you defrost the freezer area when the layer of frost is more than 3mm thick.
NB. This is the rating plate. If you need to contact our Service Department in the event of faults, remember to give them the information on the plate.
Important: If the room temperature is very warm, the appliance may work continuously and a layer of frost will deposit on the surface of the evaporator tubes and wires. In this case, turn the knob to lower settings (MIN).
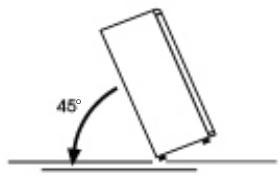
In order to reverse the opening of the doors, follow the indications in relation to the insert and hinge type your product is made up of.
Place or tilt the fridge at a 45^ angle, since it is necessary to work on the bottom of the appliance
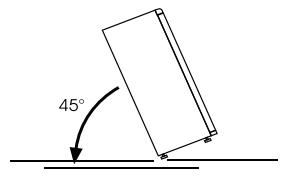
1
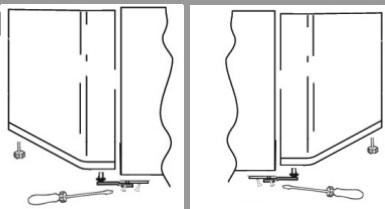
Remove the bottom hinge by removing the screws, the plug and washers, then remove the bottom door
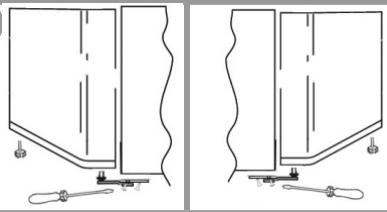
2
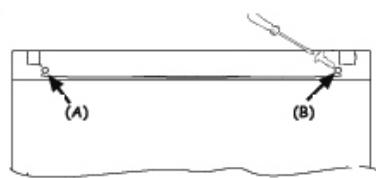
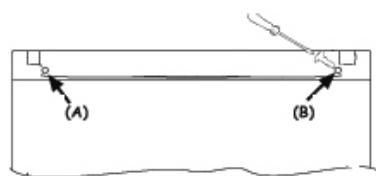
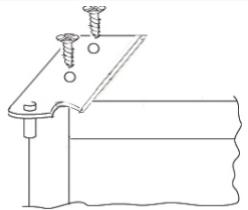
Remove the caps (A) and (B), loosen the screws and partially remove the panel.
3
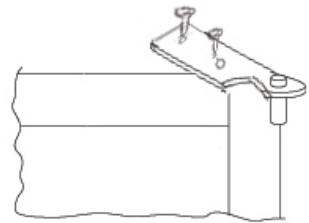
Unscrew the right hinge
4
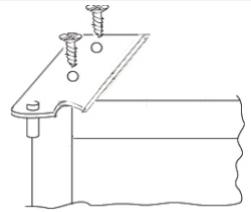
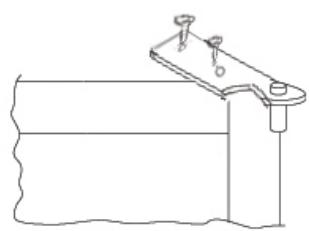
Before reassemble the hinge to the left side, reverse the direction of the hinge.
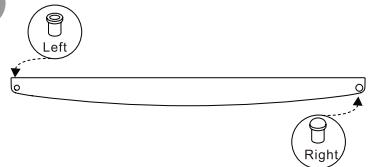
5
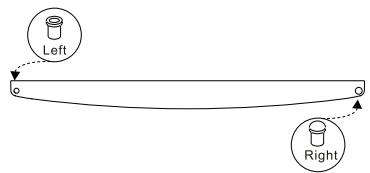
Remove the plug on the left-hand side and insert it on the right hand-side of the door.
Reassemble the hinges and doors working from bottom to top, 1 2
PORTA SINGOLA
Wait at least two hours before switching the appliance on, in order to ensure that the refrigerant circuit is fully efficient.
QUADRO COMANDI
Il termostato per il controllo dell'apparecchio è collocato in alto a destra.
SBRINAMENTO E CONGELAZIONE
La targhetto matricola indica la quantità massima che è possible congelare, (vedi figura 2).
Corretta congelazione: Attivare la funzione Super 24h prima dell'introduzione del cibo da congelare. Dop o 24h introdurre il cibo nel congelatore e trascorse al tornare al normale funzionamento.
(Figura 2)
Si consiglia di sbrinare il congelatore quando lo spessore del ghiaccio supra i 3 mm.
NB. Posizione della targa matricola. In caso diizzato, contattare l'Assistenza technique conunicando i dati presenti sulla targa.
Importante: se la temperatura ambiente èccessivamente elevata, l'apparecchio potrebbe funzionare in continuo con seguente formazione anomala di brina sulla parete di fondo della cella frigo. In quello caso, ruotare la manopola del frigo posizionandola sull'indicazione MIN.
Per invertire il senso di apertura delle porte, seguire leindicazioni in funzione del tipo di testata e di cerniera del frigorifero.
Sdraiare o inclinar il frigorifero di 45^ per facilitare le operazioni
1
Rimuovere la cerniera inferiore svitando le viti, il perno e le rondelle, quando togliere la porta inferiore
2
Togliere i tappi (A) e (B), svitare le viti e estrarre.
parzialmente il cruscotto.
3
Svitare la cerniera destra
4
Dal kit accessori in dotazione, prelevare e fissare la cerniera superiore sinistra
5
R imuovere il tappo sulla parte sinistra e inserirlo sulla parte destra delle testatine centrali e inferiore.
6
Rimontarele cerniere e le portoperando dal basso verso l'alto,1 2
7