
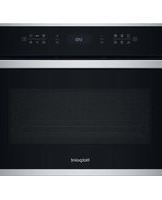
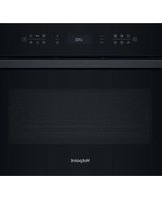
MWH 301 B - Four à micro-ondes HOTPOINT - Notice d'utilisation et mode d'emploi gratuit
Retrouvez gratuitement la notice de l'appareil MWH 301 B HOTPOINT au format PDF.

| Marque | Hotpoint |
| Modèle | MWH 301 B |
| Type de produit | Four à micro-ondes |
| Alimentation électrique | 230 V / 50 Hz |
| Puissance nominale | 1400 W |
| Puissance micro-ondes maximale | 900 W |
| Dimensions extérieures (H x l x P) | 300 x 539 x 398 mm |
| Dimensions intérieures (H x l x P) | 240 x 354 x 358 mm |
| Capacité approximative | 30 L |
| Niveaux de puissance | 90 W, 160 W, 350 W, 500 W, 650 W, 750 W, 900 W |
| Fonctions principales | Micro-ondes, décongélation manuelle, décongélation automatique (viande, volaille, légumes), cuisson automatique (10 recettes), pop-corn, maintien au chaud, nettoyage automatique, ramollir/fondre (Soft/Melt) |
| Type de commande | Tactile (boutons) |
| Affichage | LED |
| Plateau tournant | Verre, amovible |
| Support de plateau | Oui, lavable au lave-vaisselle |
| Sécurité enfant | Verrouillage automatique après 1 minute en veille |
| Mode silencieux | Oui (activation/désactivation des sons) |
| Alarme sonore | Oui, réglable |
| Entretien | Nettoyer avec un chiffon doux et un détergent doux. Plateau et support lavables au lave-vaisselle. |
| Garantie | 12 mois standard, extensible à 2 ans sur enregistrement (Royaume-Uni et Irlande) |
| Service après-vente (Royaume-Uni) | 03448 240 055 (assistance) / 03448 225 225 (pièces et accessoires) |
| Service après-vente (Irlande) | 0818 904 041 (assistance) / 0818 313 413 (pièces et accessoires) |
FOIRE AUX QUESTIONS - MWH 301 B HOTPOINT
Questions des utilisateurs sur MWH 301 B HOTPOINT
0 question sur cet appareil. Repondez a celles que vous connaissez ou posez la votre.
Poser une nouvelle question sur cet appareil
Téléchargez la notice de votre Four à micro-ondes au format PDF gratuitement ! Retrouvez votre notice MWH 301 B - HOTPOINT et reprennez votre appareil électronique en main. Sur cette page sont publiés tous les documents nécessaires à l'utilisation de votre appareil MWH 301 B de la marque HOTPOINT.
MODE D'EMPLOI MWH 301 B HOTPOINT
COOK30
INSTALLATION
Prior to connecting
Chek that the ±b ltage on the rating plate or rep onds to the ±b ltage in ±b ur home.
- Do not remove the mic owae inlet protection plates loa ted on the is de of the oen a vty wall. They prent greae & food particles from entering the mic owae inlet b annels.
- Plae the oen on a table, e n rfae that is long enough to hold the oen and the food utens is you put in it. Use a refully when handling.
- Position the oen at a dis are from other heating e ure s For sufficient ventilation there must be a p ae of at leas 30 m above the oen. Ens re that the p ae underneath, above and around the oen is empty to allow for proper airflow. The mic owae oen all not be plaed in a a binet.
- En re that the appliane is not damaged. Check the oven door closes firmly against the door pport. Empty the o n and b ean the interior with a ft, damp bOTH.
Do not operate this appliane if it has a damaged mains or rd or plug, if it is not working properly, or if it has been damaged or dropped. Do not immere the mains or rd or plug in water. Keep the o rd away from hot s rfae s Electrical shock, fire or other hazards may re-s lt.
- Do not use exenis on cord: If the power supply cord is too short, have a qualified elec ric an or e rvie man ins all an outlet near the appliane.
This appliane MUST be Earthed or this ould res lt in the rik of elec ric b ok lt MUST be o nnet ed to a properly ins allied earthed s t or fue d earthed w ith ed p ur. Consult a qualified electrician or serviceman if the earthing ins rut ions are not o mpletely under ood, or if doubt ex s as to whether the mic owae oe n is properly earthed.
AFTER CONNECTING
The oen an be operated only if the oen door is firmly closed.
Poor telev is on ree pton and radio interfe
rene may rea It if the oen is loa ted boe to a TV, radio or aerial.
The earthing of this appliane is ompul-ry. The manufatur will ae pt no reps ons bility for injury to pere ns animals or damage to objets ais ng from the nonobere ne of this requirement.
The manufact urers are not liable for any problems a ued by the ue r's failure to obere the int ructions
IMPORTANT SAFETY INSTRUCTIONS READ CAREFULLY AND KEEP FOR FUTURE REFERENCE
- Do not heat, or use flammable materials in or near the oven. Fumes can create a fire hazard or explosion.
Do not use ur mic owae o n for dry ng textiles, paper, spices, herbs, wood, flow- wers fruit or other o mbus ible materials This could result in fire.
If material ins de / outs de the o n b ould ignite or m ok is emitted, eep o n door coed and turn the o n off. Die nnet the power or rd or b ut off power at the fue or cr a it break r panel. - Do not o e r-o ok food. This ould rea It in fire.
- Do not leave the oven unattended, especially when using paper, plastic or other combustible materials in the okng process. Paper and ar or burn and me plats are n melt if used when heating foods. Do not leave the oven unattended if you are using a lot of fat or oil since they can overheat and cause a fire!
- Do not use o rois b emia is or a pors in this appliane . This type of oen is p ecifically designed to heat or cook food . It is not des gned for indues rial or laboratory
ue.
- Do not hang or plae heavy items on the door as this a n damage the one n opening and hinges The door handle b ould not be used for hanging things on.
The Mic owae oen is intended for heating food and bee rages Dry ng of food or bthing and heating of warming pads bippers p onges damp both and is milar may lead to risk of injury, ignition or fire.
This appliane a n be ued by b ildren aged from 8 4ars and above and perns with reduced phys a l, enry or mental a pabilities or lac of e erience and knowledge if they have been gi n s perivson or in s rution o ne rning ue of the appliane in a a fe way and understand the hazards involved, Children a all not play with the appliane . Cleaning and us r maintenane b all not be made by b ildren unles they are older than 8 and a perived. Keep the appliane and its o rd out of reab of b ildren les than 8 4ars
This appliane is not intended for use by persons (including b ildren) with reduce d ph - a l, s ny or mental a pabilities or lac of experiene and knowledge, unless they have been given a perision or in s ruction o nnering ue of the appliane by a pers n rep ons
ble for their a fety.
Children auld be a perve d to ena re that they do not play with the appliane .
- Do not use urmic owae or n for heating any hing in airtight e aled o ntainers The pres s re inc eas s and may a ue damage when opening or may ep lode.
- The door als and the door al areas must be regularly ins ed for damage. If these areas are damaged the appliance should not be operated until it has been repaired by a trained rvie teb nic an.
- The appliane s are not intended to be operated by means of an external timer or separate remote-control system.
- Do not use urmic owae or n for o ok ng or reheating whole eggs with or without b ell is net they may e lode e n after mic owae heating has ended.
PRECAUTIONS GENERAL
This appliane is des gned for domestic use only!
- The appliane bould not be operated without food in the oen when using mic owaes. Operation in this manner is likely to damage the appliane .
The e ntilation openings on the oen must not be o e red. Blo ng the air intake or eanuts may a ue damage to the oen and poor o ok ng res lt s
If u prac ie operating the oe n, put a glas of water in s de. The water will abe rb the mic owae energy and the oe n will not
be damaged.
- Do not store or use this appliane outdoors
- Do not use this product near a kth en isnk in a wet baement, or near a imming pool, or is milar.
- Do not use the a v t y for any s orage purposes
- Remoe wire twits -ties from paper or pla- s ic bags before plac ng bag in the oen.
DEEP-FRYING
Do not use mic owae o n for deepfry ng, bea ue the oil temperature a nnot be o n trolled.
- Ue hot pads or oen mitts to prent burns when toub ing ontainers oe n parts and pan after o ok ng. Ae is ble parts may be me hot during ue, ung b ildren b ould be k pt away.
LIQUIDS
e.g. bee rages or water. Oe rheating the liquid beg nd boiling point a n oar without ev dene of bubbling. This ould re lt in a sdden boil oer of the hot liquid.
To prevent this pos bility the following s eps hould be tal n:
- A id using a right- is ded o n tainers with narrow net
- Stir the liquid before placing the o n-tainer in the o n and let the teap oon remain in the o ntainer.
- After heating, allow anding for a 0r time, 0irring again before a refully removing the o ntainer from the o n.
After heating baby food or liquids in a baby bottle or in a baby food jar, always s ir and b ek the temperature before e ri ng. This will ens re that the heat is en nly disributed and the rik of a lding or burns a n be a o ided.
- En re the Lid and the Teat is removed before heating!
ACCESSORIES GENERAL
There are a number of ae 3ries aailable on the mark t. Before u buy, en re they are a itable for mic owae ue .
Ensure that the utensils you use are oven proof and allow microwaves to pass through them before cooking.
When u put food and ae sries in the mic owae o n, en re that they do not o me in o ntac with the interior of the oe n.
This is ep ecally important with ae 8 ries made of metal or metal parts
If ae sries ontaining metal o mes in on-tat with the oen interior, while the oen is in operation, park ng a n oo r and the oen ould be damaged.
Always enare that the turntable is able to turn freely before s arting the o n. If the turntable is 't able to turn freely u b ould ue a an allere
TURNTABLE SUPPORT
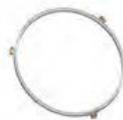
Ue the turntable a pport under the Glas turntable. Nee r put any other utens is on the turntable a pport.
- Fit the turntable support in the oen.
GLASS TURNTABLE

Ue the Glas turntable with allo ok ng methods. It o llet s thedripping juie s and foodpartic es that otherwisewould s ain and e il the
interior of the oen.
- Plae the Glas turntable on the turntable s pport.
MAINTENANCE & CLEANING
Cleaning is the only maintenance normally required. It must be a rried out with the mic owate o n di nnet ed.
Failure to maintain the oen in a cean ondition o uld lead to deterioration of the s rfae that o uld adere ly affet the life of the ap
pliane and pos bly reIt in a hazardous situation.
Do not use metal or uring pads abras beansers, steel-wool pads gritty wab boths etc whib a n damage the o ntrol panel, and the interior and exterior o n r faes Ua a coth with a mild detergent or a paper towel with ray glas caner. Apply ray glas caner to a paper towel.
Do not ray directly on the oven. At regular intervals, especially if spill overs have occurred, remove the turntable, the turntable support and wipe the base of the oven clean.
This oen is designed to operate with the turntable in plaep.
Do not operate the mic owae o n when the turntable has been removed for ceaning.
Ue a ft and damp b oth with mild detergent to be an the interior r faes front and rear of the door and the door opening.
Do not allow grease or food particles to build up around the door.
For stubborn ains boil a p of water in the o n for 2 or 3 minutes Steam will e ften the mark
Adding me lemon juie to a p of water, plac ng this on the turntable and boiling for a few minutes a n eliminate odors in de the o n.
Do not use beaming applianes when beaning ur mic owae o n.
The oven should be cleaned regularly and any food deposits removed. The eiling beneath it may need regular cleaning. This bould be done with a e ft and damp b oth with mild detergent.
DISHWASHER SAFE:
- Turntable Support
Glass Turntable
TROUBLE SHOOTING GUIDE
If the oen does not work do not make a river a II until u have made the following bek
The Turntable and turntable a pport is in pla e .
The Plug is properly inrtd in the wall
The Door is properly boe d.
- Chek yur Fues and ena re that there is power available.
- Chek that the oen has ample entilation.
Wait for 10 minutes then try to operate the one more.
- Open and then bce the door before y u try again.
This is to a id unnee a r y a lls for whib u will be b arged. When a lling for Serve , pleas give the e rial number and t e number of the oen (e e Sere vle label). Cons lt y ur warranty booklet for further advie .
If the mains or rd needs replac ng it b ould be replae d by the original mains or rd,whib is a a ilable via our service organization. The mains or rd may only be replace d by a trained e rive teb nic an.
Serve only to be a rried out by a trained service technician. It is hazardous for any other than a trained person to carry out any rescue or repair operation, which the removal of any oer, which protection against exposure to mic owae energy. Do not remove any oer.
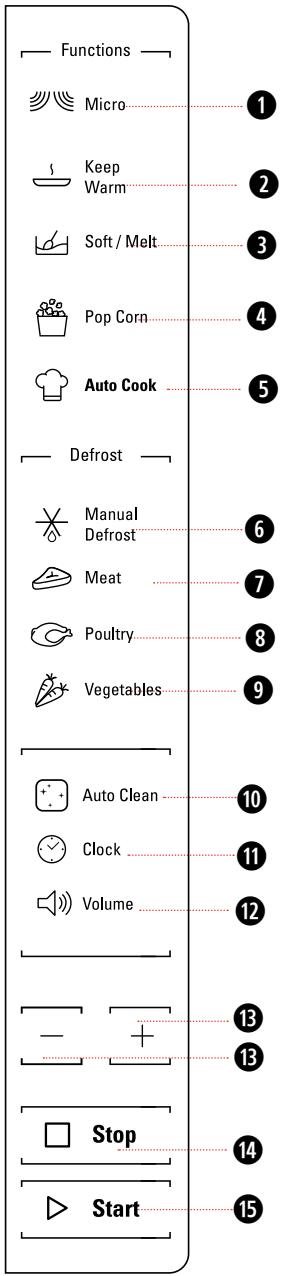
Micro Use to set power level.
Keep Warm Touch to set Keep Warm program.
Soft/Melt Press this button to access Soft/Melt cooking mode.
4 Pop corn
Auto Cook Use to access the automatic recipes menu.
6 Manual Defrost To defrost manually.
789Meat/Poultry/Vegetables To set defrost menu.
10 Auto Clean Use to clean cavity.
Clock Use to set the time of day.
Volume Use to activate/deactivate beep signal.
13+/- Use to input food menu code, clock time, cook time, cook weight.
14 STOP Use to pause, stop or cancel cooking.
JET START Use to start the cooking. Use to set quick start program.
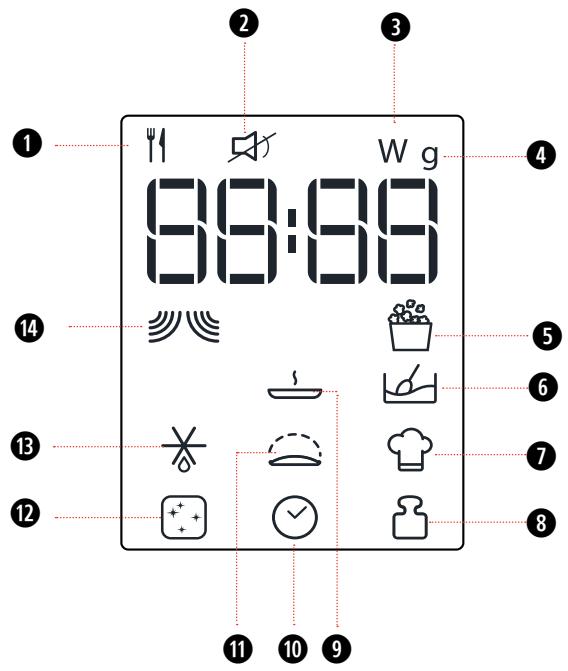
Food type selection
Mute Icon
3 Microwave power (watt)
Weight (grams)
5 Popcorn Icon
6 Soft/Melt Icon
Auto cook Icon
Insert weight
9 Keep Warm Icon
10Insert time
Dough Rising Icon
12 Auto clean Icon
BDefrost Icon
14 Microwave Icon

STAND-BY MODE
The oven is in Stand-by mode when the clock is displayed (or, if the clock has not been set, when the display will show ".").

START PROTECTION / CHILD LOCK
This automatic safety function is activated one minute after the oven has returned to "Stand-by mode".
When the safety function is active the door must be opened and closed in order to start the cooking, otherwise the display will show "door".


PAUSE OR STOP COOKING
To pause cooking:
The cooking can be paused to check, add or turn or stir the food by opening the door. Press STOP button once ,the functions can be paused as what they are,press STOP button twice,the functions stopped.
The setting will be maintained for 5 minutes.
To continue cooking:
Close the door and press the Jet Start button. The cooking is resumed from where it was paused.
If you don't want to continue cooking you can:
Remove the food, close the door and press the Stop button.
When the cooking is finished:
The display will show the text "End". An acoustic beep will signal once a minute for 2 minutes.
Please note that reducing or stopping this programmed cooling cycle will not have a negative impact on the functioning of the product.

ADD / STIR / TURN FOOD
Depending on the selected function, it could be needed to add / stir / turn food during cooking. In these cases the oven will pause cooking and it will ask you to perform the needed action.
When required, you should:
- Open the door.
- Add or Stir or Turn the food (depending on the required at ion).
- Cloe the door and res art by preis ng E T START button.
Notes: if the door is not opened within 2 minutes from the request to Add or Stir or Turn the food, the microwave oven will continue the cooking process (in this case the final result may not be the optimal one).

CLOCK
To set the Clock of your appliance:
- In standby, touch the Clock button once. The display shows the current clock.
- Press + / - to set the hour.
- Press Clock/JET START button to confirm.
- Press + / - to set the minute.
- Press Clock/JET START button to confirm the setting.
Note:
Every time after cooking process is completed, the screen shows "End" and issued a prompt until opened the door to return standby (no operation for 10 minutes automatically return to standby).
- When plug in, the screen shows "12:00" ("12" flashing), 1 minute later return to standby (before returning standby can directly set clock).
- In the process of cooking, press Stop button once to pause, press Jet Start button to continue cooking, but press Stop twice to cancel this program.
- In the process of cooking set, no operating system automatically return to standby mode in 1 minute.

JET START
This feature allows you to start the oven quickly. Press JET START button once, the oven starts work at full power level automatically. During cooking, press JET START to add time. The longest cooking time is 90 minutes.
- Press the Jet Start Button.
Pressing the Jet Start button the Microwave function will start at maximum microwave power (800 Watt) for 30 seconds.
Pressing the JET START button, the Microwave function will start at full microwave power (900W) for 30 seconds.

-
It is possible to change the power level and the duration time even after the cook-process has been already started. To adjust power level, simply press the Microwave on repeatedly.
-
To change the duration time, please press +/- button. Or press the JET START button once to increase the duration time by 30 seconds.

KEEP WARM
This function allows you to keep your dishes warm automatically.
- Press the Keep Warm button. The display shows as left side.
- Press +/- button to select suitable time, then press JET START button.

The keep warm cycle is 15minutes, to ensure keep perfect effect, please select me more than 15minutes

POPCORN
This function allows to cook Pop Corn microwaveable bags (net weight of the bag has to be 100g).
- Press the Pop corn button.
- Press JET START button to start the function.

AUTO CLEAN
This automatic cleaning cycle will help you to clean the microwave oven cavity and to remove unpleasant odors.
BEFORE STARTING THE CYCLE:
- Put 300ml water into a container (see our recommendations in the below section "Tips and suggestions").
- Place the container directly on the middle of the cavity
TO START THE CYCLE:
- Press the Auto Clean button, the cleaning cycle duration will be visible on the display.
- Press the Jet Start button to start the function.
WHEN THE CYCLET IS FINISHED:
- Press the Stop button.
- Remove the container.
- Use a soft cloth or a paper towel with mild detergent to clean the interior surfaces.

-
For a better cleaning result, it is recommended to use a container with a diameter 17-20cm, and a height that is lower than cm.
-
It is recommended to use a container of light plastic material that is suitable for the microwave.
- As the container will be hot after the cleaning cycle is completed, it is recommended to use a heat resistant glove when removing the container from the microwave.
- For a better cleaning effect and removal of unpleasant odors, add some lemon juice or vinegar to the water.

MICROWAVE
To cook with microwave power individually, press the Micro button repeatedly to select a cooking power level, then press +/- button to set a desired cooking time. The longest cooking time is 90 minutes.
- Press the Micro button. The default power level (750W) will be shown on the display and the watt icon starts blinking.
- Press the Micro button repeatedly or press +/- button to select suitable cooking power, then press JET START button
- Press + / - to set the cooking time.,then press JET START button to start cooking.

If need to change the power, press the Micro button again, the desired power lev
el can be selected as below table.
| POWER | SUGGESTED USE: |
| 90 W | Softening ice cream, butter and cheeses. keep warming. |
| 160 W | Defrosting. |
| 350 W | Simmering stews, melting butter. |
| 500 W | More careful cooking e.g. high protein sauscs, cheese and egg dishes and to finish cooking cas- seroles. |
| 650 W | Cooking of fish, meat, vegeta- bles etc. |
| 750 W | Cooking of fish,meat, vegetables,etc. |
| 900 W | Reheating of beverages, water, clear soups, coffee, tea or other food with a high water content. If the food contains egg or cream choose a lower power. |

MANUAL DEFROST
This function allows you to defrost food.
- Press the Defrost button,press JET START to confirm.
- Press +/- button to adjust cooking time.
- Press JET START to start.

Two-thirds of cooking time the system will pause to remind you to turn over the food you depress JET START button to enter into next defrosting stage, and defrost resume.
For best result we recommend to defrost directly on the cavity bottom.
If the food is warmer than deep-freeze temperature (-18^) , choose a lower weight than the food. If the food is colder than deep-freeze temperature (-18^) , choose a higher weight than the food.
Separate pieces as they begin to defrost. Individual slices defrost more easily.
Standing time after defrosting always improves the result since the temperature will then be evenly distributed throughout the food.

VOLUME:SILENCE MODE
This function allows to activate/deactivate all the sounds played by the appliances, includes button press, warnings, alarm, even end audio feedback.
Press Volume button to become mute,press Volume button again to become sounding.
This function can operate at any time.
A selection of automatic recipes with preset values to offer optimal cooking results.
- Press the Soft/Melt button.
- Press Soft/Melt button repeatedly or press +/- button to select the desired recipe (see the table below).
- Press the JET START button to confirm the recipe and press +/- button to select the weight when there is a weight range in the table.
- Press the JET START button.The function will start.
The cooking recipe will be confirmed once you leave the function button for 3 Seconds,press the function key again to change the recipe type.
| FOOD TYPE | WEIGHT | HINT | ||
| P1 | Soften | Butter | 50g - 500g/50g | From refrigerator ate, unwrap and plae in mic owae a fe dib |
| P2 | Soften | le Cream | 50g - 1000g/50g | From frozen state, place ice c eam o ntainer on turntable. |
| P3 | Soften | Cream Cheese | 50g - 500g/50g | From refrigerator ate, unwrap and plae in mic owae a fe dib |
| P4 | Soften | Frozen Juice | 250g - 1000g/250g | From frozen state, remove lid from o ntainer. |
| P5 | Melting | Butter | 50g - 500g/50g | From refrigerator ate, unwrap and plae in mic owae a fe dib |
| P6 | Melting | Choo late | 100g - 500g/50g | From room temperature, plae in mic owae a fe dib . |
| P7 | Melting | Chees | 50g - 500g/50g | From refrigerator ate,plae in mic owae a fe dib . |
| P8 | Melting | Marb mellowss | 50g - 500g/50g | From room temperature, plae in mic owae a fe dib .The dib bould be at least double u lume with the marb mellowss is ne they are e g anded during o ok ng. |
These functions allow you to defrost food.
- Press the Meat/Poultry/Vegetables buttons,press JET START to confirm.
- Press + / - button to adjust the weight of food.
- Press JET START to start.

It would be better that, turn food when the oven prompts.
| FOOD TYPE | WEIGHT | SUGGESTED USE | |
| P2 | Minced meat | 100g - 2000g | Minced meat,cutlets,steaks or roasts. After cooking,allow food to rest for at least 5 minutes for bet- ter results. |
| P3 | Poultry | 100g - 2000g | Whole chicken,pieces or fillets. After cooking,allow food to rest for 5-10 minutes for better results. |
| P4 | Vegetables | 100g - 1000g | Larger,medium and small cut vegetables. Before serving,allow food to rest for 3-5 minutes for better results. |

AUTO COOK MENU
A selection of automatic recipes with preset values to offer optimal cooking results.
- Press the Auto Cook button.
- Press Auto Cook button repeatedly or press +/- button to select the desired recipe (see the table following).
- Press the JET START button to confirm the recipe and press +/- button to select the weight when there is a weight range in the table.
- Press the JET START button.The function will start.
According to the selected recipe, after a certain time, the display would ask you to add or turn or stir the food. See "Add/Stir/Turn food" chapter on page 8.
The cooking recipe will be confirmed once you leave the function button for 3 Seconds,press the function key again to change the recipe type.
| RECIPE | INITIAL STATE | WEIGHT AMOUNT | DURATION | PREPARATION |
| 1 Rietto | Frozen | 250-1000g/250g | 20-31 min. | Put food onto microwave safe dish(250g risotto with 400g water for 1 serving ),cover the dish. |
| 2 Cupa & s | Room temperature | 300g / 600g | 5-11 min. | Put 125g eggs and 170g s gar into o ntainer then s ir for 2-3mins add 170g flour,10g bak ng powder,100g water,50g butter,put food into the o ps Put the o ps around the turntable to make s re heaten e nly. |
| 3 Vegetable | Room temperature | 200-500g/50g | 3-6 min. | Cut the vegetable into pieces,add 2 tablespoon water. |
| 4 p aghetti | Room temperature | 100-300g/100g | 13-17 min. | Put the spaghetti and water into microwave safe dish(100g for 1 serving,need 800g water). |
| 5 Soup | refrigerator temperature | 300-1200g/300g | 2-7 min. | Coe r the dib , leav ng an air e ntilation. |
| Sc ambled eggs | Room temperature | 1-4eggs | 2-4 min. | Well beat the egg and water together,o e r the meas ring o p with plast ic wrap. |
| 7 fib fillet | refrigerator temperature | 200-500g/50g | 6-11 min. | Cover the dish and leave a vent. |
| Green bean | Room temperature | 200-500g/50g | 4-7 min. | Add 2 tablep oon water and o e r the dib . |
| 9 Yogurt | Room temperature | 1000g | 5Hr20 min. | Ue boiled water to b ean the o ntainer.Put 1000ml milk and 1g g gurt s arter into o ntainer,then add 50g s gar. Coe r the o ntainer during the o ok ng. |
| Ris ng | Room temperature | 1 dough | 65min. | Put 200ml water into oe n. Add the prepared dough when oe n prompt. |
TECHNICAL SPECIFICATION
| Supply Voltage | 230 V/50 Hz |
| Rated Input Power | 1400 W |
| Outer dimensions (HxWxD) | 300X 539 X 398 |
| Inner dimensions (HxWxD) | 240 x 354 x 358 |
GUARANTEE
12 months Standard Guarantee Enhanced to 2 years upon product registration
This certificate of guarantee represents the guarantee ("Guarantee" hereinafter) offered by Indes't Company UK Limited with regis ered office at Peterborough PE2 9JB in relation to produc s purb a e d in the United Kingdom and Indesit Ireland Limited with registered office in Dublin 9, Ireland for produc s purb a e d in the Republic of Ireland. This Guarantee does not affect yur statutory rights
Your product has the benefit of our manufacturer's Guarantee, which the product for twelve months from the date of puba as
This gives you the reasons that if, within that time, your product is proven to be defective, be aware of either work and ip or materials we will, at our discretion, either repair or replace the product at no cost to you.
This Guarantee is a bject to the following o n-ditions
- Documentary proof of original purchase date is prov ded.
- Cosmetic damage must be reported within 14 days from the date of pubh ae.
- The product has been installed and operated o rret ly and in aco rdane with our operating and maintenane ins rut ions
- The product is used only on the electricity supply printed on the rating plate.
- The product has been used for normal domestic purposes only.
-
The product has not been altered, serviced, maintained, disn antled, or otherwise interfered with by any pere n not authorie d by us
-
Any repair work must be undertaken by us or our appointed agent.
- Any parts removed during repair work or any product that is replaced beo me our property.
The product is used in the United Kingdom or Republic of Ireland.
The Guarantee does not o e r:
- Damage resulting from transportation, improper use, neglect or interference or as a result of improper int allation.
- Accidental damage, this includes but is not limited to, damage whib oRs as a res lt of an ekernal at ion.
- Replacement of any consumable item or acerary. Thee include but are not limited to:
- plugs, cables, light bulbs, hoses, brushes, covers and filters.
- Replacement of any removable parts made of glas or plats
After Sales Service
No one is better plaed to a re for yur Hotpoint product during the o ure of its working life than us - the manufat urer.
Essential Contact Information Advice Line
We have a dedicated team who can provide free advice and assistance with your product if you experience any technical difficulties. Simply call our Hotpoint Service Hotline for telephone assistance .
UK: 03448 240 055
Republic of Ireland 0818 904 041
www.hotpointservice.co.uk
Please note:
Our advisors will require the following information:
Model number:
Serial number:
Consumables and Accessories
We apply a full range of o na mables and ae sries to e ep yur produc funct ioning efficiently throughout its life.
UK: 03448 225 225
Republic of Ireland: 0818 313 413
parts.hotpoint.co.uk/shop
Recycling and Disposal Information
As part of Hotpoint's o ntiuued o mmitment to helping the env ronment, Hotpoint re re s the right to ue quality, re ed oponents to e ep down a o omer o s and minimie material wastage.
Please dip oe of pal ging and old product s a refully.
Register your new product and receive 1 additional year FREE!
As an additional benefit of owning your Hotpoint product, we are offering 1 €ars additional free guarantee. To be eligible for this €u will need to o ntac us to regis er €ur produt within 28 dag of purb a. If €u do not regis er €ur appliane within the 28 dag €u will ill be entitled to 1 €ars manufat urer's guarantee. To at i te €ur 2 € ar guarantee regis er online at www.hotpoint.co.uk Please note that the ek ended guarantee is only available in the UK and Ireland and is a bject to the a me terms and o nditions as the 1 € ar guarantee. Please refer to the certificate of guarantee for more information.
DISPOSAL OF OLD ELECTRICAL APPLIANCES

The European Directive 2012/19/UE on Waste Electrical and Electronic Equipment (WEEE), requires that old household electrical appliances must not be disposed of in the normal unsorted municipal waste
stream.
Old appliane s must be o llet ed e parately in order to optimise the recoery and reing of the materials they ontain and redue the impa c on human health and the env ronment.
The c oə d out "wheeled bin" n bol on the product reminds u of u or obligation, that when u dip oes of the appliane it must be e parately o llet ed. Cons mers b ou n-tat their loa I authority or retailer for information o ne rning the o rret dip o a I of their old appliane .
Hotpoint
Whirlpool EMEA S.p.A.
via Carlo Pisacane n.1,
20016 Pero (MI), Italy


- COOK30
- INSTALLATION
- Prior to connecting
- AFTER CONNECTING
- IMPORTANT SAFETY INSTRUCTIONS READ CAREFULLY AND KEEP FOR FUTURE REFERENCE
- PRECAUTIONS GENERAL
- DEEP-FRYING
- LIQUIDS
- ACCESSORIES GENERAL
- TURNTABLE SUPPORT
- GLASS TURNTABLE
- MAINTENANCE & CLEANING
- DISHWASHER SAFE:
- TROUBLE SHOOTING GUIDE
- STAND-BY MODE
- START PROTECTION / CHILD LOCK
- PAUSE OR STOP COOKING
- To pause cooking:
- To continue cooking:
- If you don't want to continue cooking you can:
- When the cooking is finished:
- ADD / STIR / TURN FOOD
- CLOCK
- Note:
- - When plug in, the screen shows "12:00" ("12" flashing), 1 minute later return to standby (before returning standby can directly set clock).
- JET START
- KEEP WARM
- POPCORN
- AUTO CLEAN
- BEFORE STARTING THE CYCLE:
- TO START THE CYCLE:
- WHEN THE CYCLET IS FINISHED:
- MICROWAVE
- MANUAL DEFROST
- VOLUME:SILENCE MODE
- AUTO COOK MENU
- TECHNICAL SPECIFICATION
- GUARANTEE
- months Standard Guarantee Enhanced to 2 years upon product registration
- After Sales Service
- Essential Contact Information Advice Line
- Please note:
- Our advisors will require the following information:
- Consumables and Accessories
- Recycling and Disposal Information
- Register your new product and receive 1 additional year FREE!
- DISPOSAL OF OLD ELECTRICAL APPLIANCES
- Hotpoint
Marque : HOTPOINT
Modèle : MWH 301 B
Catégorie : Four à micro-ondes