ZE3 230V - Aspirateur LUX - Notice d'utilisation et mode d'emploi gratuit
Retrouvez gratuitement la notice de l'appareil ZE3 230V LUX au format PDF.

| Type de produit | Suceur motorisé pour aspirateur |
| Marque | LUX |
| Modèle | ZE3 230V |
| Tension nominale | 230 V ~ 50 Hz |
| Puissance nominale | 140 W |
| Éclairage | 12 V / 5 W |
| Largeur de travail | 335 mm |
| Longueur | 220 mm |
| Hauteur | 80 mm |
| Double isolation | Oui |
| Usage | Intérieur, domestique |
| Surface recommandée | Tapis |
| Surface déconseillée | Sol dur, tapis à longs poils |
| Type de connexion | Adapté aux aspirateurs LUX (modèles 775/790, Lux 1) |
| Fixation du câble | Clips de câble |
| Entretien | Nettoyage après chaque utilisation |
| Démontage de la brosse | Dévissez la plaque inférieure |
| Réglage des balais | Positions I (neuf) et II (usé) |
| Remplacement de l'ampoule | Par un revendeur agréé |
| Sécurité | Débrancher avant entretien |
| Normes | Conforme aux directives CE pour le marquage |
FOIRE AUX QUESTIONS - ZE3 230V LUX
Consultez la notice pour les étapes de dépannage.
Questions des utilisateurs sur ZE3 230V LUX
0 question sur cet appareil. Repondez a celles que vous connaissez ou posez la votre.
Poser une nouvelle question sur cet appareil
Téléchargez la notice de votre Aspirateur au format PDF gratuitement ! Retrouvez votre notice ZE3 230V - LUX et reprennez votre appareil électronique en main. Sur cette page sont publiés tous les documents nécessaires à l'utilisation de votre appareil ZE3 230V de la marque LUX.
MODE D'EMPLOI ZE3 230V LUX


10

11
13

14

15
16

17
18
LUX ZE3
Svenska 2
Norsk 4
Suomeksi 6
English 8
Nederlands 10
Deutsch 12
Francais 14
Portugues 16
Espanol 183
Italiano 20
Magyar 22
Cesky, 24
26
日本語 28
中文. 30
1
Babasa Malaysia 34
Bahasa Indonesia 36
Tagalog 38
Congratulations on owning a LUX!
Thank you for your vote of confidence in our first rate product. Used correctly it will ease cleaning for many years to come. Your new motorised mouthpiece is designed for household vacuuming and is a wonderful complement specially designed for carpets.
For professional use, for example during renovation, we recommend using only our commercial cleaning products.
Read through this instruction manual before use.
It is also important that this manual remains with the vacuum cleaner for future reference. If this motorised mouthpiece for carpets should be sold, transferred or left behind during a move, see that the new owner is able to make use of the functions and read the warning texts.
Read through the safety precautions before the motorised mouthpiece for carpets is attached or used.
TECHNICAL DATA
Motorised mouthpiece
Width: 335 mm
Length: 220 mm
Height: 80 mm
Voltage: Taiwan: 110V / 60Hz
Japan: 100V / 50 / 60Hz
Malaysia: 230V / 50Hz
Australia: 230V / 50Hz
New Zealand: 230V / 50Hz
Output: Taiwan: 120 W
Japan: 115 W
Malaysia: 140 W
Australia: 140 W
New Zealand: 140 W
Lamp: 12 V/5 W
Complies with EU-directives for -marking
IMPORTANT SAFETY INSTRUCTIONS
Only for household and indoor use!
To minimise the risk of fire:
-
Do not vacuum close to smoke, sparks or fire, e.g. cigarettes, matches, warm ashes or flammable fluids or gasses.
-
Do not vacuum in places where flammable or in-flammable fluids or gasses could be encountered.
-
Do not spray air fresheners into or onto the vacuum cleaner, since it could explode.
To minimise the risk of electric shock:
- Do not leave the vacuum cleaner/motorised mouthpiece connected when not in use. Disconnect the power cord when the vacuum cleaner is not to be used.
-
Carefully observe the instructions in the operating instructions. Service and repair work should only be done by an authorised Lux service centre. Use only spare parts and accessories recommended by the manufacturer. Never try to modify the motorised mouthpiece yourself.
-
This motorised mouthpiece has double insulation, as indicated by the symbol (□) on the type plate. Products with double insulation do not have any earth connector.
To minimise the risk of injury or product damage: - Make sure that hair, fingers, clothes and the like do not come into contact with the rotating cylinder of the motorised mouthpiece. Never touch the brush cylinder when the vacuum cleaner is connected to an outlet.
- Do not clean plastic parts using cleaners containing solvents.
- Do not pull the vacuum cleaner over its power cord.
- NOTE! To prevent damage to the unit and injuries, a damaged cord should be replaced only by the manufacturer or an authorised service centre.
- Keep moving the power nozzle during operation to avoid unnecessary wear.
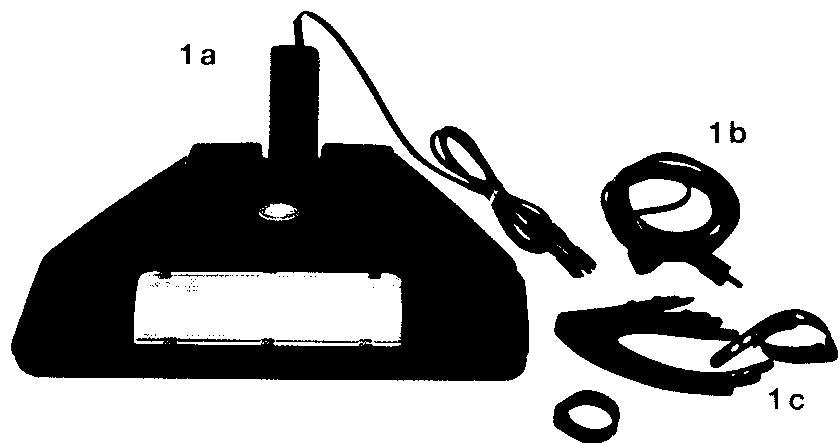
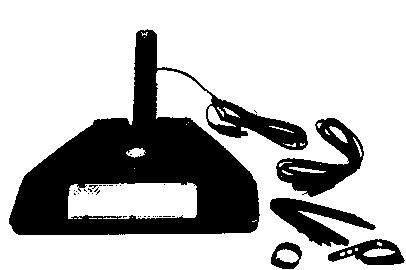
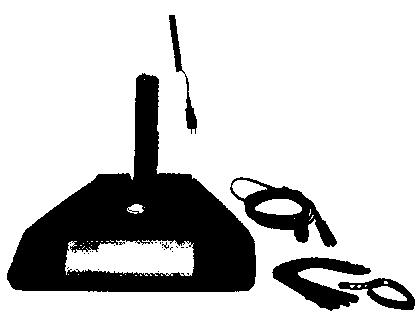
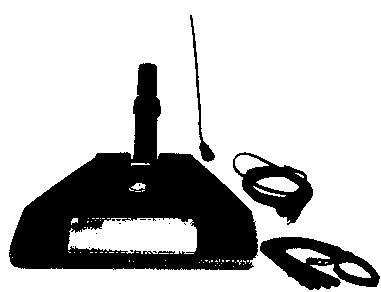
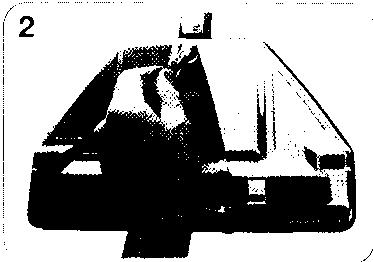
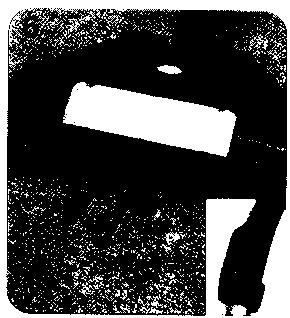
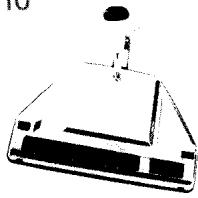
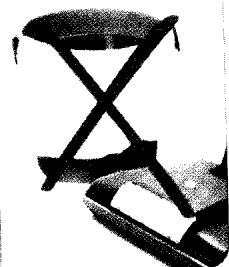
LUX ZE3 MOTORISED MOUTHPIECE
1a.Motorised mouthpiece
b. Cable extensions
c. Cable clips
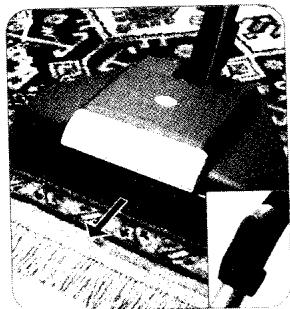
- Remove the blue protective film on the bottom plate before use.
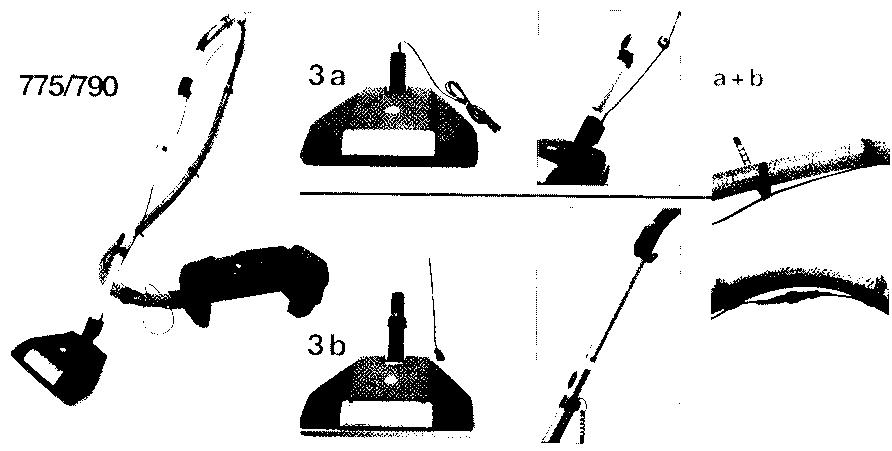
- Assemblage to:
775/790
a) Motorised mouthpiece without tube
Insert the tube into the motorised mouthpiece. Assemble the cord to the tube and the cable extension to the hose, using the cable clips. To dismantle the mouthpiece twist and pull apart.
b) Motorised mouthpiece with tube
Attach the mouthpiece to the hose handle. Assemble the cable extension to the hose, using the cable clips. Twist and pull apart to dismantle.
a + b) Connect the mouthpiece cord to the extension cable. Ensure that the contact is correctly connected.
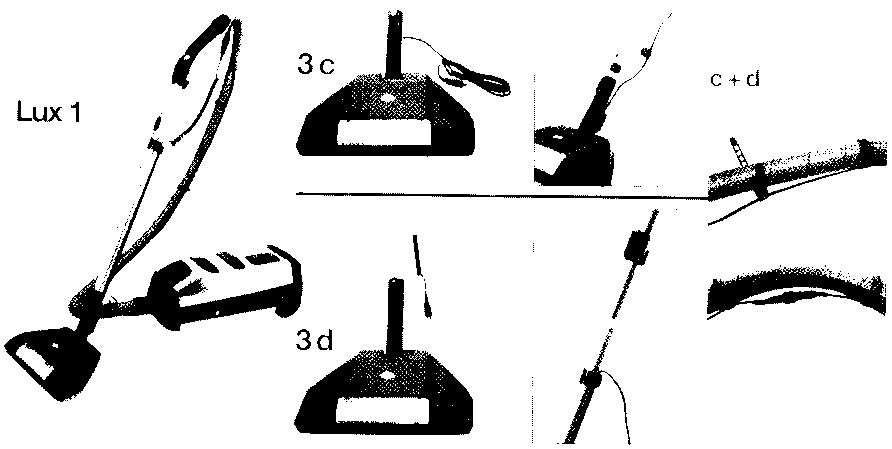
Lux 1
c) Motorised mouthpiece without tube
Insert the telescopic tube into the motorised mouthpiece until the locking button clicks to engage. Assemble the cord to the tube, using the cable clip. To dismantle the mouthpiece press the locking button and pull apart.
d) Motorised mouthpiece with tube
Attach the mouthpiece to the hose handle. To dismantle the mouthpiece push the sliding knob on the tube and pull apart.
c + d) Connect the mouthpiece cord to the extension cable. Ensure that the contact is correctly connected.
- Connect the hose to the vacuum cleaner. Connect the contact to the socket of the vacuum cleaner. Ensure that the contact is correctly connected. Grab the plug and pull the cord out to the desired length. Connect the plug to an electrical wall socket with a voltage of 230V . The motorised mouthpiece should not be used if the vacuum cleaner is not working.
- Select the MAX-level and start your vacuum cleaner.
-
On wall-to-wall carpets and the like - vacuum with gentle motions back and forth. Adjust the suction according to need.
-
On carpets with fringes and the like - vacuum with gentle motions from the carpet to the fringes. Adjust the suction according to need.
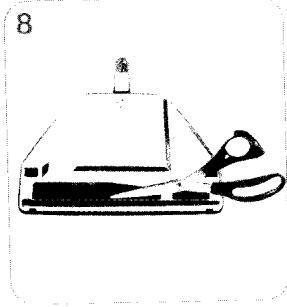
- Make a habit of always cleaning the motorised mouthpiece after use. Always remove the plug from the wall socket before cleaning. If "dust-threads" or the like get stuck in the brush, cut the threads carefully without harming the brush.
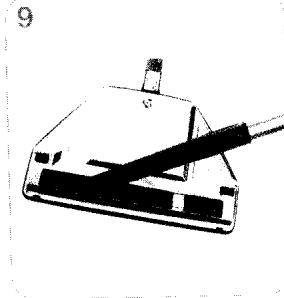
- Vacuum the remaining threads with the help of the vacuum's joining crevice nozzle.
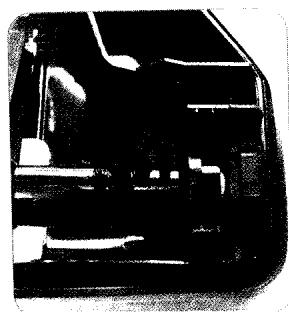
- Dismantling the brush cylinder. Always remove the plug from the wall socket before opening the motorised mouthpiece. Loosen the screw on the bottom of the motorised mouthpiece.
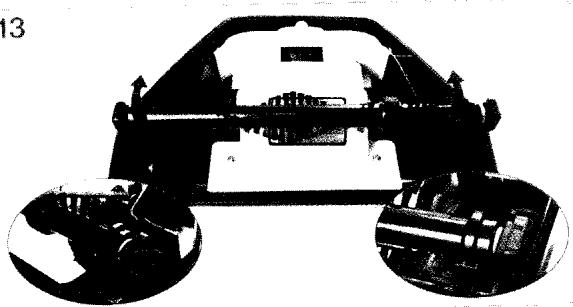
- Remove the bottom plate. Remove both bearings and clean them. Make sure that both bearings are correctly installed when the cylinder is assembled.
- To facilitate the assembling, the bearings are marked with I and II markings. When mark I is up and the brush is new or not worn, the brush will stick out ca. 2mm under the bottom of the plate.
- When the brushes become worn-out and are no longer brushing satisfactorily, mount the bearings with the marking II up. The motorised mouthpiece can then be used some more before the brush cylinder is changed.
- To replace a broken lamp, take the motorised mouthpiece to an authorised LUX dealer.
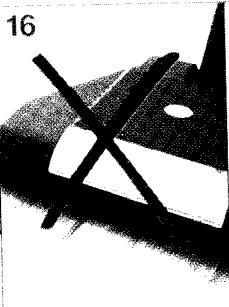
15-18. Never vacuum with the motorised mouthpiece on surfaces of long fluff or hard floor. Never suck liquids, flammable substances, glass, hot ash or coal. Always remove carefully the plug by grabbing it. Do not pull on the cord.