1 - Savon LUX - Notice d'utilisation et mode d'emploi gratuit
Retrouvez gratuitement la notice de l'appareil 1 LUX au format PDF.

| Type de produit | Aspirateur traîneau |
| Marque | LUX |
| Modèle | 1 Royal |
| Dimensions (L × l × h) | 557 × 259 × 241 mm |
| Poids | 7,8 kg |
| Alimentation | 230 V ~ 50 Hz |
| Puissance max absorbée | 1230 W |
| Puissance d'aspiration | 270 W |
| Niveau sonore | 67 dBA |
| Rayon d'action | 12 m |
| Capacité du sac à poussière | 3 L |
| Système de filtration | 3 voies : sac à poussière (3 couches, fermeture automatique), filtre moteur (charbon actif), filtre HEPA clinique |
| Type de tube | Télescopique en aluminium, Ø 32 mm |
| Accessoires fournis | Buse sol, buse combinée, buse fente, suceur pour radiateur (option) |
| Réglage puissance | Électronique avec pédale (AUTO/MIN/MAX) |
| Protection | Double isolation, protection surchauffe, protection électricité statique |
| Matériau du corps | Acier |
| Couleur | Lux métallisé |
| Entretien | Vider ou remplacer le sac lorsque le voyant s'allume, nettoyer les filtres régulièrement |
| Sécurité | Ne pas aspirer de liquides, cendres ou objets pointus ; débrancher avant entretien |
| Pièces détachées | Sacs à poussière, filtres HEPA, filtres moteur, courroies, accessoires optionnels |
| Garantie | Contactez votre revendeur Lux |
FOIRE AUX QUESTIONS - 1 LUX
Questions des utilisateurs sur 1 LUX
0 question sur cet appareil. Repondez a celles que vous connaissez ou posez la votre.
Poser une nouvelle question sur cet appareil
Téléchargez la notice de votre Savon au format PDF gratuitement ! Retrouvez votre notice 1 - LUX et reprennez votre appareil électronique en main. Sur cette page sont publiés tous les documents nécessaires à l'utilisation de votre appareil 1 de la marque LUX.
MODE D'EMPLOI 1 LUX


Svenska 2
Norsk. 4
Suomeksi 6
English 8
Deutsch 10
Espanol 12
Francais 14
Italiano 16
Portugués 18
Cesky 20
Magyar 22
日本語 24
中文 26
H
Bahasa Malaysia 30
Thank you for choosing a Lux 1 Royal! To achieve the best vacuuming results, read this instruction manual carefully. Keep the manual for future reference.
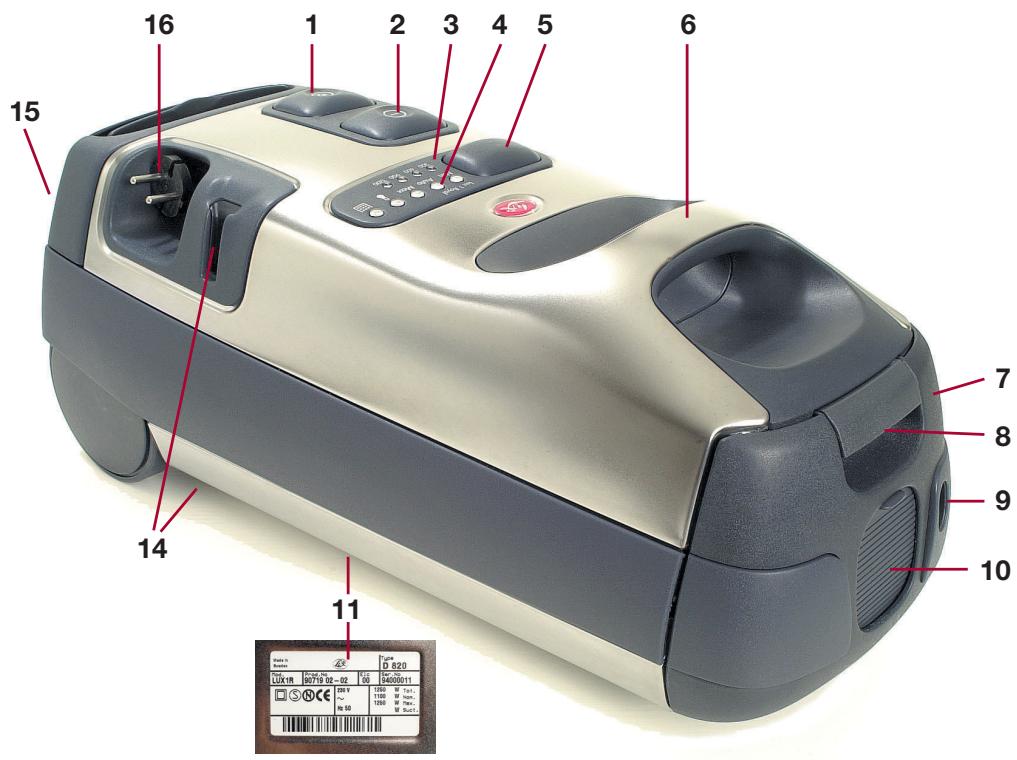
Description
- Cord reel
- Start/stop
- Display
- Indicator lamps
- Suction control
- Handle
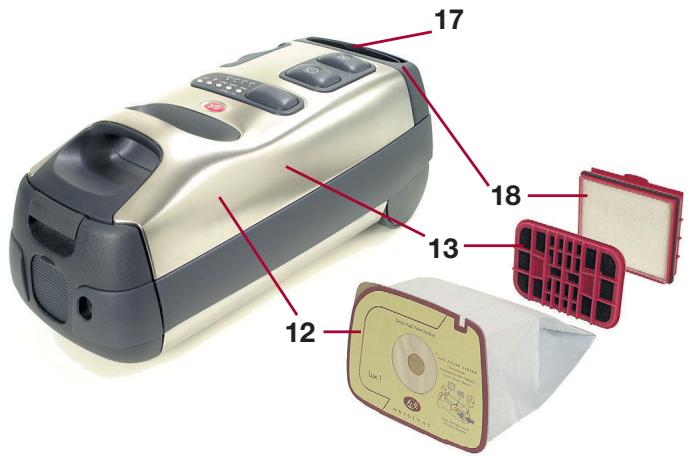
- Dust bag cover
- Cover unlock switch
-
Power outlet
-
Hose connector with shutter
- Rating plate
- Dust bag
- Safety filter
- Parking position (x 2)
- Exhaust vent
- Electric plug
- Filter cover
- HEPA filter
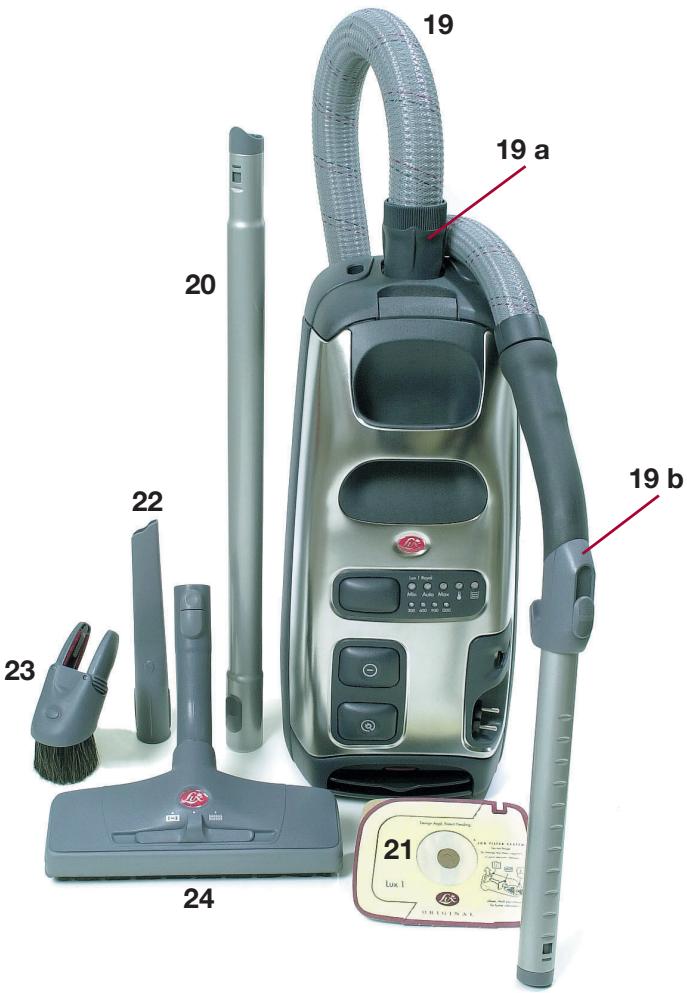
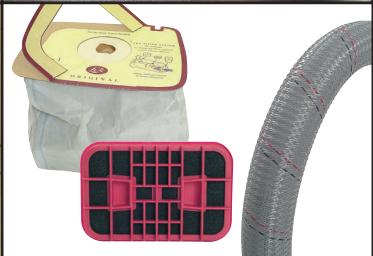
- Hose with a) connecting piece and b) hose handle with air vent
- Telescopic tube
- Dust bag
- Crevice nozzle
- Combination nozzle
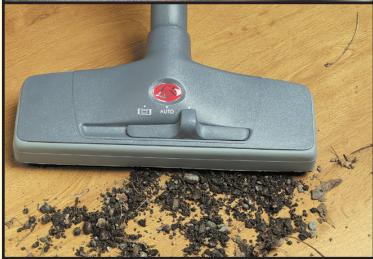
- Floor nozzle
When unpacking the vacuum cleaner, check that it is undamaged and that all parts are supplied.
Operation
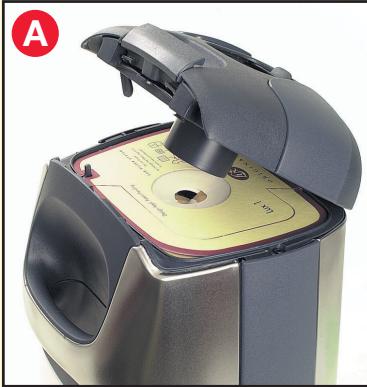
A. Lift the dust bag cover and make sure the dust bag and the filter have been set correctly (see the section on the Lux filter system below).
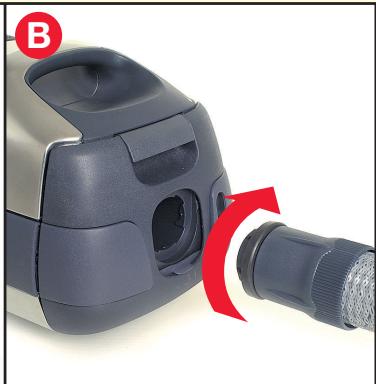
B. Slide away the shutter and connect the hose to the vacuum cleaner.
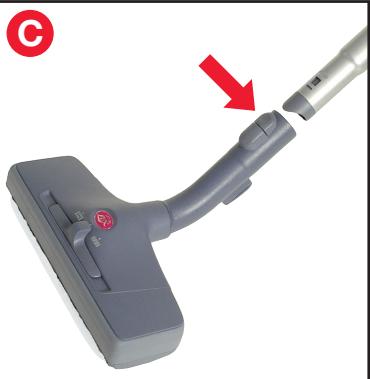
C. Slide the lock switch on the telescopic tube towards the hose handle. Insert the hose handle into the telescopic tube and the telescopic tube into the floor nozzle.
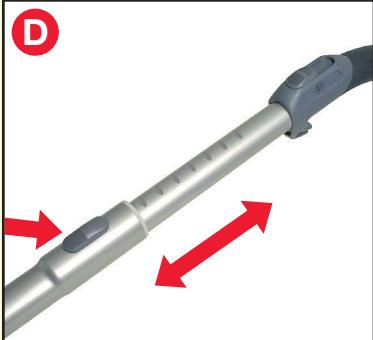
D. Adjust the length of the telescopic tube as desired by sliding the lock switch on the telescopic tube towards the hose handle.
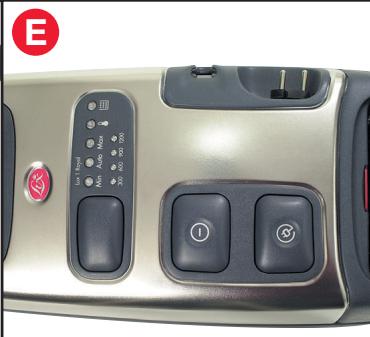
Extend the cord (16) and connect to the mains. Lightly press the foot pedal (2) to start and stop the vacuum cleaner. To rewind the cord, lightly press the foot pedal with the cord symbol (1).
E. Set the desired suction effect by lightly and repeatedly pressing the foot pedal (5).
Select the AUTO position for normal vacuuming. The vacuum cleaner then automatically adjusts the suction effect depending on the surface.
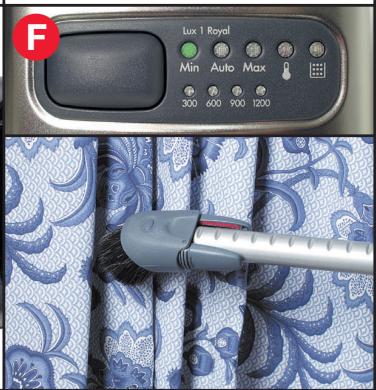
F. For vacuuming with reduced suction effect, select the MIN position. The suction effect can be further reduced by using the air vent on the hose handle. Select the MIN position and keep the air vent open when vacuuming curtains, etc.
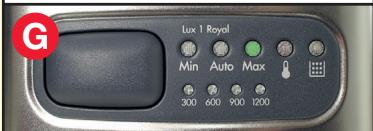
G. For vacuuming very dirty floors or when using air-powered equipment, select the MAX position.
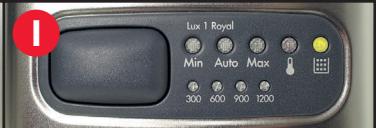
H. When the indicator lamp for the dust bag lights, the bag should be replaced and the motor and HEPA filters inspected.
- When the overheating indicator lamp blinks, the vacuum cleaner stops operating. Disconnect the electric plug. Replace the dust bag, check the filters and other matters, then verify if the tube/hose is blocked. Let the vacuum cleaner cool down and do not use it for 30 minutes. After this, the vacuum cleaner should be ready for use again. In case the vacuum cleaner does not start after the following measures have been taken, contact your Lux dealer.
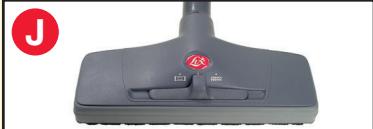
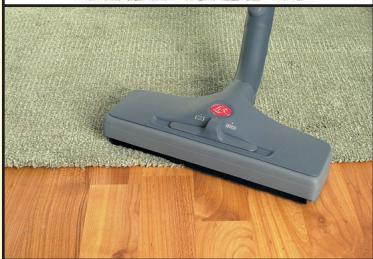
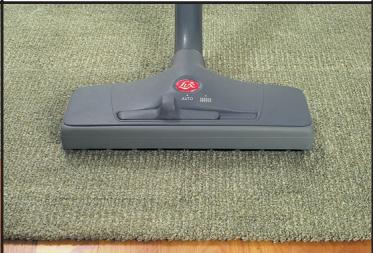
J. In the AUTO position, the nozzle is adjusted automatically depending on the surface.
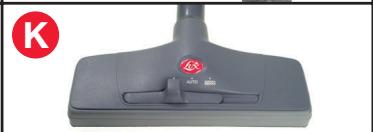
K. Set the carpet position on the nozzle to make vacuuming of carpets easier.
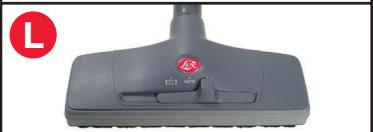
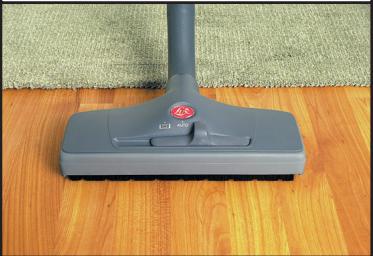
L. Set the hard floor position on the nozzle for smooth operation when vacuuming hard floors.
M. Press the lock switch and pull apart the nozzle and tube. Insert the tube into the desired nozzle (refer to optional accessories).
N. Clean the floor nozzle after use by using the hose handle. To make cleaning easier, the wheels can be removed by using a screwdriver. - Use the combination nozzle for vacuuming furniture, shelves, furnishings, etc.
P. Attach the combination nozzle on the hose handle so it is always within easy reach. Use the nozzle on the telescopic tube to vacuum panels, etc.
Q. Use the crevice nozzle when vacuuming in narrow spaces, such as corners, joints and radiators.
Lux filter system
When inspecting/replacing filters, always disconnect the electric plug beforehand. All products in the Lux filter system programme can be discarded with normal household rubbish.
R. a) Dust bag with three-layer paper and automatic closing. b) Motor filter with activated carbon. c) HEPA clinical filter for high-performance filtering.
S. Stand the vacuum cleaner on end. Open the cover for the dust bag and motor filter. Pull up the handle of the dust bag and lift out the bag. Clean the interior with a dry cloth. Straighten out the new dust bad and insert it in the compartment. Close the cover.
T. When necessary, replace the safety filter. Open
the dust bag cover. Lift out the dust bag. Remove the safety filter. Insert a new Lux safety filter. Insert the dust bag and close the cover.
U. When necessary, replace the HEPA filter. Open the filter cover and remove the filter cassette. Insert a new HEPA filter and close the cover.
Never vacuum liquids, broken glass or other sharp objects. Also do not vacuum ashes or inflammable liquids or gases.
V. For short breaks while vacuuming, set the tube and nozzle in the parking position on the side of the vacuum cleaner. The vacuum cleaner will then be automatically switched off. NOTE! Switching off the appliance in this manner is only intended for short breaks while cleaning.
X. The vacuum cleaner is equipped with a hot air exhaust vent. Connect the hose to the exhaust vent from the rear. Point the hose handle in the desired direction. Use the hot air exhaust vent to dry shoes, boots, etc.
Optional accessories
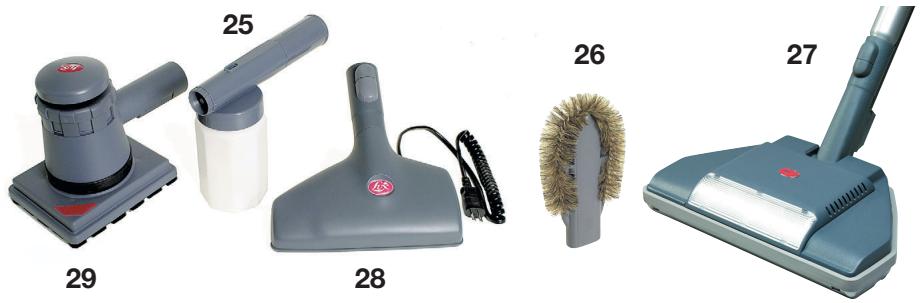
- The optional spray container can be fitted on your Lux vacuum cleaner to paint, water flowers, etc. Connect the hose to the exhaust vent. Insert the tube in the spray container. Fill the container with liquid. Adjust the spray jet with the dial a. The sprayed volume can be adjusted by covering the hole b.
- Use the radiator brush for thorough vacuuming of radiators.
- Use the ZE3 power nozzle for effective vacuuming of carpets and textiles. Connect the power nozzle to the power outlet.
- The Power Lux power nozzle is specially designed for textiles. Attach the power nozzle to the hose handle and connect it to the power outlet.
- Turboclean is a flexible air driven accessory for numerous applications, such as grinding, polishing, massaging and cleaning.
Important
Y. Always store your Lux vacuum cleaner in a dry space at room temperature with the power switch switched off, the electric plug disconnected and the power cord rewound. The hose and tube can be positioned as shown in the picture.
If the hose becomes blocked: Connect the hose to the exhaust vent, insert the tube at the entrance, then start the vacuum cleaner. If the vacuum cleaner is switched off during use and the overheating indicator lamp blinks - refer to the instructions in item I. Before cleaning or performing maintenance of the vacuum cleaner, be sure to disconnect the electric plug from the wall outlet. For all other service work, spare parts and accessories, contact your Lux dealer.
Do not pull or lift the vacuum cleaner by holding
the electric cord. Regularly inspect the cord for any damage. NOTE! Do not use the vacuum cleaner if the electric cord is damaged. In this case, request an authorised Lux service centre to replace the electric cord.
Your Lux vacuum cleaner has double insulation which is why grounding of the appliance is not necessary. The vacuum cleaner should only be used by adults.
Specifications
Technical data
Double insulation ( l
CC Conforms to the EU directive for CE certification. Safety approved according to IEC 335-1 and 335-2-2.
Max power consumption: 1230 W
Fan: Two-stage radial fan
Connecting voltage:
New Zealand 230 V/50 Hz, Australia 240 V/50 Hz
Suction power:
New Zealand 270 W, Australia 280 W
Noise level, vacuum cleaner: 67 dBA
Operating radius: 12m
Weight: 7.8kg
Dimensions: 557 × 259 × 241 ~mm
Electronics
Electronic power control
Soft start
Power down
Power outlet
Overheating protector
Static electricity protector
Lux three-way filter system
HEPA filter
Safety filter
Dust bag: 3 litre volume, automatic closing
Lux tube system
Telescopic tube with integrated crevice nozzle
Tube material: Light-weight aluminium, 032mm
Accessories
Small combination nozzle
Crevicenozzle
Radiator brush (option)
Spray container (option)
Power nozzle for carpets (option)
Power nozzle for textiles (option)
Miscellaneous
Vacuum cleaner body: Steel housing
Colour: Lux metallic
Shutter
Exhaust vent
Vertical/horisontal parking position
Vielen Dank, daß Sie sich für den Lux 1 Royal entschieden haben! Dieses Anleitungshandbuch sorgfältig durchlesen, um Beste Ergebnisse beim Staubsaugen zu erziellen. Das Handbuch für späteres Nachschlagen aufbewahrenen.
Beschreibung
- Kabelwinde
- Start/Stopp
- Display
- Anzeigelampen
- Saugleistungsregelung
- Handgriff
- Staubbeuteldeckel
- Verriegelungssperre für Deckel
- Steckdose
- Schlauchverbinder mit Verschluß
- Leistungsschild
- Staubbeutel
- Sicherheitsfilter
- Abstellposition (x 2)
- Luftauslaßöffnung
16.Netzstecker - Filterdeckel
- HEPA-Filter
- Schlauch mit a) Anschlußstutzen und b) Handgriff mit Luftauslaßöffnung
- Teleskoprohr
- Staubbeutel
- Fugendüse
- Kombi-Düse
- Bodensaugduse
Beim Auspacken des Staubsaugers überprüfen, ob der Staubsauger unbeschädigt ist und alle Teile vorhanden sind.
Betrieb
A. Den Staubbeuteldeckel öffnen und überprüften, ob der Staubbeutel und der Filter korrekt eingesetzt sind (siehe unten stehenden Abschnitt "Lux-Filtersystem").
B. Den Verschluß beiseite schieben und den Schlauch am Staubsauger setzen.
C. Die Vertriegelungssperre am Teleskoprohr in Richtung Schlauchgriff schieben. Den Schlauchgriff am Teleskoprohr und das Teleskoprohr in die Bodensaugduse eingenet.
D. Die gewünschte Länge des Teleskoprohres einstellen, indemn die Verriegelungssperre am Teleskoprohr in Richtung Schlauchgriff geschoben wird.
Das Kabel (16) ausziehen und an eine Steckdose anschließen. Der Staubsauger laßt sich mit dem Fußpedal (2) ein- und ausschalten. Das mit dem Kabel-Symbol (1) gekennzeichnete Fußpedal betätigten, um das Kabel wieder einrolten zu halten.
E. Die gewünschte Saugleistung durch wiederholtes Betätigten des Fußpedals (5) einstellen.
FürnormalesStaubsaugen die AUTO-Stellung wahlen.DerStaubsaugerstelltdanndieSaugleistung entsprechend derBeschaffenheitderOberflachecomautomatisch ein.
F. Für reduzierte Saugleistung die MIN-Stellung wahren. Die Saugleistung kann noch mehr reduziert werden, indem der Luftauslaß am Schlauchgriff verwendet wird. Die MIN-Stellung wahren und die Auslaßöffnung offen setzen, wenn Vorhänge etc. abgesaugt werden.
G. Bei sehr verschmuttenden Böden oder bei Verwendung von Druckluftgeräten, die MAX-Stellung wahren.
H. Wenn die Anzeigelampe für den Staubbeutel leuchtet, sollte der Staubbeutel ausgetaucht und der Motor und die HEPA-Filter überprüft werden.
I. Wenn die Anzeigelampe für Überhitzung blinkt, wird der Betrieb des Staubsaugers unterbrochen. Den Netzstecker hersausziehen. Den Staubbeutel austauschen, die Filter etc. überprüfen. Dann prufen, ob das Rohr oder der Schlauch verstopt ist. Den Staubsauger abkühlen setzen und 30 Minuten lang nicht benutzten. Danach solte der Staubsauger wieder betriebsbereit sein. Soltte der Staubsauger nach Durchführung der folgenden Maßnahmen nicht eingeschaltet werden können, wenden Sie sich an ihren Lux- Handler.
J. In der AUTO-Stellung wird die Duse entspruchend der Beschaffenheit der Oberfläche automatisch eingestellt.
K. Die Teppich-Stellung an der Düse wahlen, um das Staubsaugen auf Teppichen zu erreichtern.
L. Die Hartboden-Stellung an der Düse wahlen, um das Staubsaugen auf harten Böden fließer zu machen.
M. Die Verriegelungssperre drucken, um die Duse vom Rohr abzunehmen. Setzen Sie die gewünschte Duse auf das Rohr (siehe Sonderzubehr).
N. Die Bodensaugduse nach Gebrauch mit Hilfe des Schlauchgriffs reinigen. Die Räder konnen für leichteres Reinigen mit Hilfe eines Schraubendrehers entfern't werden.
O. Die Kombi-Düse wird zum Staubsaugen von Möbeln, Bücherregalen, Ausstattungsgegenständen, etc. verwendet.
P. Die Kombi-Düse am Schlauchgriff befestigen, so daß diese stets griffbereit ist. Diese Düse wird beim Staubsaugen von Täfelungen, etc. verwendet.
Q. Die Fugendüse eignet sich ausgezeichnet auf engem Raum für das Staubsaugen von beispielweise Ecken, Ritzen und Heizkörpern.
Lux-Filtersystem
Vor jeder Überprüfung oder Austausch von Filtern stets den Netzstecker herausziehen. Alle Produkte des Lux-Filtersystemprogrammes konnen zusammen mit dem Haushaltsmull entsorgt werden.
R. a) Staubbeutel mit drei Papierschichten und automatischer Schliebung. b) Motorfilter mit Aktivkohle. c) HEPA-Klinikfilter für Hochleistungsfiltrierung.
S. Den Staubsauger aufrecht hinstellen. Den Staubbeutel- und Motorfilterdeckel öffnen. Am Staub
beutelgriff ziehen und den Beutel hersausheben. Das Staubbeitelfach mit einem trockenen Tuch reinigen. Neuen Staubbeitel gerade ins Staubbeitelfach einsetzen. Deckel schreiben.
T. Bei Bedarf den Sicherheitsfilter ausauschen. Staubbeuteldeckel öffnen. Den Staubbeutel hersausheben. Den Sicherheitsfilter herausnahmen. Einen neuen Lux-Sicherheitsfilter einsetzen. Staubbeutel einsetzen und Deckel schreiben.
U. Bei Bedarf den HEPA-Filter austauschen. Filterdeckel öffnen und Filterkassette herausnahmen. Einen neuen HEPA-Filter einsetzen und Deckel schreiben.
Niemals Flüssigkeiten, Glassplitter oder andere scharfe Gegenstände aufsaugen. Auch nicht Asche oder entzündliche Flüssigkeiten oder Gase.
V. Bei kurzen Unterbrechungen während des Staubsaugens, das Rohr und die Duse in Abstellposition auf der Staubsaugerseite bringen. Der Staubsauger wird dann automatisch ausgeschelt. HINWEIS! Diese Art der Geräteausschaltung ist nur für kurze Unterbrechungen während des Staubsaugens bestimmt.
X. Der Staubsauger ist mit einer HeiBluftauslaBöffnung ausgestattet. Den Schlauch von hinten an die AuslaBöffnung anschließen. Den Schlauchgriff in die gewünsche Stellung bringen. Mit der HeiBluftauslaBöffnung Schuhe, Stiefel etc. trocknen.
Sonderzubehör
- Der optionale Spraybehälter kann auf ihren Lux-Staubsauger aufgesetzt werden, um Wasserblumen, etc. zu besprühen. Den Schlauch an die Auslaßöffnung anschließen. Das Rohr in den Spraybehälter einstecken. Den Behälter mit einer Flüssigkeit fällen. Die Sprydlöse mit der Drehscheibe a. einstellen. Das Sprayvolumen kann durch Abdecken des Loches b eingestellt werden.
- Für das gründliche Staubsaugen von Heizkörpern wird der Heizkörperpinsel verwendet.
- Die ZE3-Powerduse wird für effektives Staubsaugen von Teppichen und Textilien verwendet. Die Powerduse an eine Steckdose anschließen.
- Die Power Lux-Powerduse wurde speziell für Textilien konzipiert. Die Powerduse am Schlauchgriff befestigen und an eine Steckdose anschließen.
- "Turboclean" ist ein flexibles Druckluftzubehrönteil, das vielseitig einsetzbar ist, z. B. zum Schleifen, Polieren, Massieren und Reinigen.
Wichtig
Y. Ihren Lux-Staubsauger stets trocken bei Zimmer-temperatur, mit dem Hauptschalter ausgescheltet, dem Netzstecker aus der Steckdose herausbezogen und mit eingezogenem Kabel abstellen. Der Schlauch und das Rohr können wie in der Abbildung gezeigt positioniert werden.
Wenn der Schlauch verstopt ist: Den Schlauch an die Auslaßöffnung anschließen, das Rohr am Eingang befestigen und dann den Staubsauger einschalten. Wenn der Staubsauger während des Betriebs ausgeschelt
wird und die Anzeigelampe für Überhitzung blinkt - siehe Anleitungen unter Punkt I. Vor der Reinigung oder Ausführung von Wartungsarbeiten am Staubsauger, sicherten, daß der Netzstecker aus der Steckdose herausgezogen ist. Wenden Sie sich hinsichtlich aller anderen Servicearbeiten, Ersatsteile und Zubehörteile an ihren Lux- Handler.
Den Staubsauger nicht mit dem Kabel ziehen oder anheben. Das Kabel regelmäßig auf Schäden hin überprüfen. HINWEIS! Den Staubsauger nicht in Betriebnehmen, wenn das Netzkabel beschädigt ist. Wenden Sie sich in soch einem Fall an einen autorisierten Lux-Kundendienst, der Ihnen das Kabel austauscht.
Ihr Lux-Staubsauger ist mit einer Doppelisolierung ausgestattet, die eine Erdung des Gerätes überflüssig macht. Der Staubsauger solle nur von Erwachsenen bedient werden.
Spezifikationen
Technische Daten
Doppelisolierung(回)
CStimmt mit der EU-Direktive fur CE-Zertifikation
überein. Sicherheit gemäß IEC 335-1 und 335-2-2 bestätig.
Max. Leistungsaufnahme: 1230 W
Lüfter: Zweistufiger Radiallufter
Anschlußspannung: 230 V
Saugleistung: 270 Watt (Saugwirkung)
Gerauschpegel, Staubsauger: 67 dBA
Betriebsradius: 10m
Gewicht: 7,8 kg
Abmessungen: 557 × 259 × 241 ~mm
Elektrik
Elektronische Leistungsregelung
Soft-Start
Strom Aus
Steckdose
Überhitzungsschutz
Schutz vor statischer Elektrizität
Lux Drei-Wege-Filtersystem
HEPA-Filter
Sicherheitsfilter
Staubbeutel: Volumen 3 I, automatische Schliebung
Lux-Rohrsystem
Teleskoprohr mit integrierter Fugendüse
Rohrmaterial: Leichtaluminium, Ø 32 mm
Zubehörteile
Kleine Kombi-Duse
Fugenduse
Heizkörperpinsel (Sonderzubehör)
Spraybehälter (Sonderzubehör)
Powerdüse für Teppiche (Sonderzubehör)
Powerduse for Textilien (Sonderzubehor)
Verschiedenes
Staubsauger-Gehäuse: Stahlgehäuse
Farbe: Lux-metallic
Verschluß
Auslaßöffnung
Vertikale/horizontale Abstellposition
jLe damos las gratias por elegir una Lux 1 Royal! Para encontrar los最好的 resultados al pagar el aspirador, lea atentamente este manual de instrucciones. Guarde elmanual para futuras referencias.
Descripción
- Recogedorcable
- Arranque/parada
- Panel visualizador
- Lucesindicadoras
- Regulador de potencia
- Mango
- Tapa de la bolsa de polvo
- Interruptor de desbloqueo de la tapa
- Toma de pared
- Conector de la manguera con obturador
- Placa indicadora
- Bolsa de polvo
- Filtro de segundad
- Posicion para guardarlo (x 2)
- Orificio de escape
- Enchufe
- Tapa del filtró
- Filtro HEPA
- Manguera con a) pieza de connexion y b) mango de la manguera con respiradero
- Tubo telescópico
- Bolsa de polvo
- Boquilla para rincones
- Boquilla de combinación
- Cepillo para sueños
Al desempaquetar el aspirador, compruebe que no esté dañado y que se suministran todas las partes.
Funcionamento
A. Levante la tapa de la bolsa de polvo y asegúrese de que la Bolsa de polvo y el filtro hayan sido colocadoscorrectamente (vea la sección en el sistema de filtrodel Lux a continuación).
B. Retire el obturador deslizándolo y conecte la manquera al aspirador.
C. Deslice el interruptor de bloqueo en el tubo telescopico hacía el mango de la manguera. Introduzca el mango de la manguera en el tubo telescopico y el tubo telescopico en la boquilla para sueños.
D. Adapte la longitudud del tubo telescópico como de sees del azidado el interruptor de bloqueo en el tubo telescópico hacía el mango de la manguera.
Desenrolle el cable (16) y enchufelo en una toma de pared. Pulse ligeramente el pedal de pie (2) para arrancar y parar el aspirador. Para enrollar el cable, pulse ligeramente el pedal de pie con el symbolo de cable (1).
E. Ajuste la fuerza de aspiracion deseada pulsando ligera y repetidamente el pedal de pie (5).
Selección la posición AUTO para la aspiración normal. El aspirador entones adapta automatistically la fuerza de aspiración dependiendo de la superficie.
F. Para pagar el aspirador con reducida fuerza de aspiración, selección la posición MIN. La fuerza de aspiraciónuede ser reducida incluso másutilizando el respiradero en el mango de la manguera.Selección la posición MIN y mantenga el respiradero abierto al aspirar cortinas, etc.
G. Para pagar el aspirador sobre sueños muy sucios o al utilizing el equipo con fuerza de aire, selección la posición MAX.
H. Cuando la luz indicadora de la Bolsa de polvo se ilumina, la Bolsa deben Cambiarse y el motor y el filtro HEPA estarian ser inspeccionados.
I. Cuando la luz indicadora de sobrecalentamente parpadea, el aspiradordea de functionar. Desconecte el enchufe. Cambie la Bolsa de polvo, compruebe los filtros y otheras cosas, luigo verifique si el tubo/manguera está bloqueado.Deje que el aspiradorse enfré y no lo utilise durante 30制动os.Después de this, el aspiradordebería estar lista para serutilizado de nuevo.En caso de que el aspirador no arranque afterwardsabertomado lassiguientes medidas,contacte con su distribuidor Lux.
J. En la posicion AUTO, la boquilla se adapta automatistically dependiendo de la superficie.
K. Adapte la posicion de moqueta en la boquilla para hacer que elasar aspirador sobre moquetas sea más sencillo.
L. Adapte la posicion de suelos duros en la boquilla para un funcionaimiento suave al作為 el aspirador sobre suelos duros.
M. Pulse el interruptor de bloqueo y saque la boquilla y el tubo. Introduzca el tubo en la boquilla deseada (remitase a accesoriospcionales).
N. Limpie la boquilla para suelos afterwards de utiliser, mediante el mango de la manguera. Para que el limpiado的结果 más sencillo, pueda quitarse las ruedas mediante un destornillador.
O. Utilice la boquilla de combinacion para pagar el aspirador sobre muebles, baldas, mobiliario, etc.
P. Coloque la boquilla de combinación en el mango de la manguera de forma que está siempre a fácil alcance. Utilice la boquilla en el tubo telescólico para pagar el aspirador sobre paneles, etc.
Q. Utilice la boquilla para rincones cuando pase el aspirador en situos estrechos, tales como esquinas, juntas y radiadores.
Sistema de FILTER del Lux
Al inspeccionar/cambiar los filtros, siempre disponible ante el enchufe. Todos los productos en el programa del Sistema de filtrlo Lux se pueda(deschar con la basura normal de casa).
R. a) Bolsa de polvo de tres capas de papel y cierre automatico. b) Filtro del motor con carbón activado. c) Filtro clínico HEPA para un alto rendimiento de filtro.
S. Ponga el aspirador de pie sobre su extremo. Abra
la taps a de la Bolsa de polvo y del filtro del motor. Tire hacia arriba del mango de la Bolsa de polvo y saque la Bolsa. Limpie el interior con un paño seco. Desdoble lareshareshareshareshareshareshareshareshareshareshareshareshareshareshareshareshareshareshareshareshareshareshareshareshareshareshareshareshareshareshareshareshareshareshareshareshareshareshareshareshareshareshareshareshareshareshareshareshareshareshareshahazalapopolo yintroduzcalan el compartimiento.Cierre la tapa.
T. Cuando seanecessary, cambie el filtrodel seguidad. Abra la tapa de la bolsa de polvo. Saque la Bolsa de polvo. Quite el filtrodel seguidad. Introduzca un nuevo filtrodel seguidad Lux. Introduzca la Bolsa de polvo y cierre la tapa.
U. Cuando seanecessary, cambie el filtro HEPA.Abralapa del filtr y quite el cassette del filtr. Introduzca un nuevo filtro HEPA y ciderre la tapa.
No aspire nunca liquidos, vidrios rotos u outros objetivos aflilados. Tampoco cenizas o liquidos o gases inflamables.
V. ParaPEGUEs descansos cuando pasa el aspirador, colocque el tubo y la boquilla en la posicjion para guardarlo a un lado del aspirador. El aspirador entoces se apagar automatamente. JNOTAL: El apagar el instrumento de esta forma está intencionado solo para cortos descansos alasar el aspirador.
X. El aspirador está equipado con un orificio de escape de aire caliente. Conecte la manguera al orificio de escape desde detrás.Apunte el mango de la manguera en la direccion deseada. Utilice el orificio de escape de aire caliente para sacar zapatos, botas, etc.
Accesorios optionales
- El contendor de spray optionaluede ser fjado en el aspirador Lux para pintar, echar agua a las flores, etc. Conecte la manguera al orificio de escape. Introduzca el tubo en el contendor del spray. Llene el contendor con liquido. Ajuste el chorro de spray con el dial a. El volumen del chorro pueda ajustarse cubriendo el agujero b.
- Utilice el cepillo para radiador para pagar el aspirador profundamente sobre radiadores.
- Utilice la boquilla motorizada ZE3 para pagar el aspirador efectivamente sobre moquetas y textiles. Conecte la boquilla motorizada a la toma de pared.
- La boquilla motorizada de Power Lux está especialmente diseñada para textiles. Coloque la boquilla motorizada al mango de la manguera y conectelo a la toma de pared.
- Turboclean es un accesorio flexible de conducccion de aire para numerosas aplicaciones, tales como suavizar, sacar brillo, acolchado y limpieza.
Importante
Y. Siempre guarde el aspirador Lux en un situ seco a temperatura ambiente con el interruptor de la alimentacion apagado, el enchufe desconectado y el cable recogido.La manguera y el tubo pueda ser positioned como se muestra en la figura.
Si la manguera se atasca: Conecte la manguera al orifico de escape, introduzca el tubo en la entrada, luego arranque el aspirador. Si se apaga el aspirador
durante el uso y la luz indicadora de sobrecalmente parpadea - remitase a las instrucciones en el item I. Antes de limpar o realizar el mantenimiento del aspirador, asegürese de disconnectar el enchufe de la toma de la pared. Para todo除外 tipo de servicios, piezas de repuesto y accesorios, contacte con su distribuidor de Lux.
No tire o levante el aspirador agarrando lo por el cable eletrico. Inspeccione regularmente el cable en busca de danos. JNOTAL: No utilise el aspirador si el cable eletrico está dañado. En este caso, Solicite a un centro de servicios autorizzato Lux que le cambie el cable eletrico.
Su aspirador Lux posee doble aisliento que es por lo que no se necesita la connexion a tierra del aparato. El aspirador deben serutilzado solo poradultos.
Especificaciones
Datasétécnicos
Dobleaislamento(回)
C Cumple con las directivas de la EU para certificacion CE. Seguridad homologada segun IEC 335-1 y 335-2-2.
Max. consumo de potencia: 1230 W
Ventilador: Ventilador radial de dos pasos
Tensión de connexion: 230 V
Fuerza de aspiración: 270 varios (aspiración)
Nivel de ruido, aspirador: 67 dBA
Radio de funciona: 12 m
Peso: 7,8 kg
Dimensiones: 557× 259× 241mm
Electrónica
Control de la potencia electrónica
Arranque suave
Potencia hacía abajo
Toma de pared
Protector de sobrecalentamento
Protector de electricidad estàtica
Sistema de FILTER Lux de tres-caminos
Filtro HEPA
Filtro de segundad
Bolsa de polvo: volumen 3 l, cierre automatico
Sistema de tubo de Lux
Tubo telescópico con boquilla para esquinas integrado
Material del tubo: Aluminio de peso ligero, 032 mm
Accesorios
Boquilla de combinación(PC)
Boquilla para rincones
Brocha para radiador (opinion)
Conteditor de spray (opión)
Boquilla motorizada para moquetas (opinion)
Boquilla motorizada para textiles (opinion)
Varios
Cuerpo del aspirador: Caja de acero
Color: Lux metalico
Obturador
Orificio de escape
Posicion vertical/horizontal para guardarlo