D775 C 110V - Aspirateur LUX - Notice d'utilisation et mode d'emploi gratuit
Retrouvez gratuitement la notice de l'appareil D775 C 110V LUX au format PDF.

| Type d'appareil | Aspirateur traîneau |
| Puissance | Non précisé |
| Capacité du sac | Non précisé |
| Filtration | Filtre standard |
| Rayon d'action | Non précisé |
| Poids | Léger |
| Niveau sonore | Non précisé |
| Accessoires inclus | Brosse standard, suceur plat |
| Alimentation | Électrique filaire |
| Couleur | Non précisé |
| Dimensions | Non précisé |
| Garantie | Non précisé |
| Utilisation | Usage domestique |
| Marque | Non précisé |
| Modèle | Non précisé |
FOIRE AUX QUESTIONS - D775 C 110V LUX
Questions des utilisateurs sur D775 C 110V LUX
0 question sur cet appareil. Repondez a celles que vous connaissez ou posez la votre.
Poser une nouvelle question sur cet appareil
Téléchargez la notice de votre Aspirateur au format PDF gratuitement ! Retrouvez votre notice D775 C 110V - LUX et reprennez votre appareil électronique en main. Sur cette page sont publiés tous les documents nécessaires à l'utilisation de votre appareil D775 C 110V de la marque LUX.
MODE D'EMPLOI D775 C 110V LUX

| 1. Stickpropp Svenska ...... 6 2. Sladdvinda 3. Start/Stopp 4. Utag für utblåsning eller renblåsning av slangen 5. Filtergaller 6. Mikrofilter 7. Dammindikator 8. Handtag 9. Lock till dammbehällare 10. Locköppnare 11. Eluttag für motordrivet mattmunstycke 12. Slanganslutting 13. Dataskylt | 1. Verkkopistoke Suomeksi ...... 8 2. Johdon kelauspainike 3. Käynnistys/katkaisupainike 4. Puhallusaukko letkun puhtaaksipu hallusta tms. käytöä varten 5. Suodattimen ritiälä 6. Poistoilman suodatin 7. Polymäärän osoitin 8. Nostokahva 9. Polysäliön kansi 10. Kannen avauspainike 11. Sähköliitäntä moottorikäytöistä mattosuulaketta varten 12. Letkuliitäntä 13. Arvokilpi |
| 1. Stopsel Norsk ...... 9 2. Kabelvinne 3. Start/stopp 4. Uttak für utblåsing eller renblåsning av slangen 5. Filtergitter 6. Mikrofilter 7. Stovindikator 8. Händtak 9. Lokk til stovbeholder 10. Lokkåpner 11. El-uttak for motordrevet teppe munnstykke 12. Slangetilkopling 13. Dataskilt | 1. Mains plug English ...... 10 2. Flex winder 3. On/off switch 4. Outlet for exhaust air or blowing hose clear 5. Diffuser filter grille 6. Microfilter 7. Dust indicator 8. Handle 9. Dustbag cover 10. Cover catch 11. Electric socket for power carpet nozzle 12. Hose socket 13. Data plate |
1a
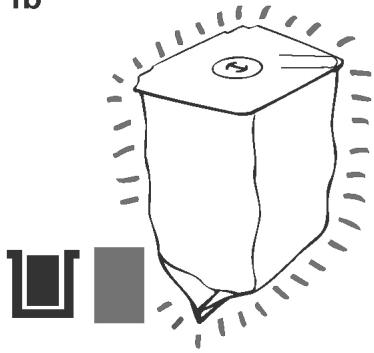
1b
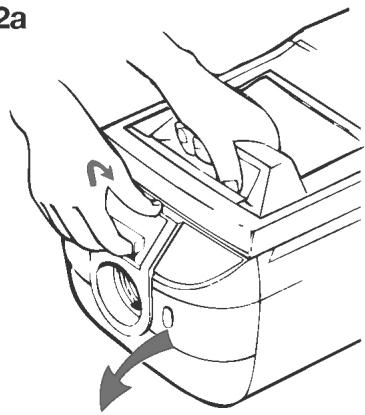
2a
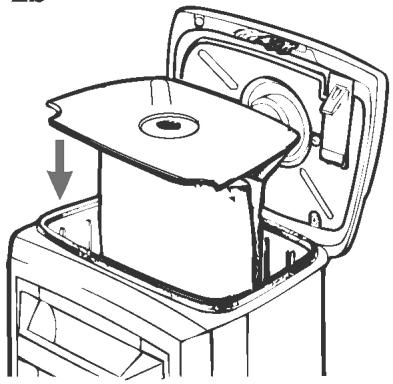
2b
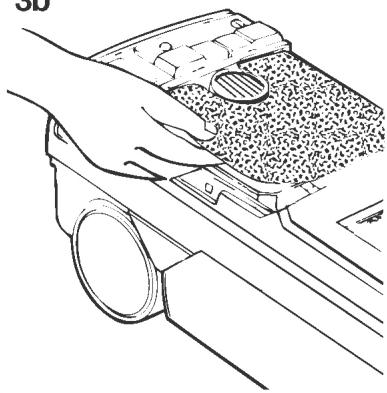
3a
3b
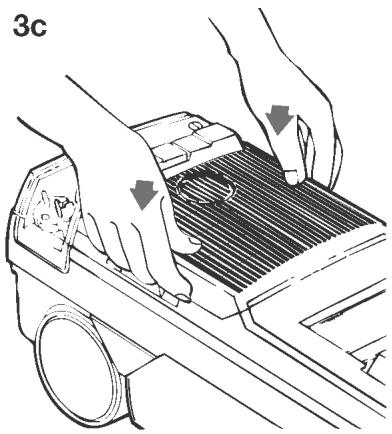
3c
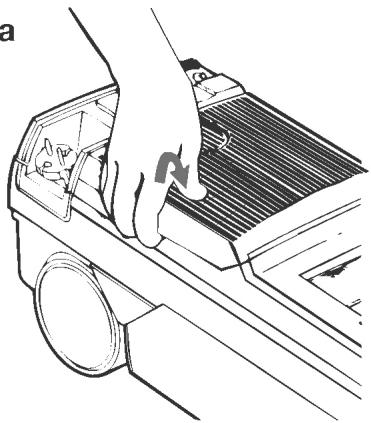
4a
5a
5b
6
7a

7b
BRUKSANVISNING
STØVSUGER D 775
1 Stovindikator
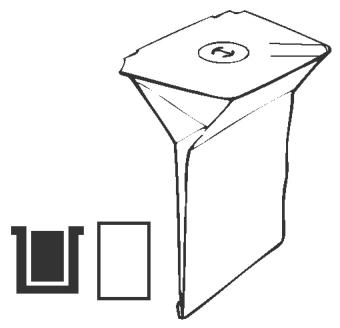
Støvsugeren kjenner selv avningar sugeeffecteken blir danglig på grunn av full ellergjenttet stovbeholder. Nar stovindikatoren lyser bør stovbeholderen byttes.
OBS! Støvbeholderens porer kan raskt tettes igjen av all slags slipestøv. Sugeeffekten minsker da for beholderen er full. Dette kan hindres hvis man forst suger inn litt lns bomull. Da fanges det fine slipestøvet OPP og porene tettes igjen langsommere.
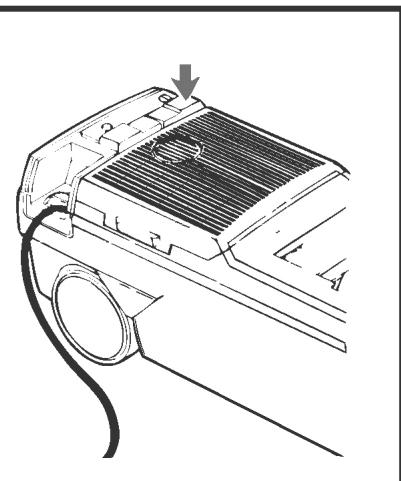
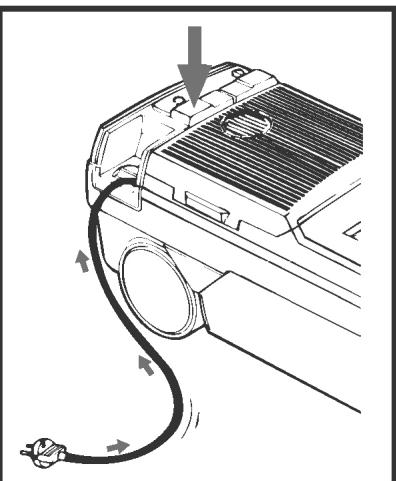
2 Bytte av støvbeholder
OBS! Lokket kan/DDs uten stovbeholder.
Bruk bare originalbeholdere.
Poser av dareligere kvalitet kan gå i stykker eller slippe gjennom stov som kan forårsake skader på støvsugeren.
3 Mikrofilter
Utblåsingsluften filtreres gjennom et mikrofilter med hoy filtreringsevne. For Å bibeholde effektiviteten bør dette byttes cirka 2 ganger per År. Bruk bare originalmikrofilter for Å oppnå riktig filtreringseffekt.
Bytte av mikrofilter
- Loft av gitteret.
-Ta ut det的游戏 mikrofilteret. - Sett inn nytt mikrofilter og snepp fast gitteret.
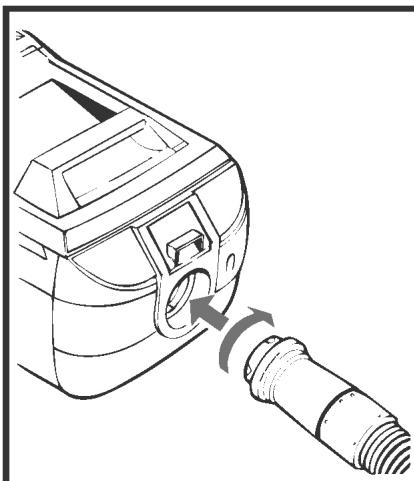
4a Utblåsingsfunksjön
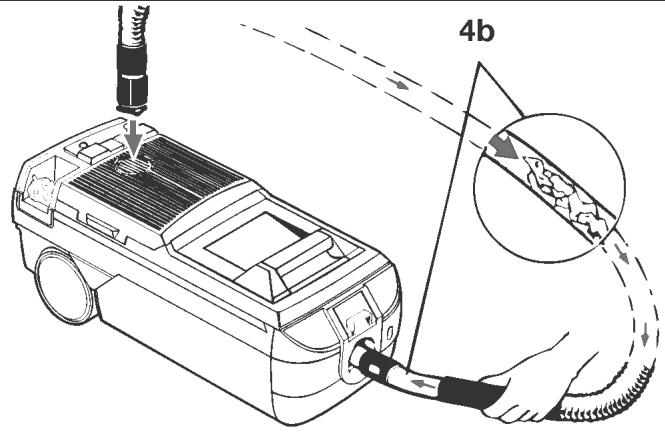
4b Renblåsing av slangen
Hvis noe har satt seg fast i slangen kan\ denne blaes ren som vist i figur.
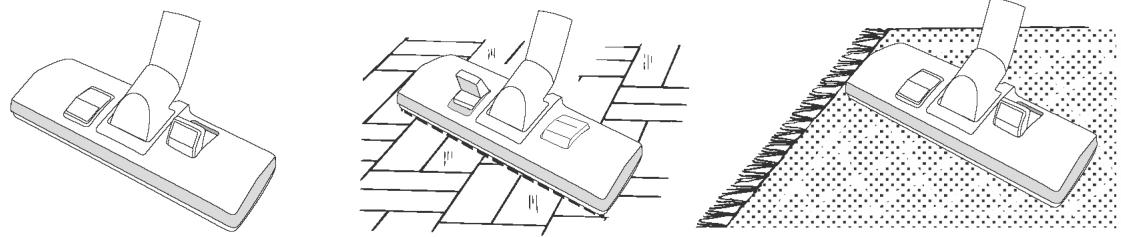
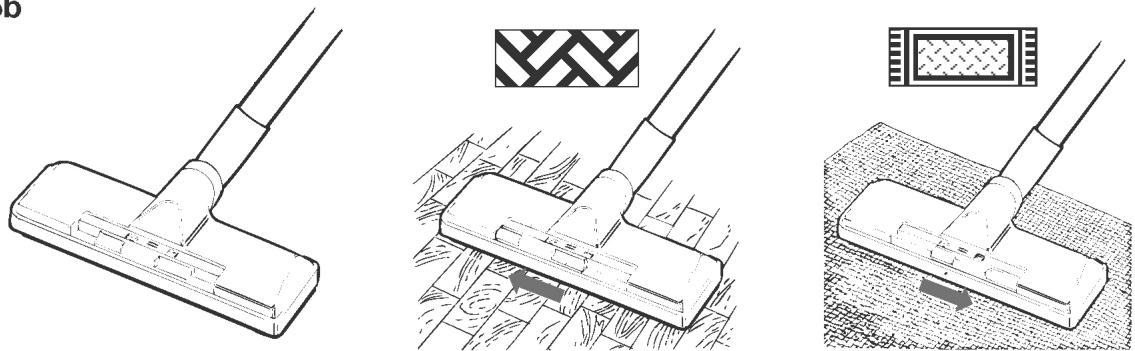
5a Golvmunnstykke, i visse land
Gulvmunnstykket kan stilles om for harde gult eller tepper ved a trå ned en pedal pà munnstykkets overside.
5b Golvmunnstykke, i visse land
Ved normal støvsuging pa tepper og golv.
Stilling:
AUTO
MATIC
Bare for golvstovsuging.
Stilling:

Bare for teppestovsuging.
Stilling:
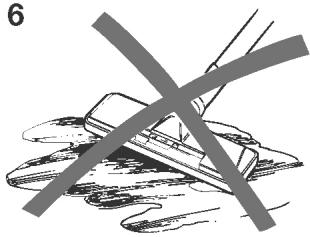
6 Støvsug aldri i våte/fuktige rom
All fuktigkeit på unngås da dette medfører at motoren blir ødelagt. Motorgarantien gjelder ikke ved fukt/vannskader.
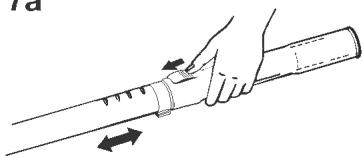
7a Teleskoprør, i visse land
Teleskoprøret er regulerbart. Tilpass lengden på røret, sik at det passer din arbeidsmåte.
7b Parkering, i visse land
Støvsugeren skal oppbevares tørt i rom-temperatur. Slange og rør kan monteres som vist på bildet.
OBS!
For a unngå personskade og forbindre at maskinen blir ødelagt, skal en skadet ledning skiftes av produsenten uller av et serviceverksted som er godkjent av denen.
C Oppfyller EUs direktiver for CE-merking.
Sikkerhetsgodkjent i h.h.t. IEC 335-1 og 335-2-2.
INSTRUCTIONS FOR USE
VACUUM CLEANER D 775
1 Dust indicator
The vacuum cleaner itself senses when cleaning efficiency deteriorates due to a full or clogged dust bag. When the dust indicator lights up it is time to change the dust bag.
NOTE: All kinds of grinding dust will quickly clog the pores of the dust bag and suction power will then fall off before the dust bag is full. This can be prevented by first sucking in a little loose cotton- wool to act as a filter and absorb the fine grinding dust so that it will take longer to clog the dust bag pores.
2 Changing the dust bag
NOTE: The cover cannot be closed properly without a dust bag.
Use only genuine dust bags!
Dust bags of poorer quality are apt to burst and may cause damage to the vacuum cleaner.
3 Microfilter
The exhaust air is filtered through a high-efficiency microfilter. To retain filtering efficiency it should be changed about twice a year. Use only genuine microfilters to be sure of correct filtering action.
Changing the microfilter
- Lift up the grille.
- Remove the microfilter.
- Fit a new microfilter and snap the grille back in place.
4a Exhaust outlet
4b Blowing the hose clear
If anything fastens inside the hose and causes an obstruction it can be blown clear as shown in the illustration.
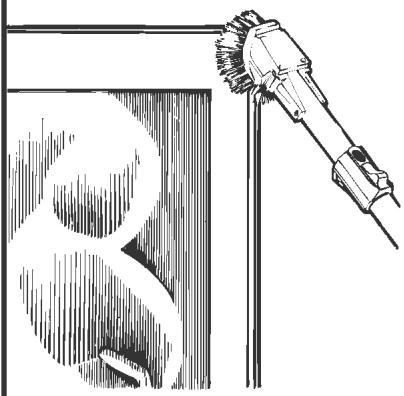
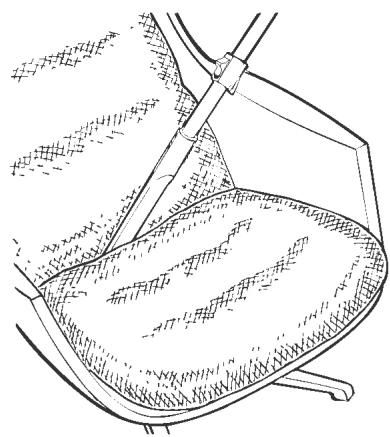
5a Floor nozzle, certain countries
The floor nozzle can be adapted to hard floors or carpets with the aid of a pedal on its top.
5b Floor nozzle, certain countries
For ordinary cleaning on carpets and smooth floor surfaces.
Position:
AUTOMATIC
For cleaning smooth floors only.
Position:

For cleaning carpets only.
Position:

6 Do not use the vacuum cleaner in wet areas
7a Telescopic extension tube, certain countries
The telescopic extension tube is adjustable in length. Adapt it to suit your particular method of vacuuming.
7b Parking position, certain countries
Always store your vacuum cleaner in a dry, room temperatured place. The tube and hose can be arranged as illustrated.
Important
To avoid injury and prevent damage to the machine, a defective lead must only be replaced by the manufacturer or a service workshop approved by the manufacturer.
C Complies with EU directives for CE marking.
Safety approved according to IEC 335-1 and 335-2-2.