
HB90 - Horloge digitale IROX - Notice d'utilisation et mode d'emploi gratuit
Retrouvez gratuitement la notice de l'appareil HB90 IROX au format PDF.

| Type de produit | Horloge digitale radio-pilotée |
| Marque | IROX |
| Modèle | HB90 |
| Technologie de réception | DCF77 (signal radio allemand) |
| Type d'affichage | LCD grand écran |
| Affichage de l'heure | Heures, minutes et secondes (format 12 ou 24h) |
| Affichage de la date | Mois, jour et jour de la semaine |
| Langues des jours de la semaine | Anglais, allemand, italien, français, espagnol |
| Alarme 1 | Quotidienne avec snooze réglable (1 à 59 minutes) |
| Alarme 2 | Quotidienne avec snooze réglable (1 à 59 minutes) |
| Fonction snooze | Durée programmable de 1 à 59 minutes (préréglage 4 minutes) |
| Réglage manuel de l'heure | Oui, via le bouton MODE |
| Affichage heure étrangère | Décalage horaire de -9h à +9h |
| Format d'affichage | 12h/24h sélectionnable |
| Rétroéclairage | Oui, activation par bouton SNOOZE/LIGHT (3 secondes) |
| Indicateur de pile faible | Oui |
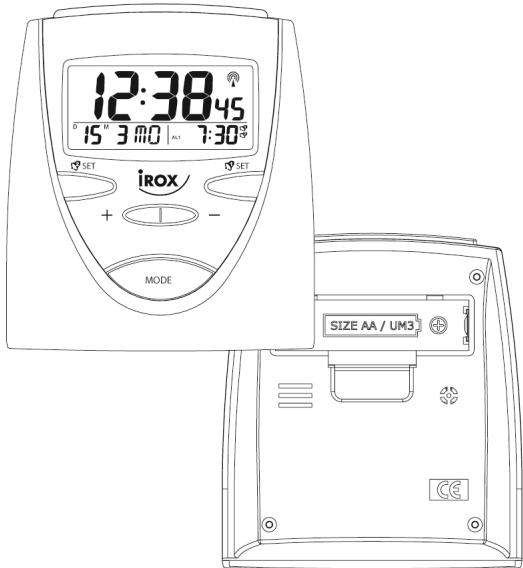
| Alimentation | 1 pile 1,5V (type AA/LR6, non fournie) |
| Entretien et nettoyage | Essuyer avec un chiffon doux et sec. Ne pas utiliser de solvants. |
| Sécurité | Ne pas ouvrir le boîtier. Tenir hors de portée des enfants. |
| Réparabilité | Aucune pièce réparable par l'utilisateur. Contacter le SAV en cas de dysfonctionnement. |
FOIRE AUX QUESTIONS - HB90 IROX
Questions des utilisateurs sur HB90 IROX
0 question sur cet appareil. Repondez a celles que vous connaissez ou posez la votre.
Poser une nouvelle question sur cet appareil
Téléchargez la notice de votre Horloge digitale au format PDF gratuitement ! Retrouvez votre notice HB90 - IROX et reprennez votre appareil électronique en main. Sur cette page sont publiés tous les documents nécessaires à l'utilisation de votre appareil HB90 de la marque IROX.
MODE D'EMPLOI HB90 IROX
Radio Controlled Clock
with Foreign Time Setting, Summer / Winter Time Display, Dual Alarm, Snooze and Light.
Instruction Manual (HB90)
FEATURES:
- Controlled by Radio Signal (German DCF77)
- Large LCD display
- Displays Hour, Minute, Second; Month, Date, Day of Week, Alarm Time
- Foreign Time Setting (-9 Hour to +9 Hour)
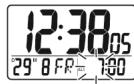
- Summer Time Indicator
- Dual Alarm with programmable snooze period
- Independent Alarm Time Setting - Crescendo Daily Alarm1 & Single Alarm 2
- 12 Hour or 24 Hour Display Format Selectable
- Weekday Indication in 5 Languages
- battery Low Indicator
- Backlight function
- Single Battery (1.5V) Operation
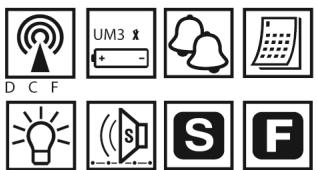
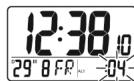
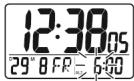
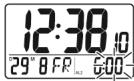
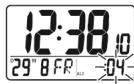
| INDICATOR | STANDING FOR | INDICATOR | STANDING FOR |
| # | RADIO SIGNAL | 2' | REPEAT ALARM INDICATION |
| D | DATE | M | MONTH |
| ■ | FOREIGN TIME INDICATION | 8 | SUMMER TIME INDICATION |
| PM | PM (12 HR DISPLAY ONLY) | 9 | ALARM 1 |
| AM | AM (12 HR DISPLAY ONLY) | 9 | ALARM 2 |
| ↓ | RADIO SIGNAL WEAKLY |
SETTING THE TIME
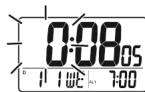
- Once the battery is installed properly, all the displays on the face of the clock will light up briefly. The time & date will be: 1^D1^M WE 0:00 and the alarm1 time will be 7:00.
-
Your radio-controlled clock will begin to seek out the DCF time signal automatically. This takes typically between 3-5 minutes in good conditions. If after 5 minutes the DCF time has not been received, use the MODE key to set the time manually. The clock will then automatically attempt to receive the DCF time each hour every day. When this is successful, the received time will override the manually set time
-
Press the MODE button and the time is set. If no key is pressed for 30 seconds, the clock will revert to normal time display.
TO SET THE LANGUAGE OF WEEKDAYS
- In normal mode, press and hold the button for 3 seconds.
- The language of the current weekdays will be displayed in the LCD: e.g. English (EN), German(GE), Italian(IT), French(FR), Spanish(SP).
- Press the button for 1 second to adjust to the correct language of weekdays.
TO SET THE FOREIGN TIME
- In normal mode, press and hold the + button for 3 seconds. The clock will switch to foreign time with the "F" icon turn on.
- Press and hold the button for 3 seconds in foreign time will switch to normal time with the "F" icon turn off.
- In foreign time, press and hold the MODE button for 3 seconds to set the foreign time with the hour digit flashes.
- Press the - button or the + button to adjust to the correct hour for the time zone.
- Press the MODE button and the foreign time is set.
- If no key is pressed for 30 seconds, the clock will revert to foreign time display.
TO SET THE DAILY ALARM 1
Press and hold the SET button for 3 seconds:
- The alarm1 hour digit will flash, then press the + button or the - button to adjust to the desired hour.
- Press the set button, the alarm1 minute digit will flash, then press the + button or the - button to adjust to the desired minute.
- Press the SET button to show the current snooze period with the minute field flashes.
- Press the + button or the - button to adjust to the desired snooze period from 1 minute to 59 minutes.
- Press the set button and the alarm1 time is set and enabled.
- If no key is pressed for 30 seconds, the clock will resume the alarm I display.
TO SET THE ALARM 2
- Press and hold the set button for 3 seconds:
- The alarm2 hour digit will flash, then press the +button or the - button to adjust to the desired hour.
- Press the SET button, the alarm2 minute digit will flash, then press the + button or the button to adjust to the desired minute.
- Press the set button to show the current snooze period with the minute field flashes.
- Press the + button or the - button to adjust to the desire snooze period from 1 minute to 59 minutes.
- Press the set button and the alarm2 time is set and enabled.
- If no key is pressed for 30 seconds, the clock will resume the alarm 2 display.
USING THE ALARM AND SNOOZE FOR DAILY ALARM 1 or ALARM 2
- Press the SET / SET button to turn the alarm1 on, or the alarm1 off/ the alarm 2 on, or the alarm2 off.
- When the current time reaches the alarm time that is enabled, the corresponding alarm is activated.
- Press the SET/SET button when the alarm is activated will stop the alarm for 24 hours.
- When the alarm is activated, press the SNOOZE/LIGHT button and the alarm stops but sounds again after the snooze period (4 minutes snooze period is pre-programmed).
- The repeat alarm indicator will flash.
- The alarm will stop after 4 minutes if the SET / SET button or SNOOZE/LIGHT button is not pressed.
FUNCTION KEYS
Your radio-controlled clock has 6 easy to use function keys that control operation:
MODE
- To view alarm1 time or alarm2 time
To set the time manually
To set the foreign time manually.

To increase the hour, minute, year, month, date during time setting
- To switch between 12 hour display format and 24 hour display format.
- To switch between the local time and foreign time

To decrease the hour, minute, year, month, date, during time setting
To select the language of day of week.

SET
To set the daily alarm1
To turn on or turn off the daily alarm1

SET
To set the daily alarm2
To turn on or turn off the daily alarm2
SNOOZE/LIGHT
- To turn on the backlight
- To switch to snooze mode when the alarm is activated
TO SET THE TIME AND DATE MANUALLY
Press and hold the MODE button for 3 seconds:
-
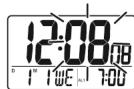
The hour digit will flash, then press the + button or the - button to adjust to the correct hour.
-
Press the MODE button:
The minute digit will flash, then press the + button or the - button to adjust to the correct minute.
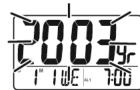
- Press the MODE button:
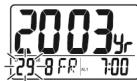
The year digit will flash, then press the + button or the - button to adjust to the correct year.
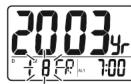
- Press the MODE button:
The month digit will flash, then press the button or the button to adjust to the correct month.
- Press the MODE button:
The date digit will flash, then press the + button or the - button to adjust to the correct date.
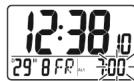
RECEIVING THE RADIO CONTROL SIGNAL
The radio-controlled clock will automatically receive the radio signal every hour. It will take 3-5 minutes to receive the radio signal. If the DCF signal is received, the DCF tower will be visible on the display, otherwise it will not.
BACKLIGHT
Press the SNOOZE/LIGHT button to light up the clock for 3 seconds.
LOW BATTERY LEVEL DETECTION
Should the battery capacity drop to a level that is not sufficient to operate the clock, the low battery indicator will light up. The battery should be replaced as soon as possible.

Attention! Please dispose of used batteries in an ecologically safe manner.