Rolleiflex 2 1/4 x 2 1/4 - Appareil photo ROLLEI - Notice d'utilisation et mode d'emploi gratuit
Retrouvez gratuitement la notice de l'appareil Rolleiflex 2 1/4 x 2 1/4 ROLLEI au format PDF.


| Type de produit | Appareil photo reflex bi-objectif (TLR) moyen format |
| Marque | Rollei |
| Modèle | Rolleiflex 2 1/4 x 2 1/4 |
| Format de film | 120 (6×6 cm, 12 vues) |
| Objectif de prise de vue | Carl Zeiss Tessar 75 mm f/3.5 (selon version) |
| Objectif de visée | Heidoskop 75 mm f/2.8 (selon version) |
| Obturateur | Synchro-Compur (vitesses de 1/500 à 1 s + pose B) |
| Mise au point | Manuelle par molette et couronne de mise au point |
| Viseur | Viseur reflex à capuchon rabattable avec loupe |
| Alimentation | Mécanique (pas de piles nécessaires) |
| Dimensions (approx.) | 100 × 100 × 150 mm (L × l × h) |
| Poids (approx.) | 1 200 g |
| Matériau du boîtier | Métal (alliage léger) avec revêtement similicuir |
| Film compatible | Film 120 (type 120) |
| Compteur de vues | Automatique (déclenché par l'avancement du film) |
| Prise de vue | Déclencheur à levier (filet pour déclencheur souple) |
| Flash | Prise synchro flash (prise PC) |
| Fonctions principales | Photographie moyen format, mise au point précise, contrôle d'exposition manuel, double exposition possible |
| Entretien et nettoyage | Nettoyer les objectifs avec un chiffon doux non pelucheux ; stocker dans un endroit sec et à l'abri de la poussière |
| Sécurité | Éviter les chocs et l'humidité ; ne pas exposer à la lumière directe du soleil prolongée |
| Pièces détachées et réparabilité | Pièces disponibles sur le marché de l'occasion ; réparation par technicien spécialisé |
| Informations générales | Appareil emblématique des années 1950-1960, réputé pour sa qualité optique et sa robustesse |
FOIRE AUX QUESTIONS - Rolleiflex 2 1/4 x 2 1/4 ROLLEI
Questions des utilisateurs sur Rolleiflex 2 1/4 x 2 1/4 ROLLEI
0 question sur cet appareil. Repondez a celles que vous connaissez ou posez la votre.
Poser une nouvelle question sur cet appareil
Téléchargez la notice de votre Appareil photo au format PDF gratuitement ! Retrouvez votre notice Rolleiflex 2 1/4 x 2 1/4 - ROLLEI et reprennez votre appareil électronique en main. Sur cette page sont publiés tous les documents nécessaires à l'utilisation de votre appareil Rolleiflex 2 1/4 x 2 1/4 de la marque ROLLEI.
MODE D'EMPLOI Rolleiflex 2 1/4 x 2 1/4 ROLLEI
@Rolleiflex 2 1 / 4 ×2 1 / 4
2 1 4 ×2 1 4
Working Instructions
No longer a mere camera, it is a Photo-automat!
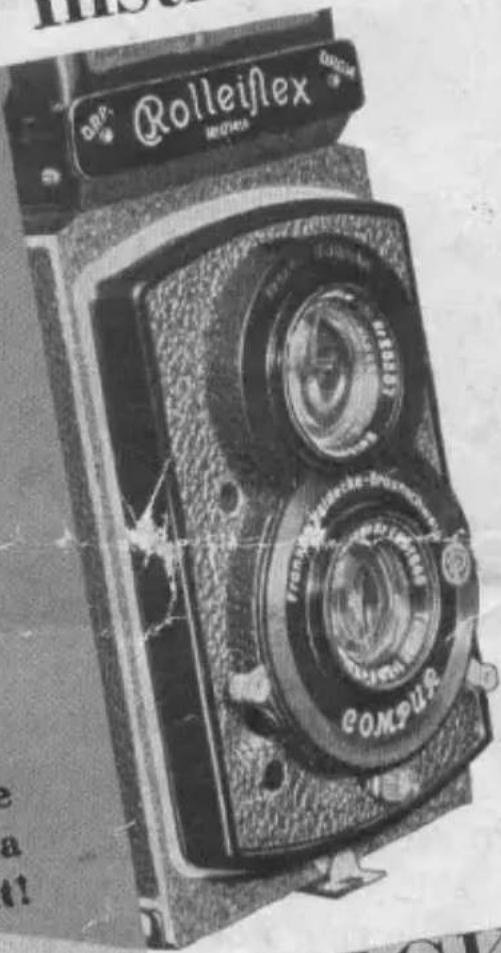
Photo-auto FRANKE & HEIDECKE BRUNSWICK
For Plate-Adapter, Cine Film Attachment, Stereo Fitment, and Panorama Head, please ask for separate Instructions.
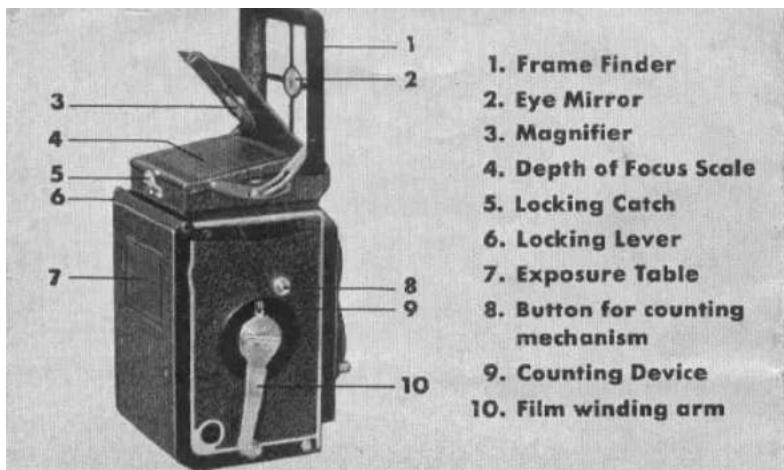
FOCUSING HOOD
To open: Release the catch 5; the focusing-hood then springs up automatically. At the same time the magnifier 3 springs into position for use, and the focusing-screen is open to view.
Fine focusing: Bring your eye close to the magnifier, turn the focusing-knob 17 and watch the focusing-screen. It is not necessary to displace the magnifier in order to observe the picture, but if it disturbs you in any way, simply fold it down.
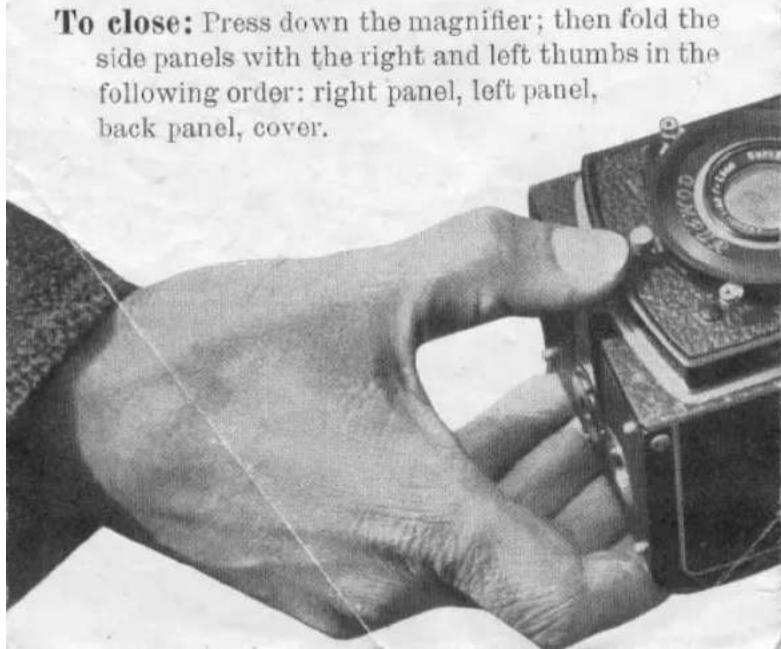
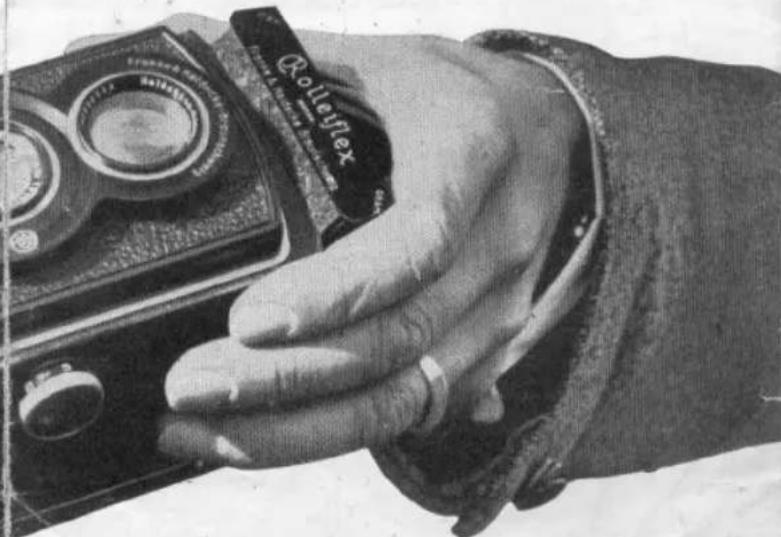
To close: Press down the magnifier; then fold the side panels with the right and left thumbs in the following order: right panel, left panel, back panel, cover.
Observation at eye-level: The focusing-hood cover 1 serves as a frame view-finder. Press with your index finger on one of the leather-covered spaces and release the catch 5; the frame finder then springs upright. If you get the reflection of your eye in the small concave mirror 2, the diopter will give you the exact outline of the picture. The pupil of your eye must register exactly with the aperture in the mirror.
BACK PANEL
To open: Pull the bolt 14 downwards with the thumb. Then grip the back panel by the two corner nipples 13 and lift slightly. The back panel can now be opened fully.
To close: Press the back panel firmly against the camera body with the thumbs and secure the bolt 14.
To remove the back: The back panel is attached in the manner of a hinge. To allow the Rolleiflex to be used with an enlarging lantern, the panel can be taken off by pressing lightly on the spring flange at the left, after having pulled upward the two locking-levers 6. First open the back to the full extent.
Opening
the back panel
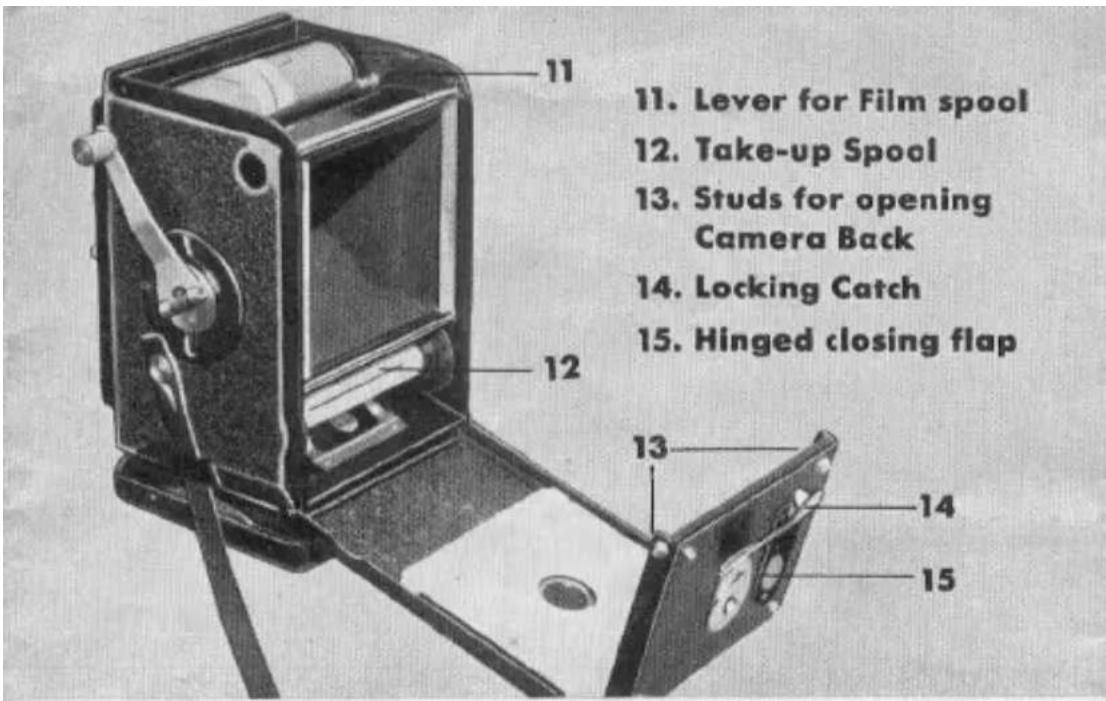
Tripod exposures: At the side of the bolt, the back panel has a bush for use with a tripod.
FILM CHANGING
Loading: Take the film out of its packing. Open the back panel, press the lever 11 firmly down and lay the spool in the groove. The spool clips fast by itself. Tear off the gummed seal. Now draw the pointed end of the cover-paper upwards over the picture window and push it as far as possible into the broad slit of the take-up spool. If necessary adjust the spool by turning the transport handle.
Changing spools: The 6 × 6 Rolleiflex uses 31/4 × 21/4 B. II, 8-exposure Film. It gives 12 pictures 21/4 × 21/4 . When inserting a new take-up spool, make sure that the boring with a cross-cut comes on the right.
Transport: Bring the transport handle 10 into action by swinging it outwards from the resting position. A few short cranking movements will suffice to tighten the cover-paper on the spool. Now make sure that the paper band is running straight: if it gets crooked, it will cause trouble!
Close the back panel. Continue the cranking movement as before, cautiously and until the figure 1 appears in the film-window in the back panel.
The film-window has now served its purpose. It is closed by means of the closing slide 15. Turn the transport handle backwards to the top check and press the button 8. The counter 9 springs to No. 1 and the camera is ready for the first exposure.
When the exposure is made, turn the handle downwards to the bottom check. The film has then travelled on the length of one picture, the counter shows No.2 and the Rolleiflex is ready

Scale of speeds
for the second picture. The film must be wound on in this manner after each exposure until the last has been made. The Red Dot behind No. 12 shows that the 12th exposure has already been made. When not in use, the transport handle is of course turned over into the resting position. In fact it is advisable to turn-it over after each exposure, so as to avoid the film being moved accidentally.
Unloading: After making the last exposure, set the counter again at No.1 and crank the transport handle until the whole film is completely wound up. Open the back panel. Pull out the knob 16, lift out the film spool and seal it at once.
Never change films in bright sunlight! Place the exposed films in the original light-tight packing.
Printed in Germany
5000, 436, Kr.
THE SHUTTER
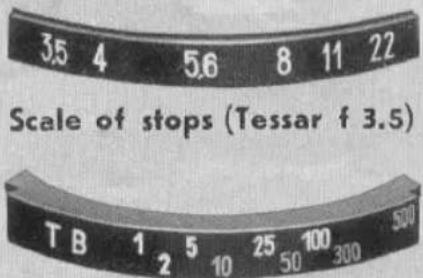
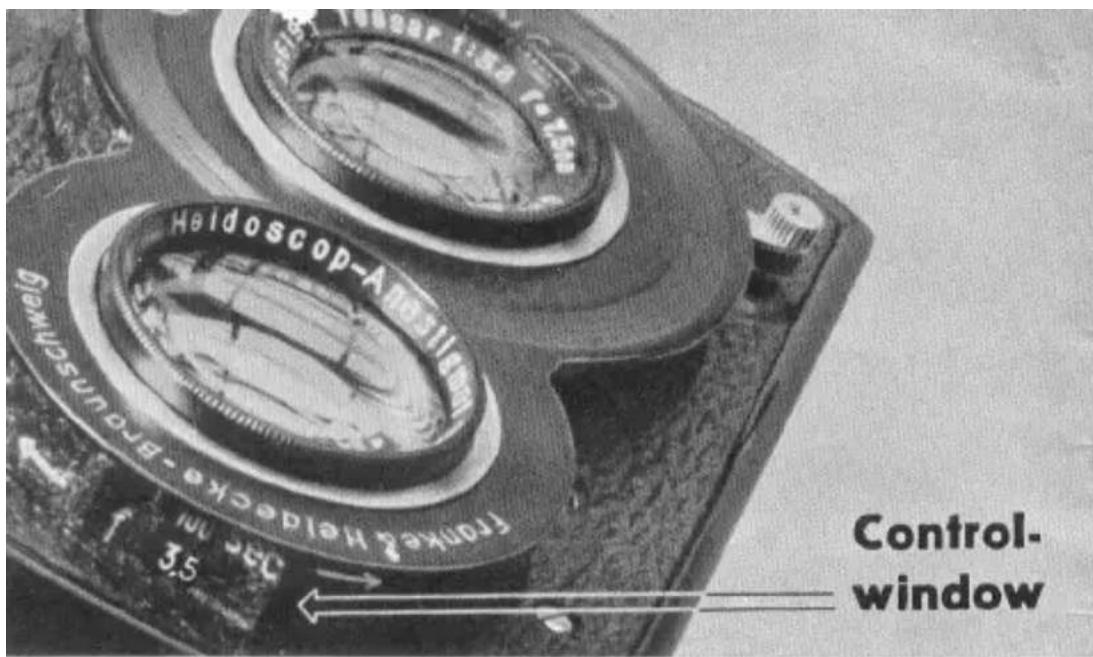
The manipulation of the Rolleiflex shutter is very simple and is easily carried out with the camera in working position. The lever 2 on the right hand operates the speeds, the lever 1 on the left the stops, and the lever 3 at the bottom the shutter. If the letters T or B are showing in the peep-window, by no means press the operating lever 3 to the right. The numbers 10, 50 and 300 are coloured red, so that the speeds most in use may be instantly recognised.
Long time exposures: If the letter T is showing in the small window and you press the operating lever of the shutter to the left, the shutter will open. It will not close until you push the lever to the left a second time. These speeds are used for long time exposures from a tripod.
Short time exposures: When the letter B shows at the window the shutter also opens when the lever is pressed to the left, but it closes again immediately the pressure is removed. This setting is used for exposures of from 2 to 5 seconds duration and these exposures should also be made from a tripod.
Instantaneous exposures: The numbers 1 to 500 indicate the fractions of a second, i.e. 1/1 to 1/500 th second. Set one of these numbers in the window
and lightly press the operating lever to the right. Now, when you release it, an exposure of the length selected is given automatically. Exposures down to 1/25 th second may confidently be made from the hand, but longer exposures are much better made with the use of a tripod, to avoid distortion. It is possible to set at speeds in between those indicated in the scale, but not between 1/10 and 1/25 nor between 1/300 and 1/500 . Further, in setting at 1/500 th second a certain amount of resistance must be overcome, and the

The Rolleiflex 3-point control

Stops

Speeds

Shutter
-
Film Knob
-
Focussing Knob
The Rolleiflex in use at eye-level

shutter must be set before the spring is tensioned. When you set the lever 3, be careful that you move it until it comes to the stop, to avoid a disturbance.
Exposure table: A useful table with approximate data will be found on the back panel of the Rolleiflex.
The calculations are made on the basis of a roll-film with a speed of 18/100 DIN in sunny weather, at midday in Summer. In Winter and in poorer lighting conditions the exposures must be proportionately lengthened. This can equally well be done by the table, by ascertaining the relative values, i.e., larger stop and lower speed.
Depth-of-focus table: (No. 4.) The top row of figures in table 4 shows the stops. The two outer columns, right and left, give the distance figures which must be adjusted by the focusing-knob. Where these two rows of figures cross will be found the figures indicating the distances between which all objects will be in sharp focus. The sign ∞ indicates infinity.
Self-portraiture: The Rolleiflex-Compur is supplied only without a built-in self-timer. In its place is given the highest speed of 1/500 th second, and for self-portraiture any automatic release can be employed. A cable release is supplied with every camera.
Distance scale: In focusing from ∞ to 1 meter the focusing-knob makes 2 complete turns, so that great accuracy in focus is assured. The engraved meter scale, however, only covers from ∞ to 1.70 m. on the first revolution. The desired distance is in focus when the appropriate figure is set at the white dot.
The meter scale itself is not of very great importance, as the really needle-sharp focusing can only be obtained with the help of the focusing-screen. This is particularly the case for distances less than 1.70m., and when using the Proxar lenses.
Proxars: These auxiliary lenses allow objects to be photographed at a distance of 20 inches and 13 inches respectively. For the Rolleiflex 2 accurately paired Proxars are necessary. Set D1 is for focusing from 40 to 20 inches and Set D2 from 20 to 13 inches. No alteration in the length of exposure or special stopping down is necessary. For use the Proxars are simply clipped over the front of the camera lenses. If they do not at first fit, this can be easily remedied by bending the clips.
Plate adapter: This enables plates to be used, which can be developed separately as required. The special slides 21/4 × 21/4 are loaded with plates 31/2 × 21/2 . The picture size remains the same as with the rollfilm. The 15/s × 15/s slides are loaded with plates 21/4 × 15/s and the picture is 15/s × 15/s .
Carrying-strap: The Rolleiflex is provided with a neat black leather strap, so that the camera can be carried at breast height, ready for immediate use. The two side clips allow the strap to be so adjusted that when hung around the neck, the camera is always perfectly upright.
Accessories: Please ask for special litterature on the cinefilm attachment, filters etc.
Marque : ROLLEI
Modèle : Rolleiflex 2 1/4 x 2 1/4
Catégorie : Appareil photo