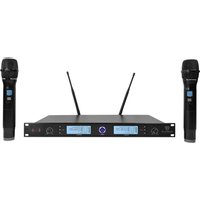
RWM3300U - Microphone Rockville - Notice d'utilisation et mode d'emploi gratuit
Retrouvez gratuitement la notice de l'appareil RWM3300U Rockville au format PDF.


| Type de produit | Microphone sans fil UHF |
| Marque | Rockville |
| Modèle | RWM3300U |
| Gamme de fréquences | UHF 500-900 MHz |
| Portée maximale | Environ 50 mètres en champ libre |
| Alimentation de l'émetteur | 2 piles AA (non incluses) |
| Alimentation du récepteur | Adaptateur secteur 12V DC (inclus) ou piles (non incluses) |
| Autonomie des piles | Environ 8 heures d'utilisation continue |
| Type de microphone | Dynamique cardioïde |
| Connectique du récepteur | Sortie audio XLR et jack 6,35 mm |
| Nombre de canaux | 2 canaux synchronisables |
| Dimensions du récepteur | 200 x 120 x 40 mm |
| Poids du récepteur | 500 g |
| Dimensions de l'émetteur | 250 x 50 mm (longueur x diamètre) |
| Poids de l'émetteur | 300 g (avec piles) |
| Entretien et nettoyage | Essuyer avec un chiffon doux et sec. Ne pas utiliser de solvants. |
| Sécurité | Ne pas exposer à l'humidité ou à des températures extrêmes. Utiliser des piles de même type. |
| Pièces détachées et réparabilité | Contacter le service client Rockville pour les pièces et réparations. |
| Informations générales | Conçu pour des applications vocales (conférences, karaoké, présentations). Livré avec un récepteur, un émetteur main, un adaptateur secteur et un câble audio. |
FOIRE AUX QUESTIONS - RWM3300U Rockville
Questions des utilisateurs sur RWM3300U Rockville
0 question sur cet appareil. Repondez a celles que vous connaissez ou posez la votre.
Poser une nouvelle question sur cet appareil
Téléchargez la notice de votre Microphone au format PDF gratuitement ! Retrouvez votre notice RWM3300U - Rockville et reprennez votre appareil électronique en main. Sur cette page sont publiés tous les documents nécessaires à l'utilisation de votre appareil RWM3300U de la marque Rockville.
MODE D'EMPLOI RWM3300U Rockville
ROCKVILLE
RWM-U2
DUAL UHF HANDHELD RECHARGEABLE
WIRELESS MICROPHONE SYSTEM
OWNER'S MANUAL
WHO READS MANUALS?
Instead, go to vimeo.com/494481584 or scan the QR code and watch a short video, which shows you how to set this item up and how to use it.
If you prefer written instructions please read ahead!
With Rockville we offer many options.

Missing items? If you ordered a bundle that includes more than one product and you are missing part of your bundle then it just means your order shipped from two different warehouses. You will receive the remaining items very soon. If you have any concerns or inquiries, feel free to call our customer support center at 646-758-0144, Monday through Thursday, 9am to 10pm EST, and Fridays, 9am to 3pm EST.
ROCKVILLE
Thank you for purchasing this Rockville RWM-U2 Wireless Microphone System. Please read this owner's manual carefully for proper use of your wireless microphone system. Should you need assistance, please call our technical help line at 1-646-758-0144, Monday through Thursday, 9am to 10pm EST., and Fridays, 9am to 3pm EST.
INCLUDES
- Two rechargeable microphones
• Full metal rack mount receiver with rack ears - 6ft 1/4'' to 1/4'' cable (connects mic receiver to mixer or speaker)
• AC power adapter with a 5ft cord - Two 1200mA lithium batteries (14650 version)
- Two antennas
- Manual
- Warranty card
Table of Contents
Specs 1
Receiver (Front) 2
Receiver (Back) 2
Microphone 3
Charging.... 3
LCD Displays 4
Setup and Operation 4
Troubleshooting 5
Specs
Operating Range*: 250' - 350' (indoor), 165' - 200' (outdoor)
Channel: 20 x 2 channel selection
Frequency Range: 500MHz - 599MHz
Frequency Stability: ±0.005%
Modulation Mode: UHF
Frequency Response: 50Hz - 20KHz (±3 dB)
Dynamic Range: 96dB
S/N: 92dB
T.H.D: < 0.1%(1KHz)
Audio Output: Mix Out: XLR balanced + 1/4" unbalanced
Channel A Out: XLR balanced
Channel B Out: XLR balanced
Power Voltage: AC110V - 240V 50/60Hz
Operating Temperature: 14°F - 122°F
Mic Battery Operating Time: up to 10 hours
Mic Recharge Time: 4 hours
Includes: RWM-U2 transmitter with two hand held rechargeable microphones, two lithium batteries, 1/4 " to 1/4 " cable, power cable, two antennas, user manual, and warranty card
*Operating range is subject to environmental conditions. Results may vary.
Tip:
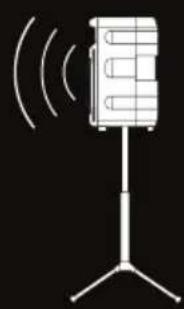
To minimize feedback avoid operating the microphones in close proximity of or in front of speakers.


Receiver (Front)
a. Antenna
b. Channel A LCD display
c. Channel A volume control knob
d. Channel B LCD display
e. Channel B volume control knob
f. Power on/off

Receiver (Back)
a. Antenna ports
b. DC 12V Power input
c. 1/4 " Mix out: outputs a mix of both channels
d. XLR Mix out: outputs a mix of both channels
e. Channel B Balanced XLR output
f. Channel A Balanced XLR output

Microphone
a. Microphone windscreen
b. LCD screen displays channel frequency and battery level
c. Power on/off button: Press and hold for 2 – 3 seconds to power on or off. While the microphone is on, press the button to mute or unmute the mic.
d. Frequency button: Press this button to switch the mic's frequency
e. Battery compartment

Charging
To charge the microphones, simply place them in the charging dock on top of the receiver (fig. a). Please ensure the microphone is properly seated in the charging dock (fig. b). Charge time is 4 hours.


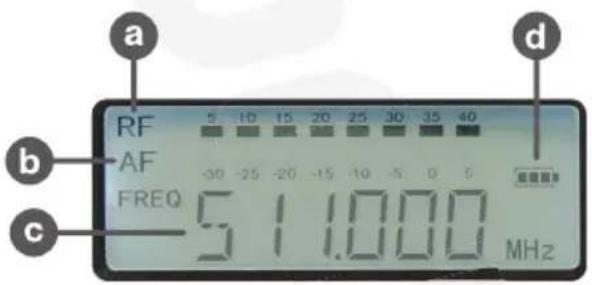
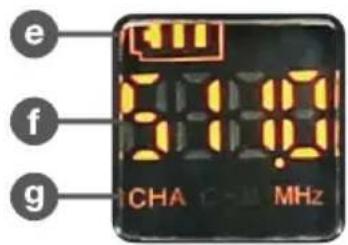
LCD Displays
a. Radio frequency (RF) strength
b. Audio frequency (AF) strength
c. Channel frequency
d. Battery status
e. Mic battery level indicator
f. Mic frequency
g. Mic channel
Setup and Operation
- Plug in the power supply and turn on the receiver.
- The receiver should be at least 3 feet off the ground for optimal transmission.
- Connect the antennas.
• The antennas should extend vertically. - Depending on your set-up, connect the appropriate outputs.
- Make sure the microphone battery is charged, is properly inserted, and the base is secure.
- Turn on the microphone. It should automatically connect to the receiver.
- If necessary, use the frequency button on the mic to change its frequency.
- Adjust channel volume as necessary.
| Problem | Solution |
| No sound or faint sound | ·Verify all sound system connections and adjust channel volume as needed.·Verify that the mic receiver is connected to the mixer/amplifier. |
| ·Verify your mics are turned on and not muted (see page 3, item c).·Check the mics frequency and adjust if necessary (see page 3).·Make sure the batteries are installed correctly.·Charge the microphones. | |
| ·Make sure AC adapter is securely connected to the unit and to the electrical outlet.·Make sure receiver is powered on. | |
| Audio artifacts or dropouts | ·Change receiver and mic to a different frequency.·Identify nearby sources of interference (cell phones, Wi-Fi access points, signal processor, etc...) and shutdown or remove source.·Charge the microphones (see page 3).·System must be set up within recommended range and receiver kept away from metallic surfaces.·Microphone must be used in line of sight from receiver for optimal sound. |
| Distortion | Reduce microphone channel volume. |
| Sound level variations when switching to different sources | Adjust microphone volume as necessary. |
| Transmitter information does not appear on the receiver LCD | Microphone is off. Please turn it on and charge if necessary (see page 3) |
FEDERAL COMMUNICATIONS COMMISSION COMPLIANCE INFORMATION
Responsible party name: Rockville
Address: 600 Bayview Ave, Entrance A, Inwood, NY 11096
Hereby declares that the product Rockville RWM-U2 UHF microphone kit complies with FCC rules as mentioned in the following paragraph:
This device complies with Part 15 of the FCC rules. Operation is subject to the following two conditions: (1) this device may not cause harmful interference, and (2) this device must accept any interference received, including interference that may cause undesired operation.
Note: This equipment has been tested and found to comply with the limits for a Class B digital device, pursuant to Part 15 of the FCC rules. These limits are designed to provide reasonable protection against harmful interference in a residential installation. This equipment generates, uses and can radiate radio frequency energy and, if not installed and used in accordance with the instructions, may cause harmful interference to radio communications. However, there is no guarantee that interference will not occur in a particular installation. If this equipment does cause harmful interference to radio or television reception, which can be determined by turning the equipment off and on, the user is encouraged to try to correct the interference by one or more of the following measures:
- Reorient or relocate the receiving antenna.
- Increase the separation between the equipment and receiver.
- Connect the equipment to an outlet on a circuit different from that to which the receiver is connected.
- Consult the dealer or an experienced radio/TV technician for help.
POCKINIL
Visit us at:
RockvilleAudio.com
Marque : Rockville
Modèle : RWM3300U
Catégorie : Microphone