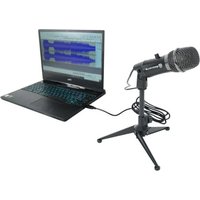
A-STREAM - Microphone Rockville - Notice d'utilisation et mode d'emploi gratuit
Retrouvez gratuitement la notice de l'appareil A-STREAM Rockville au format PDF.


| Type de produit | Microphone à condensateur USB |
| Marque | Rockville |
| Modèle | A-STREAM |
| Directivité | Cardioïde |
| Réponse en fréquence | 20 Hz - 20 kHz |
| Impédance | 32 ohms |
| Connectivité | USB-A (câble fourni) |
| Alimentation | 5V via port USB |
| Dimensions (avec pied) | 150 mm x 100 mm x 250 mm |
| Poids | 550 g |
| Fonctions principales | Bouton mute tactile, molette de gain, prise casque 3.5 mm |
| Compatibilité | Windows, macOS, Linux, PS4, PS5 |
| Entretien et nettoyage | Essuyer avec un chiffon doux et sec. Éviter les liquides. |
| Sécurité | Ne pas exposer à l'humidité ou à des températures extrêmes. |
| Pièces détachées et réparabilité | Câble USB détachable, support remplaçable. Pas de réparation par l'utilisateur. |
| Contenu de la boîte | Microphone, câble USB, support de bureau, manuel d'utilisation |
| Garantie | 2 ans |
FOIRE AUX QUESTIONS - A-STREAM Rockville
Questions des utilisateurs sur A-STREAM Rockville
0 question sur cet appareil. Repondez a celles que vous connaissez ou posez la votre.
Poser une nouvelle question sur cet appareil
Téléchargez la notice de votre Microphone au format PDF gratuitement ! Retrouvez votre notice A-STREAM - Rockville et reprennez votre appareil électronique en main. Sur cette page sont publiés tous les documents nécessaires à l'utilisation de votre appareil A-STREAM de la marque Rockville.
MODE D'EMPLOI A-STREAM Rockville
ROCKVILLE
A-STREAM
LIVE STREAMING USB MICROPHONE
OWNER'S MANUAL
WHO READS MANUALS?
Instead, go to vimeo.com/518544832 or scan the QR code and watch a short video, which shows you how to set this item up and how to use it.
If you prefer written instructions please read ahead!
With Rockville we offer many options.

Missing items? If you ordered a bundle that includes more than one product and you are missing part of your bundle then it just means your order shipped from two different warehouses. You will receive the remaining items very soon. If you have any concerns or inquiries, feel free to call our customer support center at 646-758-0144, Monday through Thursday, 9am to 10pm EST, and Fridays, 9am to 3pm EST.
Thank you for purchasing this Rockville A-STREAM live streaming USB microphone. Please read this owner's manual carefully for proper use of your A-STREAM. Should you need assistance, please call our technical help line at 1-646-758-0144, Monday through Thursday, 9am to 10pm EST., and Fridays, 9pm to 3pm EST.
INCLUDES
- Microphone with USB cable
- Desktop Mic Stand
- Foam Windscreen
- Owner's Manual
- Warranty Card
FUNCTIONS
- Omnidirectional mic
- LED mute indicator. When lit the microphone is muted
- Volume knob
- ON/OFF/Mute button
- USB Type A plug

SETUP


OPERATION
The A-STREAM is a plug-and-play microphone compatible with Macs running OS X or any PC running Windows XP or later. Connect it to your computer via a USB port and it will automatically install the necessary drivers. Once the drivers are installed, press the ON/OFF/Mute button at the top of the mic body. Your computer should automatically set it as the default recording device. If the computer does not recognize the mic, follow the procedure below.
PC
- Go to the bottom right-hand corner of the desktop and right click on the speaker icon (fig. a). Select "Open Sound settings" from the menu (fig. b).
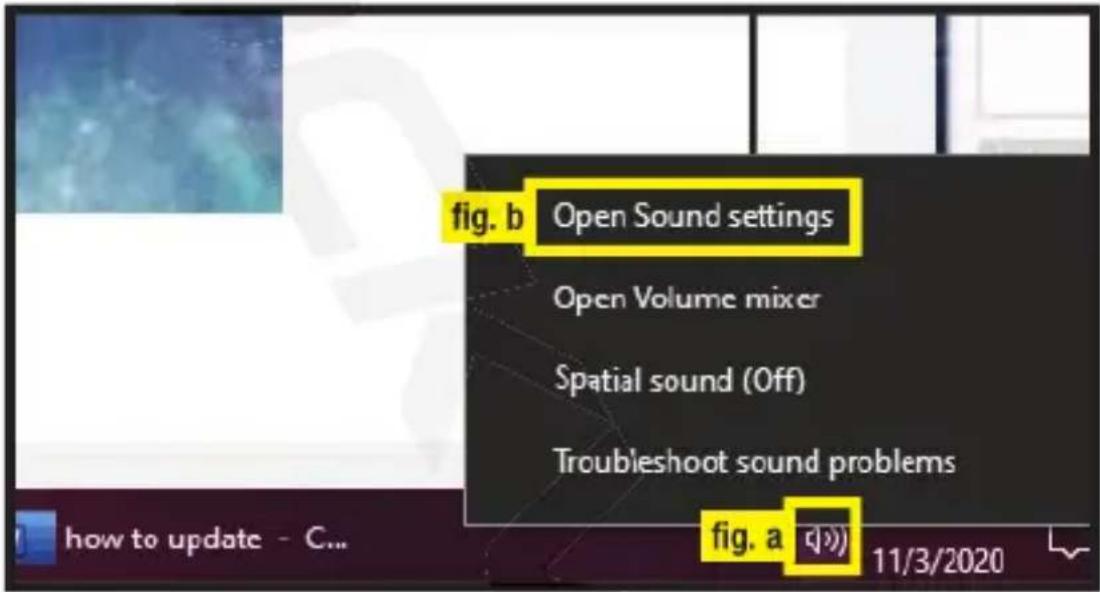
- On the Sound menu, go to Input and select A-STREAM from the "Choose your input device" drop-down menu (fig. c). Make sure the microphone is on then talk. The "Test your microphone" meter should move (fig. d), indicating that the mic is connected and working properly.

OPERATION (continued)
If after performing the procedure on the previous page your computer still doesn't recognize the microphone, please refer to the procedure below.
- Go to the bottom left-hand corner of the desktop, type "control panel" into the search bar (fig. a) and select the Control Panel app (fig. b).
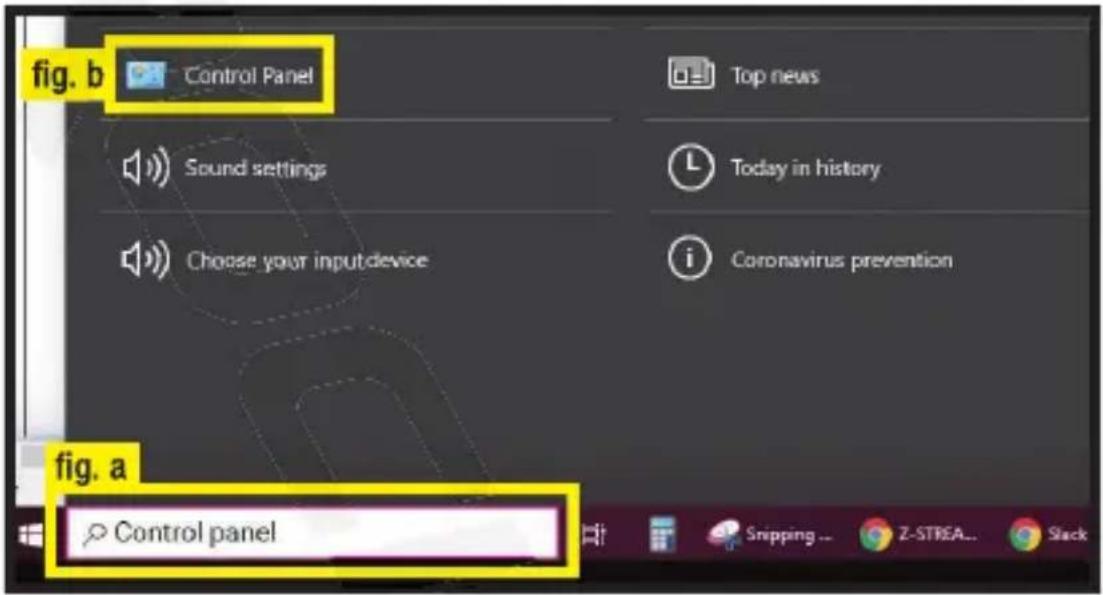
- On the Control Panel screen click on Hardware and Sound (fig. c). Now click on Sound. (fig. d). Click on the Recording tab (fig. e), then left click on A-STREAM (fig. f) and select "Set Default" from the pop-up menu. Make sure the microphone is on, then speak into it. You should see the green bars on the meter moving (fig. g), indicating that the mic is connected and working properly.


Fine-Tuning Microphone Output
Follow the steps below to adjust the quality of the microphone's output.
- On the Sound menu, click on Device properties (fig. a).

- On the Device properties screen, scroll down to Related Settings and click on Additional device properties (fig. b).

- Click on the Listen tab (fig. c), then check the "Listen to this device" box (fig. d). Click on the Default Playback Device drop-down menu (fig. e) to select the playback device. We strongly recommend headphones, as speakers can potentially pick up feedback and cause damage to your hearing. Now click Apply and talk into the mic to hear how you would sound to other people. Make sure to uncheck the Listen to this device box and click Apply, otherwise it will constantly listen back.

OPERATION (continued)
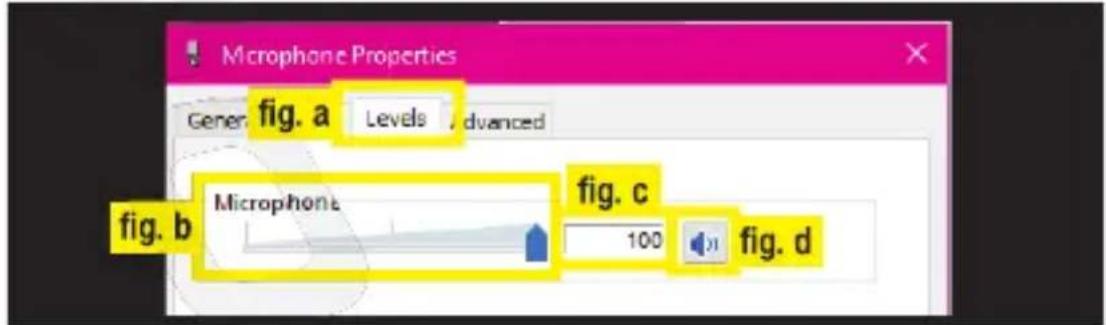
To adjust the mic input levels, click on the Levels tab (fig. a) and use the slider (fig. b) or enter the desired value (fig. c). You also have the option of muting the mic by clicking on the speaker icon to the right of the mic levels value field (fig. d). Click Apply when you're done.
Mac
- Plug the USB cable into a USB port on your Mac. Click on the apple icon (fig. a) on the top left-hand corner of the desktop. In the drop-down menu, click on System Preferences (fig. b).

- In the System Preferences panel, click on the speaker icon labeled Sound (fig. c).
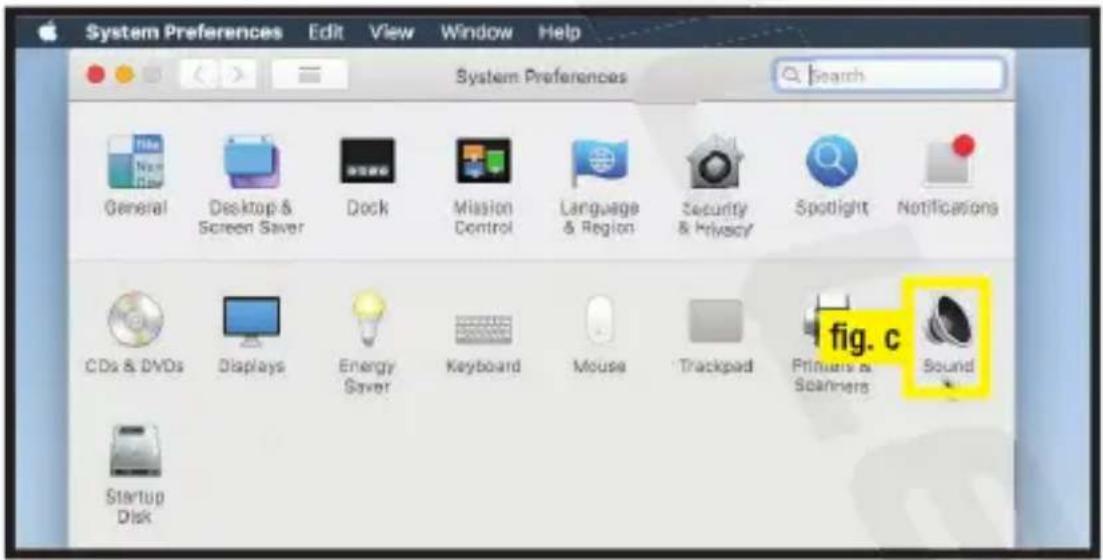
- In the Sound panel, click on Input (fig. d). Select A-STREAM to set it as your sound input device (fig. e). Now you can adjust the Input volume and check the Input level (fig. f).

FEATURES and SPECIFICATIONS
- Plug-and-play mic is perfect for participating in Zoom meetings, recording, podcasting, streaming, gaming, and more
• Gain knob adjusts the mic sensitivity volume - Mute button
- Mute status LED indicator
- Compatible with all Windows & Mac computers
- Great natural sound
- Blocks out unwanted noises such as fans and air-conditioning, making this perfect for business, school, home recording, gaming, and any type of streaming applications
- 14mm cartridge
- Omnidirectional
- Mic sensitivity adjustable via computer
• High-quality steel microphone head
• Aluminum microphone body - Open Circuit Sensitivity: -30dB ±2dB (0dB = 1V/Pa @ 1kHz)
• Frequency Response: 20Hz - 20kHz
• Impedance: 100 Ohms
• Electrical Current: 500Ua
• Dynamic Range (typical): 120dB, 1kHz @ Max SPL
• Signal-to-Noise Ratio: 93.5dB, 1kHz @ 1Pa
FEATURES and SPECIFICATIONS (continued)
- Fixed Crossover Filter Cutoff Frequency: 50Hz – 16kHz
• Power requirements: 5V computer USB input
• Output connector: USB A Plug - Unit weight: 0.83Lbs.
TROUBLESHOOTING
| PROBLEM | SOLUTION |
| No Sound/ Distortion | 1. Make sure the microphone is on.2. Check the mic's volume settings.3. Check all connections to ensure everything is properly connected.4. Make sure the A-STREAM microphone is selected as your audio source.5. Check the computer's input and volume settings (see pages 3–6 for PC and pages 6–7 for Mac). |
| Dull Sound | 1. Clean internal and external windscreens. |
Visit us at:
RockvilleAudio.com
©2021 ROCKVILLE//Features and specifications are subject to change and/or improvement without notice.
Marque : Rockville
Modèle : A-STREAM
Catégorie : Microphone