
FT2A-PWR-EU-1-BASIC - Module électronique Crestron - Notice d'utilisation et mode d'emploi gratuit
Retrouvez gratuitement la notice de l'appareil FT2A-PWR-EU-1-BASIC Crestron au format PDF.


| Type de produit | Alimentation secteur |
| Marque | Crestron |
| Modèle | FT2A-PWR-EU-1-BASIC |
| Tension d'entrée | 100-240 V AC |
| Tension de sortie | 24 V DC |
| Courant de sortie | 1 A |
| Puissance nominale | 24 W |
| Type de connecteur | Fiche UE type C |
| Dimensions (approx.) | 100 x 50 x 30 mm |
| Poids (approx.) | 200 g |
| Compatibilité | Systèmes Crestron FT2A |
| Protections | Surcharge et court-circuit |
| Température de fonctionnement | 0 °C à 40 °C |
| Matériau | Plastique ignifuge |
| Certifications | CE, RoHS |
| Contenu de l'emballage | 1 x alimentation, 1 x câble d'alimentation |
| Usage | Intérieur uniquement |
| Fonctions principales | Conversion AC/DC, alimentation des appareils Crestron |
FOIRE AUX QUESTIONS - FT2A-PWR-EU-1-BASIC Crestron
Questions des utilisateurs sur FT2A-PWR-EU-1-BASIC Crestron
0 question sur cet appareil. Repondez a celles que vous connaissez ou posez la votre.
Poser une nouvelle question sur cet appareil
Téléchargez la notice de votre Module électronique au format PDF gratuitement ! Retrouvez votre notice FT2A-PWR-EU-1-BASIC - Crestron et reprennez votre appareil électronique en main. Sur cette page sont publiés tous les documents nécessaires à l'utilisation de votre appareil FT2A-PWR-EU-1-BASIC de la marque Crestron.
MODE D'EMPLOI FT2A-PWR-EU-1-BASIC Crestron
CRESTRON
Quick Start
FT2A-PWR-EU
AC Power Outlet Modules for FT2 Series
The Crestron® FT2A-PWR-EU-1-BASIC and FT2A-PWR-EU-2 are modules designed for installation in Crestron FT2 FlipTop™ cable management assemblies.
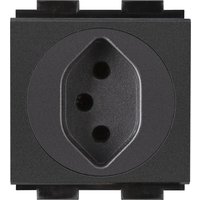
The outlet modules provide up to two European "Schuko" Type F outlets AC power outlets on top of the table. A 2.74 m (7/1) power cord is fused to the bottom of the module. The premium European power module (5T2A-PWR-EU-2) provides two under-the-table receptacles for power switchers, HDBase 1 transmitters, chargers, and other devices. Each module is rated for 10 A (total) at 220-240 V, 50/60 Hz. The following table provides a size and feature comparison among models.
| Module Model Module Slots Required Outlets on Top of the Table | Outlets Beneath the Table |
PT2A-PWR-EU-BASIC 21 None
IT2A-PWR-CU-2422
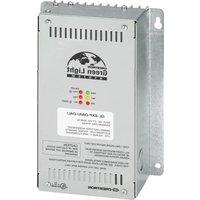
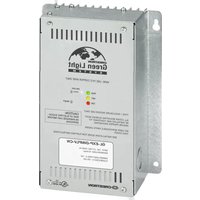
The illustrations below show the FT2A-PWR-EU-1-BASIC and FT2A-PWR-EU-2 power modules. FT2A-PWR-EU-1-BASIC FT2A-PWR-EU-2

Check the Box
Item Qty
FT2A-PWR-EU-1-BASIC or FT2A-PWR-EU-2
> Install the Module
Install the power module into the FT2 FlipTop assembly. If the bezel and locking bars have not been installed on the FT2 FlipTop assembly, jump to step 5.
NOTE: For ease of installation, install power outlet modules before installing any other module. To install the power outlet module:
- Top the lid retraction button to retract the one-touch lid, which disappears into the FT2 FlipTop assembly. If the assembly has two lids retract both.
- Remove and retrain the magnetic barrel from the FT2 FlipTop assembly by grasping the inside of the bazal and firmly pulling it up and away from the assembly until the magnetic hold is broken.
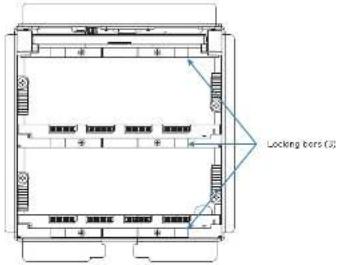
- Use a manual torque screwdriver to unscrew, remove and retain the two locking bars on either side of the module row where the module is to be installed.
Remove Two Locking Bars
- Lift and remove the modules to be replaced.
- Insert the new module's power cable(s) through the empty module slots.
- Orient the module as shown in the following illustration and slide it down into the appropriate module slots. Use the guide ribs on the front and rear of the module to help position it in the assembly.
Position the Module (FT2A-PWR-EU-1-BASIC shown)

ΓT2A-PWR-CU-1-GASIC
- Confirm that all modules are level with their surroundings and place the locking bars (removed in step 3) into position so that the screws on either side engage the screw holes in the assembly.
B. Use a remote because screwdriver set to its lowest possible setting to lighten the lacking bar screws until the lock bars are secured to the FT2 Laptop assembly. - Place the bezel (removed in step 2) onto the FT2 FlipTop assembly so that the retractable lid fits inside the bezel opening. The bezel is held in place by magnets.
Attach the Bezel

Connect the Module
The FT2A-PWR-EU-2 provides two European Type F/AC power receptacles beneath the table (the FT2A-PWR-EU-1-BASIC does not). Use these receptacles to provide power to an electrical FT2 HipTop assembly and to devices installed below the surface within the FT2 HipTop assembly system.
To activate the power outlet module, insert the two-prong plug into a nearby AC wall or floor outlet.
Operate the Module
To operate the power outlet module.
- Top the lid retraction button to retract the one-touch lid, which disappears into the FT2 FlipTop assembly.
- Connect the device needing power to one of the next module outputs on the module.
- Confirm that the power indicator on the device shows that the device is receiving power.


Additional Information
Scan or click the QR code for detailed product information.


FT2A PWR EU 1 BASIC FT2A PWR EU 2
Compliance and Legal
Original instructions: The U.S. English version of this document, is the original instructions all other language versions or translations of the original instructions.
Regulatory Model M201907002
in at the date of manufacture, the product "as been tested and found to comply with specifications are for C" marking
CE
The Waste Electric & Electronic Equipment (WEE) directive marking our product indicators that I think not be disposed of with general household waste, instead, you are encouraged to reuse or recycle the product in accordance with Directive 2017/43. of the European Union. Proper scope of this product will help prevent potential negative effects on the environment and human health, which could otherwise be caused by improper the waste-reducing. There was no may be applicable
For incorrect disposal of this waste, it is overdue with your national legislation. For information above, recycling this product, please contact your household website disposal reader, your original distribution or One-train.

The proof, we only can be "well at the right" (com/vea/vea).
The specific contents that cover Creation products are listed at www.creation.com/legal/patients.
Certain Construction products containing open source software. For special information, this work must be done in advance
Creation, the Creator logo, and FlyTongre other instrument mark on registered documents of Creation Electronics Inc. in the United States and/or other countries. HTRay7 is a trademark or registry trademark of the HTRay7.4 Limited in the United States and/or other countries. Other trademarks, registered trademarks, one trade name may be used in this document to refer to the audit to defining the market and norms of the products. Creation disclosure proprietary interest in the markets and norms of others. Creation's not responsible for errors in typographic or photographic
60217 Creative Electronics Inc.
Crentron Electronics, Inc.
E. W. D. R.
141 SCHLRESTON
95864 12700110
Quick Start - Doc. 0407A
(2054107)
specifications subject to
change without of ce
Marque : Crestron
Modèle : FT2A-PWR-EU-1-BASIC
Catégorie : Module électronique