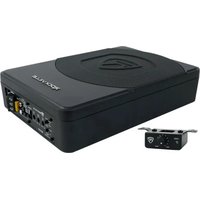
SS10P - Subwoofer Rockville - Notice d'utilisation et mode d'emploi gratuit
Retrouvez gratuitement la notice de l'appareil SS10P Rockville au format PDF.


| Type de produit | Enceinte passive |
| Marque | Rockville |
| Modèle | SS10P |
| Dimensions (L x P x H) | 35 x 25 x 30 cm |
| Poids | 5,2 kg |
| Alimentation | Passive (nécessite amplificateur externe) |
| Impédance | 8 ohms |
| Puissance admissible | 100 W RMS / 200 W crête |
| Réponse en fréquence | 50 Hz – 20 kHz |
| Sensibilité | 89 dB (1W/1m) |
| Haut-parleur | 10 pouces (25 cm) |
| Matériau du coffret | MDF avec finition vinyle noir |
| Connectique | Bornes à vis (compatibles fiches banane) |
| Fonctions principales | Reproduction sonore de qualité pour home cinéma ou musique |
| Entretien et nettoyage | Essuyer avec un chiffon doux sec. Ne pas utiliser de produits abrasifs. |
| Sécurité | Ne pas exposer à l'humidité, aux chocs ou à des températures extrêmes. |
| Pièces détachées et réparabilité | Réparation possible par un professionnel, pièces disponibles sur demande |
| Informations générales | Rockville SS10P – enceinte passive 10 pouces pour usage domestique |
FOIRE AUX QUESTIONS - SS10P Rockville
Questions des utilisateurs sur SS10P Rockville
0 question sur cet appareil. Repondez a celles que vous connaissez ou posez la votre.
Poser une nouvelle question sur cet appareil
Téléchargez la notice de votre Subwoofer au format PDF gratuitement ! Retrouvez votre notice SS10P - Rockville et reprennez votre appareil électronique en main. Sur cette page sont publiés tous les documents nécessaires à l'utilisation de votre appareil SS10P de la marque Rockville.
MODE D'EMPLOI SS10P Rockville
ROCKVILLE
SS10P
10"800W SLIM UNDER-SEAT ACTIVE
POWERED CAR/TRUCK SUBWOOFER
OWNER'S MANUAL
ATTENTION:
WATCH THIS VIDEO BEFORE FIRST USE!
Who reads manuals?
Scan the QR code or go to rockvillesupport.com/ss10p to access how-to video(s), the owner's manual, and other important information you may need to get the most out of your item.
If you prefer written instructions, please read ahead!
With Rockville you get many options.

Missing items? If you ordered a bundle that includes more than one product and you are missing part of your bundle then it just means your order shipped from two different warehouses. You will receive the remaining items very soon. If you have any concerns or inquiries, feel free to call our customer support center at 1-646-758-0144, 24 hours a day/7 days a week.
Thank you for purchasing this Rockville SS10P under-seat active subwoofer.
The SS10P is an all in one solution to give you great sounding bass in your vehicle without taking up a lot of space. This sub enclosure is only 3" thick so that it can easily fit under your seat. The amplifier is built in, so installation and wiring is clean and simple. This is a true all in one subwoofer solution with the subwoofer built into the enclosure along with a top of the line amplifier built in as well.
We focused on making installation a breeze so we designed this unit with you the customer in mind. We added high level inputs so you can install this to an after-market or factory system. The high level input allows you to install this even if you have no preamp outputs available.
Please read this installation guide carefully for proper use of your SS10P under-seat active subwoofer. Should you need assistance, please call our technical help line at 1-646-758-0144, 24 hours a day/7 days a week.
IMPORTANT SAFETY INSTRUCTIONS

- To reduce risk of electric shock, never open the unit. There are no serviceable parts, refer service to the Rockville service center.
- Do not expose this unit to any kind of moisture.
- Please ensure that the unit is situated in a properly ventilated area.
Features
- Power/Protect LEDs: The 2 LED's located on the side of the amplifier provide indication of the amplifier status, the Power LED will light when the amplifier is receiving proper power, ground and remote voltages. The second LED will light when the amp goes into protection mode.
Thermal Protection: When the unit reaches an unsafe operating temperature of 80 degrees Celsius, the unit will turn off. Once the unit cools down to a safe temperature, it will automatically turn on again. If you are installing the unit in your trunk and you live in a hot climate, we suggest installing additional cooling fans to exhaust the hot air which can build up. This will help keep the ambient temperature in the trunk as low as possible so that your unit works flawlessly and without any musical interruption.
Input Overload Protection: This circuit will either shut down the unit completely or make the unit spurt on and off indicating that it is in a diagnostic condition. Turn the system off and reduce the gain on the unit or volume from your head unit. This should result in a corrected condition.
DC Offset Protection: Should any DC voltage try to enter the unit via the speaker terminals it will cause the unit to shut down and not operate until this condition is remedied. This circuit will also protect damaging high DC voltages from reaching your unit should it ever malfunction.
PLEASE NOTE: You must reset the unit by turning it OFF and then ON again after correcting a diagnostic condition (turn your radio off and then on again). If the unit stays in protection after a reset, it is most likely faulty.
- Phase Shift: Use this button to help compensate for time alignment problems. Such problems usually result from having the subwoofer positioned at a different distance from the listener than the other speakers in the system.
- Auto Power-on: The auto power-on function is for high level (speaker level) connections.
When the switch is in the "ON" position, the subwoofer will turn on when there is a signal input. If there is no signal input, the subwoofer will automatically turn off. If you prefer to use the remote turn-on function, leave the switch in the "OFF" position.
- Low Pass Filter: This control permits you to define the frequency range you want the subwoofer amplifier to receive. The subwoofer will reproduce all sound below the frequency you set.
- Bass Boost: This control will increase the sound level of the bass frequencies.
- Input Gain Control: After you've installed your system, turn this control to minimum. Turn the head unit on (subwoofer will turn on via the remote connection) and set the volume to 2/3 full level. Slowly turn up the subwoofer input gain control until you hear a small amount of distortion. Now reduce the level until the distortion is completely gone. The input gain control is now set.
- Remote Level Control Port: Plug in the included remote level control to adjust the volume level of the subwoofer independently.
- High Level Input: These inputs, also referred to as speaker level inputs, allow you to connect to the factory speaker wires. They are called High Level inputs because they convert the high voltage running through factory speaker wires to one the amplifier can handle. These inputs will provide the end user with clean, well defined sound for optimal musical enjoyment. Use the supplied cable and wire harness and connect the outputs properly as shown in the connection diagram in this manual.
- Low Level RCA Inputs: Low level inputs are the recommended way to introduce an audio signal to the subwoofer if RCA outputs are present on your head unit or other signal source (such as a sound processor).
- Fuse: Do not use a fuse with a different value than the one provided.
- +12V, Remote, and Ground terminals.

Wiring
Low Level Input
Low-level (RCA) input wiring is preferred for best audio performance. Most trunk and under-seat installations will require a 6 – 12 foot RCA cable. For best audio performance be sure to use high-quality RCA cables. Be sure to run the RCA cables on the side of the vehicle opposite to the side used to carry the power and ground leads of the amplifier.

Power/Ground Wiring for Low-Level Input Configuration

- Use an 8 gauge (or heavier) wire to connect the +12V terminal of the amp to the positive (+) terminal of the vehicle's battery.
- Use a 16 gauge (or heavier) wire to connect the amp's remote terminal to the remote output of the head unit. The unit will not turn-on if this cable is not connected. Make sure the AUTO ON button is set to the OFF position.
- Use an 8 gauge (or heavier) wire to connect the GND terminal of the amp to the closest metal part of the vehicle's chassis.
High Level Input
The high level inputs should only be used when your receiver lacks RCA outputs. Splice the high level input leads from the harness directly to your head unit's speaker-level outputs. Be sure to observe polarity to avoid audio phase problems and make sure the AUTO ON button is set to the ON position.

- Left Negative (white/black), Left Positive (white)
- Right Negative (grey/black), Right Positive (grey)

Power/Ground Wiring for High-Level Input Configuration
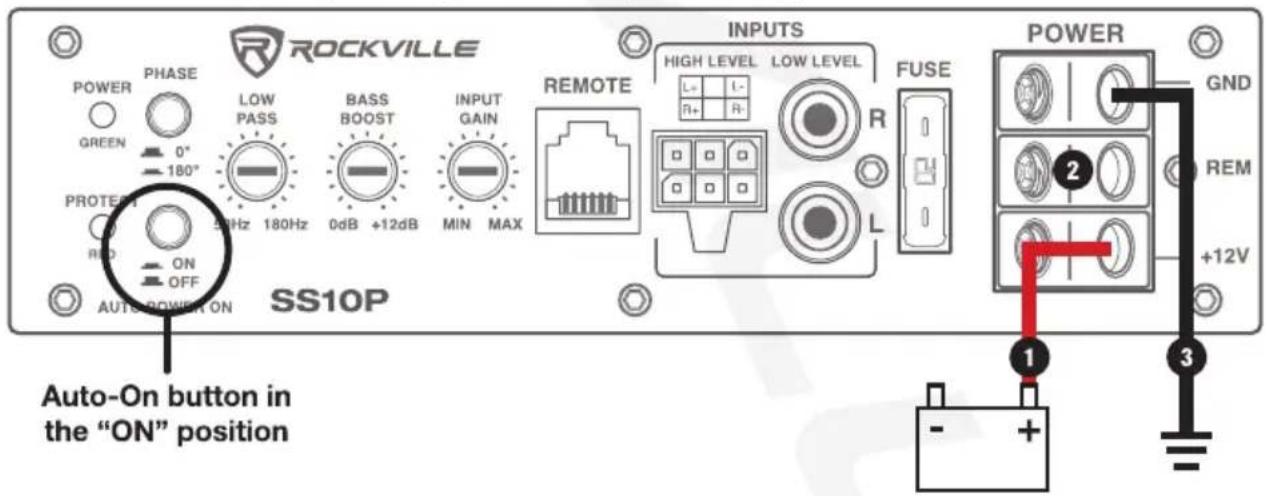
- Use an 8 gauge (or heavier) wire to connect the +12V terminal of the amp to the positive (+) terminal of the vehicle's battery.
- Do not wire the amp's remote terminal to the remote output of the head unit. It is not needed for this configuration. Make sure the AUTO ON button is set to the ON position.
- Use an 8 gauge (or heavier) wire to connect the GND terminal of the amp to the closest metal part of the vehicle's chassis.

ATTENTION
Do not connect the high level and low level inputs to the amplifier at the same time!
Bass Remote
Using the included RJ12 cable, install the remote control securely under the dash or in a similar location where using it will not distract the driver.

Features
• 800 Watts Peak/200 Watts RMS
- Gain, bass boost, and crossover control
• Heavy Duty Mounting Feet
• PWM MOSFET Power Supply
- Low Level RCA Input
• High Level Inputs with Auto Turn-On Technology
- Adjustable Input Sensitivity
- Soft Delayed Remote Turn-On
• Thermal Protection Circuit, Short Protection Circuit
• Overload Protection circuit
• Green Power/Red Protect LEDs
• Phase Switch: 0° or 180°
- Low Pass Filter: 50Hz – 180Hz
• Bass Boost: 0 - 12dB @ 45Hz
• Built in Subsonic Filter @ 20Hz
- THD < 0.4%
- Subwoofer Level Remote Control
- Fuse Rating: Single 20A
Specifications
- Impedance: 4 Ohm
• Dimensions: 13.6 x 9.65 x 3 (L x W X H) Inches
• Frequency Response: 20Hz – 180Hz
• Signal to Noise Ratio >90dB
• Sensitivity: 90dB @ 1w/1m - Input sensitivity, Low level 300mV
- Input sensitivity, High level 1.0V
Troubleshooting
| PROBLEM | SOLUTION |
| No power | 1. Check your ground and power connections.2. Make sure the power terminal is receiving at least 12V.3. If using RCA inputs, ensure the Remote Turn-On is receiving at least 5VDC.4. Check the fuse and replace if necessary.5. Make sure the Protect LED is not illuminated. If it is, turn the amplifier off and then back on.6. Check the Remote Turn-On switch. It should be OFF if using the RCA inputs and ON if using the high-level inputs. |
| Protection LED illuminates when the unit is powered on | 1. Check for short-circuits on high-level leads.2. Turn down the head unit's volume to prevent overdriving.3. Disconnect the high-level leads and reset the amplifier (turn off and then on). If the Protect LED still illuminates, the amp is faulty and needs servicing.4. If the signal is too hot, lower the gain level.5. Make sure the power connections are secure. |
| No output | 1. Check he unit's gain settings2. Check the fuse and replace if necessary.3. Make sure the unit is properly grounded.4. Make sure the Remote Turn-On is receiving at least 5VDC.5. Make sure the RCA cables are properly connected.6. Check your high-level connections.7. If your head unit has a separate subwoofer output, check the settings to make sure it is enabled.8. Check the Remote Turn-On switch. It should be OFF if using the RCA inputs and ON if using the high-level inputs. |
| Low output | 1. Reset the gain control.2. Check the crossover control settings.3. Power and ground cables that are too thin a gauge size for the terminals may cause low sound. Determine the proper cable gauge necessary and replace existing cables. |
| High hiss sound/squealing noise is present | 1. Check for improperly grounded RCA interconnects.2. Check to see how your wires are run. If your RCA cables and speaker wire are run alongside your power cables, they will pick up feedback. If this is the case, you will need to run the RCA cable on the other side separate from your power cable.3. Noise can be picked up due to bad RCA cables. We recommend doing a test with different RCA cables. Replace the RCA cables if needed. |
| Distorted sound | 1. Make sure the input level control is set to match the signal level of the head unit. Always try to set the input level as low as possible.2. Make sure all crossover frequencies are properly set.3. Check for short circuits on the high-level leads. |
| Amplifier gets very hot | 1. Make sure the wiring is correct and you are using the proper wires for your system.2. A poor ground cable connection can cause your amp to get very hot. Check your ground connection and make sure that the cable is securely tightened.3. Check the location where your amp is mounted. Make sure it is in a spot where it will receive proper ventilation. |
| Engine noise: static type | 1. Route your RCA cables away from the power cables.2. Use high quality RCA cables. |
| Engine noise: alternator whine | 1. Check that the RCA grounds are not shorted to the vehicle chassis.2. Check that the head unit is properly grounded. |
ROCKVILLE

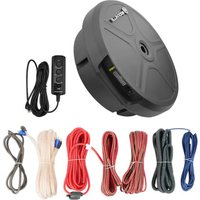
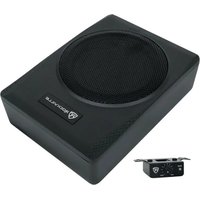
Marque : Rockville
Modèle : SS10P
Catégorie : Subwoofer