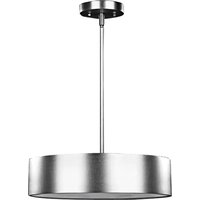
IPL318A03AL - Éclairage Canarm - Notice d'utilisation et mode d'emploi gratuit
Retrouvez gratuitement la notice de l'appareil IPL318A03AL Canarm au format PDF.


| Type de produit | Luminaire LED intérieur |
| Marque | Canarm |
| Modèle | IPL318A03AL |
| Dimensions (L x l x h) | 30 cm x 30 cm x 5 cm |
| Poids | 1,2 kg |
| Alimentation | 120 V AC, 60 Hz |
| Puissance | 18 W |
| Flux lumineux | 1200 lumens |
| Température de couleur | 3000 K (blanc chaud) |
| Indice de protection (IP) | IP20 |
| Durée de vie | 25 000 heures |
| Matériau | Aluminium et plastique |
| Installation | Montage au plafond ou au mur |
| Dimmable | Non |
| Garantie | 2 ans |
| Entretien | Nettoyer avec un chiffon sec et doux |
| Sécurité | Ne pas utiliser à l'extérieur |
| Pièces détachées | LED non remplaçable, alimentation intégrée |
FOIRE AUX QUESTIONS - IPL318A03AL Canarm
Questions des utilisateurs sur IPL318A03AL Canarm
0 question sur cet appareil. Repondez a celles que vous connaissez ou posez la votre.
Poser une nouvelle question sur cet appareil
Téléchargez la notice de votre Éclairage au format PDF gratuitement ! Retrouvez votre notice IPL318A03AL - Canarm et reprennez votre appareil électronique en main. Sur cette page sont publiés tous les documents nécessaires à l'utilisation de votre appareil IPL318A03AL de la marque Canarm.
MODE D'EMPLOI IPL318A03AL Canarm
QUESTIONS OR CONCERNS CONTACT CANARM AT:
1-800-265-1833 (English) 1-800-567-2513 (French)
Monday through Friday 8:00 AM to 5:00 PM E.S.T.

"INSTRUCTIONS PERTAINING TO RISK OF FIRE OR INJURY TO PERSONS" "READ ALL INSTRUCTIONS"
"IMPORTANT SAFETY
INSTRUCTIONS"
"SAVE THESE INSTRUCTIONS"
TOOLS AND MATERIALS REQUIRED:

Star-headed
Screwdriver
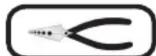
Wire Cutters

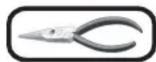
Pliers Wrench
SAFETY PRECAUTIONS:
- TURN OFF ELECTRICAL POWER BEFORE STARTING INSTALLATION OF LIGHT FIXTURE.
- THIS PRODUCT MUST BE INSTALLED IN ACCORDANCE WITH THE APPLICABLE INSTALLATION CODE BY A PERSON FAMILIAR WITH THE CONSTRUCTION AND OPERATION OF THE PRODUCT AND THE HAZARDS INVOLVED.
- CONNECT THE GROUND WIRE (BARE COPPER OR GREEN) FROM YOUR FIXTURE TO THE GROUND WIRE (BARE COPPER OR GREEN) OR GROUND SCREW IN THE ELECTRICAL OUTLET BOX.
INSTALLATION:
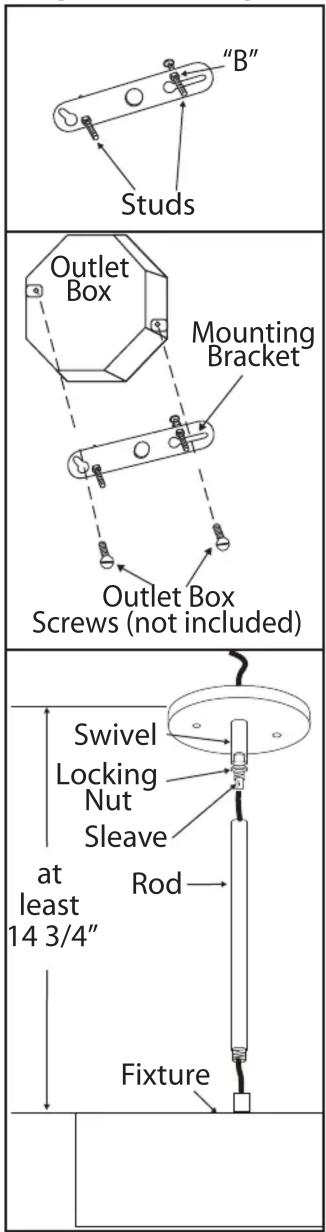
- Loosen "B". Adjust stud to desired length and lock in place with "B".
- Mount the mounting bracket to outlet box using outlet box screws (not included). Make sure the studs or nipple on the mounting bracket are facing out from the outlet box.
- Screw lower downrod into the fixture. Install swivel to the rod, ensuring that the sleeve is at the swivel. Tighten the locking nut to secure rod to the fixture.
Note: Remove fixture pan, plate and rods if required (If you wish to change the downrod length) Install the length of rod that is required by threading wire through the rod and securing it to the fixture.
Caution: Risk of fire, keep at least an 14 3/4" distance from the ceiling to the top surface of diffuser.

- Connect the ground wire (bare copper or green) from your fixture to the ground wire (bare copper or green) or ground screw in the electrical outlet box. Connect black wire from fixture to black wire in outlet box and connect the white wire from fixture to white wire in outlet box.
- Tuck electrical wires into outlet box and position fixture over studs or nipple on mounting bracket assembly. Secure fixture in place with star washers and cap nuts.
- Install the proper bulb type and wattage (not included).
Marque : Canarm
Modèle : IPL318A03AL
Catégorie : Éclairage