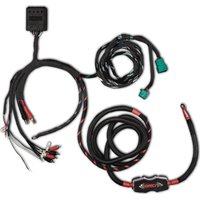
JL24-SBAHKIT - Accessoire audio voiture DS18 - Notice d'utilisation et mode d'emploi gratuit
Retrouvez gratuitement la notice de l'appareil JL24-SBAHKIT DS18 au format PDF.


| Marque | DS18 |
| Modèle | JL24-SBAHKIT |
| Type de produit | Kit d'enceintes marines ou subwoofer |
| Nombre de voies | 2 voies (coaxial ou composant) |
| Taille du haut-parleur | 2x4 pouces (10 cm) |
| Puissance RMS | 60 Watts |
| Puissance crête | 120 Watts |
| Impédance | 4 Ohms |
| Réponse en fréquence | 80 Hz - 20 kHz |
| Sensibilité | 90 dB |
| Matériau du cône | Polypropylène injecté |
| Matériau de la suspension | Caoutchouc |
| Type d'aimant | Ferrite |
| Dimensions (L x H x P) | 12 x 12 x 8 cm |
| Poids | 0,5 kg (par paire) |
| Alimentation | 12V DC (système audio auto) |
| Fonctions principales | Reproduction sonore, résistance à l'eau (marine) |
| Entretien et nettoyage | Chiffon doux et sec, éviter produits abrasifs |
| Sécurité | Ne pas exposer à des températures extrêmes |
| Pièces détachées et réparabilité | Grilles et cônes disponibles via SAV DS18 |
| Informations générales | Kit d'enceintes marines 2x4 pouces, usage nautique |
FOIRE AUX QUESTIONS - JL24-SBAHKIT DS18
Questions des utilisateurs sur JL24-SBAHKIT DS18
0 question sur cet appareil. Repondez a celles que vous connaissez ou posez la votre.
Poser une nouvelle question sur cet appareil
Téléchargez la notice de votre Accessoire audio voiture au format PDF gratuitement ! Retrouvez votre notice JL24-SBAHKIT - DS18 et reprennez votre appareil électronique en main. Sur cette page sont publiés tous les documents nécessaires à l'utilisation de votre appareil JL24-SBAHKIT de la marque DS18.
MODE D'EMPLOI JL24-SBAHKIT DS18
DS18®
USER MANUAL
MANUAL DEL USUARIO
JL24-SBAHKIT
SOUND BAR AND AMPLIFIER WIRING
HARNESS KIT FOR JEEP JL 2024
KIT DE CABLEADO PARA BARRA DE SONIDO
Y AMPLIFICADOR PARA JEEP JL 2024



ENGLISH | ESPAÑOL


2024
TO CURRENT / A LA ACTUALIDAD
JL24-SBAHKIT
SOUND BAR AND AMPLIFIER WIRING HARNESS KIT FOR JEEP JL 2024
KIT DE CABLEADO PARA BARRA DE SONIDO Y AMPLIFICADOR PARA JEEP JL 2024
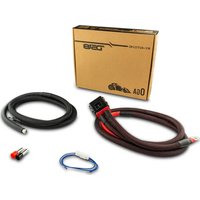
Thank you for choosing the DS18 JL24-SBAHKIT for your factory radio.
This harness installation kit will allow you to add an amplifier for the DS18 JL24-SBAR and also amplify the upgraded dashboard speakers (optional JP6). It also comes with the VX4HL 4 channel line output converter and the connections needed for the aftermarket amplifier.
WHAT IS INCLUDED:
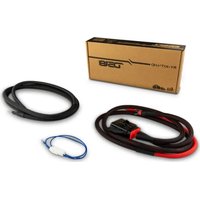
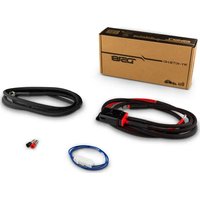
- Harness kit OFC with all factory style connectors and terminals
- Fuse Holder ANL 150A
- 4 channel line output converter VX4HL
- Manual
WHAT YOU WILL NEED:
■ Any 4, 5 or 6 channels amplifier
■ Soundbar for Jeep JL / JLU / JT (JL24-SBAR)
RECOMMENDED:
■ Front Speaker Upgrade: (JP6) Loaded
6.5" Dash Enclosure, Left and Right, with PRO-JP6NEO
■ LC-DRM Digital LED Control Module
**ATTENTION**
Installation of mobile audio and video components requires experience with a variety of mechanical and electrical procedures. Although this manual provides general installation and operation instructions, it does not show the exact installation methods for your vehicle. If you do not have the required knowledge and experience to successfully complete the installation, consult an authorized dealer about professional installation service.



2024 TO CURRENT / 2024 A LA ACTUALIDAD
Gracias por elegir el DS18 JL24-SBAHKIT para su radio de fábrica.
Este kit de instalación de arnés le permitirá agregar un amplificador para el DS18 JL24-SBAR y también amplifica los altavoces del tablero actualizados (JP6 opcional). También viene con el convertidor de salida de línea de 4 canales VX4HL y las conexiones necesarias para el amplificador de posventa.
QUÉ ESTÁ INCLUIDO:
- Kit de arnés de cableado OFC con todos los conectores y terminales con estilo de fábrica.
• Portafusibles ANL 150A - Convertidor de salida de línea de 4 canales VX4HL
- Manual
LO QUE NECESITARÁS:
- Cualquier amplificador de 4, 5 o 6 canales
- Barra de sonido para Jeep JL / JLU / JT (JL24-SBAR).
SE RECOMIENDA:
- Actualización del altavoz frontal: (JP6) Cápsula cargada para tablero de 6.5", izquierdo y derecho, con PRO-JP6NEO.
- Módulo de control LED digital LC-DRM
**ATENCIÓN**
La instalación de componentes móviles de audio y video requiere experiencia con una variedad de procedimientos mecánicos y eléctricos. Aunque este manual proporciona instrucciones generales de instalación y operación, no muestra los métodos de instalación exactos para su vehículo. Si no tiene el conocimiento y la experiencia necesarios para completar con éxito la instalación, consulte a un distribuidor autorizado sobre un servicio de instalación profesional.
RADIO SIDE INSTALLATION
USING FACTORY OEM RADIO
INSTALACIÓN DEL LADO DE LA RADIO
USANDO RADIO DE FÁBRICA
Connect the DS18 T-Harness connector between the factory radio unit and the radio harness.
Conecte el conector del arnés en T de DS18 entre la unidad del radio de fábrica y el arnés del radio.
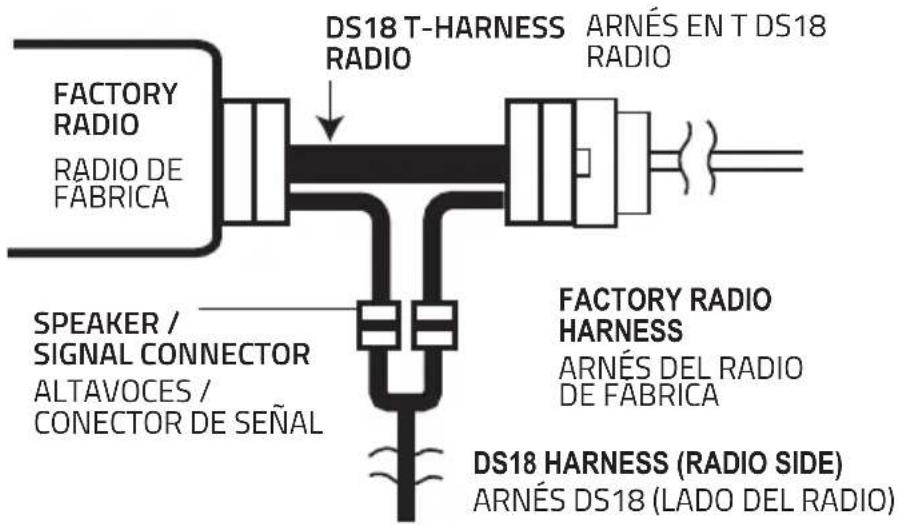
**ATTENTION** Disconnect the negative post (Ground) of the battery before you start the installation. This helps avoid airbags coding and malfunctions, codes module malfunction or any electrical issues.
**ATENCIÓN** Desconecte el borne negativo (Tierra) de la batería antes de iniciar la instalación. Esto ayuda a evitar la codificación y el mal funcionamiento de las bolsas de aire, el mal funcionamiento del módulo de códigos o cualquier problema eléctrico.
![graph TD A["FACTORY RADIO HARNESS\nARNÉS DEL RADIO DE FÁBRICA"] --> B["DS18 HARNESS (RADIO SIDE)\nARNÉS DS18 (LADO DEL RADIO)"] B --> C["FACTOR RADIO\nRADIO DE FÁBRICA"] C --> D["Speaker / SIGNAL CONNECTOR\nALTAVOZ/ CONECTOR DE SEÑAL"] D --> E["FROM RADIO SIDE DESDE LA RADIO"] E --> F["WHITE - BLANC…](/content/2026/07/1444519/images/fbb8b1067b6609b27f8526fa9bef0839287e68ad5860a2fddf5b564850aa7ce5.jpg)
NOTE: If you use a 4 or 5-channel amplifier without upgrading the front speakers, you will need to bypass the 'Front' signal. Use only the 'Rear' signal for the JL24-SBAR or subwoofer channels.
Cut the wires: White CH1(+), White/Black CH1(-), Gray CH2(+) and Gray/Black CH2(-) from each side of the harness speaker/signal connector. Connect wires of the same color together using crimp wire connectors.
NOTA: Si utiliza un amplificador de 4 o 5 canales sin actualizar el altavoz frontal, deberá omitir la señal "frontal". Utilice sólo la señal "trasera" para los canales JL24-SBAR o subwoofer.
Corte los cables: Blanco CH1(+), Blanco/Negro CH1(-), Gris CH2(+) y Gris/Negro CH2(-) de cada conector de señal/altavoz lateral del arnés. Conecte cada uno del mismo color usando conectores de cables crimpados.

JL24-SBAHKIT
HARNESS INSTALLATION INSTRUCTIONS
INSTRUCCIONES DE INSTALACIÓN DEL ARNÉS
1. RADIO T HARNESS INSTALLATION
Follow the steps on page #2
2. +12V BATTERY CABLE AND FUSE HOLDER MAIN POWER
Route this cable to battery positive terminal where it will feed power to the system. You can use the existing drain caps on the floor in the seat area to pass the wire through. Remove the fuse holder to pass the cable through the drain hole (you should remove the seat). Do not connect this till all the steps are done.
3. HARNESS MAIN GROUND
Before putting back the seat, make sure to connect the ground terminal to the factory ground under the seat. Replace the seat and ensure all connectors are plugged in and secure.
4. VX4HL
(4 CHANNEL LINE OUTPUT CONVERTER)
This is prewired for the low-level signal needed to add an aftermarket amplifier.
5. DIGITAL LED LIGHT CONTROLLER (LC-DRM REQUIRED)
This is required for the Digital LED function. Follow the instructions on pages #3-4.
6. AMPLIFIER HARNESS
These cables are for the install of the aftermarket amplifier required to power the JL24-SBAR. Follow the diagram on pages #3-4 #6.
7. OPTIONAL FRONT SPEAKER UPGRADE (JP6 RECOMMENDED)
Use this step if aftermarket speakers(JP6) are installed in the front OEM dash location. See #1 on pages #2 and #7 on pages #3-4
8. JL24-SBAR HARNESS(NOT INCLUDED)
Follow the instructions for this on the manual included with the JL24-SBAR. See #8 on pages #3-4 for the setup diagram.
- INSTALACIÓN DEL ARNÉS EN T DE RADIO Siga los pasos en la página #2
2. CABLE DE BATERÍA +12V Y PORTAFUSIBLES DE ALIMENTACIÓN PRINCIPAL
Dirija este cable al terminal positivo de la batería donde alimentará el sistema. Puede utilizar las tapas de drenaje existentes en el suelo del área del asiento para pasar el cable. Retire el portafusibles para pasar el cable por el orificio de drenaje (debe quitar el asiento). No conecte esto hasta que se hayan realizado todos los pasos.
3. TIERRA PRINCIPAL DE ARNÉS
Antes de volver a colocar el asiento, asegúrese de conectar el terminal de tierra a la tierra de fábrica debajo del asiento. Reemplace el asiento y asegúrese de que todos los conectores estén enchufados y seguros.
4. VX4HL
(CONVERTIDOR DE SALIDA DE LÍNEA DE 4 CANALES) Está precableado para la señal de bajo nivel necesaria para agregar un amplificador de posventa.
5. CONTROLADOR DE LUZ LED DIGITAL (SE REQUIERE LC-DRM)
Esto es necesario para la función LED digital.Siga las instrucciones en las páginas #3-4.
6. ARNÉS DEL AMPLIFICADOR
Estos cables son para la instalación del amplificador de posventa necesario para alimentar el JL24-SBAR, siga el diagrama en las páginas #3-4 #6.
7. ACTUALIZACIÓN OPCIONAL DEL ALTAVOZ FRONTAL (SE RECOMIENDA JP6)
Utilice este paso si se instalan altavoces del mercado secundario (JP6) en la ubicación original de fábrica del tablero delantero. Consulte el #1 en la página #2 y el #7 en las páginas #3-4.
8. ARNÉS JL24-SBAR (NO INCLUIDO)
Siga las instrucciones para esto en el manual incluido con el JL24-SBAR. Consulte el punto #8 en las páginas #3-4 para ver el diagrama de configuración.
FINAL STEP
-
Secure the wire harness using zip ties to the chassis or the factory harnesses nearby, always keeping it far away from the header/exhaust.
-
Make sure all the connections are correct before you power up the system.
-
Connect +12V battery cable to +12V side of the battery.
-
Turn on the radio and check if there is sound, making sure that all speakers are playing. Then adjust the amplifier's gain and crossover point to your preference.
-
You are finally done with the install. Enjoy your new DS18 JL24-SBAHKIT and PLAY IT LOUD.
ÚLTIMO PASO
-
Asegure el arnés de cables mediante bridas al chasis o a los mazos de fábrica cercanos, manteniéndolo siempre alejado del cabezal/escape.
-
Asegúrese de que todas las conexiones sean correctas antes de encender el sistema.
-
Conecte el cable de la batería de +12V al lado de +12V de la batería.
-
Encienda la radio y verifique si hay sonido, asegurándose de que todos los altavoces estén funcionando. Luego, ajuste la ganancia del amplificador y el punto de crossover según su preferencia.
-
Finalmente has terminado con la instalación. Disfrute de su nuevo DS18 JL24-SBAHKIT.
WARRANTYGARANTÍA
Please visit our website DS18.com for more information on our warranty policy.
Visite nuestra página web DS18.com para obtener más información sobre nuestra garantía.
We reserve the right to change products and specifications at any time without notice. Images may or may not include optional equipment.
Nos reservamos el derecho de cambiar productos y especificaciones en cualquier momento sin previo aviso. Las imágenes pueden incluir o no equipo opcional.

WARNING:
Cancer and Reproductive Harm.
www.P65Warning.ca.gov

ADVERTENCIA:
Cáncer y Daño Reproductivo.
www.P65Warning.ca.gov

FOR MORE INFORMATION
PLEASE VISIT
DS18.COM
WE LIKE IT LOUD
DS18®
- DS18®
- USER MANUAL
- MANUAL DEL USUARIO
- JL24-SBAHKIT
- SOUND BAR AND AMPLIFIER WIRING
- HARNESS KIT FOR JEEP JL 2024
- SOUND BAR AND AMPLIFIER WIRING HARNESS KIT FOR JEEP JL 2024
- WHAT IS INCLUDED
- WHAT YOU WILL NEED
- RECOMMENDED
- ATTENTION
- 2024 TO CURRENT / 2024 A LA ACTUALIDAD
- QUÉ ESTÁ INCLUIDO
- LO QUE NECESITARÁS
- SE RECOMIENDA
- ATENCIÓN
- RADIO SIDE INSTALLATION
- USING FACTORY OEM RADIO
- HARNESS INSTALLATION INSTRUCTIONS
- RADIO T HARNESS INSTALLATION
- 12V BATTERY CABLE AND FUSE HOLDER MAIN POWER
- HARNESS MAIN GROUND
- VX4HL
- DIGITAL LED LIGHT CONTROLLER (LC-DRM REQUIRED)
- AMPLIFIER HARNESS
- OPTIONAL FRONT SPEAKER UPGRADE (JP6 RECOMMENDED)
- JL24-SBAR HARNESS(NOT INCLUDED)
- CABLE DE BATERÍA +12V Y PORTAFUSIBLES DE ALIMENTACIÓN PRINCIPAL
- TIERRA PRINCIPAL DE ARNÉS
- CONTROLADOR DE LUZ LED DIGITAL (SE REQUIERE LC-DRM)
- ARNÉS DEL AMPLIFICADOR
- ACTUALIZACIÓN OPCIONAL DEL ALTAVOZ FRONTAL (SE RECOMIENDA JP6)
- ARNÉS JL24-SBAR (NO INCLUIDO)
- FINAL STEP
- ÚLTIMO PASO
- WARRANTYGARANTÍA
- FOR MORE INFORMATION
- PLEASE VISIT
- DS18.COM
Marque : DS18
Modèle : JL24-SBAHKIT
Catégorie : Accessoire audio voiture