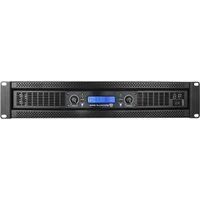
RPA16 - Recepteur Rockville - Notice d'utilisation et mode d'emploi gratuit
Retrouvez gratuitement la notice de l'appareil RPA16 Rockville au format PDF.


| Type de produit | Récepteur audio stéréo |
| Marque | Rockville |
| Modèle | RPA16 |
| Dimensions (L x H x P) | 43 x 13 x 30 cm |
| Poids | 8,2 kg |
| Alimentation | 120 V / 240 V, 50/60 Hz |
| Puissance de sortie | 2 x 100 W RMS sous 8 ohms |
| Entrées audio | 3 x RCA, 1 x AUX 3,5 mm, 1 x micro XLR |
| Sorties audio | 2 x enceintes (bornes à vis), 1 x casque 6,35 mm, 1 x pré-out RCA |
| Tuner radio | FM/AM intégré avec 30 présélections |
| Connectivité sans fil | Bluetooth 5.0, port USB pour lecture MP3 |
| Fonctions principales | Amplification stéréo, réception radio, lecture Bluetooth/USB/SD, égaliseur 5 bandes |
| Écran | Afficheur LED bleu |
| Télécommande | Oui (infrarouge, incluse) |
| Entretien | Dépoussiérage régulier avec un chiffon doux et sec |
| Nettoyage | Utiliser un chiffon légèrement humide, ne pas utiliser de solvants |
| Sécurité | Ne pas exposer à l'humidité, éteindre avant de connecter/déconnecter des câbles |
| Pièces détachées | Disponibles auprès du service après-vente Rockville |
| Réparabilité | Indice de réparabilité : 8,1/10 (selon la législation française) |
| Accessoires inclus | Câble d'alimentation, télécommande, antenne FM, manuel d'utilisation |
FOIRE AUX QUESTIONS - RPA16 Rockville
Questions des utilisateurs sur RPA16 Rockville
0 question sur cet appareil. Repondez a celles que vous connaissez ou posez la votre.
Poser une nouvelle question sur cet appareil
Téléchargez la notice de votre Recepteur au format PDF gratuitement ! Retrouvez votre notice RPA16 - Rockville et reprennez votre appareil électronique en main. Sur cette page sont publiés tous les documents nécessaires à l'utilisation de votre appareil RPA16 de la marque Rockville.
MODE D'EMPLOI RPA16 Rockville
ROCKVILLE
RPA16 10,000 WATT PRO RACK AMPLIFIER
OWNER'S MANUAL
ATTENTION: VISIT THE ROCKVILLE SUPPORT SITE FIRST!

Who reads manuals?
Scan the QR code or go to rockvillesupport.com/rpa16 to access how-to video(s), the owner's manual, and other important information you may need to get the most out of your item.
If you prefer written instructions, please read ahead!
With Rockville you get many options.
Missing items? If you ordered a bundle that includes more than one product and you are missing part of your bundle then it just means your order shipped from two different warehouses. You will receive the remaining items very soon. If you have any concerns or inquiries, feel free to call our customer support center at 1-646-758-0144, 24 hours a day/7 days a week.
Thank you for purchasing this Rockville product. Please read this installation guide carefully for proper use of your Rockville RPA16 10,000 Watt Pro Rack Amplifier. Should you need assistance, please call our technical help line at 1-646-758-0144, 24 hours a day/7 days a week.
IMPORTANT SAFETY INSTRUCTIONS

TO REDUCE THE RISK OF ELECTRICAL SHOCK, NEVER OPEN THE UNIT. NO USER SERVICEABLE PARTS INSIDE. WE RECOMMEND CONTACTING THE ROCKVILLE SERVICE CENTER FOR ANY REPAIRS.
- Do not expose this unit to any kind of moisture.
- Please ensure that the unit is situated in a properly ventilated area.
- Make sure cooling fan vents are free of obstructions.
- Replace fuse with one of the same type, size, and rating only.
- Do not attempt to operate this unit if the power cord has been frayed or broken.
- Do not attempt to break off or remove the ground prong. This prong is used to reduce the risk of electrical shock and fire in case of an internal short.
- Do not operate this unit if it is damaged.
• This unit is intended for indoor use only. - During long periods of non-use, disconnect the unit from power source.
• Always mount this unit in a safe and stable manner. - Power supply cords should be routed so that they are not likely to be walked on or pinched by items placed upon or against them, paying particular attention to the point of exit from the unit.
- To avoid unnecessary wear and to improve the unit's lifespan, unplug the unit when not in use for extended periods of time.
Features

- Power On/Off Switch.
- Channel A Signal Level Adjustment Knob: Controls the level of incoming signal. The actual voltage attenuation of the amplifier is shown in decibels. Turn the knob counterclockwise if the Clip LED remains on for more than 5 seconds (indicating the input signal is too strong).
- Channel A LEDs:
Clip - Indicates that the amplifier's output is within 3dB of clipping. Occasional blinking is acceptable, but if it remains on for more than 5 seconds you should turn down the level controls or reduce the output level of the input source to avoid audible distortion.
Signal - Indicates that there is an input signal greater than 100mV.
Protect - Indicates that the output connection is shorted, the load impedance is too low, or there is an internal malfunction.
On - Indicates the power is turned on.
- LCD screen displays signal level and temperature for each channel.
- Channel B LEDs: See item 3 above.
- Channel B Signal Level Adjustment Knob: See item 2 above.
- Ventilation
Features (continued)

- Channel A/B XLR Link Out
- Channel A/B XLR/1/4" TRS/TS combo inputs
- Channel B Binding Post/Banana Plug outputs
- Channel A/B Binding Post/Banana Plug bridged output
- Channel A Binding Post/Banana Plug outputs
-
User serviceable fuse compartment (25A/250V)
-
Mode switch: stereo/parallel/bridged
- Crossover switch: bypass/80Hz/160Hz
- Built-in automatic variable-speed high-velocity cooling fan
- Channel A/B Speakon outputs
- AC 120V/50 - 60Hz power input
Setup
Rack Mounting
The RPA16 was designed for standard 19" rack mounting and requires 2U rack space. Use the included heavy-duty rack mount ears, 4 screws, and 4 washers for mounting to the front rack rail. Preferably, the side wall should be at least 2" from the sides of the amplifier and the back of the rack should be open. This will ensure a source of cool air to all sides. Be sure to support the rear of the amp, especially for mobile use where it will be subjected to strong vibrations. The RPA16 can also be "stack" mounted without a cabinet.
Configurations
Crossover and Mode Switches
In STEREO mode the amplifier is fed a full-range signal and outputs a specific left and right signal. Each channel is fully independent and has a separate level control. Make sure the speakers' impedance is no less than 4 ohms.
In PARALLEL mode the channels are connected internally. On the RPA16 Channel A is the dedicated input for use when in this mode. The signal input to Channel A will feed a mono signal to both channels. Each channel has a separate level control.
In BRIDGED mode, the amplifier operates as a one channel mono amp. The power from both channels is combined into one channel. As with parallel mode, the channels are connected internally and Channel A is the dedicated input. The signal input to Channel A will feed a mono signal to the positive binding post output terminals of each channel. The Channel B positive output is connected to the negative input of your speaker. The Channel A positive output is connected to the positive input of your speaker. This mode is primarily used when connecting subwoofers.

Set the switch to BYPASS when using full-range speakers.
Set the switch to SUB 80Hz or SUB 160Hz when using subwoofer(s). This will allow frequencies below 80Hz or 160Hz only.
Configurations (continued)
Stereo

WARNING: Total impedance of your speakers must not be less than 4 ohms.

RockMix8
Signal from the passive mixer's left main output to the Channel A (left) 1/4 input and the signal from the mixer's right main output to the Channel B (right) 1/4 input.

Parallel (mono to speakers via speakon)

WARNING: Total impedance of your speakers must not be less than 4 ohms.


Configurations (continued)
Parallel (mono to speakers via binding posts)

WARNING: Total impedance of your speakers must not be less than 4 ohms.

RockMix8
Signal from a passive mixer's FX send output to the Channel A (left) 1/4 input.
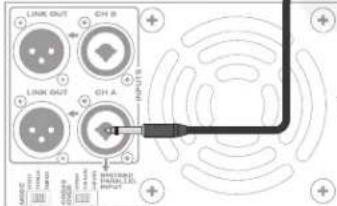
Make sure the switch is set to PARALLEL
Make sure the switch is set to BYPASS

Parallel (mono to subwoofers)

WARNING: Total impedance of your speakers must not be less than 4 ohms.
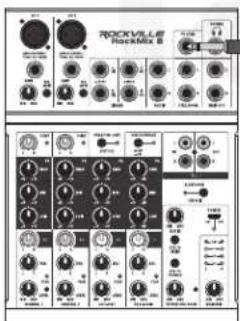
RockMix8
Signal from a passive mixer's FX send output to the Channel A (left) 1/4 " input.


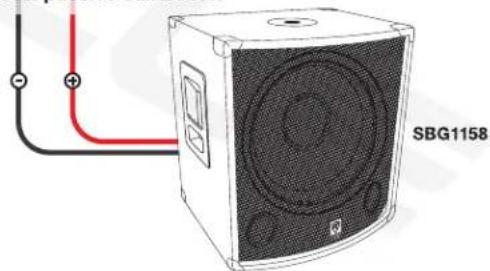
Mono signal from Channel A and Channel B binding post outputs to passive subwoofers
Make sure the switch is set to SUB 160Hz (allows for frequencies of 160Hz and below) or SUB 80Hz (allows for frequencies of 80Hz and below).

SBG1158
Configurations (continued)
Bridged (mono)

WARNING: Total impedance of your speakers must not be less than 4 ohms.

RockMix8
Signal from a passive mixer's FX send output to the Channel A (left) 1/4 input.
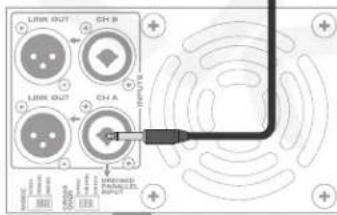
ROCKVILLE RPA16

Make sure the switch is set to BRIDGED
Make sure the switch is set to SUB 160Hz (allows for frequencies of 160Hz and below) or SUB 80Hz (allows for frequencies of 80Hz and below).
Mono signal from Channel A positive (+) and Channel B negative (-) binding post outputs to an 8Ω passive subwoofer
Link Out XLR
These setups allow you to use the amplifier's XLR Link outputs to send the full-range signal from the main amp to a secondary amp (Diagram A) as shown below, directly to a powered sub (Diagram B on page 12), or to a pair of powered PA speakers (Diagram C, page 13).
DIAGRAM A
![graph TD A["RockMix8"] -->|Signal from the passive mixer's left main output to the Channel A (left) ¼" input and the signal from the mixer's right main output to the Channel B (right) ¼" input.| B["RockMix8"] A -->|Make sure the MODE switch is set to STEREO | C["RockMix8"] A -->|Make sure the CROSS-…](/content/2026/07/1444512/images/858615ebcc4033bb96c0bcab7844a2ada8923eaf870d1ec1d907e79cb5679880.jpg)
Configurations (continued)
DIAGRAM B

WARNING: Total impedance of your speakers must not be less than 4 ohms.

RockMix8
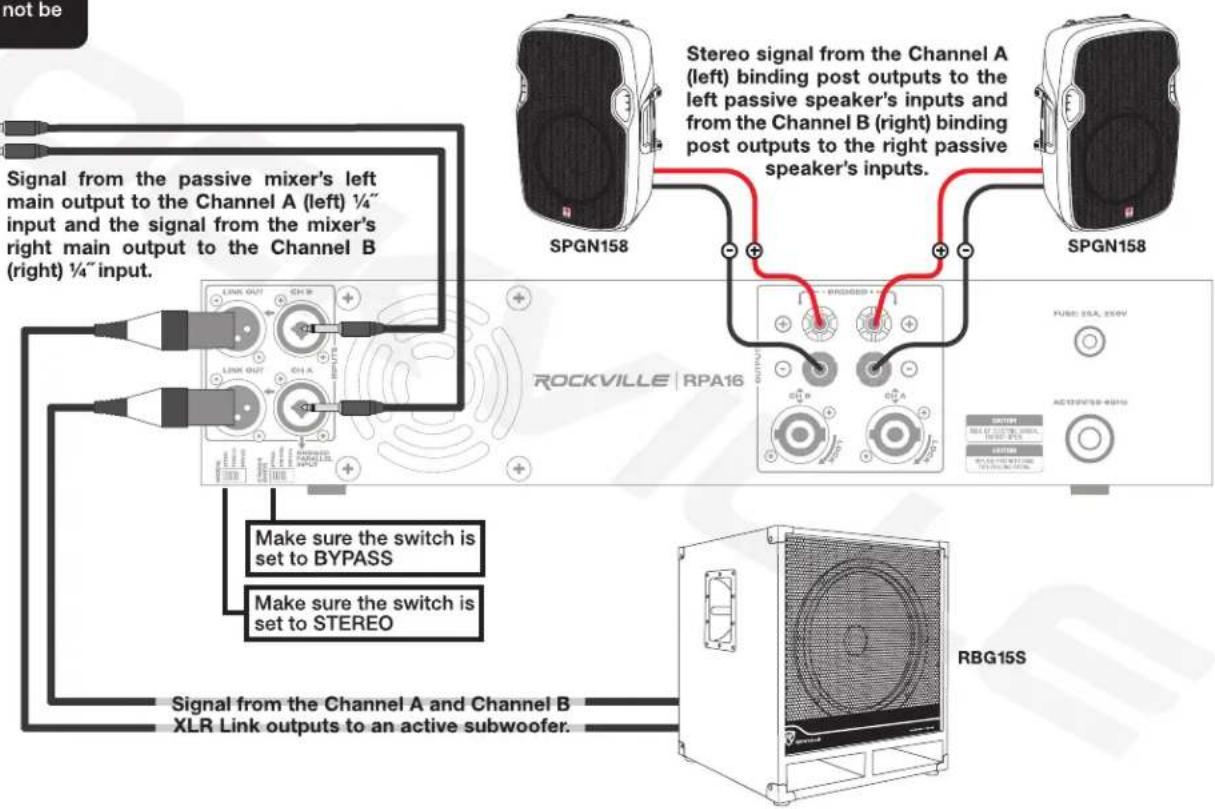
DIAGRAM C

WARNING: Total impedance of your speakers must not be less than 4 ohms.
RockMix8
Signal from the Channel A (left) and Channel B (right) XLR Link outputs to two active speakers.

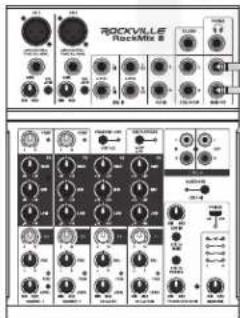
Signal from the passive mixer's left main output to the Channel A (left) 1/4 " input and the signal from the mixer's right main output to the Channel B (right) 1/4 " input.

TITAN 12
SPGN158
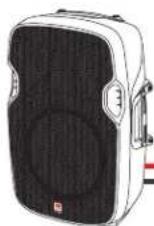
Stereo signal from the Channel A (left) binding post outputs to the left passive speaker's inputs and from the Channel B (right) binding post outputs to the right passive speaker's inputs.

SPGN158
ROCKVILLE|RPA16


Features/Specifications
- LCD displays the volume in dB per channel and the operating temperature
- 2U rack space
• Built-in limiter protects your speakers from distortion and clipping
- Bridged mode allows you to combine both channels' power into one channel for use with a subwoofer
- Stereo mode is perfect for (2) speakers or (4) speakers in a left and right configuration
- Parallel mode gives you dual mono output signals, which is perfect for monitor use when you want all sounds coming out of each speaker instead of a L/R configuration
• Built-in crossover switch (bypass, 80 Hz, 160 Hz) allows amp to be used with full-range PA speakers or Subwoofer(s)
• Channel A & B Clipping Led Indicators
• Channel A & B Separate Level Controls
• Power, signal, clipping, and protection LED indicators on front of amp
• Heavy-duty rack mount ears with handles
• Built-in variable-speed high-velocity quiet cooling fan
• Maximum headroom for 4-ohm and 8-ohm speakers
- Input Terminals: Combo jack (XLR and 1/4" ) A & B inputs
• Output Terminals: Banana binding post speaker output, Speakon output, XLR output (to connect another amplifier or powered sub)
- Level controls for precise setting and matching of sensitivity
- Computer controlled IC protection circuitry against speaker short circuit, thermal over load, DC over load
- User serviceable fuse (25A, 250V)
• RMS Power Output: Stereo 8 Ohm: 2 x 1000W
Stereo 4 Ohm: 2 x 1500W
Bridged 8 Ohm: 1 x 3000W
- Peak Power Output: Stereo 4 Ohm: 2 x 5000W Max
Bridged 8 Ohm: 1 x 10,000W Max
- Frequency Response (bandwidth @ 2Vrms out, @ -3.0dB) 10Hz – 30khz
• THD + Noise @ 1kHz full power: <0.04% - Input Impedance: 10k Ohm Balanced
- Input signal voltage: 660mV – 1.5V
- Input sensitivity: 0.7v
• Damping factor: 100Hz, 10w, 4 ohms: 36.5
1kHz @ 8 ohms: >400:1
• Effective damping factor: 100Hz, 10w, 4 ohms: 1.08
• Output impedance at speaker terminals: 0.10975 ohms
• Frequency Response vs THD+N (worst case, across normal bandwidth 1W) 0.6%
• Signal to Noise Ratio: >100dB
- IMD 60Hz & 1kHz, 4:1: <0.04%
• SLEW RATE (input filter limited): 40v/uS
• Power Requirements: 120V/50 – 60Hz
• Weight: 40.8 lbs
• Dimensions: 19.09 x 16.93 x 3.35 inch
Troubleshooting
| PROBLEM | SOLUTION |
| No power | 1. Make sure the unit is plugged in and the power switch is in the ON position.2. Check that the power cable is properly plugged into the wall socket.3. Check and replace the fuse if necessary.4. If people or equipment tend to step on and roll over or stretch your power cable it can get damaged. Check the power cable for damage. If the cable is damaged, discontinue using the unit until the cable can be repaired. |
| No sound | 1. Check that all appropriate cables and wires are plugged in correctly.2. Check the channel level settings.3. Check the volume settings on your input devices.4. Check mixer's master and input volumes.5. Make sure you are using the proper cables.6. Make sure speakers are connected to the amp's OUTPUT, not INPUT.7. Make sure mixer is connected to the amp's INPUT, not OUTPUT.8. Make sure the mixer's mute isn't on. |
| Clipping light is on | 1. Turn down signal level controls (gain).2. Check impedance of speakers or subs. |
ROCKVILLE

RockvilleAudio.com
© 2023 ROCKVILLE // Features and specifications are subject to change and/or improvement without notice.
- ROCKVILLE
- RPA16 10,000 WATT PRO RACK AMPLIFIER
- OWNER'S MANUAL
- ATTENTION: VISIT THE ROCKVILLE SUPPORT SITE FIRST
- IMPORTANT SAFETY INSTRUCTIONS
- TO REDUCE THE RISK OF ELECTRICAL SHOCK, NEVER OPEN THE UNIT. NO USER SERVICEABLE PARTS INSIDE. WE RECOMMEND CONTACTING THE ROCKVILLE SERVICE CENTER FOR ANY REPAIRS
- FEATURES
- SETUP
- RACK MOUNTING
- CONFIGURATIONS
- CROSSOVER AND MODE SWITCHES
- CONFIGURATIONS (CONTINUED)
- STEREO
- PARALLEL (MONO TO SPEAKERS VIA SPEAKON)
- PARALLEL (MONO TO SUBWOOFERS)
- BRIDGED (MONO)
- LINK OUT XLR
- DIAGRAM C
- FEATURES/SPECIFICATIONS
- ROCKVILLEAUDIO.COM
Marque : Rockville
Modèle : RPA16
Catégorie : Recepteur