SD-271 - Machine à glace Hoshizaki - Notice d'utilisation et mode d'emploi gratuit
Retrouvez gratuitement la notice de l'appareil SD-271 Hoshizaki au format PDF.


| Marque | Hoshizaki |
| Modèle | SD-271 |
| Type de produit | Machine à glace automatique |
| Production de glace | Jusqu'à 271 kg / 595 lb par jour (conditions standard) |
| Type de glace | Glaçons en forme de cube |
| Type de refroidissement | Air (ventilé) ou eau (selon version) |
| Dimensions (L x P x H) | 560 x 610 x 920 mm (approx. 22" x 24" x 36") |
| Poids net | Environ 65 kg |
| Alimentation électrique | 230 V / 50 Hz / monophasé |
| Consommation électrique | Environ 1,5 kW en fonctionnement |
| Alimentation en eau | Raccordement direct au réseau d'eau (pression 1-5 bar) |
| Capacité du bac de stockage | Intégré d'une capacité d'environ 50 kg |
| Fonctions principales | Production automatique de glace, indicateur de niveau de glace, arrêt automatique |
| Entretien et nettoyage | Cycle de nettoyage automatique recommandé tous les 3 mois |
| Sécurité | Protection contre les surchauffes, arrêt automatique en cas de panne d'eau |
| Pièces détachées et réparabilité | Disponibles via réseau de distribution Hoshizaki |
| Informations générales | Utilisation professionnelle recommandée, garantie constructeur 2 ans |
FOIRE AUX QUESTIONS - SD-271 Hoshizaki
Questions des utilisateurs sur SD-271 Hoshizaki
0 question sur cet appareil. Repondez a celles que vous connaissez ou posez la votre.
Poser une nouvelle question sur cet appareil
Téléchargez la notice de votre Machine à glace au format PDF gratuitement ! Retrouvez votre notice SD-271 - Hoshizaki et reprennez votre appareil électronique en main. Sur cette page sont publiés tous les documents nécessaires à l'utilisation de votre appareil SD-271 de la marque Hoshizaki.
MODE D'EMPLOI SD-271 Hoshizaki
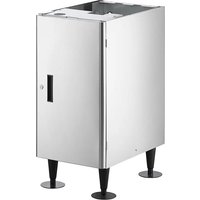
Hoshizaki SD-271 Cabinet Stand
For Use with DCM-271BAH and DCM-271BAH-OS
Installation Instructions to attach a DCM-271 series dispenser to the cabinet stand.
1) Select a flat and firm installation site.
2) Attach the four (4) adjustable legs (included) to the stand. Adjust the legs to prevent instability.
3) Open the door.
4) Remove the two screws securing the panel and then remove the panel.
5) Remove the legs from the dispenser. Make sure the drain line and water supply line are disconnected from the dispenser.
6) Position the dispenser on top of the stand. Be sure to align the drain on the dispenser with the drain hole on the stand.
7) Using the four (4) bolts included with the stand, secure the dispenser to the stand.
8) Make the drain line and water line connections. Route the lines and the electrical cord through the grommets on the stand's rear panel.
9) Using the two screws, reattach the panel in its proper position.
10) Seal the seam all the way around between the dispenser and stand with food grade silicone.
Note: The door on the stand is reversible. To reverse the door, remove the screws securing the hinges to the stand. Rotate the door 180° and reattach on the other side.

Marque : Hoshizaki
Modèle : SD-271
Catégorie : Machine à glace