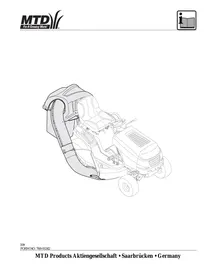
GRASS CATCHER FOR LAWN TRACTORS 700, 900, RT99 - Accessoires pour tondeuses à gazon MTD - Notice d'utilisation et mode d'emploi gratuit
Retrouvez gratuitement la notice de l'appareil GRASS CATCHER FOR LAWN TRACTORS 700, 900, RT99 MTD au format PDF.
| Type de produit | Bac de ramassage pour tondeuses autoportées |
| Marque | MTD |
| Modèle | GRASS CATCHER FOR LAWN TRACTORS 700, 900, RT99 |
| Compatibilité | Séries MTD 700, 900, RT99 et similaires |
| Capacité du bac | Environ 200 litres (deux sacs) |
| Dimensions (L x l x h) | Environ 100 x 50 x 40 cm |
| Poids | Environ 10 kg |
| Matériaux | Plastique ABS, toile tissée, acier peint |
| Alimentation | Aucune (accessoire mécanique) |
| Fonctions principales | Ramasse et stocke l'herbe coupée, se fixe à l'arrière de la tondeuse |
| Installation | Nécessite un montage sur châssis avec support, tube et connecteur de pont (outils fournis) |
| Entretien | Vider après chaque utilisation, nettoyer les sacs, vérifier les fixations |
| Sécurité | Couper le moteur, serrer le frein de stationnement, débrancher la bougie avant installation |
| Pièces détachées | Sacs de rechange, supports, lames haute levée optionnelles |
| Réparabilité | Pièces disponibles chez revendeur MTD, échange possible |
| Garantie | Garantie fabricant standard MTD (consulter notice) |
FOIRE AUX QUESTIONS - GRASS CATCHER FOR LAWN TRACTORS 700, 900, RT99 MTD
Questions des utilisateurs sur GRASS CATCHER FOR LAWN TRACTORS 700, 900, RT99 MTD
0 question sur cet appareil. Repondez a celles que vous connaissez ou posez la votre.
Poser une nouvelle question sur cet appareil
Téléchargez la notice de votre Accessoires pour tondeuses à gazon au format PDF gratuitement ! Retrouvez votre notice GRASS CATCHER FOR LAWN TRACTORS 700, 900, RT99 - MTD et reprennez votre appareil électronique en main. Sur cette page sont publiés tous les documents nécessaires à l'utilisation de votre appareil GRASS CATCHER FOR LAWN TRACTORS 700, 900, RT99 de la marque MTD.
MODE D'EMPLOI GRASS CATCHER FOR LAWN TRACTORS 700, 900, RT99 MTD

1


English

François

Deutsch


Installing the grass catcher
Follow the safety instructions and operating instructions in the operating manual for the lawn tractor. Before installing the grass catcher, park the lawn tractor on a level surface, apply the parking brake, switch the engine off and remove the spark-plug terminal.
Check your model number so that you know which installation steps to perform.
Identification of the model number:
You can find the rating plate under the driver's seat. The fifth to seventh digits of the model number indicate the series.
Example: Model number: 13AN773G600 = Series 700
Installation diagrams

The installation diagrams 1 to 26 are at the front (illustrated fold-out pages) of the manual.
Installing the holder “L” – Only required on units belonging to Series 700
Figs. 1-3
- Fit a shoulder bolt (D1) and nut (E1) to each of the holders (F1) and (G1) - Fig. 2.
- Remove the 4 screws (2 on left and 2 on right) from the rear side of the chassis and use these 4 screws (A1) subsequently for the side holder attachment (Fig. 3).
- Now attach the pre-assembled holders (F1 and G1) from Step 1 to the tractor using the 8 screws (A1) (Fig. 3).
- Insert the bolts (B1) into the two holders and secure each bolt with a cotter pin (C1) - Fig. 3.
Installing the mounting frame
Figs. 1 and 4-7
- Fit the two plates (L1 and K1) to the plate (J1) using 4 screws (H1) and 4 nuts (I1) - Fig. 4.
Note: Ensure that the plates are fitted correctly.
- Now turn the pre-assembled mounting frame by 180^ - see Fig. 5.
- Fit the holder (C) to the pre-assembled mounting frame using 4 screws (D2) and 4 nuts (F2).
Note: Ensure that correct mounting holes are used in the side retaining plates and initially tighten the nuts only hand-tight, as this will facilitate the subsequent installation.
Fig. 5a – for mounting on tractors belonging to the 700 Series.
Fig. 5b - for mounting on all other tractors.
- Now hook the pre-assembled mounting frame into the shoulder screws on the tractor frame/holder (Fig. 6).
Note: In the tractor series 700 first remove the retaining bolts (B1) and cotter pins (C1) from the holder (Fig. 3).
Then re-attach them after hooking in the mounting frame to secure the mounting frame to the holder as well.
Use mounting holes (X - Fig. 4) for installation.
- Align the lower hole in the mounting frame with the hole in the hitching device on the tractor chassis. Insert the bolt (E2) through the mounting holes and secure the bolt with the cotter pin (G2) – Fig. 7.
- Now tighten all bolts and nuts on the mounting frame.
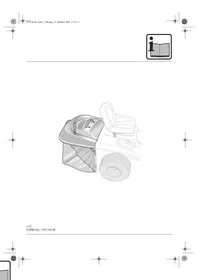
Installing the grass catcher
Figs. 1, 8-26
- Push the support plate (I) into the recess on the grass catcher bag carrier (J) and secure the support plate on the grass catcher carrier using a bolt (B2) and nut (C2) (Figs. 8 and 9).
- Now hook the pre-assembled part into the mounting frame on the tractor between the 2 lugs and secure the part on the mounting frame using a bolt (A2) and nut (C2) (Figs. 10 and 11).
- Install the tube holder (F) by clicking it onto the tubular frame of the grass catcher bag carrier (Fig. 12).
Note: In Step 1 ensure that the edge of the tube holder is flush with the red line on the tubular frame. -
Install the cover (E) in the hood (D):
-
Push the long end of the cover all the way into the recess of the hood (Fig. 13).
Note: Ensure that the cover is situated under the guide (1) (Fig. 14). -
Now press the other end of the cover into the designated recess (2) in the hood (Fig. 14).
-
Now position the hood on the mounting eyelets of the tubular frame (Fig. 15).
-
Attach the hood with the bolt (K). To do this, push the bolt (K) through the first mounting eyelet and then continue through the second mounting eyelet until the end of the bolt touches the hood (Fig. 17). The bolt is now secured on the hood by the two lugs (Fig. 17).
Note: To facilitate installation, use the inspection opening (1) in the hood (Fig. 16).
- Open the hood (Fig. 18).
-
To do this, press your right hand onto the rear, right plate (Step 1) and grip the middle plate with your left hand to open the hood upwards (Step 2) - Fig. 18.
-
Hook both grass catcher bags (G) into the tube holder, ensuring that the more impervious side (closer meshed fabric) is at the front (Fig. 19). Note: First hook in the front side and then lower the rear side until the grass catcher bag is situated firmly in the tubular frame.
- Fit the rubber mount (N2) to the mower deck connector (B) using the bolt (H2), washer (I2) and safety cotter pin (J2) - Fig. 20.
- Fit the retaining bolt (L2) and nut (M2) to the mower deck (Fig. 21).
-
Installing the mowed deck connector: (Figs. 22 - 24):
-
Open the impact guard on the mower deck and hold it firmly in this position (Fig. 22).
- Place the rear upper edge of the mower deck connector over the rear upper edge of the mower deck opening. Now swivel the connector down over the mower deck opening (Fig. 22).
Note: The connector is correctly installed when the lower edge is situated over the lower edge of the mower deck opening (Fig. 23). Ensure that the installation is correct.
- Hook the rubber mount into the retaining bolt on the mower deck to secure the mower deck connector on the mower deck (Fig. 24).
- Align the guide grooves (1) on the intermediate piece (A) with the mounting lugs (2) on the mower deck connector and push the intermediate piece all the way onto the mower deck connector (Fig. 25).
- Secure the intermediate piece on the mower deck connector using the retaining clips (K2) (Fig. 25).
- Open the hood and push the pipe end section (H) onto the intermediate piece and align it until the lower retaining groove (1) is situated firmly in the tube holder (2) (Fig. 26). Note: Ensure that the installation is secure and correct.
- Close the hood on the grass catcher.
- Inspect the installation and perform a function test.
Operating the grass catcher:
Emptying
- Switch off the unit.
Apply parking brake. - Open grass catcher hood and lift up.
Take hold of the grass catcher baskets by the grip points at the bottom of the grass catcher bags and then take out of the holders.
Empty grass catcher bags. - Hook in grass catcher bags and close the grass catcher hood again.
Additional information: To ensure that the grass catcher functions optimally, the "Highlift blades" (optional accessories / or included in product package depending on model) should be installed (tightening torque of the blade screw 122 Nm). If required, contact your local dealer.