ELECTRIC SHREDDER - Déchiqueteuse électrique MTD - Notice d'utilisation et mode d'emploi gratuit
Retrouvez gratuitement la notice de l'appareil ELECTRIC SHREDDER MTD au format PDF.


| Type de produit | Broyeur électrique MTD |
| Caractéristiques techniques principales | Broyeur à végétaux, idéal pour le compostage et le recyclage des déchets de jardin |
| Alimentation électrique | 230 V, 50 Hz |
| Dimensions approximatives | Longueur : 60 cm, Largeur : 45 cm, Hauteur : 100 cm |
| Poids | Environ 30 kg |
| Puissance | 2500 W |
| Fonctions principales | Réduction des déchets de jardin, broyage des branches et feuillage |
| Entretien et nettoyage | Nettoyer les lames après chaque utilisation, vérifier les connexions électriques régulièrement |
| Pièces détachées et réparabilité | Disponibilité de pièces de rechange auprès des distributeurs agréés |
| Sécurité | Équipé d'un interrupteur de sécurité, porter des gants et des lunettes de protection lors de l'utilisation |
| Informations générales utiles à connaître | Vérifier la compatibilité avec les types de végétaux à broyer, consulter le manuel d'utilisation pour des conseils spécifiques |
FOIRE AUX QUESTIONS - ELECTRIC SHREDDER MTD
Questions des utilisateurs sur ELECTRIC SHREDDER MTD
0 question sur cet appareil. Repondez a celles que vous connaissez ou posez la votre.
Poser une nouvelle question sur cet appareil
Téléchargez la notice de votre Déchiqueteuse électrique au format PDF gratuitement ! Retrouvez votre notice ELECTRIC SHREDDER - MTD et reprennez votre appareil électronique en main. Sur cette page sont publiés tous les documents nécessaires à l'utilisation de votre appareil ELECTRIC SHREDDER de la marque MTD.
MODE D'EMPLOI ELECTRIC SHREDDER MTD
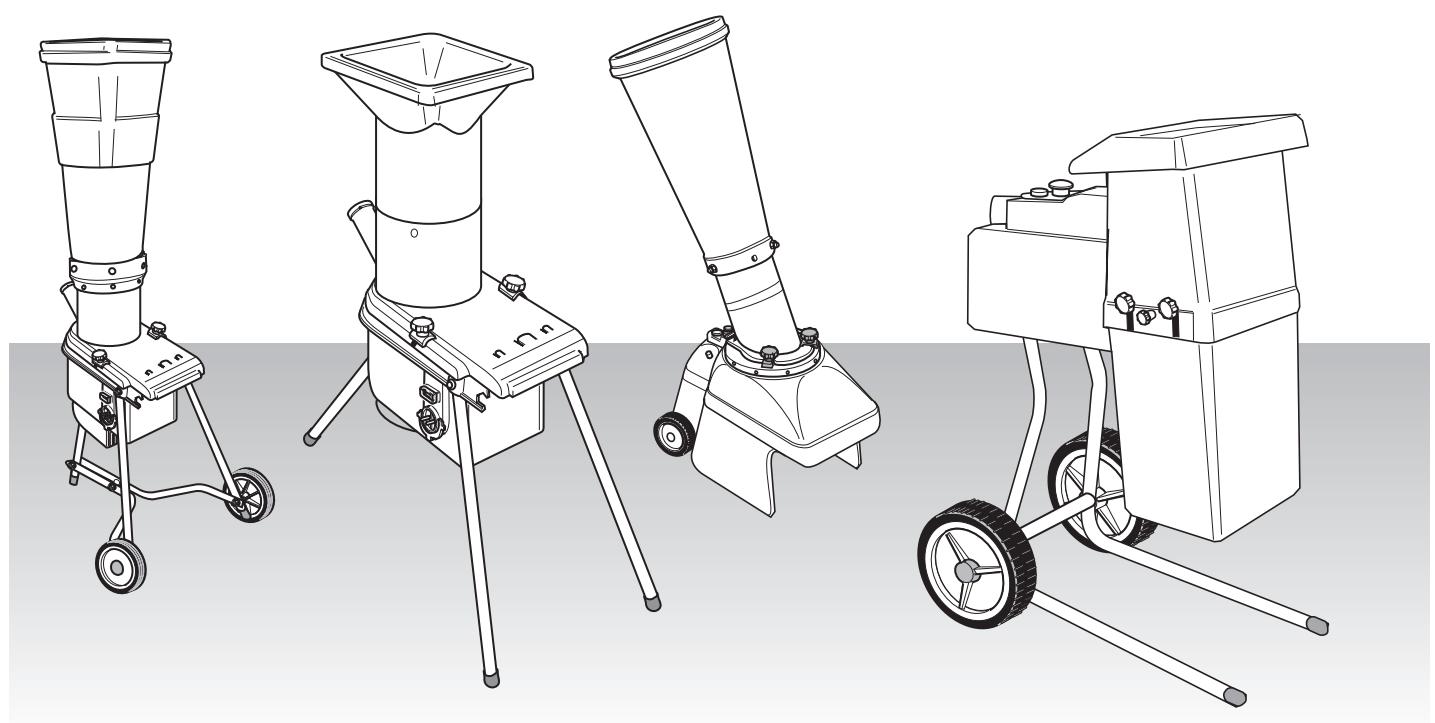
1

2
Typ 1/5/11
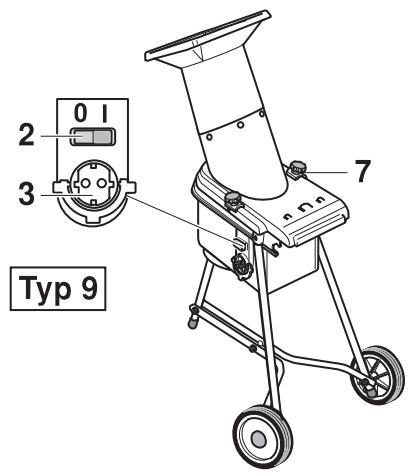
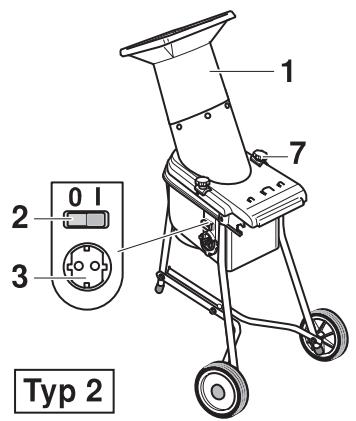
Typ 2/3/9
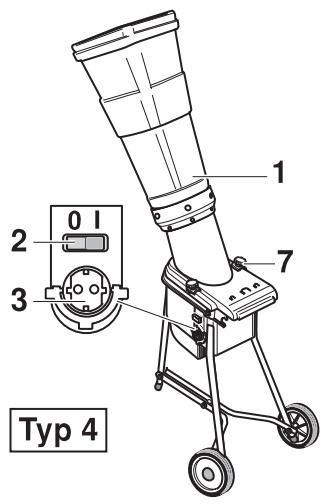
Typ 4
Typ 8
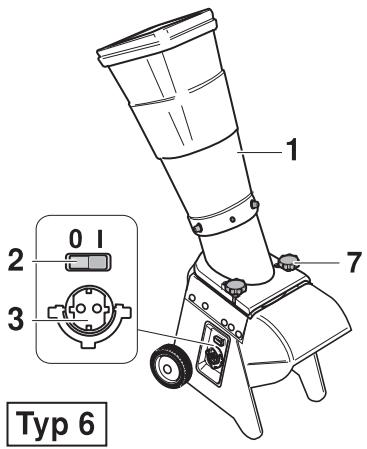
Typ 6
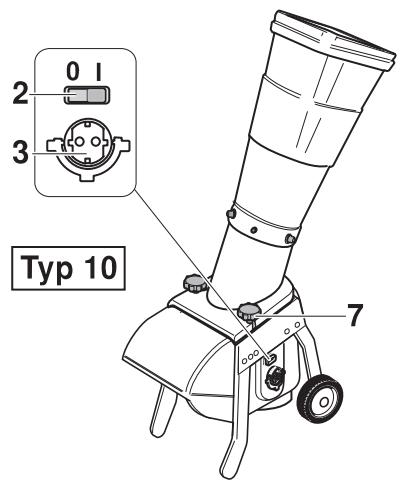
Typ 10

English
François
Deutsch
Nederlandss
Italiano
Espanol
Svenska
Dansk
Norsk
Suomi
Português
Eλληνικά


Information on the identification plate
This information is very important for later identification of the unit if replacement parts have to be ordered, and for the customer service.
You will find the identification plate in the vicinity of the motor.
Enter all the information shown on the identification plate of your mower into the following box.

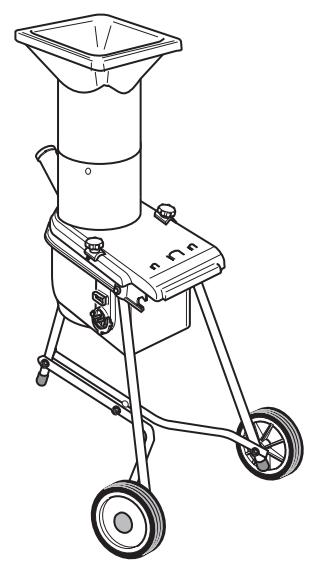
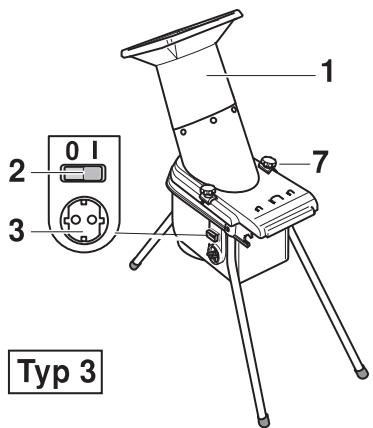
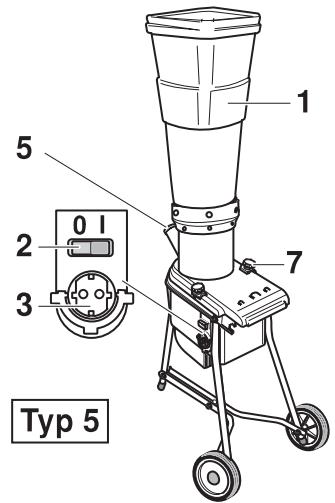
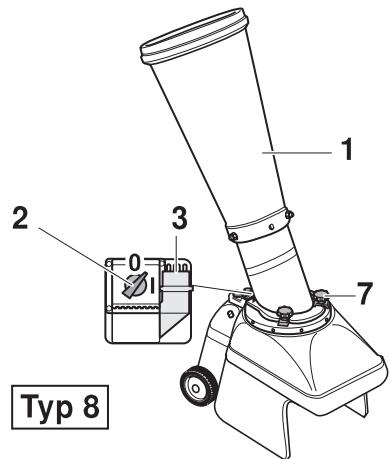
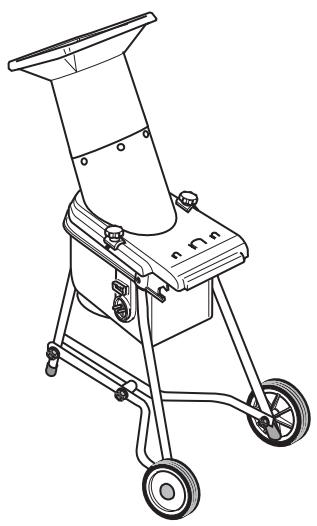
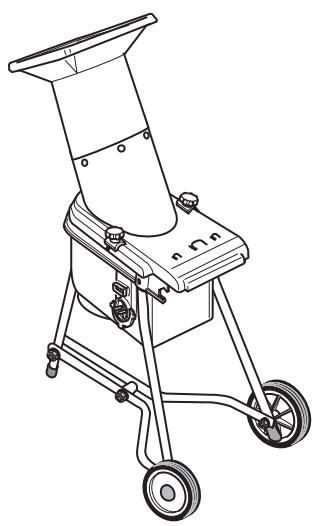
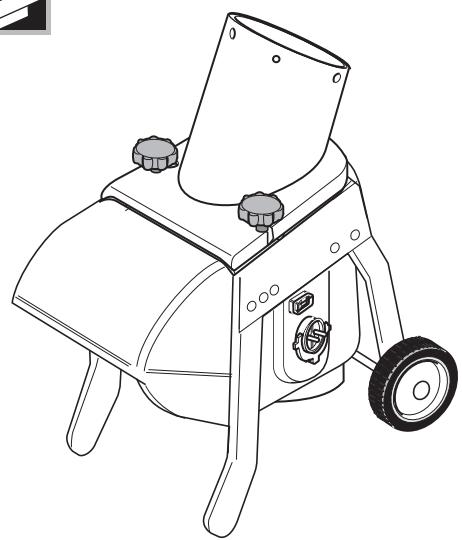
Various models are described in these operating instructions. The models are designated as Type 1 to Type 11 (see Figure 1 on the fold-out pages).
For your safety
Use the unit correctly
This machine is exclusively intended for use:
- in accordance with the specifications and safety notes given in these operating instructions
(in all cases except for Type 4) - as a chopper for plant material, shrub cuttings and pruned branches (no thicker than: 5 cm in Type 8, 4 cm in Type 6 and Type 7, 3–3.5 cm in all other units)
(Type 4) - only as a chopper for fruit cores and fruit stones in domestic use.
Any other use is regarded as contrary to specifications!
Use of the machine contrary to specifications or any unauthorised changes to the unit invalidate any liability of the manufacturer.
The user is liable for any damage or injury caused to third parties and their property by use of the machine.
General Safety Notes
As the user of the machine, please read through these operating instructions carefully before using the machine for the first time. Handle it in accordance with the instructions and retain the instructions for later use or for a subsequent owner.
Do not permit children under the age of 16 to handle this machine (local regulations may specify the minimum age of the user).
Keep persons, especially children, and domestic animals well away from the danger area.
Stand the machine only on an even, horizontal, firm and dry ground. Secure it against rolling away.
When working, always wear gloves, hearing protection and protective glasses.
Do not let any parts of the body or clothing come into the vicinity of rotating parts of the machine.
Switch off the motor and pull out themains plug when you
-
are not working with the machine or
-
move away from it.
Only have the machine repaired by a specialist workshop.
Safety devices
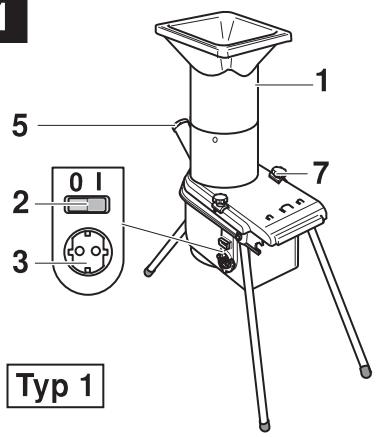
Figure 1
Safety devices serve for your protection and must always operate efficiently. They must not be removed, changed or by-passed.
Filling funnel (1)
Owing to its depth in association with the height of the machine or with the feed-in opening, the filling funnel prevents unintentional contact with the cutting tool.
Restart protection device
Switches off the machine (motor and cutting tool) when the filling funnel is removed. When the filling funnel has been put back on, the operating switch must be positioned to "0" before the machine can be switched on again.
EMERGENCY-OFF switch (4)
Some models have an EMERGENCY-OFF switch. When this switch is pressed (in an emergency) the machine is switched off.
Symbols on the machine
At various places on the machine you will find safety and warning indications, represented by symbols or pictograms. The symbols have the following meanings:

Danger of injury or damage to property.

Read and observe this instruction, especially the chapter "For your safety", before operating this machine.

Protect from permeating damp.

Caution! Danger! Cutting tool rotating!


Pull out mains plug before working on cutting tool.
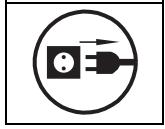

Wear work gloves.

Wear ear muffs.

Wear eye protectors.
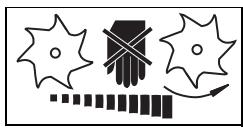
Rotating cutters! Cutter running down!
Unpacking and assembly
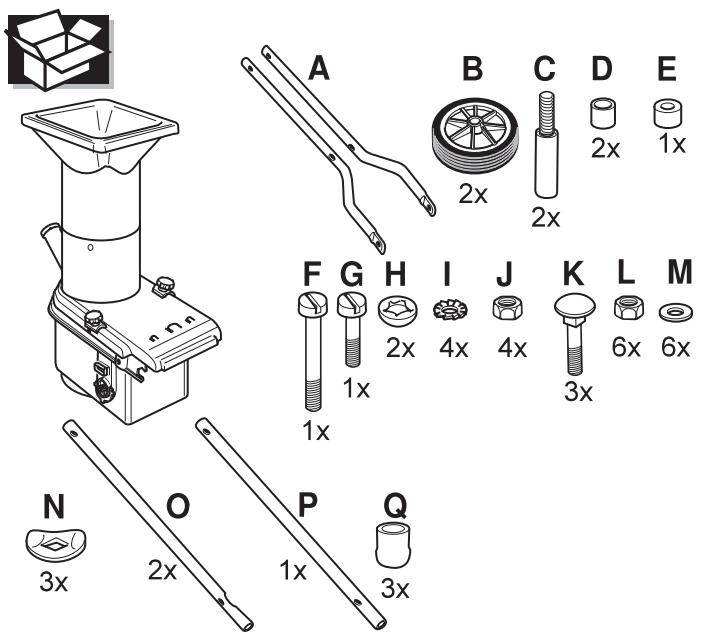
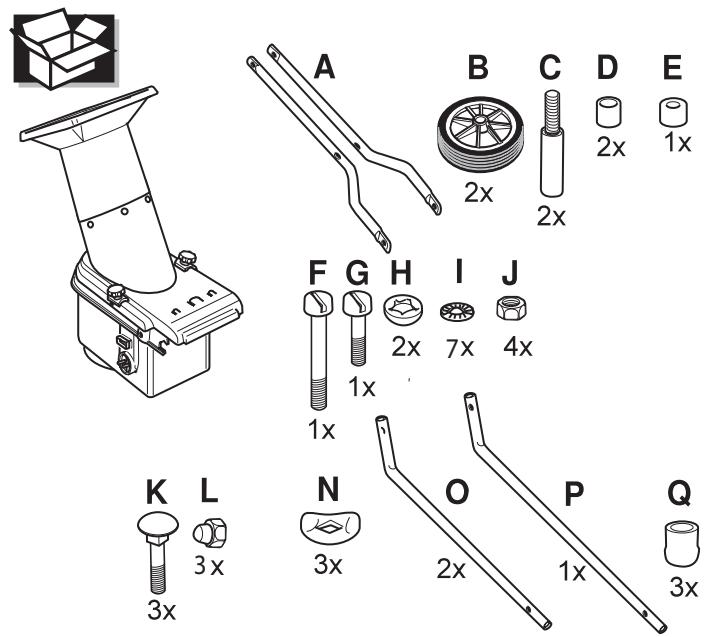
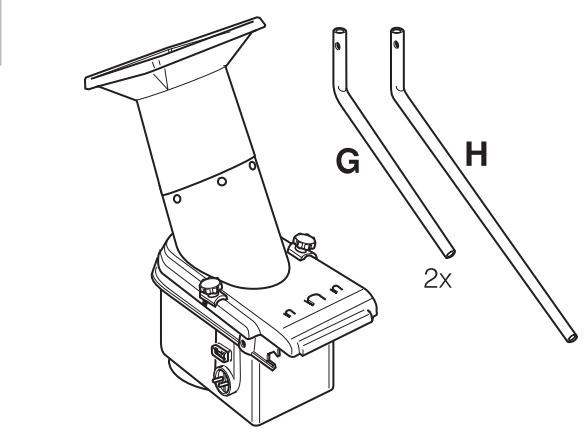
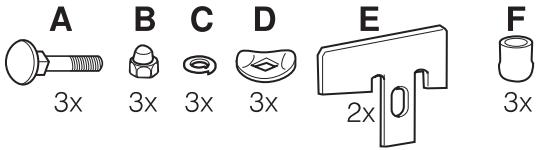
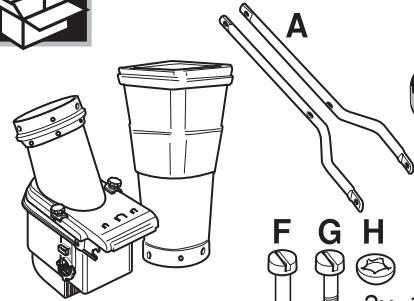
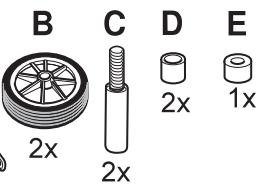
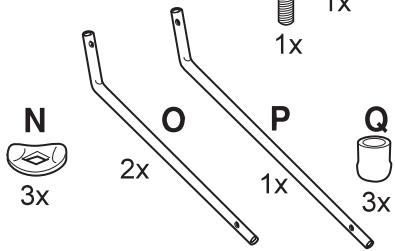
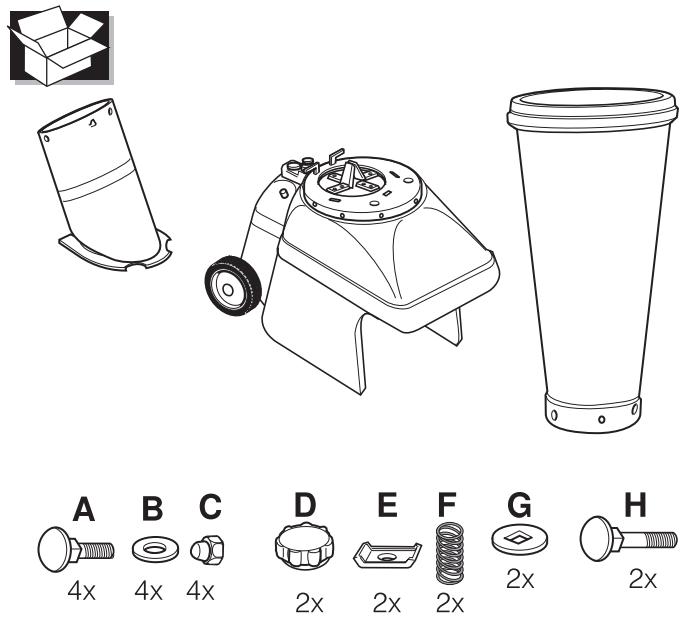
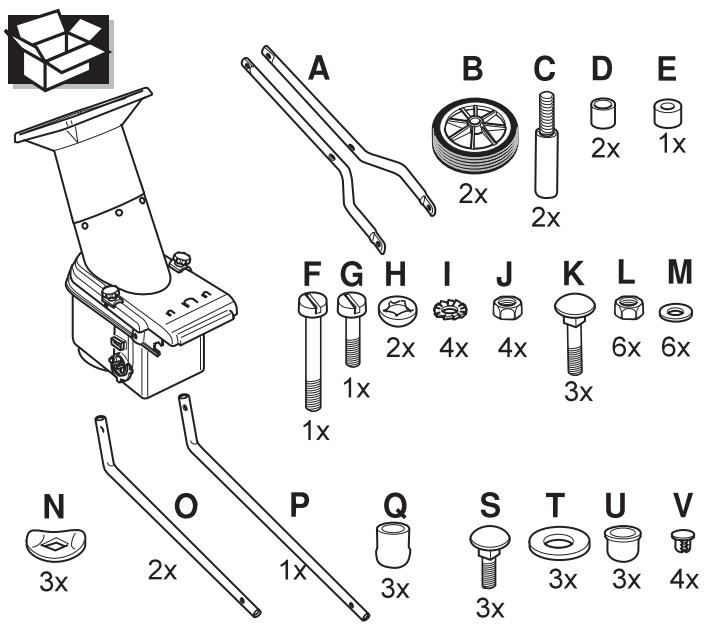
When unpacking, check the supplied contents.
Assembling the lawn mower
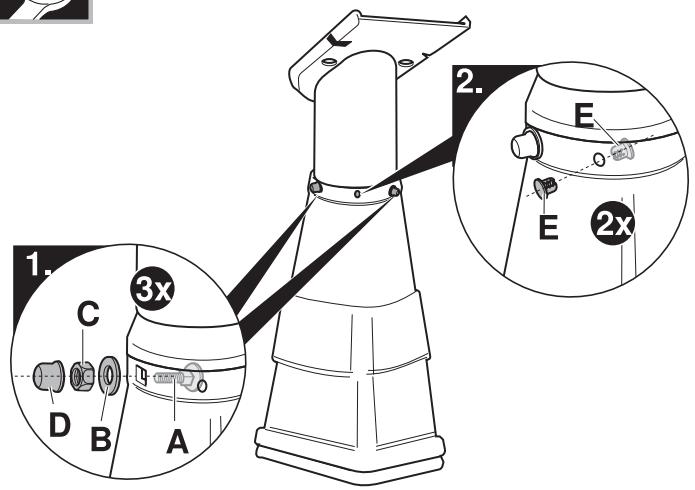
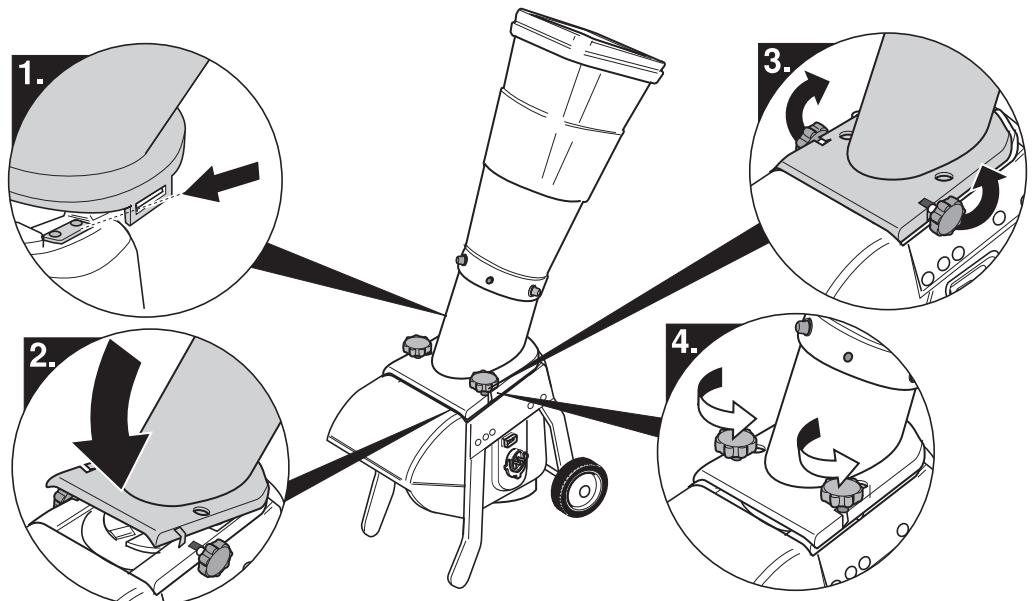
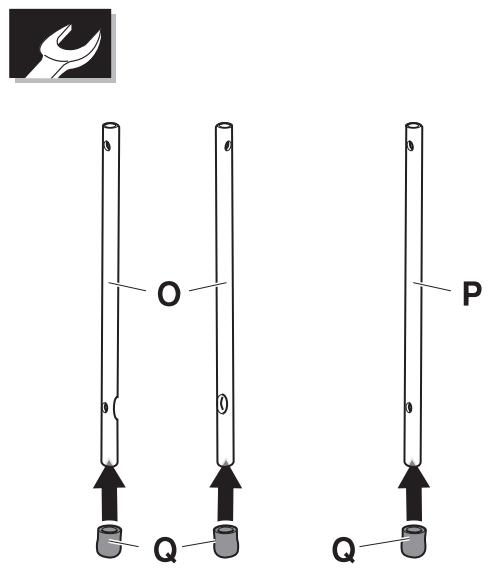
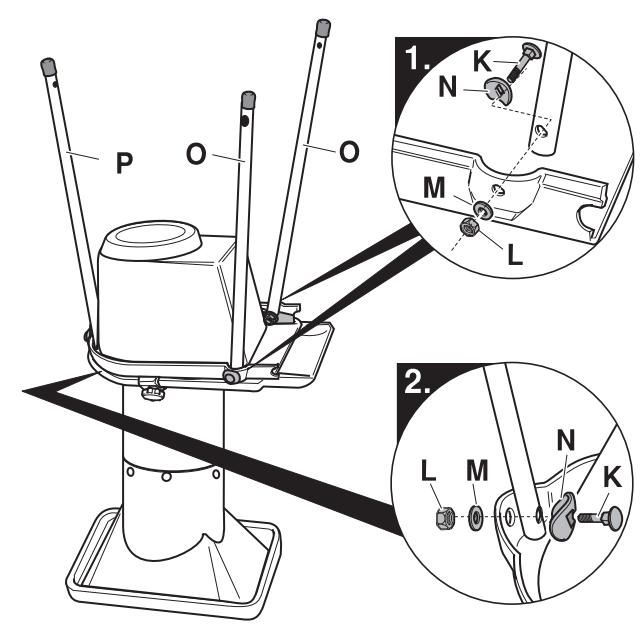
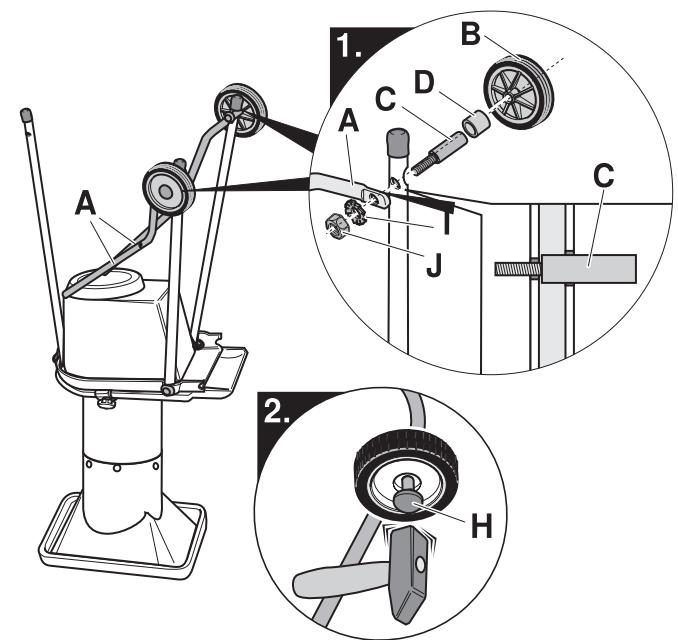
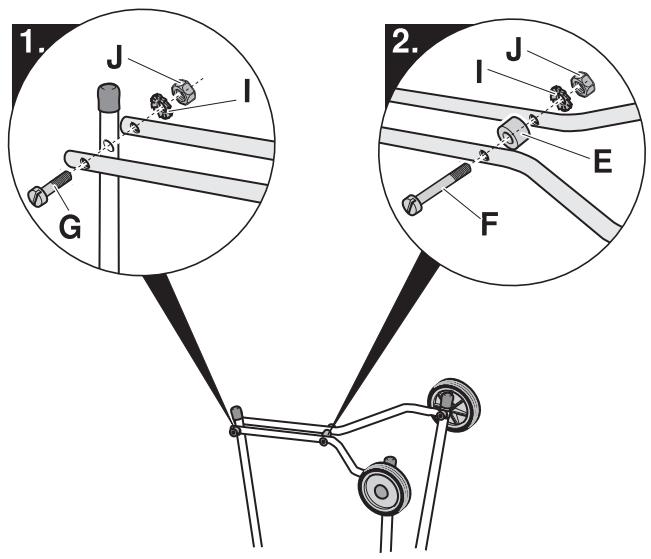
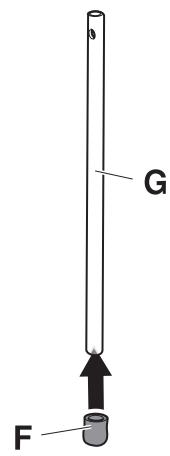
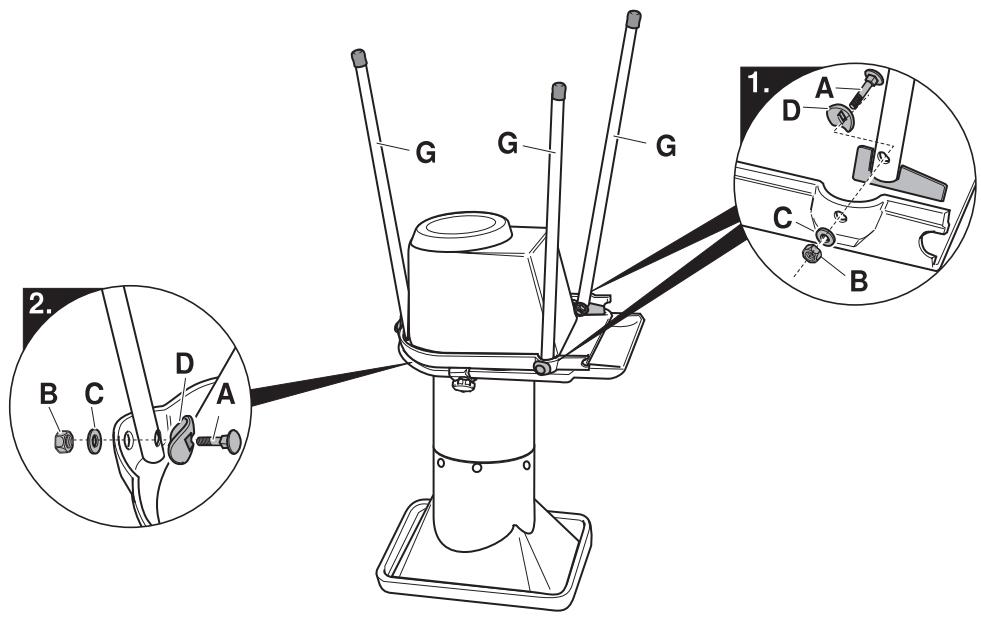
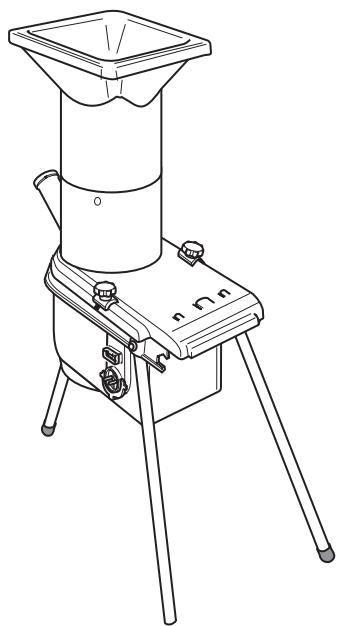
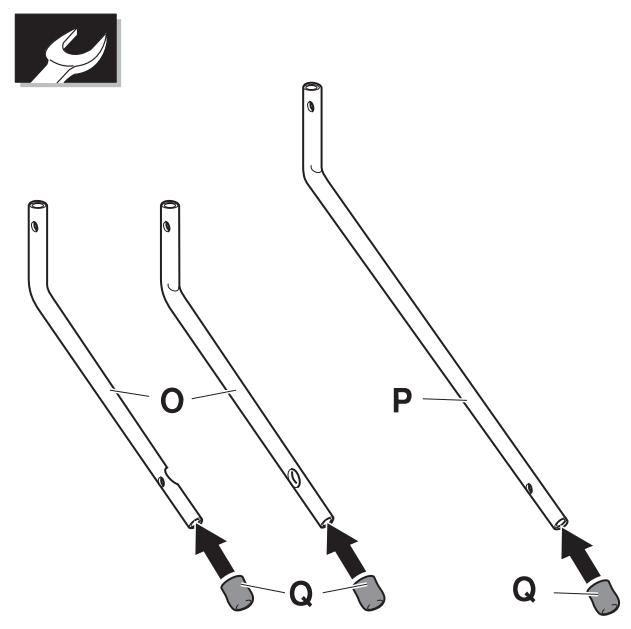
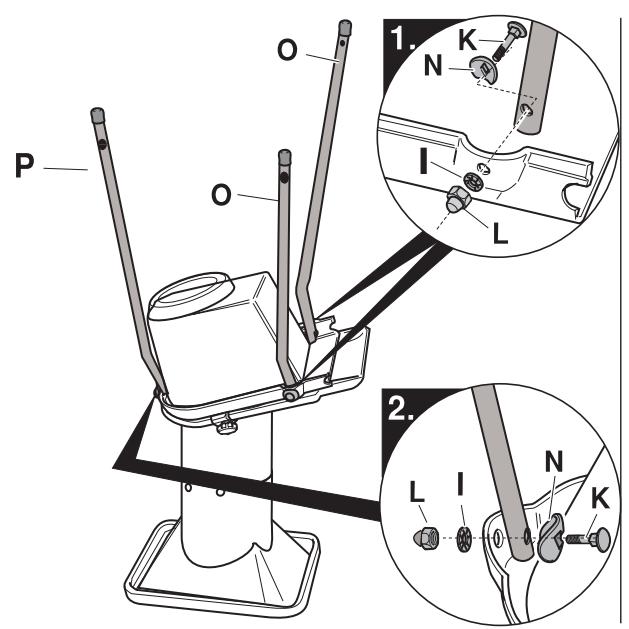
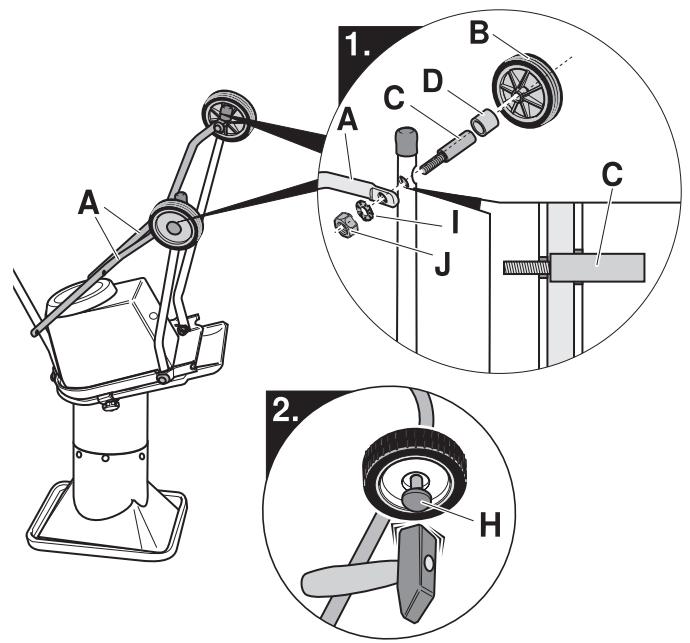
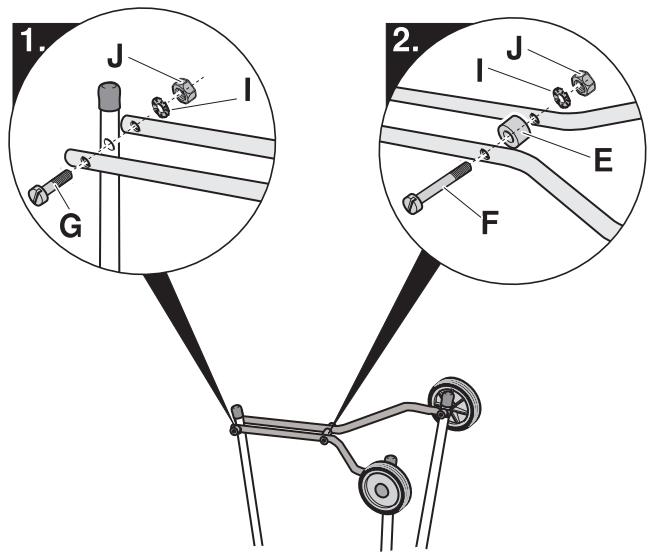
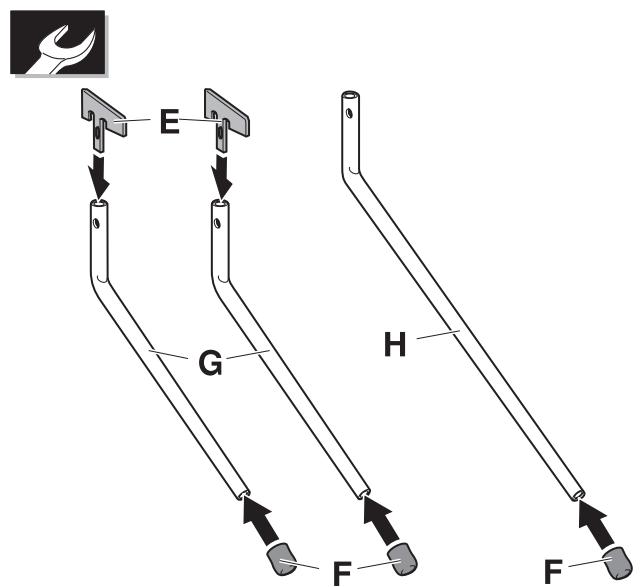
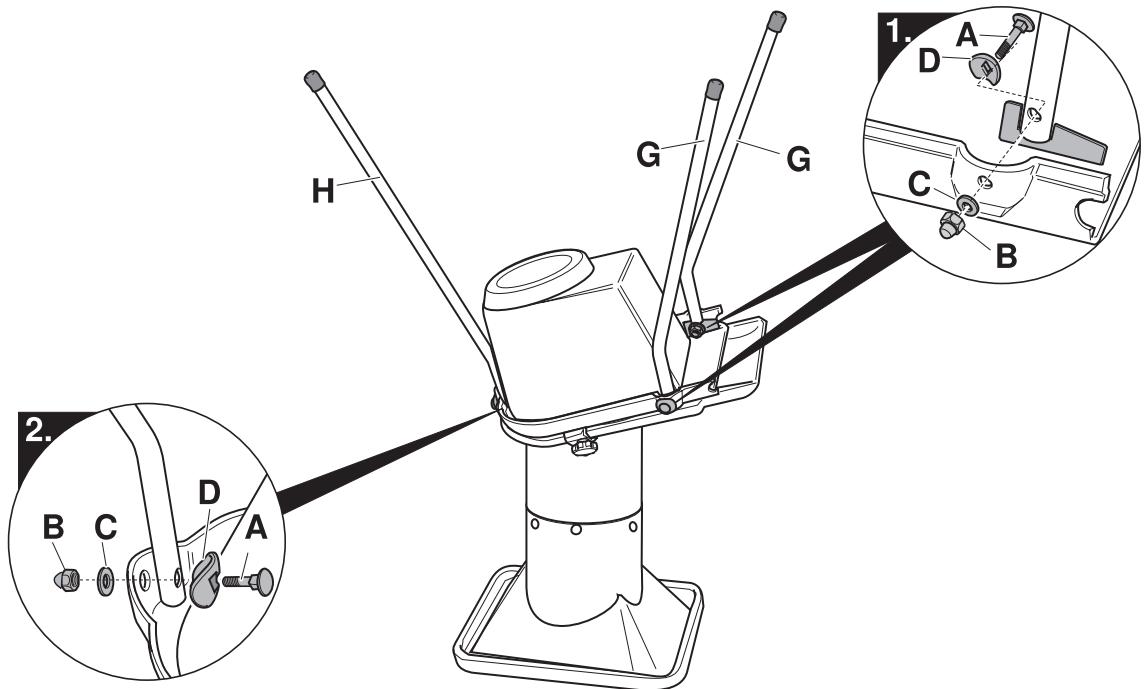
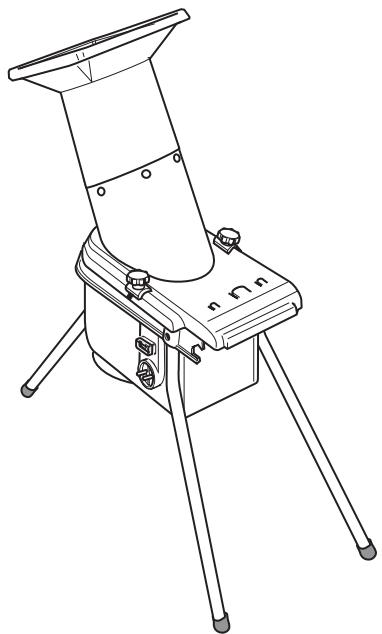
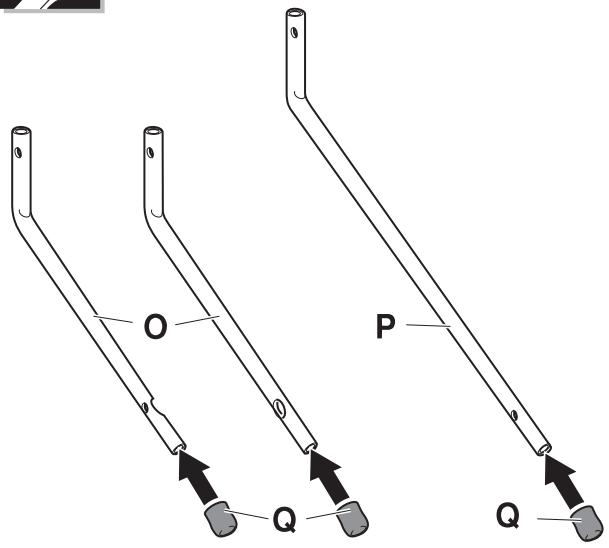
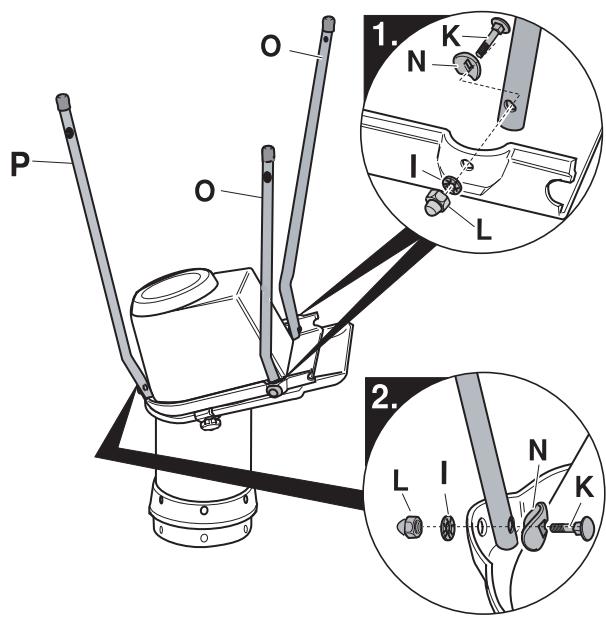
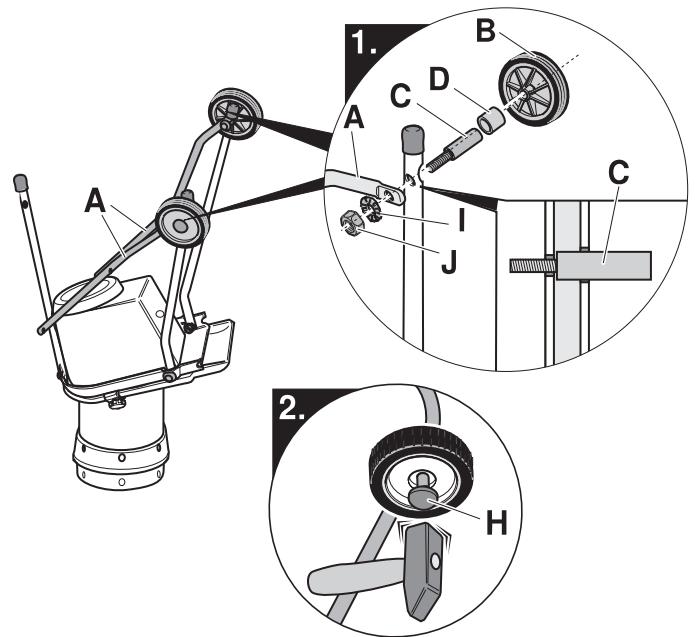
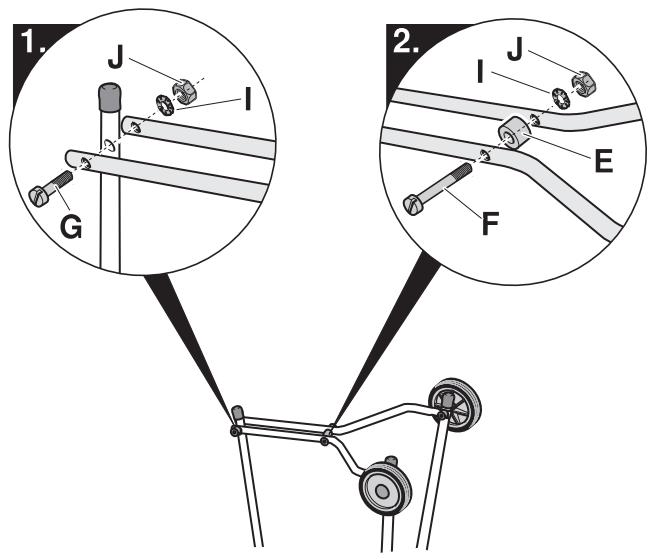
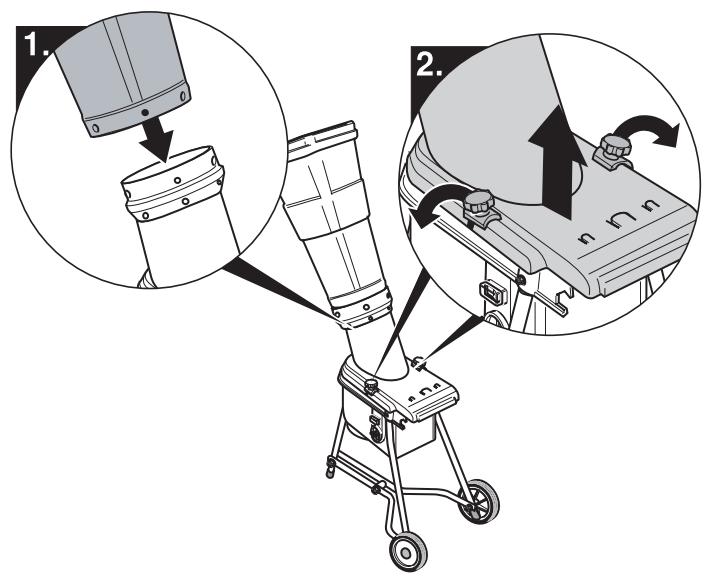
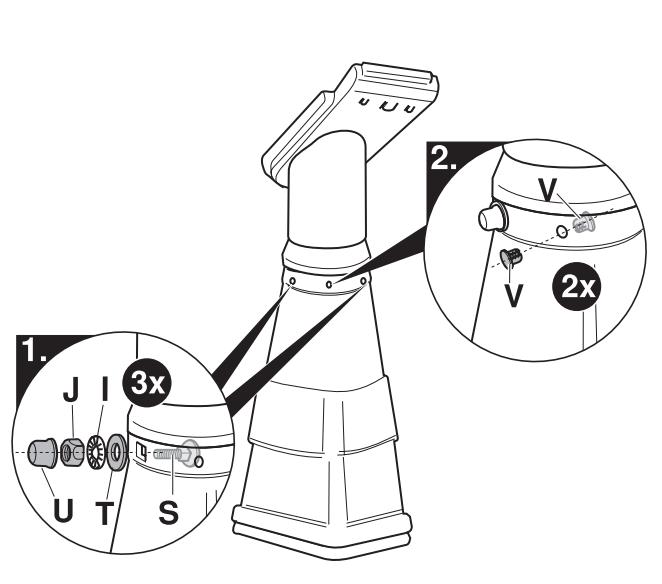
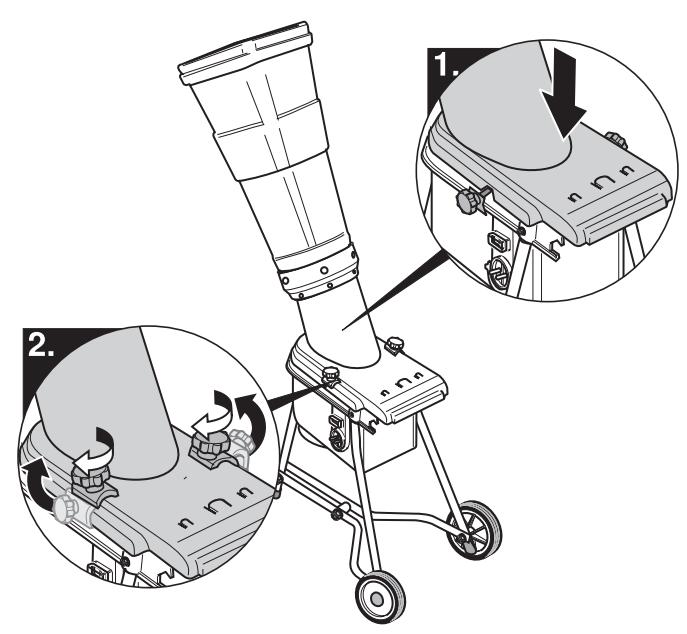
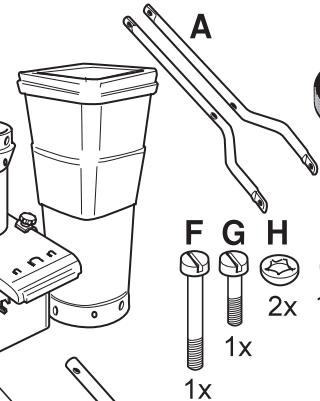
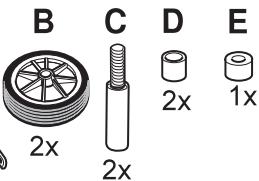
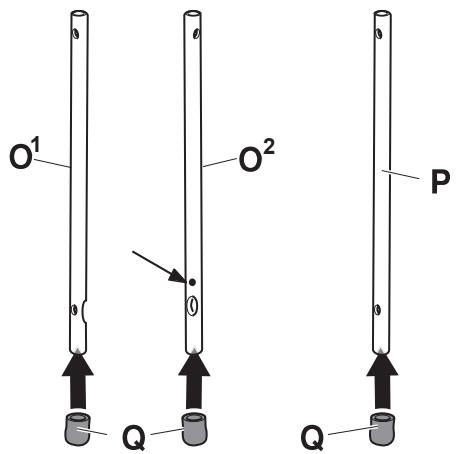
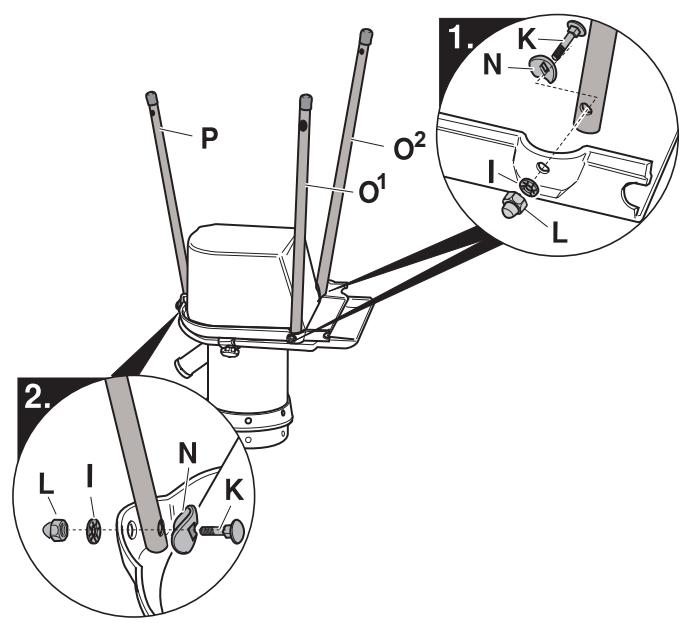
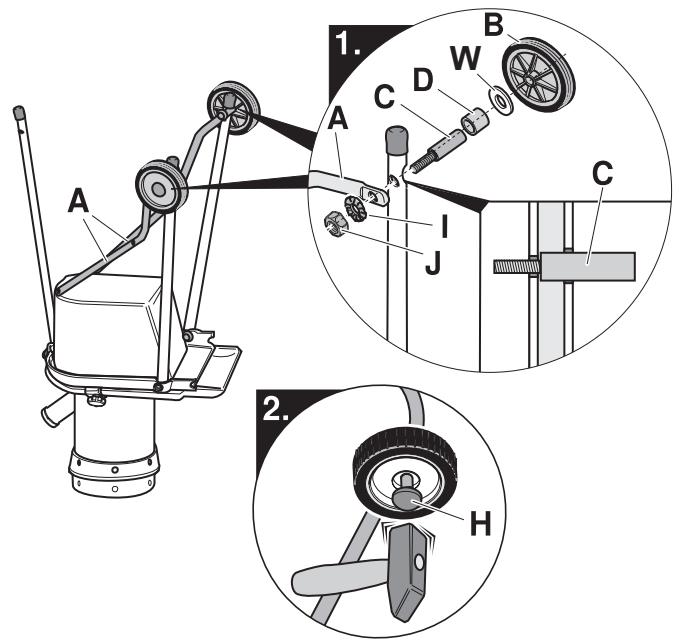
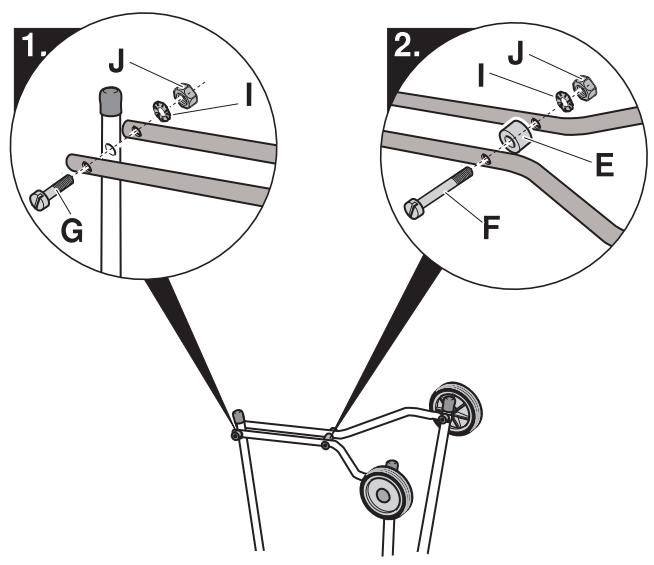
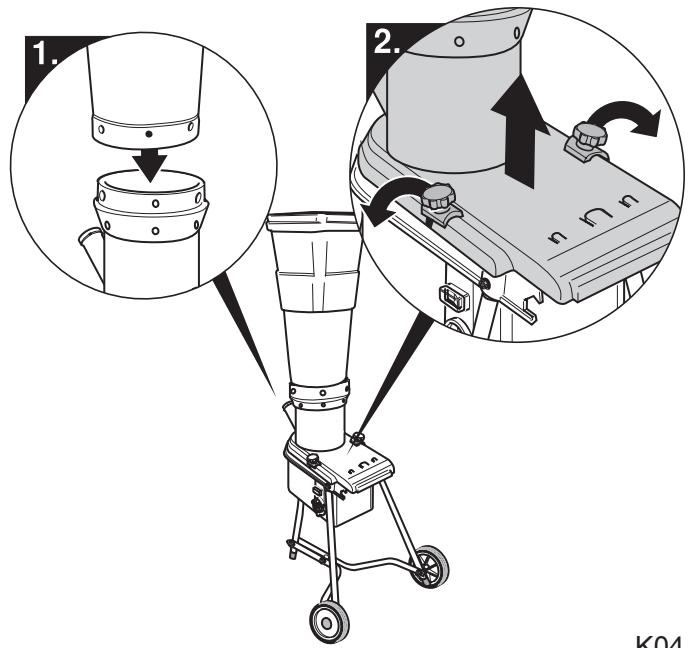
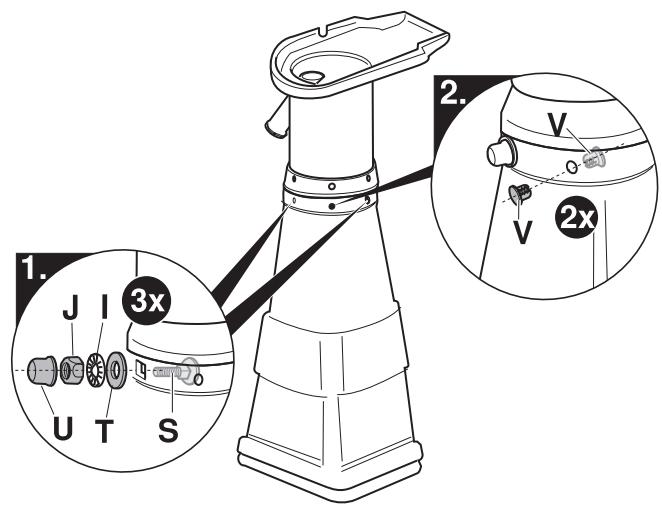
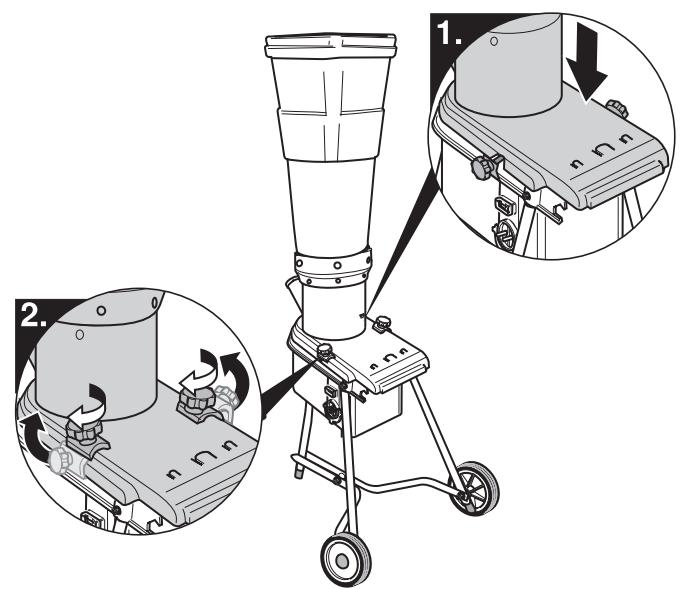
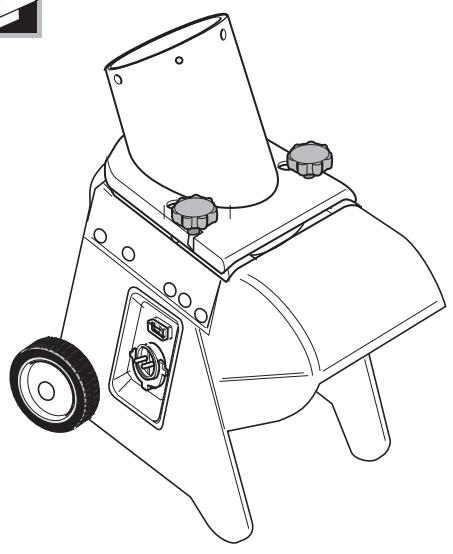
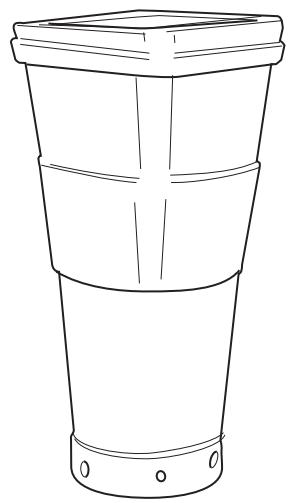
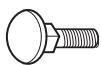
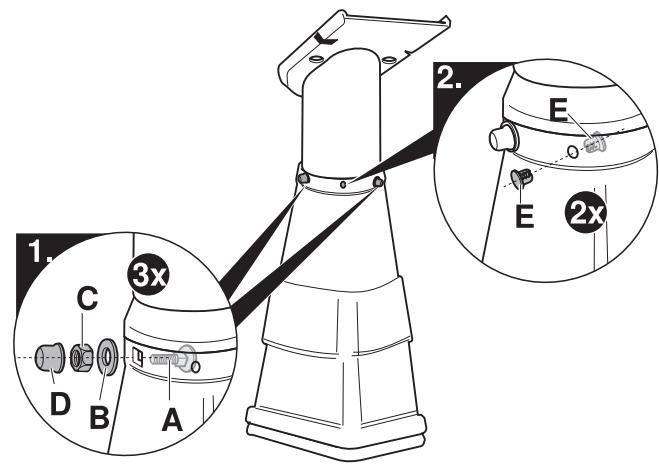
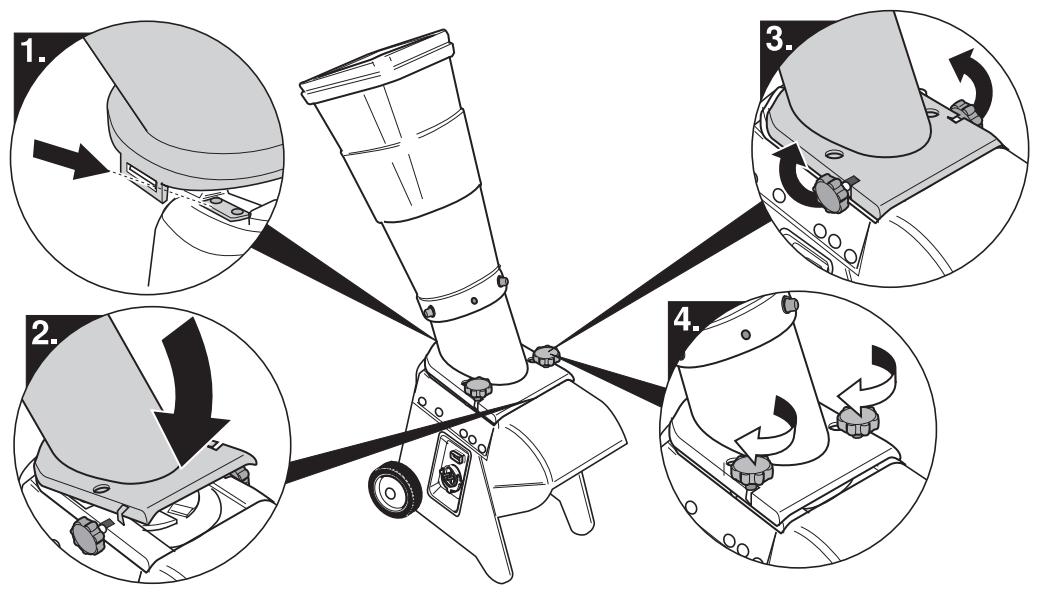
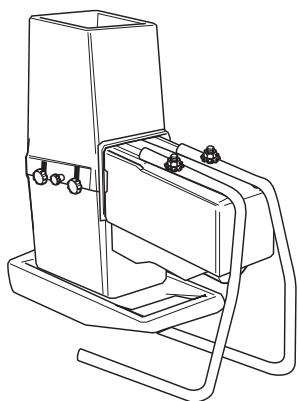
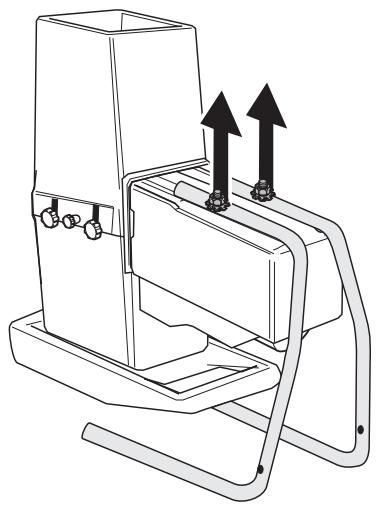
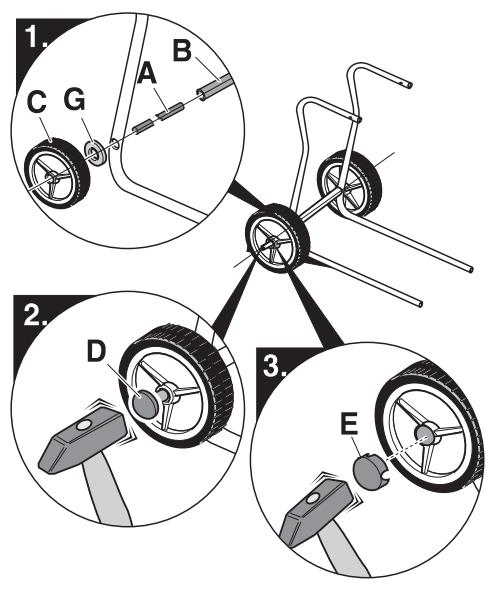
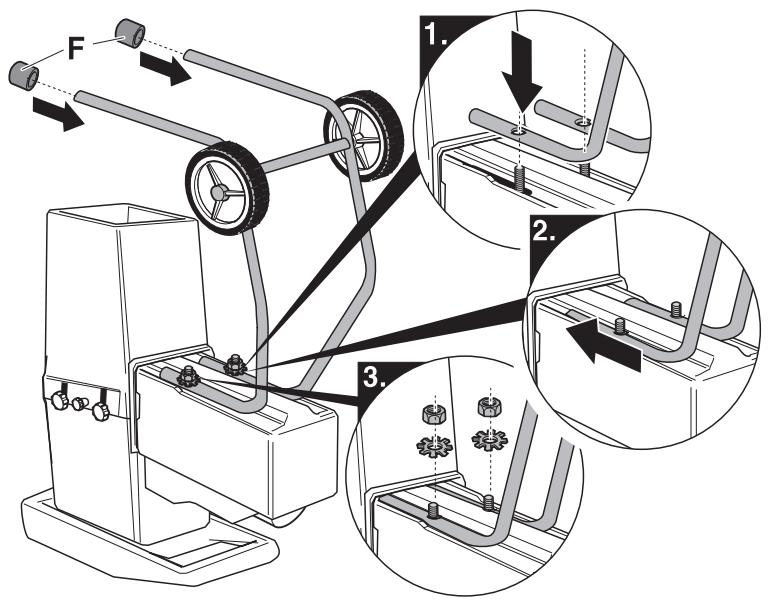
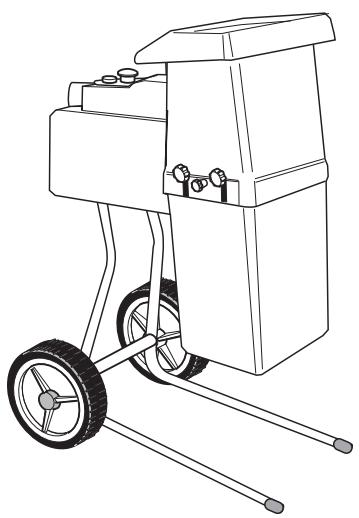
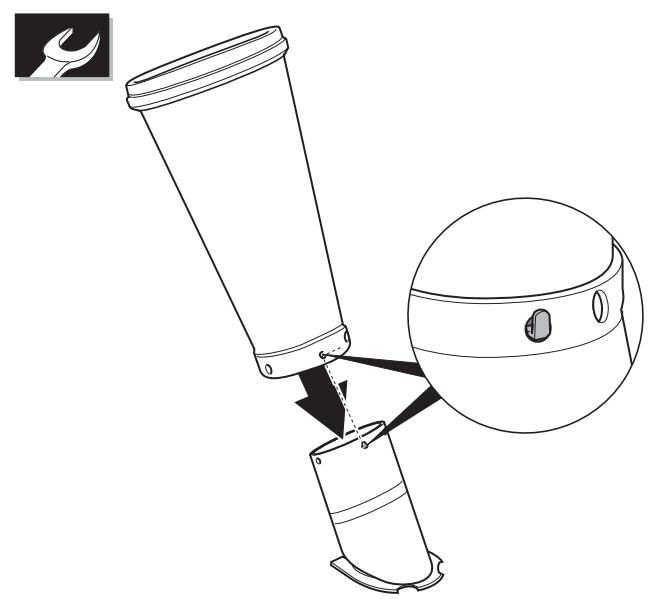
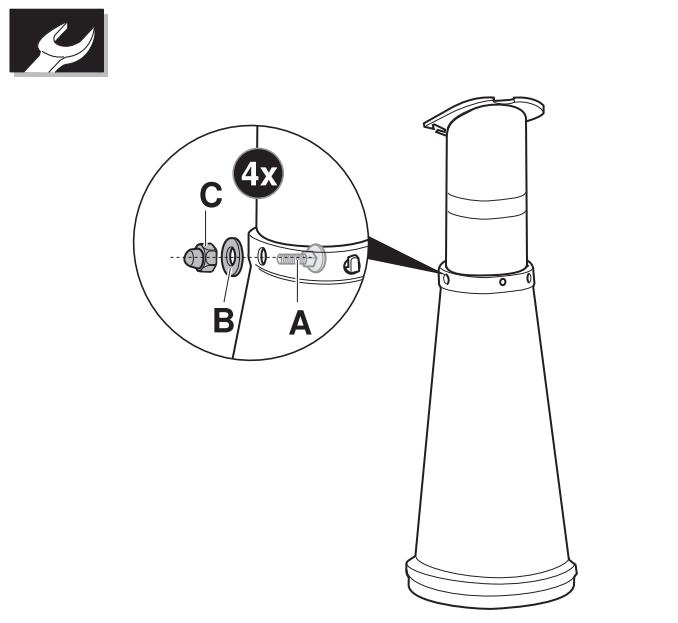
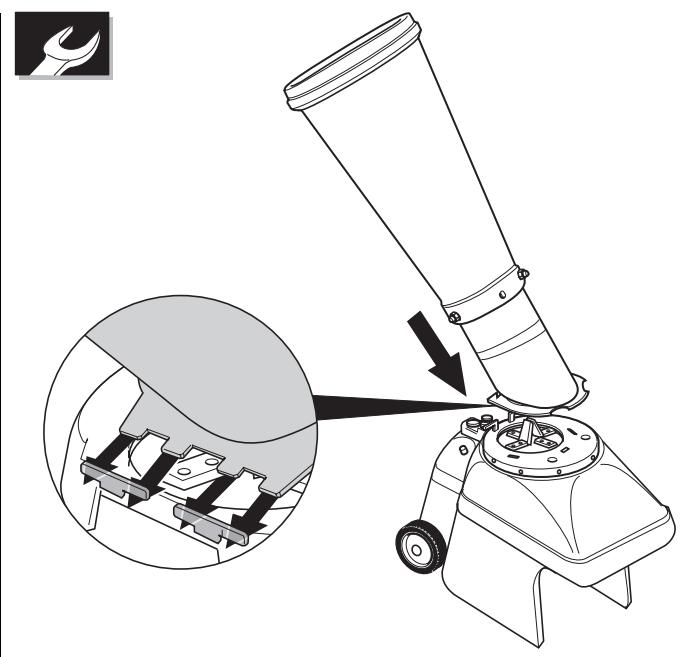
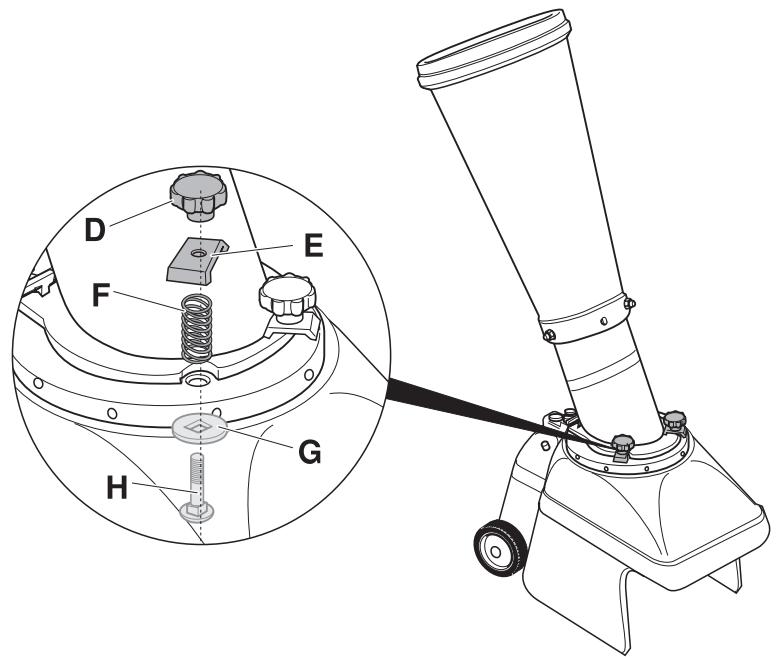
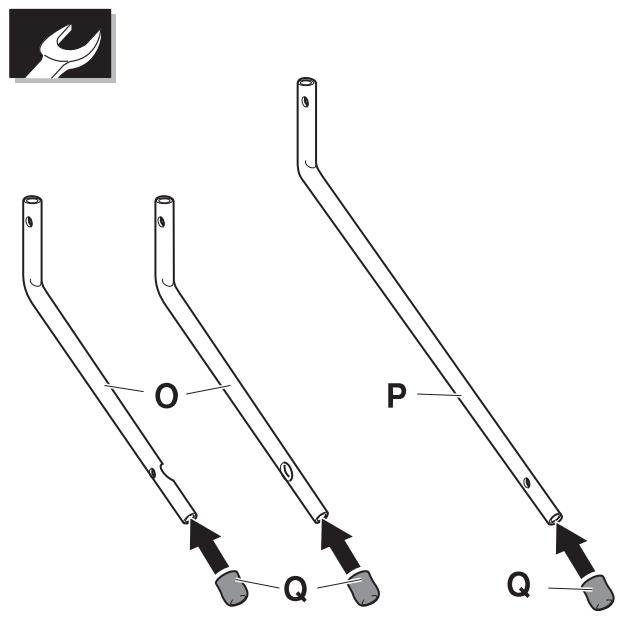
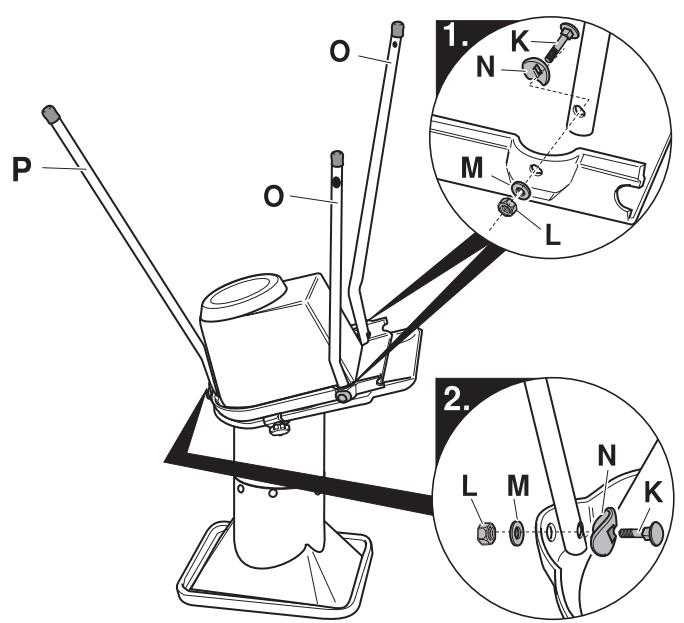
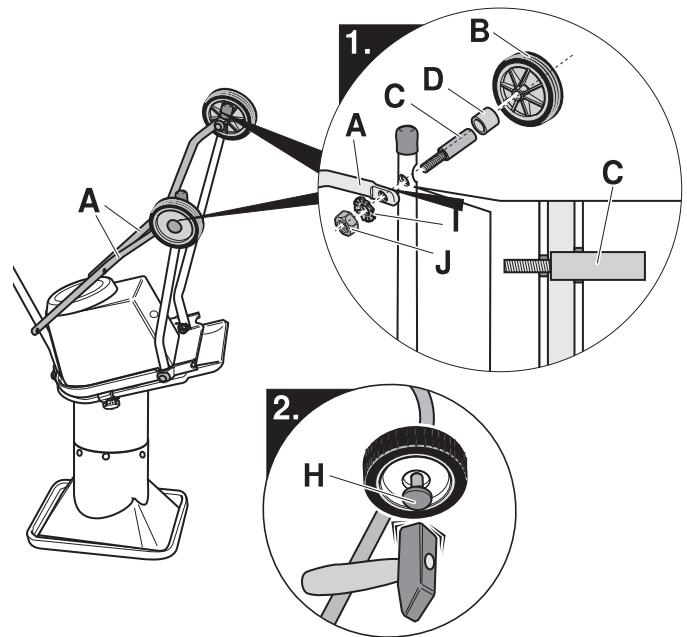
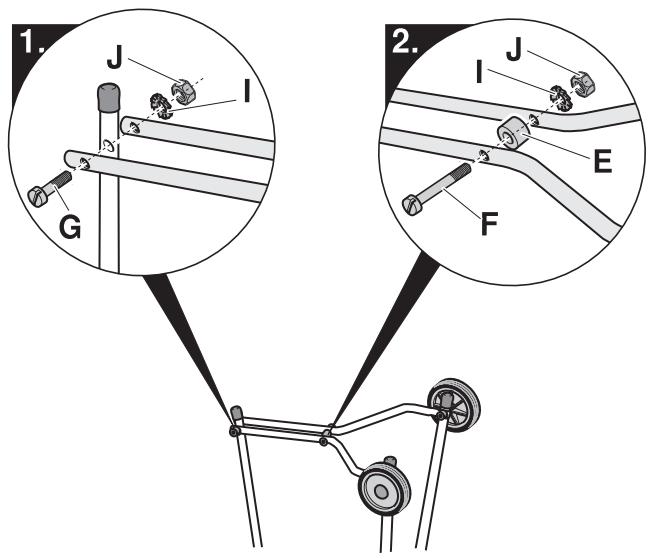
The enclosed sheet provides step-by-step illustrations on how to assembly your lawn mower and prepare it for use.
Connecting the machine

Risk of injury
Risk of electric shock
Make sure that the mains power supply is fused with a fault current circuit-breaker. Have an appropriate switch fitted if necessary, but only by a skilled electrician.

Caution
If the machine is not connected properly, material damage may be caused to the machine or to its surroundings.
Make sure that
- the supply voltage corresponds to the specified voltage on the identification plate
- the power supply is fused with an appropriate fuse.
The machine is supplied without connection cable. To connect the machine, use
-
only connection cables which meet requirements for use in the open air, e.g. H07RN-F 3x1.5 mm² (for Type 8 H07RN-F 5x1.5 mm²) up to a maximum length of 50 m
-
only mains power plugs and extensions which are authorised for use in the open air.
Operating

Danger of injury
Keep persons, especially children, well clear of the danger zone.
Never bring parts of the body or clothing near rotating parts.
Only operate the machine if it is in a faultless state.
Wear work gloves, protective goggles and ear muffs.
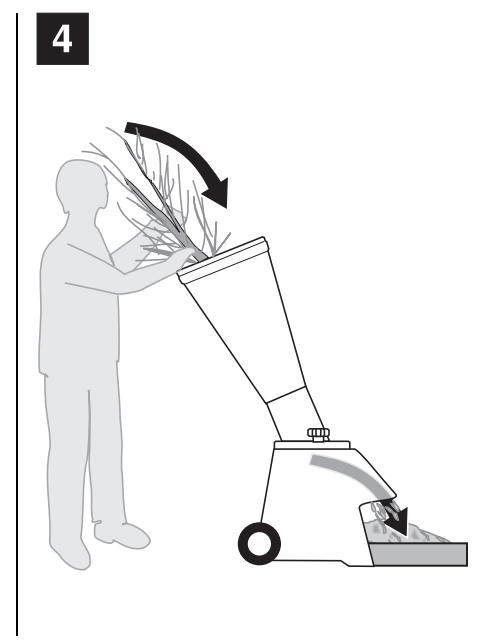
Stand behind the filler funnel while it is in operation (Figure 4).

Risk of poisoning
(Type 4) Poisonous substances can be formed at the cutting tool and on the inside surfaces of the filling funnel (fruit residue), if the machine remains unused for a certain length of time. Before and after each use, clean the machine thoroughly. Only use cleaning agents suitable for use with foodstuffs (e.g. washing-up liquid) and a damp cloth.

Caution
Before operating the machine, check that the cutting tool is sharp and is firmly in position.
Make sure that the material to be chopped contains no hard parts or earth clinging to it (increased wear of cutting tool).
Protect the machine against dampness.
(Type 4) Use a clean container to collect the chopped fruit. (Do not place machine in container – risk of material damage to machine.)
Switching the machine on and off
For safety reasons the motor can only be started when the filler funnel has been attached.

Caution
Make sure that the filler funnel is empty.
Figure 1
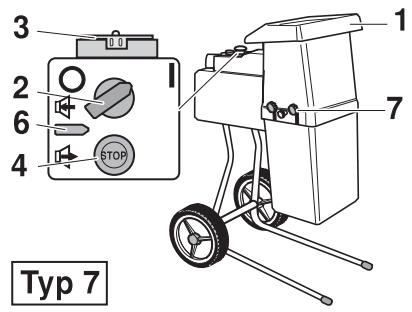
Motor and cutting tool are switched on and off simultaneously by the operating switch (2).
Switching on
(Type 7) Set rotation direction switch (6) to "
Set operating switch (2) to position "I".
Switching off
Set operating switch (2) to position "0".
EMERGENCY-OFF (on some models)
Figure 1
In case of emergency, press EMERGENCY-OFF red switch (4); motor and cutting tool come to a halt.
Switch on the machine again:
Set operating switch (2) to "0".
Set operating switch to "I" again.
Restarting after blocking
Figure 1
The machine is automatically switched off by an overload protection device if the cutting tool gets blocked. The operating switch (2) jumps to "0", (on machines with EMERGENCY-OFF switch, the operating switch remains at "1"). The machine can only be switched on again after approximately 20 seconds.
When the cause of the blockage has been remedied, switch the machine on again as follows:
(All types except for Types 7 and 8)
Set operating switch (2) to "I".
(Types 7 and 8)
Set operating switch (2) to "0".
Set operating switch to "I" again.
Changing the direction of rotation (Type 7 only)
Figure 1

Caution
Never change the direction of rotation when the motor is running. If the cutting tool is blocked or the filling funnel is blocked:
- Switch off the machine and wait until all moving parts are at a standstill.
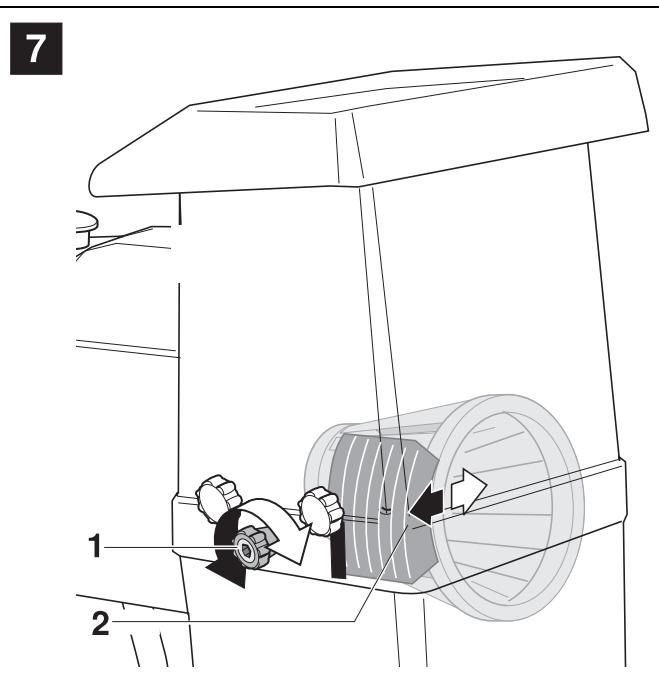
- Set rotating direction switch (6) to position for reverse-operation “ ”. As required, move slotted plate back: turn notched ring (Figure 7, item 1) in a counter clockwise direction, if necessary use an Allen key.
Switch on machine again. - Adjust the slotted plate if necessary.
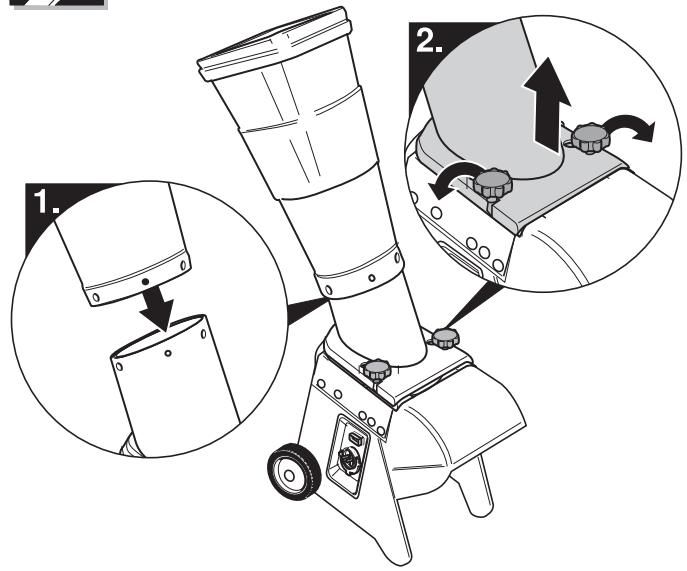
Removing and attaching the filling funnel
E.g. for eliminating blockages, cleaning or maintaining the machine.
Figure 1
- Switch off machine and withdraw mains connector.
Removing the funnel
Hold filling funnel (1) with one hand.
- Undo star-grip knob (7) and swing it outwards (not on all models).
Remove filling funnel.
Attaching the funnel
- Attach filling funnel (1) and screw it down with star-grip knobs (7).
Collecting ejected material
E.g. in a sack (accessory), a box or bucket.
- (Type 4) Place a clean bucket under the ejection point to collect chopped fruit cores and stones.
Transportation
Danger of injury
Before transporting the machine, switch it off and pull out the mains connector.
Short distances
For machines with wheels:
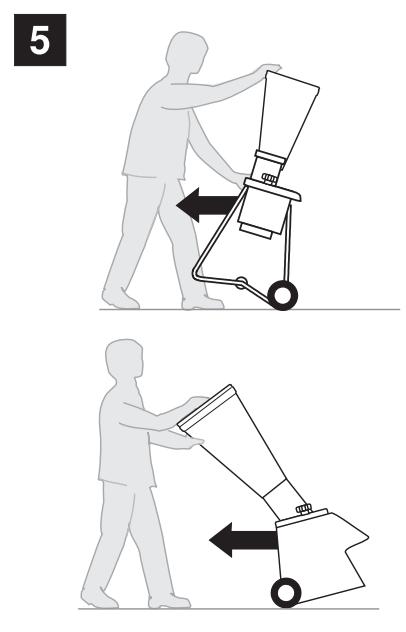
Hold the machine by the filling funnel and tip it backwards or lift it up at the rear (Figure 5).
Pull the machine carefully.
On a vehicle
- Place the machine on or in the vehicle, if necessary remove the filling funnel.
- Ensure that the machine cannot roll or slip.
Conversion
Risk of injury
Before undertaking conversion work, switch off the machine and pull out the mains connector. Wear work gloves.
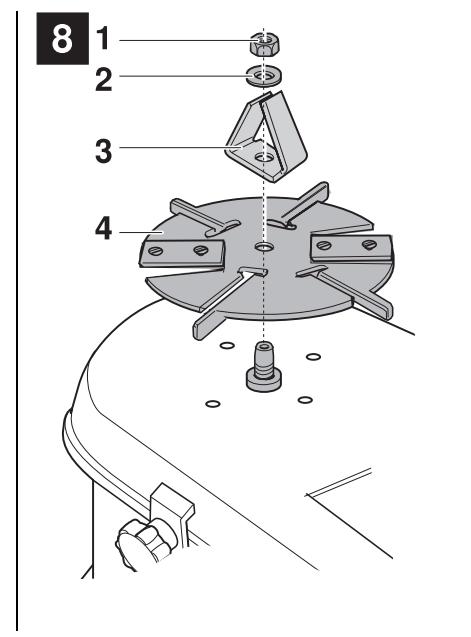
For the purposes of undoing or tightening screws or nuts, the cutting blade support (Figure 8, item 4) should not be allowed to rotate. Use a tool to stop it from turning while you work.
Chopping fruit which have stones
(Type 4 only)
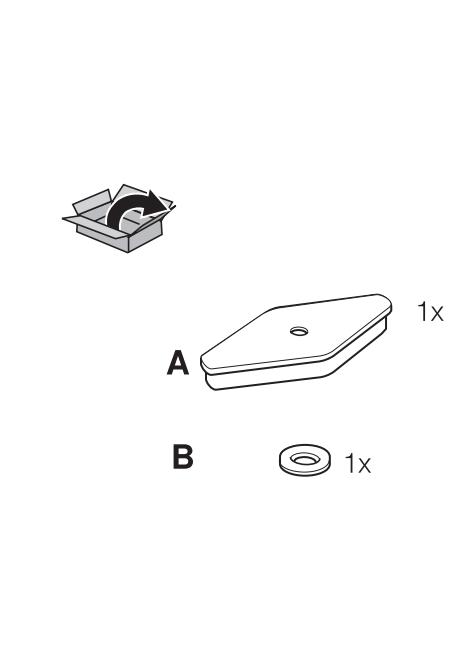
Using a conversion kit (optional), fruit with stones can be chopped.
Dismantle cutting tool
Figure 8
Remove filling funnel.
Undo nut (1).
- Remove washer (2), coarse chopper (3) and cutting blade support (4).
Mount stone fruit chopper
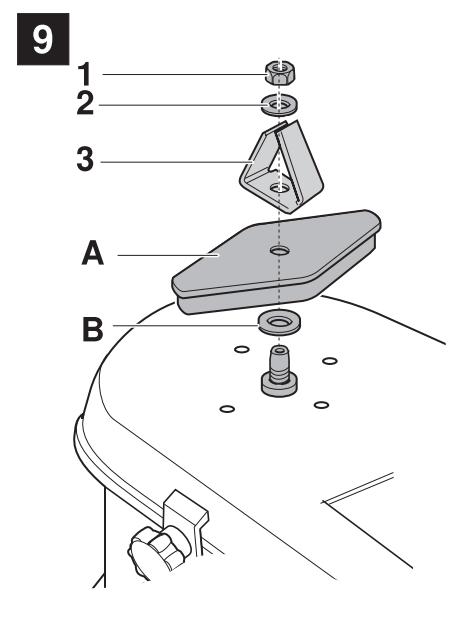
Figure 9
-
Attach washer (B), stone fruit blade (A) and coarse chopper (3).
-
Attach washer (2) and screw down with nut (1).
- Attach filling funnel.
Chopping compost and earth (Types 6 and 10 only)
Using a conversion kit (optional), compost and earth can be chopped up finely.
Tips on chopping and composting
Chopped-up garden refuse and plant remains offer ideal conditions for soil-inhabiting animal life and micro-organisms; the material is decomposed by them and turned into valuable humus. Soil is thereby created which is rich in nutrients and savings are made on fertilisers. The composting of garden and kitchen refuse not only contributes to the protection of the environment but also provides a feed-back into the biological cycle. A balance of nature exists in the garden which allows plants to grow in healthy soil.
When chopping take note of the following:
- If refuse has earth stuck to it, knock off the excess earth and chop it at the end.
- Cut woody material when it is as new as possible.
- Let soft and wet refuse dry before cutting it.
- Put soft and hard material through alternately.
- Feed material into the filling funnel in small quantities only.
- Do not let cut-up material accumulate at the ejection point.
- Feed thick branches to the cutting tool via the special hole for branches (Figure 1, item 5) or the branches hole in the vent of the filling funnel.
When composting take note of the following:
-
Choose a suitable place for composting: partly shaded, protected from the wind, easily accessible and on an area of loose soil.
-
The following can be composted: organic garden refuse (e.g. remains of plants, prunings from shrubs and bushes), organic refuse from the kitchen (e.g. eggshells, tea and coffee grounds), dung from small animals.
- The following are not suitable: peel from sprayed citrus fruits, leftovers of meat, fish and sausage, cooked food, diseased plants and weeds with seeds and suckers.
- Prerequisites for successful composting are good ventilation and sufficient moisture. Mix up different types of organic refuse: coarse and fine, dry and wet. Chop up garden refuse which takes a long time to decay. Heap up the mixture in layers.
- Additives can be strewn on the layers: they accelerate the rotting process and improve the quality of the compost: compost starter as accelerator, lime, a little organic fertiliser (e.g. horn meal), fine clay to absorb surplus moisture.
- To surface compost, distribute the chopped-up material and rake it in lightly; it accelerates the rotting process, keeps the soil moist, loosens it up and fertilises it.
- For mulching purposes, spread the chopped-up material 5 - 10 ~cm thick over the ground; it inhibits the growth of weeds and keeps the soil moist.
Maintenance

Risk of injury
Before carrying out any work on the machine, switch it off and pull out the mains connector. Wear work gloves.
Maintenance plan
Once per season:
- Have the machine tested and serviced in a specialist workshop.
Before each use:
- Check that the cutting tool is sharp and is firmly in position.
Type 4) Clean the machine thoroughly (see "Cleaning").
- (Type 4) Check the seal of the filling funnel, replace if damaged (see “Changing the seal”).
After each use
Clean machine (see "Cleaning").
As required
- Turn cutting tool, resharpen or replace it. (Type 7) adjust slotted plate (see "Adjusting the slotted plate").
Cleaning the machine
Remove filling funnel.
Clean cutting tool with brush and cloth.
Clean filling funnel with water and dry it.
- Attach filling funnel.
Clean other machine parts with cloth.
Adjusting the slotted plate (Type 7 only)
Figure 7
The slotted plate (2) is adjusted when the machine is running.

Caution
Adjustment of the slotted plate when not necessary accelerates the wear on the cutting tool. Only make an adjustment to the slotted plate if branches are not being adequately severed.
- Turn the notched ring (1) in a clockwise direction until you hear a grinding noise.
Turn notched ring one notch back
Changing the seal (Type 4 only)
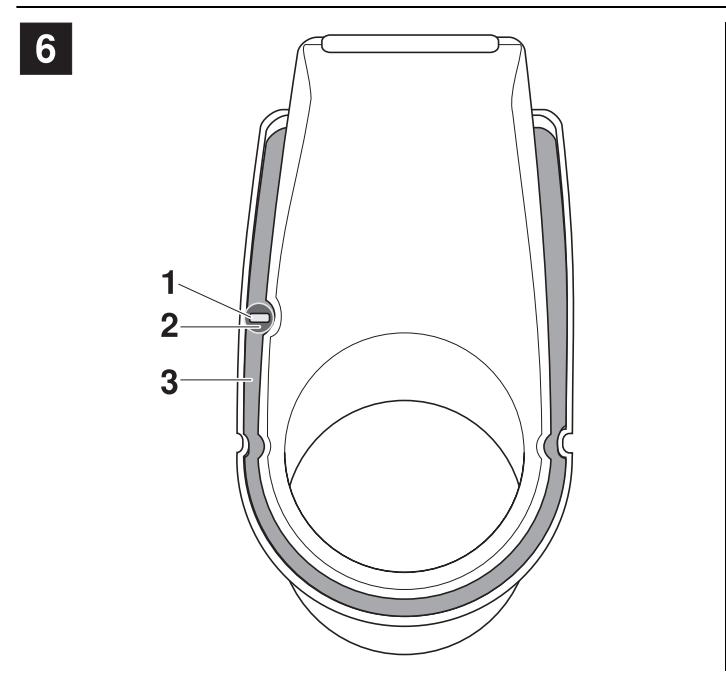
Figure 6
Remove filling funnel.
- Remove old seal (3) and adjusting washer (2).
Clean adhesion surface.
- Attach adjusting washer (2) over the switch plate (1).
- Remove adhesive protection from the new seal, stick on seal.
- Attach filling funnel.
Turning, resharpening or replacing cutting tool
(Type 7) The blades may be resharpened or replaced by a specialist workshop only.
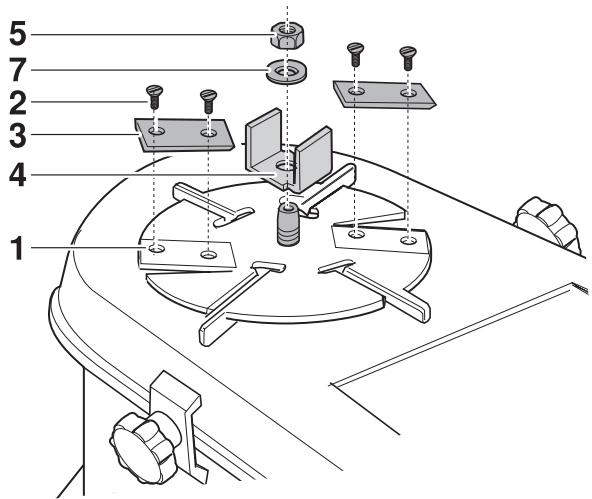
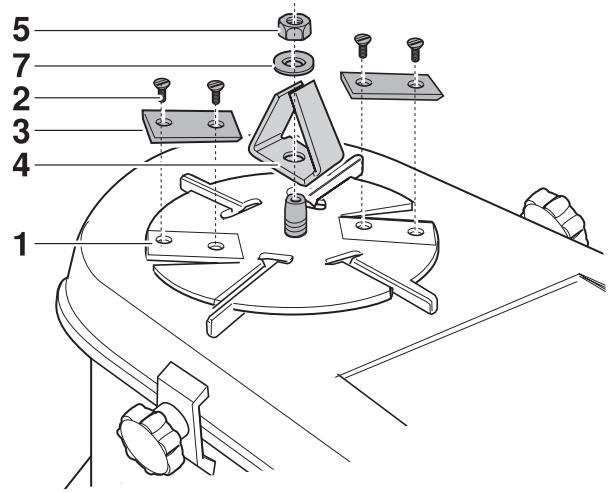
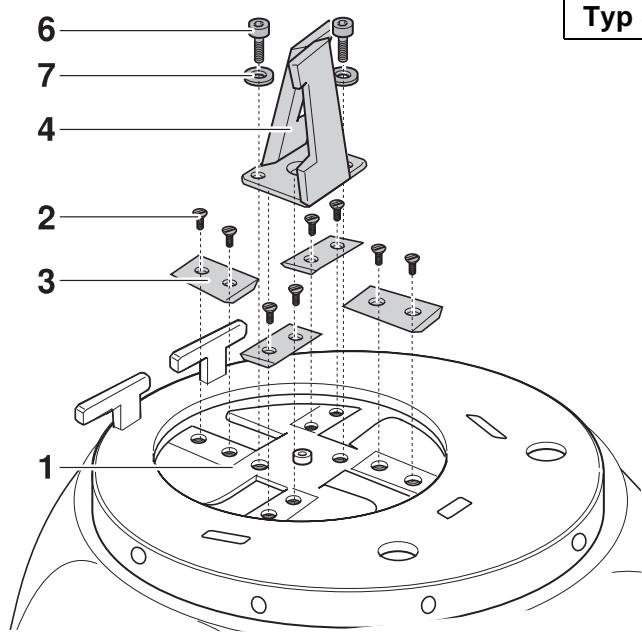
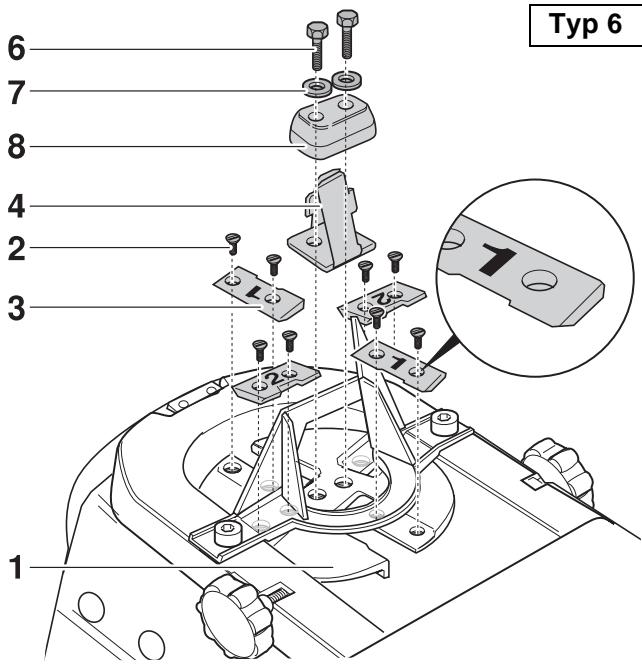
Figure 2
Risk of injury
Before removing the filling funnel, switch off the machine and pull out the mains connector. Wear work gloves.
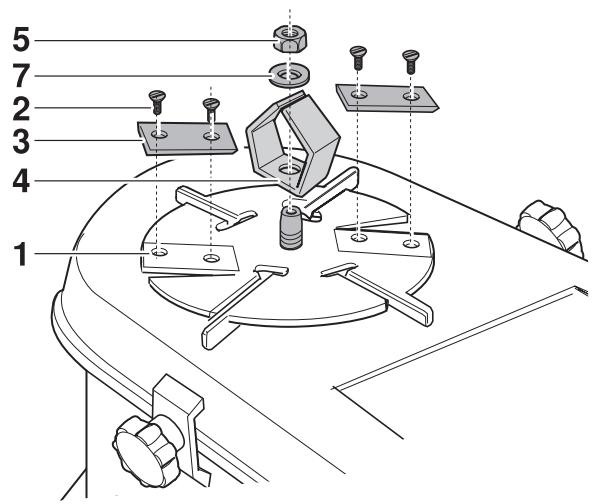
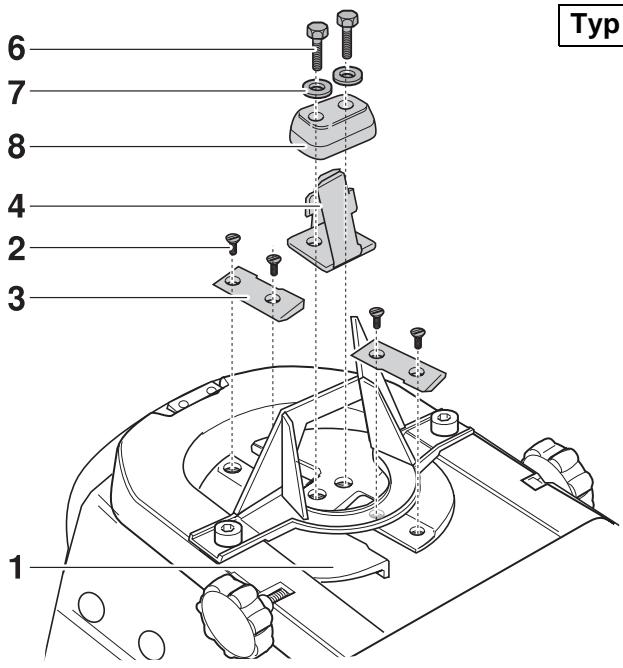
For the purposes of undoing or tightening screws or nuts, the cutting blade support (1) should not be allowed to rotate. Use a tool to stop it from rotating while you work.
Turning, resharpening or replacing flat blades
Remove filling funnel.
- Undo countersunk screws (2).
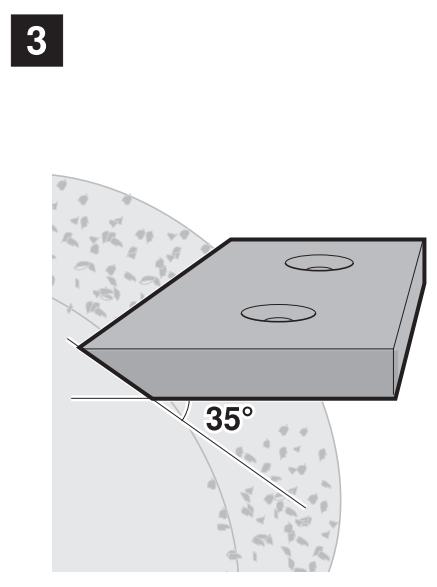
Remove flat blades and depending on the circumstances
- turn them if they have two cutting edges
- re-sharpen them if cutting edge(s) blunt (Figure 3)
-
replace if cutting edge(s) worn down.
-
Insert flat blades again (in Type 6 keep to sequence 1, 2, 1, 2) and secure with countersunk screws (2).
- Attach filling funnel.
Changing coarse chopper
Figure 2
The coarse chopper is made of wear-resistant material and has a long service life. Coarse choppers which are worn down must be replaced.
Remove filling funnel.
- (Type 8) Loosen screws (2) a little so that the flat blades become loose (the flat blades hold the coarse chopper firmly in position).
Undo nut (5), or screws (6) in Types 6, 8 and 10.
Replace coarse chopper (4).
Fasten the new coarse chopper with washer (7) and nut (5), or with screws (6) in Types 6, 8 and 10.
- (Type 8) Retighten screws (2) on flat blades.
- Attach filling funnel.
Immobilizing
If the machine will not be used for more than a month, e.g. when the season is over:
Clean machine (see "Cleaning the machine").
Store the machine in a clean and dry room.
Guarantee
In each country, the guarantee conditions of our company or of the importer are applicable.
Malfunctions in our machines are repaired free of charge under the terms of the guarantee, providing the cause is a material or manufacturing fault. If you wish to claim under the guarantee, please contact the vendor or the nearest of our branches.
Troubleshooting aid
Risk of injury
Before all work on this machine, switch it off and pull out the mains connector.
Wear work gloves.
Caution
Often, malfunctions of the machine have simple causes which you can remedy yourself. If in any doubt, or if expressly instructed to do so, seek advice from a specialist workshop.
Only permit repairs to be made by a specialist workshop and using original spare parts.
| Fault | Possible cause | Remedy |
| Machine does not start. | No voltage. | Check fuse. Have voltage checked 1). |
| Defective connection cable or extension cable. | Check cable, change if necessary. | |
| Filling funnel not on properly or not screwed down. | Attach filling funnel properly and screw it down. | |
| Motor is turning but machine does not chop. | Filling funnel blocked. | Clean machine. |
| (Type 7) Cutting tool runs in reverse. | Change direction of rotation. | |
| (Type 8) Cutting tool rotates in reverse, machine wrongly connected. | Have the polarity of the connection changed 1). | |
| Cutting tool blunt. | Check flat blades. Depending on circumstances, resharpen or replace. (Type 7) Check cutting tool, as required have it sharpened or replaced 2). | |
| (Type 6) Belt tension too low or belt defective. | Adjust belt tension or have belt replaced 2). | |
| Reduced chopping power. | Cutting tool worn or blunt. | Check flat blades. Depending on circumstances, turn, resharpen or replace. (Type 7) Adjust slotted plate. Check cutting tool, as required have it sharpened or changed 2). |
| Machine switches off. | Cutting tool blocked, overload protection switches machine off. | See “Restarting after blocking”. |
| Voltage dropout. | Check fuse. Have voltage checked 1). | |
| Plug and socket connection of connection cable interrupted. | Check connection and if necessary make again. |
1) Have this work carried out only by a skilled electrician.
2) Have this work carried out only by a specialist workshop.

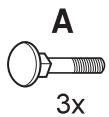
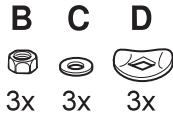
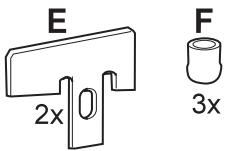
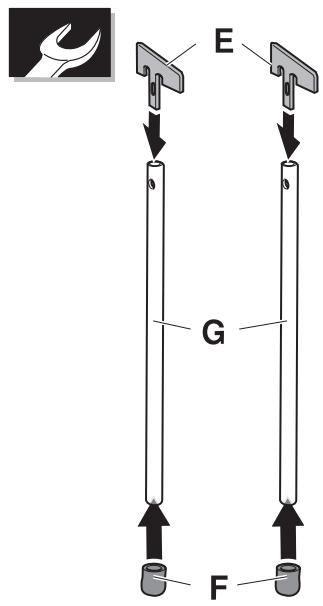

Typ 3



B

J04

B


K04

A
3x

B
3x

C
3x

D
3x

E
4x



F9







A
3x

B
3x

C
3x

D
3x

E
4x