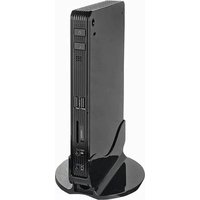
NanoPC IBR37 - Ordinateur FOXCONN - Notice d'utilisation et mode d'emploi gratuit
Retrouvez gratuitement la notice de l'appareil NanoPC IBR37 FOXCONN au format PDF.


| Type de produit | Mini PC bureautique |
| Marque | Foxconn |
| Modèle | NanoPC IBR37 |
| Dimensions (L x l x H) | 19,0 x 15,0 x 3,5 cm |
| Poids | 0,9 kg |
| Alimentation | Adaptateur secteur 19V, 2,1A (40 W) |
| Processeur | Intel Atom x5-Z8350 (quad-core, 1,44 GHz) |
| Mémoire RAM | 4 Go DDR3L |
| Stockage | 64 Go eMMC |
| Connectivité | Wi-Fi 802.11b/g/n, Bluetooth 4.0, Ethernet 10/100/1000 |
| Ports USB | 2 x USB 3.0, 2 x USB 2.0 |
| Sortie vidéo | 1 x HDMI 1.4, 1 x VGA |
| Entrée audio | 1 x micro / casque combo |
| Lecteur de carte | Oui, microSD |
| Système d'exploitation | Windows 10 Pro 64 bits |
| Fonctions principales | Bureautique, navigation Web, lecture multimédia |
| Entretien et nettoyage | Dépoussiérer les grilles d'aération avec un chiffon doux et sec. Ne pas utiliser de liquide. |
| Sécurité | Ne pas exposer à l'humidité ou aux chocs. Débrancher avant toute intervention. |
| Pièces détachées et réparabilité | Les composants internes ne sont pas accessibles à l'utilisateur. Contacter le support technique Foxconn. |
| Informations générales | Appareil conçu pour un usage domestique ou professionnel léger. Compatible VESA. |
FOIRE AUX QUESTIONS - NanoPC IBR37 FOXCONN
Questions des utilisateurs sur NanoPC IBR37 FOXCONN
0 question sur cet appareil. Repondez a celles que vous connaissez ou posez la votre.
Poser une nouvelle question sur cet appareil
Téléchargez la notice de votre Ordinateur au format PDF gratuitement ! Retrouvez votre notice NanoPC IBR37 - FOXCONN et reprennez votre appareil électronique en main. Sur cette page sont publiés tous les documents nécessaires à l'utilisation de votre appareil NanoPC IBR37 de la marque FOXCONN.
MODE D'EMPLOI NanoPC IBR37 FOXCONN
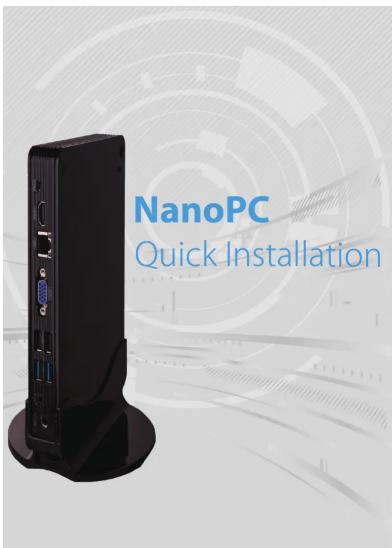
Components

Tools Needed

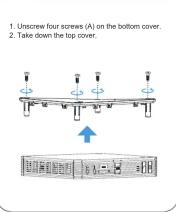
1 Open the case
2 Install memory

3 Install Add-on Card

4 Install Hard Disk Drive (HDD)
1. Release the screws (B) and take down the HDD bracket.
2. Install the HDD into the HDD bracket, and fasten them with three screws (C).
3. Install HDD module into the socket on the motherboard gently.
4. Fasten the HDD module by screwing the bracket (B).


6 Connection of NanoPC

简体中文
1> 打开机壳
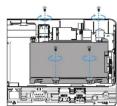
1. 将上盖的四颗螺丝 (A) 拧开。
2. 取下上盖。
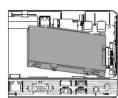
2> 安装内存
1. 将内存条倾斜地插入内存插槽内。
2. 向下按压内存条,使其固定。
3>安装附加卡
2. 将 M.2 附加卡用螺丝 (D) 固定在主板上。
4> 安装硬盘(HDD)
1. 拧开螺丝 (B) 并取下硬盘支架。
2. 将硬盘装入硬盘支架并用三颗螺丝 (C) 将其固定。
3. 将硬盘模组轻轻装入主板上的硬盘插槽内。
4. 将硬盘模组用螺丝 (B) 国自
-
将 M.2 附加卡倾斜地插入插槽内,然后向下轻轻按压,使其固定。
-
将硬盘模组用螺丝 (B) 固定。
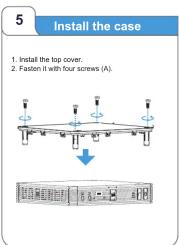
5>安装机壳
-
安装上盖。
-
将其用四颗螺丝 (A) 锁定。
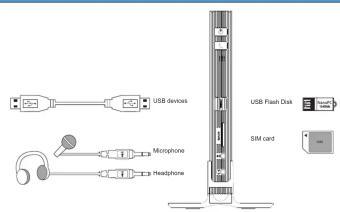
6> NanoPC 的连接
7> NanoPC的放置方式
1.安装于底座上
2.安装于显示器背面
2.1将挂架用四颗螺丝(E)固定在显示器背面。
2.2 将 NanoPC 按照正确的方向装入挂架中。
7 Placement of NanoPC
1. In Seat Base,

2. On display back
2.1 Fasten it onto the display with four screws (E).

2.2 Fit the NanoPC into the VESA mount in the correct alignment.

flowchart
graph LR
    A["Device"] --> B["Computer Monitor"]
    B --> C["Computer"]
5>安装机壳
-
安装上盖。
-
将其用四颗螺丝 (A) 锁定。
6> NanoPC 的连接
7> NanoPC的放置方式
1.安装于底座上
2.安装于显示器背面
2.1将挂架用四颗螺丝(E)固定在显示器背面。

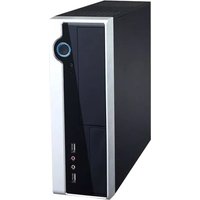
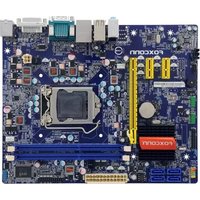
Marque : FOXCONN
Modèle : NanoPC IBR37
Catégorie : Ordinateur