
DS-U301 - Disque dur Sabrent - Notice d'utilisation et mode d'emploi gratuit
Retrouvez gratuitement la notice de l'appareil DS-U301 Sabrent au format PDF.


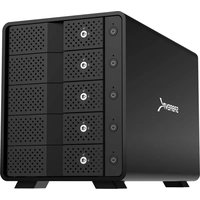
| Type de produit | Boîtier de disque dur externe |
| Marque | Sabrent |
| Modèle | DS-U301 |
| Dimensions (L x l x H) | 12,8 x 7,8 x 1,3 cm |
| Poids | 90 g |
| Interface | USB 3.0 (rétrocompatible USB 2.0) |
| Type de disque compatible | SATA 2,5 pouces (HHD ou SSD) |
| Vitesse de transfert maximale | 5 Gbps |
| Alimentation | Alimenté via USB (bus-powered) |
| Systèmes d'exploitation compatibles | Windows, macOS, Linux |
| Fonctions principales | Extension de stockage, sauvegarde, transfert de données |
| Installation | Aucun pilote requis (plug-and-play) |
| Matière du boîtier | Plastique ABS |
| Couleur | Noir |
| Entretien et nettoyage | Essuyer avec un chiffon doux et sec. Ne pas utiliser de produits liquides ou abrasifs. |
| Sécurité | Éviter les chocs, l'humidité et les températures extrêmes. Débrancher correctement avant de retirer le disque. |
| Pièces détachées et réparabilité | L'appareil ne contient aucune pièce réparable par l'utilisateur. En cas de dysfonctionnement, contacter le SAV. |
| Contenu de l'emballage | Boîtier DS-U301, câble USB 3.0, notice d'utilisation |
| Garantie | 1 an (selon revendeur) |
FOIRE AUX QUESTIONS - DS-U301 Sabrent
Questions des utilisateurs sur DS-U301 Sabrent
0 question sur cet appareil. Repondez a celles que vous connaissez ou posez la votre.
Poser une nouvelle question sur cet appareil
Téléchargez la notice de votre Disque dur au format PDF gratuitement ! Retrouvez votre notice DS-U301 - Sabrent et reprennez votre appareil électronique en main. Sur cette page sont publiés tous les documents nécessaires à l'utilisation de votre appareil DS-U301 de la marque Sabrent.
MODE D'EMPLOI DS-U301 Sabrent
SABRENT
Connecting Differently™
USB 3.0 SATA 2.5"/3.5" SSD HDD DOCKING STATION + USB PORTS
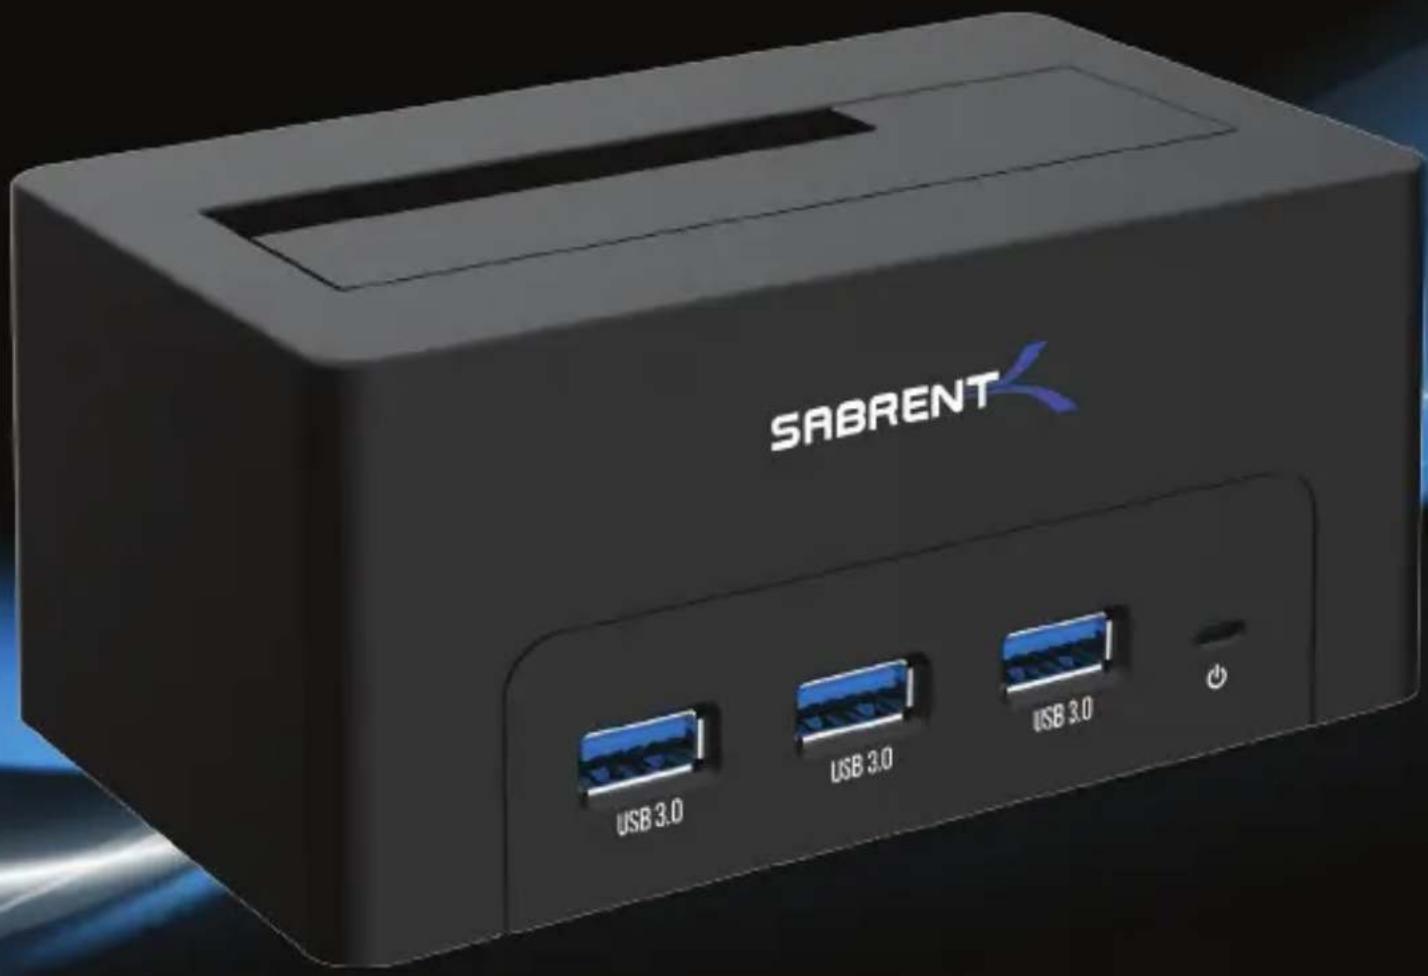
With a Sabrent USB 3.0 SATA 2.5"/3.5" SSD/HDD Docking Station + USB Ports you can Hot-Swap 2.5"/3.5" SATA Hard Drives when connected to your Desktop or Notebook. Tool free Plug & Play installation makes for an easy setup. You can now transfer data quickly and easily through USB Type-A 3.0 at high speeds up to 5Gbps. Featuring three USB 3.0 Type-A ports you can simultaneously connect your other devices with transfer speeds of 5Gbps.
System requirements
- Windows OS
- Mac OS
Package contents
• HDD Docking Station + USB Ports
- Type-A USB cable
- Power adapter
- User Manual
PRODUCT OVERVIEW

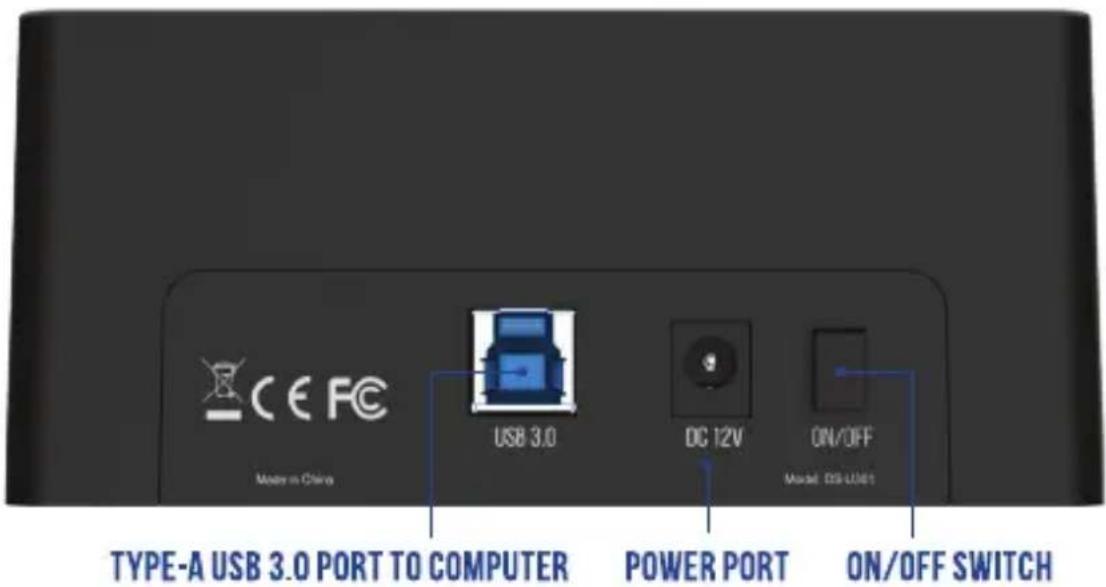
1
Connect the Power Adapter to the back of the dock

natural_image
Close-up of a black electronic device with a cable and ports, no visible text or symbols on the body.3
Connect the USB Cable to the back of the dock

natural_image
Black rectangular electronic device with a blue LED and USB cable, no visible text or symbols on the body.2
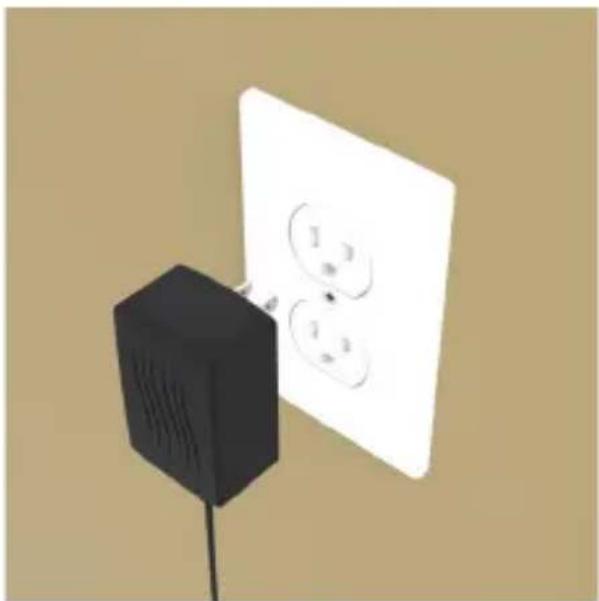
Connect the AC Power to a power outlet
natural_image
3D illustration of a black electrical outlet with three white outlets and two circular outlets, mounted on a stand against a beige background (no text or symbols)4
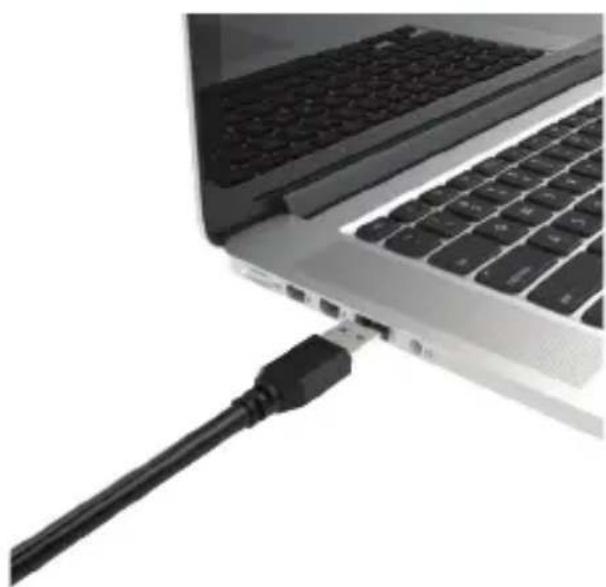
Connect the other end of the USB Cable to your Computer USB Port
natural_image
Close-up of a laptop with an attached black USB cable (no text or symbols visible)5
Insert your hard into the HDD bay

natural_image
Black Siemens AG/OS card drive with two USB ports and a top-mounted card (no visible text or symbols on the device body)7
The Power LED should illuminate

natural_image
Close-up of a black device's right-hand corner showing a blue indicator light and a power button (no text or symbols visible)6
Press the Power Switch to the ON position

WINDOWS PC HARD DRIVE WITH DATA/FILES
Click on the Start Icon located on the bottom left of the screen and then click on Computer

Note:
You can also click on the File Explorer Icon and then click on This PC or Computer

flowchart
graph LR
    A["手机"] --> B["文件夹"]
    B --> C["邮件"]
    C --> D[" email "]
    style A fill:#f9f,stroke:#333
    style B fill:#ccf,stroke:#333
    style C fill:#cfc,stroke:#333
    style D fill:#fcc,stroke:#333

You should get a new drive letter every time you insert a hard drive with data/files
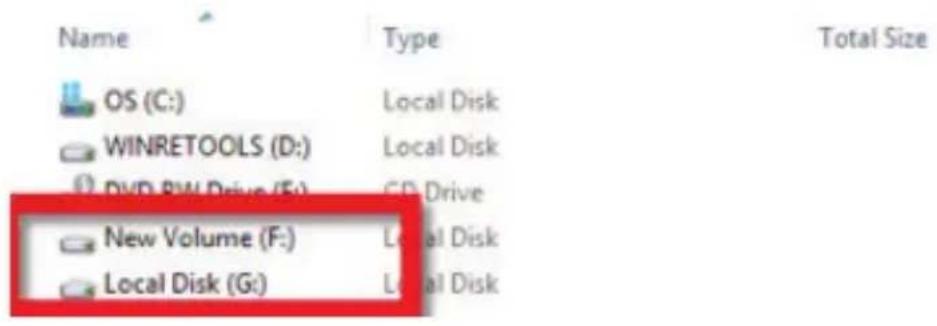
WINDOWS PC NEW HARD DRIVE SETUP (HARD DRIVE WITH NO DATA/FILES)
Click on the Start Icon located on the bottom left of the screen and then RIGHT click on Computer
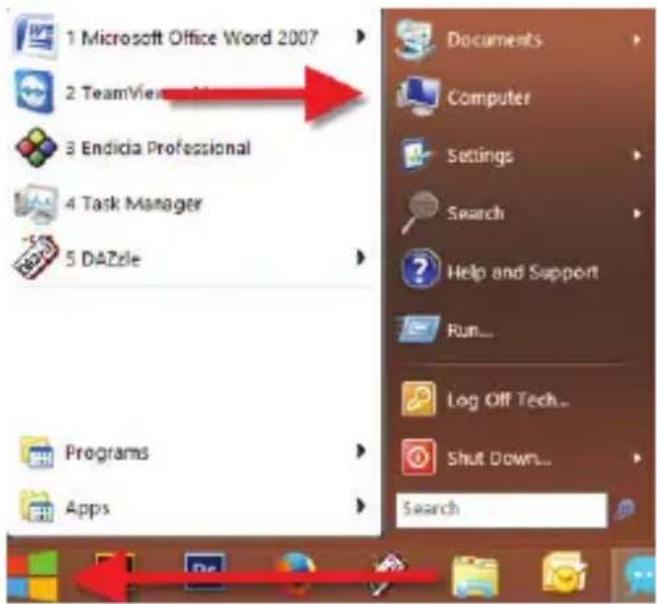
Note:
You can also click on the File Explorer Icon and then click on This PC or Computer


Click on Manage
| Collapse |
| Manage |
| Open in new window Pin to Start |
| Map network drive... Disconnect network drive... |
| Add a network location |
| Delete |
| Rename |
| Properties |
Click on Disk Management
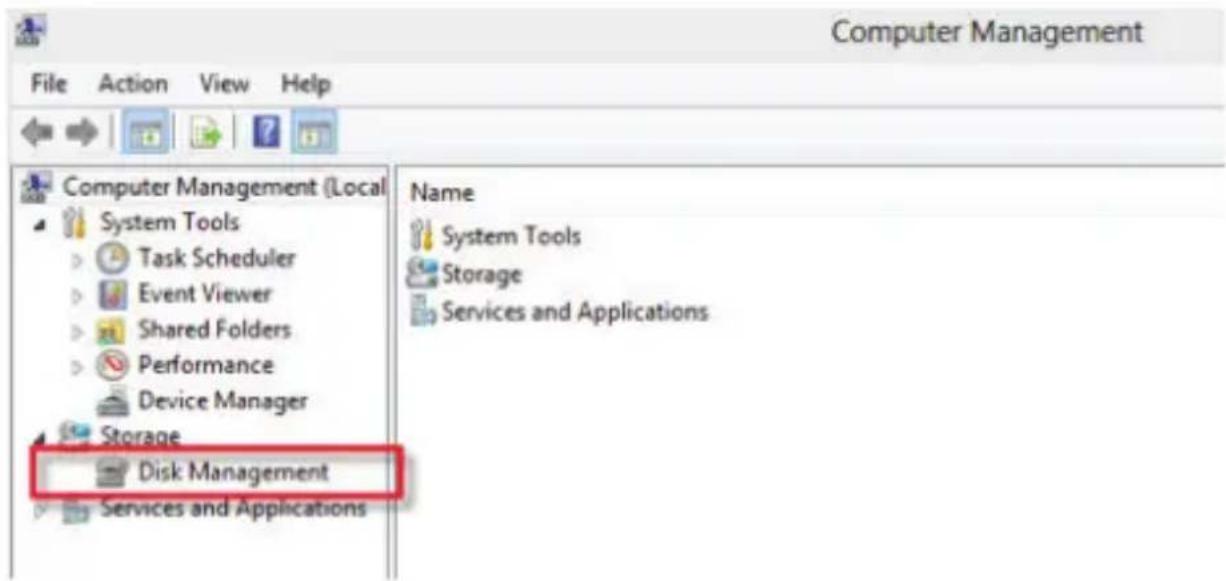
Note: Disk 0 should be your internal hard drive Disk 1 should be your external hard drive but SETUPS MAY DIFFER
RIGHT click on Unallocated and click on New Simple Volume
| Disk 0 Basic 465.76 GB Online | (C:) 195.32 GB NTFS Healthy (System, Boot, Page File) |
| Disk 1 Basic 465.76 GB Online | 465.76 GB Unallocated |
| CD-ROM 0 DVD (F:) No Media |
Go through the Setup Wizard to assign a drive letter

MAC OS HARD DRIVE WITH DATA/FILES
A new Icon should pop up on your main screen each time you insert a hard drive with DATA/Files

natural_image
Illustration of a yellow and silver server drive with a green indicator light (no text or symbols)
Click on the Icon to view your hard drive
Note: You can also click on the Finder icon and select your hard drive under Devices
MAC OS NEW HARD DRIVE SETUP (HARD DRIVE WITH NO DATA/FILES)
Click on the Search icon on your toolbar

Type in Disk Utility and click on it

Click the icon for your external hard drive located in the sidebar on the left Click on the Erase tab at the top of the window
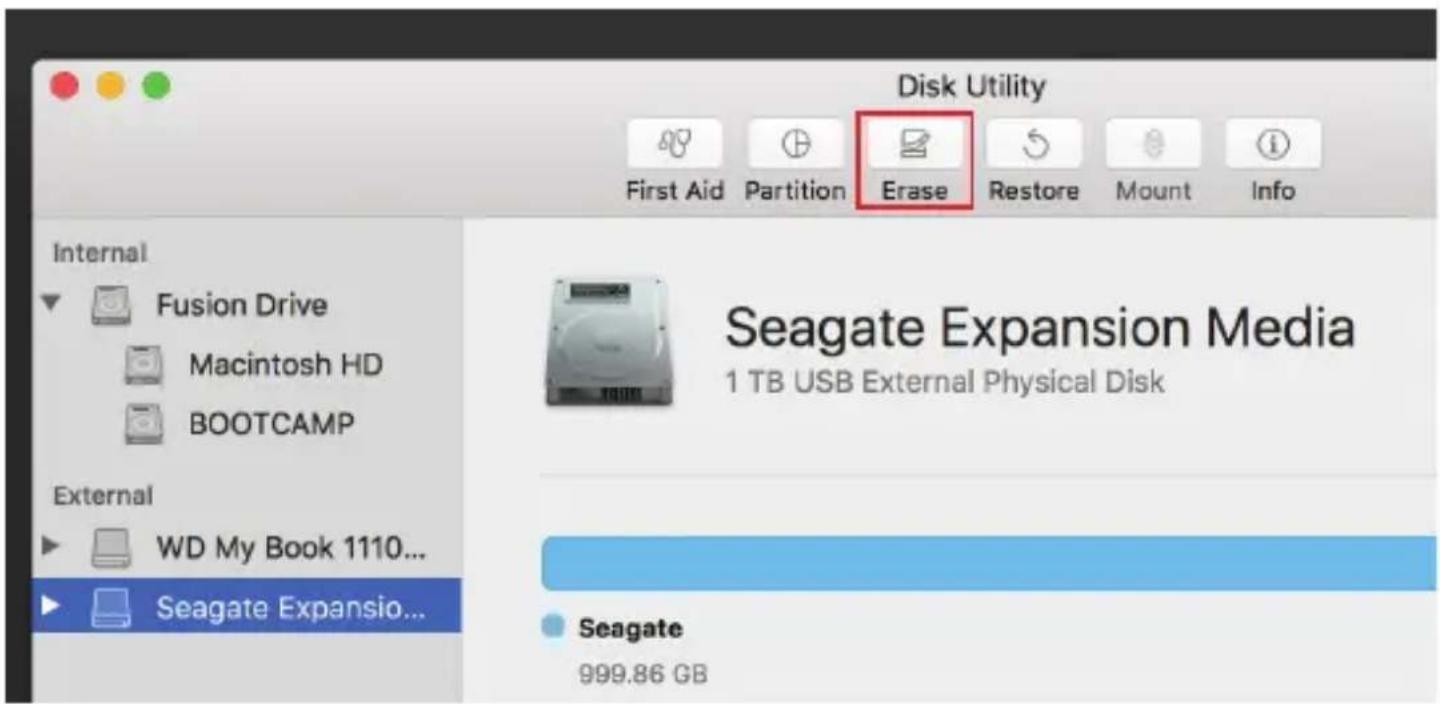
Select the volume format you want and give it a name

Click on erase
NOTES
This is backwards compatible on USB 2.0 and 1.1 with their transfer speeds. Please do not remove your hard drive while hard drive is being accessed.
TROUBLESHOOTING/SUPPORT
Power LED does not come on?
• Make sure that you have a tight connection between the power adapter and dock.
- Try it on a different power outlet.
HHD LED does not come one?
• Re-seat the hard drive into the bay.
- Swap the hard drive out with a spare.
Computer does not recognize the hard drive?
• Make sure that you have a tight connection between the dock and 3.0 cable.
- Try the USB cable on a different USB port on your computer.
- New hard drives must setup, please review new hard drive setup for your OS.
- Swap the hard drive out with a spare.
Please contact our Technical Support Team if issues continue





- SABRENT
- Connecting Differently™
- USB 3.0 SATA 2.5"/3.5" SSD HDD DOCKING STATION + USB PORTS
- System requirements
- Package contents
- WINDOWS PC HARD DRIVE WITH DATA/FILES
- Note:
- WINDOWS PC NEW HARD DRIVE SETUP (HARD DRIVE WITH NO DATA/FILES)
- Go through the Setup Wizard to assign a drive letter
- MAC OS HARD DRIVE WITH DATA/FILES
- MAC OS NEW HARD DRIVE SETUP (HARD DRIVE WITH NO DATA/FILES)
- NOTES
- TROUBLESHOOTING/SUPPORT
- Power LED does not come on?
- HHD LED does not come one?
- Computer does not recognize the hard drive?
Marque : Sabrent
Modèle : DS-U301
Catégorie : Disque dur