
R-ZX740RA - Réfrigérateur HITACHI - Notice d'utilisation et mode d'emploi gratuit
Retrouvez gratuitement la notice de l'appareil R-ZX740RA HITACHI au format PDF.


| Type de produit | Réfrigérateur américain (congélateur en bas) |
| Marque | Hitachi |
| Modèle | R-ZX740RA |
| Hauteur | 1820 mm |
| Largeur | 920 mm |
| Profondeur | 720 mm |
| Poids net | 90 kg |
| Alimentation électrique | 220-240 V, 50 Hz |
| Classe énergétique | A+ |
| Capacité totale | 550 L |
| Capacité réfrigérateur | 380 L |
| Capacité congélateur | 170 L |
| Type de froid | Ventilé (No Frost) |
| Distributeur d'eau et glaçons | Oui, intégré |
| Écran d'affichage | Digital, tactile |
| Dégivrage | Automatique |
| Alarme de porte ouverte | Oui |
| Verrouillage enfants | Oui |
| Nettoyage condenseur | Recommandé tous les 6 mois |
| Pièces détachées | Disponibles via service après-vente Hitachi |
| Réparabilité | Indice de réparabilité : 7,5/10 |
FOIRE AUX QUESTIONS - R-ZX740RA HITACHI
Questions des utilisateurs sur R-ZX740RA HITACHI
0 question sur cet appareil. Repondez a celles que vous connaissez ou posez la votre.
Poser une nouvelle question sur cet appareil
Téléchargez la notice de votre Réfrigérateur au format PDF gratuitement ! Retrouvez votre notice R-ZX740RA - HITACHI et reprennez votre appareil électronique en main. Sur cette page sont publiés tous les documents nécessaires à l'utilisation de votre appareil R-ZX740RA de la marque HITACHI.
MODE D'EMPLOI R-ZX740RA HITACHI
日立多門電冰箱
REFRIGERATOR-FREEZER
家庭用 For household use
型號 Model
R-ZX740KN
R-WX670KM
R-ZX740KSE
R-ZX740RA
R-ZX740KM
R-WX670KA
R-WX740KSE
R-WX670RA
R-ZX740KA
R-WX620KM
R-WX670KSE
R-WX670KN
R-WX620KA
R-WX620KSE

日本製
Made in Japan
六門 6 doors
非常感謝您購買日立電冰箱。
此電冰箱僅供家庭使用,請勿使用於商業用途和儲存食品以外的目的上。
請詳閱本使用說明書,以確保正確使用。
使用前請務必詳閱「安全上之注意事項」。
請妥善保管本使用說明書與保證書,當將電冰箱交給他人在別的場所使用時,以及交給回收工廠時,請將本使用說明書隨電冰箱一同轉交。
Thank you very much for purchasing a Hitachi Refrigerator.
This refrigerator is designed for home use only. Do not use this refrigerator for the business use and/or any purpose other than storing food.
Please read this operation manual carefully and ensure you use the appliance correctly. In particular, be sure to read the "Safety Suggestions" section of this operation manual before use.
Please keep this operation manual along with your guarantee card.
Hand over this operation manual together with the refrigerator when the refrigerator is passed to a third party and used in a different location, or when it is sent to a recycling plant.
● 購買後初次使用時。→ 8,9頁
初次使用時,庫內冷卻可能需要約4小時至24小時以上。
● 請遵守可容納食物的高度及食品之間空開間隙儲放。→ 20, 23頁
過分塞堵食物,會造成食品及袋子被門夾住關不緊,製冷效率低,不能製冰等。
It takes time to cool for the first time. →Pg.58, 61
It may take more than 4 \~ 24 hours to fully cool.
● Make sure that no food protrudes beyond the storage height limit of each compartment, and allow clearance between each food in each
compartment. → Pg.68, 71
Otherwise, food and/or package may not be stored in each compartment properly, and as a result, the door may not be closed completely. It may cause the refrigerator not to cool sufficiently and/or not to make ice.
節省能源的使用方法
Tips for using the refrigerator wisely for energy savings
- 減少冰箱門的開閉,切勿時間過長
開閉次數多,冷氣向外流失,保冷效果差。
- 切勿塞滿過多的食物
一旦塞滿過多的食物,冷氣的流通循環不良,不僅無法讓冰箱內均一冷卻,而且還會消耗電力。存放食品時請適度地保留間隙。
- 將熱的食物放冷之後再放入冰箱
將熱的食物放入冰箱時,冰箱內部的溫度升高,周邊食物的溫度也隨之升高。
- 冰箱周邊應保留適當的間隙
若周邊無保留間隙時,冰箱無法散熱,而導致電力的浪費。
- 更換受損的冰箱門墊圈
因受損後所產生的間隙可讓冷氣流失,而導致電力的浪費。將名片等夾在其間,若因無法夾緊而滑落,請更換冰箱門的墊圈。
- Open or close a door less frequently and quickly.
Frequent opening and closing leads to waste of energy.
- Do not overfill the refrigerator.
Overfilling the refrigerator prevents a smooth circulation of cool air, precluding even cooling throughout the refrigerator and consuming unnecessary power. Place food at appropriate intervals.
- Do not place hot food in the refrigerator.
Placing hot food raises the temperature in the refrigerator, which, in turn, raises the temperature of surrounding food.
- Provide an appropriate gap around the refrigerator.
Installing the refrigerator with little clearance between the refrigerator and the surrounding objects prevents the release of heat and thus leads to the waste of power.
- Replace a damaged door gasket.
Cool air leaks through a damaged gasket, which leads to the waste of power. If a name card inserted between the gasket and the refrigerator slides down, the gasket needs replacing.
常見問題 FREQUENTLY-ASKED QUESTIONS (FAQs)
無法製冰時
If the ice is not made
→ 34頁
→Pg.72
冰箱内冷度不夠時
If the refrigerator is not cooled down
well
→ 35頁
→Pg.73
結霜或結露時
If frost or dew is formed
→ 35頁
→Pg.73
CONTENTS
BEFORE USE
SAFETY SUGGESTIONS 42
BEFORE USE 46
Preparation before use 46
LEARN NAME & FUNCTION OF EACH PART ... 48
Name of each compartment, temperature guide, and examples of stored food 48
Functions of the Control Panel 49
GENERAL USE
Auto Door 50
Setting the Auto Door 50
Using the Auto Refrigerator Door 51
Using the Auto Drawer 51
REFRIGERATOR COMPARTMENT 52
Adjusting temperature in a refrigerator compartment .... 52
Adjust the height of a pocket/shelf 52
When keeping food at lower temperatures (using "Sensor Cooling" function) 53
When you want to quickly cool the foods. (using the "Spot Powerful Cooling" function) .... 53
VACUUM COMPARTMENT 54
Key points for using appropriate temperatures 54
Change the settings of the Vacuum Compartment … 55
When opening/closing the door of the Vacuum Case … 55
ICE COMPARTMENT (AUTOMATIC ICE MAKER) ... 56
How to make Ice 56
Stored ice amount and ice-making time 57
Quick Ice Making 57
Stop Ice Making 57
Water Supply indicator 57
When the "On" indicator blinks, or the "■■■" and "■"
Freezer indicators and the "■" Indige indicator blink ....
FREEZER COMPARTMENT 58
Stored foods 58
When storing food 58
Adjusting temperature in a refrigerator compartment .... 59
Using the Delicious Freezing 59
VEGETABLE COMPARTMENT 60
Stored foods 60
Adjusting temperature of Vegetable Compartment [Vegetable Compartment (MAX)] 60
When storing food 61
Tips for storing vegetables 61
VARIOUS FUNCTIONS 62
Fine adjustment of the temperature (Refrigerator Compartment / Freezer Compartment) 62
Locking the Control Panel 62
Door Alarm 63
Door Alarm and volume adjustment of the operation sound … 63
Triple Power Deodorizing Effect 63
Energy Saving 64
"eco" Operation indicator lamp 64
Door Open & Close indicator lamp 64
Setting "Energy Saving" mode 65
Set the condensation prevention heater to MIN. (Swing partition)… 65
MAINTENANCE
MAINTENANCE 66
Power plug / Door gaskets 66
Surface of door / Each shelf/pocket / Case 66
The back/floor of the refrigerator / Liquid receivers … 66
Vacuum Compartment 67
Auto Drawer 67
Ice Maker Cleaning 68
Water supply container 69
Ice tray 69
HOW TO REMOVE/ATTACH PARTS 70
Height adjustable upper and middle shelf 70
Fixed shelf 70
Height adjustable lower shelf 70
Door pocket 70
Vacuum Case 70
Ice Case (Ice Compartment) · Upper Freezer case (Upper Freezer) … 71
Slide case and lower freezer case (Lower Freezer) 71
Upper Case, Lower Case (Vegetable Compartment) 71
How to attach the slide door (Ice Compartment/Upper Freezer/71
Lower Freezer/Vegetable Compartment)
TROUBLESHOOTING
TROUBLESHOOTING 72
Initial stage 72
Control Panel 72
Automatic ice making 72
Refrigerator does not cool 73
Frost and/or dew occurs 73
Lamp at Display Section is blinking 73
Refrigerator cools overly 74
Abnormal operating sound is generated 74
Door is not in a horizontal state 74
Refrigerator becomes hot 74
There is something strange with the Vacuum Compartment … 74
It smells strange 75
Vegetable Compartment 75
Auto Refrigerator Door 76
Auto Drawer 76
Others 77
Transporting your refrigerator (transport for moving) 78
AVAILABLE PARTS 78
ABOUT NON-CFC REFRIGERATORS/STORABLE WEIGHT 79
SAFETY SUGGESTIONS
Ensure to follow these precautions
When using this appliance, failure to follow safety precautions may result in personal harm, harm to other people, and also damage to property.
The following pictographs categorize and explain the level of possible harm on damage that may occur from ignoring suggestions resulting in missing the appliances.

WARNING
Suggestions headed by this pictograph indicate "There is high chance of serious injury or death" if ignored.

CAUTION
Suggestions headed by this pictograph indicate "There is a high chance of injury or damage to property" if ignored.
How the suggestions should be taken are indicated and categorized by the following symbols accompanied by explanations. (The symbols below are examples)

This symbol indicates something you must not do. (Prohibited)

This symbol indicates something you must do. (Compulsory)
This refrigerator uses flammable refrigerants. The symbol column below states the precautions on flammable refrigerants.
This symbol denotes the precautions on flammable refrigerants.

WARNING
Installation

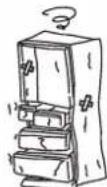
● Take measures to prevent overturning of refrigerator due to earthquake, etc.
• Overturning of the refrigerator could result in personal injury.


Wetting
Prohibited
- Do not install the refrigerator in damp places or where water may splash.
- This may impair electricity insulation causing electric shock or fire.

Handling the power and power cable

Prohibited
● Avoid usage that may cause the wall outlet or power cord components to work beyond their specified electric current.

Also do not use power sources that are not a rated AC voltage.
If a power source is shared with other appliances, double or multipoint adapters may heat up beyond normal levels and cause fire.
- Use a wall outlet rated above 10 ampere by itself.
- When positioning the appliance, ensure the supply cord is not trapped or damaged.
The power cord or plug should not be cut, modified, touched with hot implements, bent by force, twisted, pulled, have heavy objects placed on it, squeezed by the refrigerator, or be bound or tied up.

Using a damaged power cord may cause electric shock, short circuits, or fire.
- If the supply cord is damaged, it must be replaced by the manufacturer or its service agent or a similarly qualified person in order to avoid a hazard.

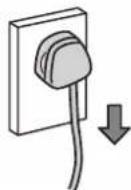
● Connect the power plug firmly to a power outlet with the cord running down.
- Connection of the power plug with the cord running up could apply stress on the cord and cause electrical short or overheat, which could result in electrical shock or fire.
- Incomplete connection of the power plug could result in electrical shock or fire due to heat.
● Clean the dust on the power plug frequently.
Insulation failure from moisture when dust collects on the power plug may cause fire.
- Unplug the power plug and wipe it with a dry cloth.

Handling the power and power cable

Wet Hands Prohibited
- Do not insert or remove the power plug with wet hands. - This may result in electric shock.


● Be sure to unplug the power plug before maintaining the refrigerator.

Continued use may cause electric shock or injury.
· Always hold the plug when unplugging it.
During use

Wetting
Prohibited
- Do not splash water on or inside the refrigerator.
- This may impair electrical insulation causing electric shock or fire.
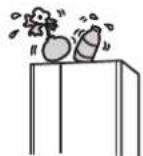
- Do not put water containers on the refrigerator.
- Spilled water may impair insulation of electrical components causing faulty electrical currents. This may result in electric shock or fire.

Prohibited
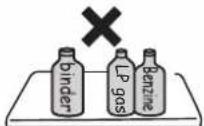
● Do not put in things that may catch fire.
- Benzine, ether, LP gas, thinner, adhesives may ignite an explosion.
- Do not store dry ices in the refrigerator.
- It may be dangerous of busting if placed in a bag or etc.
- Do not use flammable sprays near the refrigerator.
- Sparks from points of electrical contact such as door switches may ignite a fire.
- Do not hang on the doors or step on the various compartments.
- Injury may be caused by the refrigerator tipping over or hands getting caught between doors.
- Do not put too much force on the door by opening it too much or leaning on the opened door.
● Drugs, chemicals, research and experimental substances should not be stored in the refrigerator.
- Substances that require precise conditions for storage cannot be stored in a domestic refrigerator.

● Do not put things on top of the refrigerator.
- Opening and closing doors etc. may cause things placed on top of the refrigerator to fall resulting in injury.
- Do not remove the cover of the interior lamp.
- When the interior lamp is damaged, please contact the service centre for replacing the lamp to avoid injury.

- Do not add impact to the glass door.
- Do not locate multiple portable socket-outlets or portable power supplies at the rear of the appliance.

Contact Prohibited
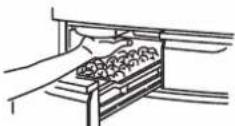
- Do not touch the machinery components of the automatic ice maker.
- There is a danger of injury when the ice trays are rotating.

● This appliance is not intended for use by persons (including children) with reduced physical, sensory or mental capabilities, or lack of experience and knowledge, unless they have been given supervision or instruction concerning use of the appliance by a person responsible for their safety. Children should be supervised to ensure that they do not play with the appliance.
- When an infant child may use the Auto Door or Auto Refrigerator Door to make mischief, please stop the Auto Door function. → Pg.50
Concerning the refrigerant (Be careful of the following related to the use of flammable gas.)

Prohibited
- Do not scratch or damage the main body of the refrigerator with a sharp object such as screw.
Since the refrigerant used is flammable, any leakage from the pipe inside the wall may cause ignition and explosion.
- Do not use mechanical devices or other means to accelerate the defrosting process, other than those recommended by the manufacturer.
- Do not use electrical appliances inside the refrigerator.
- If the refrigerant leaks, sparks on the contact may cause ignition and explosion.

- Do not damage the refrigerant circuit. If you happen to damage the refrigerant pipe, stay away from the refrigerator and avoid using fire and electrical appliances.
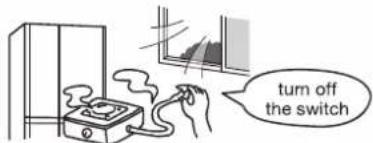
Should you damage the refrigerator, open the window to ventilate and contact the authorised service centre.
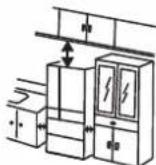
- Allow clearance around the refrigerator and keep ventilation openings when installing it. → Pg.46 Leakage of the refrigerant may accumulate and cause ignition and explosion.
- Please consult your dealer or the Recycle Hotline of the Recycle Centers in the Environmental Protection Administration when discarding the unit.
If the refrigerant leaks, it may cause ignition and explosion.

R600a
● The warning label and name plate including this symbol affixed on compressor and refrigerator should be kept throughout the life of the refrigerator.
● Handling, service and installation of used flammable refrigerant shall be done by Hitachi authorized service companies or service engineer only.
In case of emergency

- Stop the refrigerator by unplugging it if it is not running properly or breaks down.
Continuous running may cause electric shock or injury.
• Always hold the plug when unplugging it.


Disassembly prohibited
- Do not disassemble, repair, or modify your refrigerator.
Injury may be caused by ignition of fire or faulty running.
- Please consult with a retailer if any repairs or disassembly are required.

● In the event of gas leak, do not touch the refrigerator and open windows to allow ventilation.
- Sparks from points of electrical contact such as door switches may ignite explosions causing fire or burn injuries.
When discarding the unit

● Before discarding the unit or recycling, remove the door gaskets to avoid the risk of an infant or child being entrapped inside.
When moving the refrigerator

Prohibited
- Do not move the refrigerator by using its wheels as it may damage the floor.
- Please lay a protective mat.
● Never hang the handle with a crane, etc.
● Take care not to bang the back / side of the refrigerator.


- Use the carrying handle when carrying it. Your hands may slip resulting in injury if you hold the refrigerator at other places than the carrying handles.

- More than 2 persons should carry the refrigerator for safety reasons.
- Carry it with the door facing upward; as shown in the illustration.
- Use a tape to fix an electric plug/power cord so that it may not hang down.
During use

Prohibited
- Do not put bottles in the Door Baskets if they do not sit properly on the bottom of the front section.
- Forcing in items like large bottles may result in them getting tipped over, causing injury.

- Do not put the glass bottles in the Freezer Compartment.
- Bottles may break from the contents freezing and cause injury.
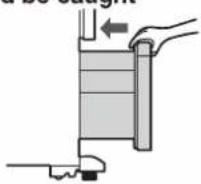
- When opening or closing a door while the adjacent door is left open, exercise caution lest your hand or a finger should be caught between the opened doors.
- Do not close a door while holding a portion other than the handle.
- Do not put your feet too close when opening the bottom door of the refrigerator.
- When opening this door you may hit the instep or other parts of your feet resulting in injury.
- Do not put your hands or feet under the base surface of the refrigerator.

When cleaning, putting your hands under the base surface of the refrigerator may result in injury by cutting them on sheet metal parts.
- Do not give a hard impact to the glass shelf. (The glass shelf may be broken, causing personal injury).

● To prevent water from dripping on the floor. Water due to dew and/or frost may drip on the floor if there is a gap clearance around the door for a long time. Close the door completely without no gap.
- When opening and closing a door while other door is opened, be careful lest your finger or hand should be caught between the opened doors.
- Do not have food items protruding over the front of the shelves.
- Injury may be caused from items like bottles getting knocked over.
- Do not open or close the door with force. (Doing so may cause food to drop)
- Do not open or close a door while other person is using the refrigerator.
- Do not open or close a door of the Refrigerator Compartment while holding the handle of the drawer.

- Do not touch the food and containers inside the Freezer Compartment with wet hands.
- This may cause frost injury. (Especially in the case of metal items)
- Do not eat food that smells strange or has changed color.
- Spoiled food may cause serious sickness.
- Do not press the auto door switch on the auto door compartment with knee, etc.
● Avoid placing anything like a bottle near the auto door compartment.
● Neither heat the glass surface of the glass shelf nor put a hot item on it.
● Be careful not to operate the Auto Door when another person is in front of the refrigerator, which may lead to personal injury unexpectedly caused by the opening door.
● Take care when removing the glass shelf because it is heavy.
- When you hear an abnormal sound or find abrasion powder during the opening or closing of a door, stop using the refrigerator and ask us for inspection.
1
Please arrange it as shown below
● The floor should be sturdy and flat.
Lay a board with 1cm thickness on the floor if the refrigerator is installed on the carpet, tatami mat, flooring or PVC sheet flooring which may be hollow or discolor.
- Place the refrigerator away from direct sunlight and heat.
This will reduce adverse effects to refrigerating power and keep electricity cost down.
- Do not place it in damp areas, and ensure good air ventilation.
This will prevent the refrigerator from rusting and dew condensation.
● The place should be separated from other equipment. To prevent disturbance (noise / scattered image) to TV and others attributable to the refrigerator.
● Provide a heat-releasing space (See the right diagram)
※ The actual size of the center part of the side of the refrigerator's main body is slightly larger than the nominal size. Therefore, please allow enough space around when installing the refrigerator.
※ If you care about discoloration of or dirt on the rear wall, provide a gap of 2 cm or more. This also prevents vibration noise or dew condensation on the rear wall due to high humidity.

2
Fixing the refrigerator on the level or adjusting its horizontal level
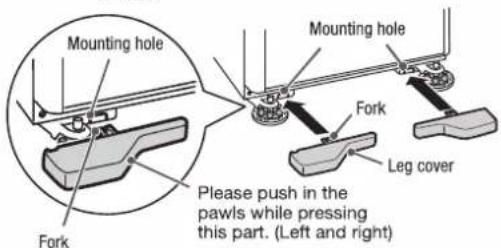
1 To remove leg covers, hold the both ends of one leg cover and pull it towards to you and repeat this operation for another leg cover.

2 Place pads under the adjustable mounts. Place pads under the adjustable mounts evenly so that they can be leveled.
● Always wipe the adjustable mounts and floor clean before placing pads. Adherents may scratch the floor if they remain.

3 Rotate the right and left adjustable mounts until they reach the floor. Adjust the mounts so that the right and left doors of the Refrigerator Compartment get parallel.
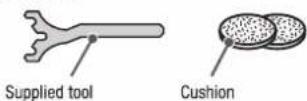
The height of the door can be adjusted 1mm every one turn of the adjustable mount. Clamp the supplied tool adjusting to the shape of the adjustable mounts.
The left side door is lower.

Turn the left adjustable mount clockwise to level the left and right doors
The right side door is lower.
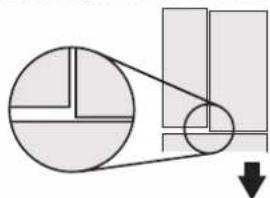
Turn the right adjustable mount clockwise to level the left and right doors
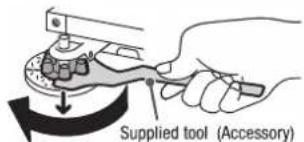

- Be careful not to scratch the floor with the supplied tool when turning the adjustable mount.
● Excessively turning an adjustable mount may cause it to detach.
Make sure to use a supplied tool and 2 cushions
Notice
● Packaging specifications may vary depends on production time, but this does not affect the quality.
● Depending on the material or strength of a floor on which the refrigerator is installed or the weight of food put in it, a door may sag in several days (about five days) after the installation. If this happens, adjust the parallelism between the doors again.
● Installing the refrigerator on an unlevel floor or sinking of its leg(s) due to a floor which is not strong enough to support the weight of food may cause a difference in level between the right and left doors.
This does not affect the refrigerator function. Adjust the parallelism of the doors according to the left procedure if you want to correct it.
- Correcting any left/right lean and lifting slightly the front side of the refrigerator until the door can close easily and completely.
- When you release your hand from a refrigerator door with the door open, the door may move, but this is normal.
4 Insert the fork of the leg cover into the mounting holes to attach the cover.
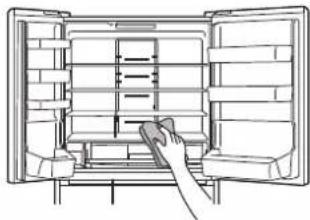
Cleaning the inside of the refrigerator → Pg.66\~69
● Wipe it with a wet and soft cloth and then wipe it with a dry cloth.
● Wash the water supply tank, water filter and ice tray with water.
※ Do not wipe off the lubricant applied to the drawer rail or rail contact surface.
(The lubricant is compliant with the Food Sanitation Act)
※ Initially, the inside may smell like plastic. If you do not like it, ventilate the room so that the smell does not linger for long. (The smell will fade away gradually)
Plug the power cord.
It is not a problem to plug in the power cord soon after installing the refrigerator.
Use a wall outlet exclusively when connecting the power cord. (Alternating current 220 - 240V, rated 10A or more)
- Check that the power plug or the cord is not wedged between the back of the refrigerator and the wall in order to prevent the cord from getting hot.
Cooling inside the refrigerator starts.
- It may take more than 4 hours to cool well the inside of the refrigerator, depending on conditions such as the ambient temperature or storage state of foods. It may take 24 hours or more in summer, etc.
Do not put ice cream, uncooled foods or perishable foods in it until the inside of the refrigerator is cooled well.
● Perform "Ice Maker Cleaning" when using the automatic ice making function first. → Pg.68
● A series of ice making operation will start automatically after the inside of the refrigerator is cooled well. (When using for the first time, it may take 24 hours and more to make ice.) - If the inside of the refrigerator has a low temperature, cooling may not start until the elapse of about 10 minutes after inserting the power plug.
Notice
● Pipes may require rust preventive measures.
If your refrigerator is installed near a hot-spring or industrial area or a sewage pipe, the refrigerator pipe may corrode due to sulfidizing gas. Consult your dealer. If the pipe is blackened, any failure due to a gas hazard is not covered by our guarantee.
● You will hear an operating sound after inserting the power plug. You may feel that the compressor or fan is noisy before the refrigerator is fully cooled.
- Do not peel off the seal on the back or plastics at the lower part of the side.
- When a magnet or suction cup is attached on the side of the body or the surface of a door, it may leave a mark.
- When you attach a paper sheet on the door surface in a high ambient temperature, dew may form on the door surface, or the paper may absorb moisture.

Plastic parts - Left/Right
LEARN NAME & FUNCTION OF EACH PART
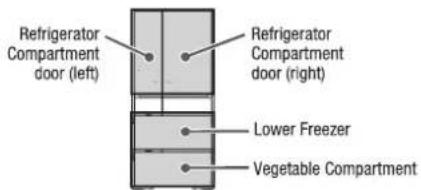
Name of each compartment, temperature guide, and examples of stored food

Tip for storage
● Store foods in a loosely arranged way.
● It is recommended to wrap smelling foods.
● There is a rough guide on the weight of foods that can be stored in the refrigerator. → Pg.79
The Control Panel is divided into two sections:
Display Section in the upper part and Operation Section in the lower part.
The Display and Operation Sections are normally unlit. Touch MENU to light it up.
The Operation Section is a touch panel. Touch it to toggle the setting.
![graph TD A["First touch it."] --> B["Setting Energy Saving mode"] B --> C["Adjusting temperature settings"] C --> D["Setting an ice-making"] D --> E["Setting a cooling mode"] E --> F["Setting the Vacuum Compartment"] subgraph "Energy-saving by reducing cooling power of each compartment." G["Save"] -…](/content/2026/06/1398957/images/e1233f901a421aa2b12ee0ffc3e65eab07c9c82d7d31507be017ee1416ec0cda.jpg)
Notice
- Touch MENU to light up the Control Panel and display the current settings. The current settings are also displayed when a door of the Refrigerator Compartment is opened.
- Touch MENU again at the end of operation to turn off the light of the Display and Operation Sections.
Even if you do not touch MENU, the display and Operation Sections go out after approx. 40 seconds for energy savings, except for the indicators of the "Energy Saving" mode, "Quick", "Off (Stop Ice Making)", "Water", "Off (Non-vacuum)", ["eco" Operation], and [Door Open & Close].
● The Display and Operation Sections are lighted up when a door of the Refrigerator Compartment is opened. They go out approx. 15 seconds after the door is closed.
● Response of the touch panel may change depending on the surrounding temperature, humidity, physical condition of the user or operation status of the adjoining electric product. - Release a finger and touch the panel again if the panel does not respond after touching it. False detection may occur (it may be kept pressed) if the time interval between key touches is too short. Response of the touch panel does not improve even if you touch it strongly.
● The panel may not respond if it is wet or dirty. After removing dirt with a wet cloth, wipe off the water with a dry cloth.
● While a door of the Refrigerator Compartment is left open or the Display Section is blinking, the Operation Section remains inactive even if you touch a button. The display is blinking. Please see → Pg.73.
Auto Door
■ Auto Refrigerator Door
You can open the door easily by touching the door lightly with your fingers thanks to the Auto Refrigerator Door function. (Only for R-ZX740K type)
Auto Drawer
Auto Drawer function helps you to pull out the case easily even if it is heavy with plentiful foods in.

Warning
- When an infant child may use the Auto Refrigerator Door or the Auto Drawer to make mischief, please stop the Auto Door function.

Caution
- When an infant child may use the Auto Door to make mischief, please stop the Auto Door function.
- Do not operate the Auto Refrigerator Door Switch when another person is in front of the refrigerator (which may lead to personal injury unexpectedly by the opening door).
- Do not bring your foot too near the refrigerator when you press the Auto Drawer switch of the vegetable compartment. (You may knock your foot against the door and may cause injury)
- Do not put any item on the refrigerator.
- Do not hold any portion of the door other than the handle. (This can cause pinching of fingers, which could result in injury.)
- Do not press the Auto Drawer switch with your knee.
![graph TD A["Open Button for the Auto Refrigerator Door (Automated)"] --> B["Electric Refrigerator Unit"] C["Handle (manual operation)"] --> D["Handle (manual operation)"] E["Handle (manual operation)"] --> F["Handle"] G["Auto Drawer Switch (Automatic)"] --> H["Handle"] I["Handle"] --> J["Handle"]](/content/2026/06/1398957/images/df6690c2bb260304d9551e39a1aa5b03190a1a07464089cf7843fa50f2d7e659.jpg)
Setting the Auto Door
You can enable or disable the Auto Door function. The function is enabled when you purchase the product.
1
Touch MENU button on the Control Panel to turn on the indicator lamp.
All indicator lamps turn on, and then the current settings are displayed.
2
Press and hold Freezer for three seconds or more until the preset sound (long beep) is heard to turn on the "Auto Door" indicator lamp.
![graph LR A["MENU"] --> B["Energy Saving"] B --> C["Button Lock (Press 3 Sec.)"] C --> D["Freezer"] D --> E["Touch for 3 seconds"] E --> F["Auto Door (Press 3 Sec.)"] F --> G["Light ON"] G --> H["MENU"] H --> I["Energy Saving"] I --> J["Button Lock (Press 3 Sec.)"] J --> K["Freezer"] K --> L["Auto Do…](/content/2026/06/1398957/images/e9bfce0a6903b5083c77d80afeb9a6346629f3c1329996a1ecacf5005b707ebe.jpg)
(At the time of purchase / At the time of setting)
3
Touch MENU on the Control Panel to turn on the indicator lamp, press and hold Freezer for 3 seconds or more until the preset sound (2 beeps) is heard to turn off the "Auto Door" indicator lamp.
Notice
- When the Auto Door function is turned "off", open the door with the handle.
● The Auto Door function cannot be disabled for either Auto Refrigerator Door or Auto Drawer only.
Using the Auto Refrigerator Door
When touching the Open Button for the Auto Refrigerator Door, the operation sound is heard, and then it will open automatically.
Request
When closing it, use the handle with your hand to do so.
The door does not close automatically.
| How to open the Auto Refrigerator Door | Opening one door on either side | Top view of the refrigerator 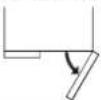 | Open both doors at a time | Top view of the refrigerator  |
| How to operate | Touch the Open Button of the door to be opened * Operate with a finger. |  | Slide your finger from one edge of the Open Button to the other. (Doors will open in turn from the side you touch.) |  |
| Operation sound of the Auto Refrigerator Door | 1 beep | Long beep | ||
Notice
● The Auto Refrigerator Door does not open when either the "Ice Compartment" or the "Upper Freezer" is opened to prevent hands from being caught.
● The Auto Refrigerator Door is a function to reduce load incurred at the beginning of the opening of the door of the Refrigerator Compartment. Opening angle of the door may vary or the door may slightly go back, depending on installation conditions of the refrigerator or how beverages or foods are stored in the door pocket, but this is not an abnormal.
● After touching the Open Button for the Auto Refrigerator Door, the operation sound may be heard when opening the door, but this is not malfunction.
- If the Open Button for the Auto Refrigerator Door is wet or dirty, it may not respond. Use a wet cloth to wipe off dirt, and then wipe it with a dry cloth.
- If you touch the Open Button of the Auto Refrigerator Door and its neighboring part at the same time, or you touch it for about one second or more, the Auto Refrigerator Door may not be opened automatically.
● Hold the handle with your hand to open the door while the Auto Refrigerator Door function is disabled.
■ Manually open and close the Refrigerator Door.
When opening a door
- Do not hold the swing partition to open the door. (It may make it impossible to open the door.)

Swing partition

Swing partition
When closing a door
- Do not close the door with the swing partition erected. (It may make it impossible to close the door completely.)

Swing partition

Swing partition
Request
Do not apply excessive force to a door, by, for example, opening it with too much force or leaning against the opened door. Doing so may damage it.
Using the Auto Drawer
Press the Auto Drawer to automatically open the drawer.
When you close it, push the handle on the right/left to close.
The door does not close automatically.

Notice
● This function is to reduce an initial load when pulling out the Auto Drawer. The Auto Drawer can be pulled out by approx. 15 cm or more. The length may vary depending on installation conditions of the refrigerator, or the door may go back a little after the door is opened automatically, but it is normal.
● "Lower freezer" and "vegetable compartment" cannot be electrically opened at the same time.
- When one of the "lower freezer" and "vegetable compartment" is open, the Auto Drawer function does not work.
● A sound is heard when you press the Auto Drawer switch. This is not abnormal.
● Wipe off spilled liquid and others on the Auto Drawer switch immediately. Or Auto Drawer switch may fail to work, causing the door open disorderly
● Hold the right and left handles with your hand to pull the drawer out while the Auto Drawer function is disabled.

REFRIGERATOR COMPARTMENT
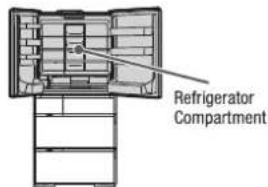

Request
- Food containing a lot of water or canned beverage placed in front of the cold air blowout port may be frozen or burst. Avoid doing so. In particular, they are likely to be frozen if "Sensor Cooling" is enabled. A lid or plastic wrap can prevent freezing.
Adjusting temperature in a refrigerator compartment
The temperature is set to “■■” at the time of purchase. Use the setting on a daily basis.
If you feel the inside is not cooled enough in summer, select "■■■".
Touch MENU button on the Control Panel to turn on the indicator lamp.
All indicator lamps turn on, and then the current settings are displayed.

Touch Fridge button to set the temperature as you like.

Guide for Refrigerator Compartment temperatures:
“■■■” sets a temperature lower than that for “■■” by about 1 to 3 °C.
“■” sets a temperature higher than that for “■■” by about 1 to 3 °C.
Request
- When you use “■■■” for a long time during winter, food may be frozen. If the inside is too cool, use “■■” or “■”.
Notice
● The temperature may change depending on the operation states.
● If you adjust the temperature more finely. → Pg.62
● The “■■■” setting of the Freezer Compartment consumes more energy than the “■■” setting by approximately 20%.
● Changing the temperature setting of the Refrigerator Compartment also changes the temperature in the Vacuum Compartment.
Adjust the height of a pocket/shelf
You can adjust the position of the pocket and the shelf depending on size of foods or beverages.
For how to remove/attach, see → Pg.70.

CAUTION
Handling the glass shelves
● Avoid a high impact on the glass shelf. (A broken glass may cause injury)
● Be careful to attach the glass shelves because they are heavy.
■ Height adjustable upper shelves / Height adjustable middle shelves / Height adjustable lower shelves / Height adjustable pockets


● State at the time of purchase

● Storage of pans, etc.

Mount the shelf board at the middle level.
● Storage of pans, etc.

Turn the upside of the shelf board down and mount it at the upper level.
● Storage of milk carton, etc.

Mount the shelf board at the lower level.
● Storage of milk carton, etc.

Turn the upside of the shelf board down and mount it at the lower level.
When keeping food at lower temperatures (using the "Sensor Cooling" function)
"Sensor Cooling" has two functions:
● Lower the temperature of the "Low-temperature Refrigeration Space" (Disabled: About 2 to 6 °C
⇒ Enabled: About 0 to 3 °C)
Suitable for storing prepared daily dishes.
Upon placing a hot food in the "Automatic Rapid Cooling Space", a sensor detects the temperature of the food and cools it rapidly. Even if you put a hot pan, the refrigerator can cool it rapidly, while reducing the impact on other foods. To put a pan in the "Automatic Rapid Cooling Space", cool it down to a temperature at which one can touch it with bare hands (50 °C or less). This can prevent burn injury or shelf deformation.

Notice
● Enabling "Sensor Cooling" enables both of the "Low-temperature Refrigeration" and "Automatic Rapid Cooling" functions at the same time. Either of the functions cannot be enabled.
- When "Sensor Cooling" is enabled, the refrigerator consumes more power than when disabled. The operating sound may be noisier.
- When "Sensor Cooling" is enabled, temperature in the Double door pockets is also lower than when disabled.
- When the Refrigerator Compartment is set to “■” or “Energy Saving”, the temperature in the entire Refrigerator Compartment is higher than that for “■■” by about 1 to 3 °C. If the Refrigerator Compartment is set to “■■■”,the temperature in the entire Refrigerator Compartment is about 0 to 3 °C.
In the "Automatic Rapid Cooling" mode, the sensor may not be able to detect the temperature of food, depending on the amount or temperature of the food. However, when "Sensor Cooling" is enabled, the Low-temperature Refrigeration Space is lower than when disabled, allowing you to cool food more quickly.
The above temperature in the "Low-temperature Refrigeration Space" is based on the assumption that the surrounding temperature is about 32 °C and the temperatures of the Refrigerator and Freezer Compartments are stable at the "■■" setting.
How to enable "Sensor Cooling"
| 1 | TouchMENUbutton on the Control Panel to turn on the indicator lamp.All indicator lamps turn on, and then the current settings are displayed.The Sensor Cooling is set to “Off” at the time of purchase. |
| 2 | Touch and holdPowerfulfor at least 3 seconds until the setting sound (beep) sounds to light “Sensor Cool”.“Sensor Cool” is valid until it is released. |
| Cancel | TouchMENUon the Control Panel to turn on the indicator lamp, touch and holdPowerfulfor at least 3 seconds until the setting sound (2 beeps) sounds to turn off the “Sensor Cool”. |
![graph LR A["Powerful Sensor Cool (Press 3 Sec.) (At the time of purchase)"] -->|Light ON| B["Sensor Cool (Setting at time of purchase)"] B -->|Touch for 3 seconds| A](/content/2026/06/1398957/images/d5adaa9027daf9b16dcf0cacabf8c76e67e5a1a6562d1a40211818797990bf30.jpg)
When you want to quickly cool the foods. (using the "Spot Powerful Cooling" function)
When you want to quickly cool the foods, operate to strengthen the cooling of the "Automatic Rapid Cooling Space".
It can reduce the time for cooling warm foods and the removal of heat just after cooking. It is recommended when you want to quickly cool a lunch box or drinks as well as vegetables before going out just after cooking. When storing warm foods, cool it to a temperature that can be touched by hand (50°C or less) and then put it in. It can prevent burns or shelf deformation.
Notice
- When "Spot Powerful Cooling" is set, the amount of power consumption is greater than when it is released.
● Continuous use of "Spot Powerful Cooling" may freeze foods in the refrigerator. - It can be also used even when the "Sensor Cooling" is set.

How to enable "Spot Powerful Cooling"
| 1 | TouchMENUbutton on the Control Panel to turn on the indicator lamp. All indicator lamps turn on, and then the current settings are displayed. The Spot Powerful Cooling is set to “Off” at the time of purchase. |
| 2 | TouchPowerfulbutton to turn on “Spot Cool” indicator lamp. The operation is automatically stopped in around 60 minutes and the indicator “Spot Cool” display turns off. |
| To cancel it | TouchMENUbutton on the Control Panel to turn on the indicator lamp, and touchPowerfulbutton to turn off “Spot Cool” indicator lamp. |
![graph LR A["Powerful Sensor Cool (Press 3 Sec.) (At the time of purchase)"] -->|Light ON| B["Spot Cool"] B -->|Touch it| A B -->|Powerful Sensor Cool (Press 3 Sec.) (Setting at time of purchase)| A](/content/2026/06/1398957/images/ea4406122e3895a8385e70c90a816bbc36127ae6670905339a408d02ba54699e.jpg)
VACUUM COMPARTMENT
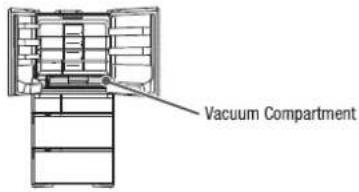
Key points for using appropriate temperatures
Switch between “+1°C” and “-1°C”, depending on the food to be stored.
※ At the time of purchase, the refrigerator is set to the "-1°C".
 | ● Dairy products  Precut vegetables and fruits Precut vegetables and fruits  Food which form air bubbles inside if frozen Food which form air bubbles inside if frozen   |
 | ● Meat, processed meat Fish, seafood, boiled fish paste Thawing meat or fish        · Foods containing a lot of water may be frozen. · Foods containing a lot of water may be frozen. |
| Off (Vacuum off) (About -2°C - 0°C) | The vacuum function is disabled. This setting is recommended to store food in “sealed bags” or “sealed plastic containers”, which requires caution in storing. Foods with a high water content may freeze because this is an ice-temperature compartment. |
Notice
Caution
The vacuum effect will not be changed even if foods are wrapped. If you are concerned about the transfer of smell, be sure to wrap a food item in question.
● Foods high in water content may freeze if ambient temperature is low.
- When putting food materials that should be stored at subzero and chiller temperatures together, set the temperature to “+1°C” to prevent freezing.
● The temperatures of the Vacuum Compartments also change if the temperature of Refrigerator/Freezer Compartment is set to “■■■” or “■”.
- Do not put too much food or too many containers in the Vacuum Compartment.
Doing so may make it difficult to pull out the Vacuum Case.
1
Touch MENU button on the Control Panel to turn on the indicator lamp.
All indicator lamps turn on, and then the current settings are displayed.
2
Touch Vacuum button to change the settings as you like.
The display switches in sequence as shown below every time the button is touched.
The temperature is set to “-1°C (Subzero)” at the time of purchase.
Caution
The "Off" indicator lamp continues to be lit during the "Off" operation. The display will be turned off after about 40 seconds for energy saving, but the function that is set once will remain effective.
![graph LR A["-1°C\n"Vacuum\nTouch it"] --> B["+1°C\n"Vacuum\nTouch it"] B --> C["Off\n"Vacuum\nTouch it\nNon-vacuum (-1°C)"] style A fill:#000,stroke:#fff,color:#fff style B fill:#000,stroke:#fff,color:#fff style C fill:#000,stroke:#fff,color:#fff](/content/2026/06/1398957/images/7f530b8b8bb2fc43bc3d20d2ac1df6e4e893fff35e710fcc536f2636169e1250.jpg)
※The above values are obtained with an ambient temperature of 32° C, the temperature in the Vacuum compartment in a stable state with no food stored and no door opened.
When opening/closing the door of the Vacuum Case
When opening the door
1
Pull up the handle to unlock.
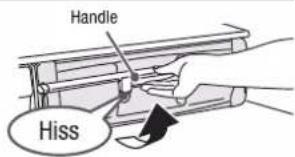
※ It takes about three to four minutes for the Vacuum Case to be vacuumed after the vacuum pump starts to operate. The hissing sound may not be heard when the Vacuum
Case is opened within four minutes.
※ If you pull out the Vacuum Case without opening the door on the left/right, it may cause damage to parts.
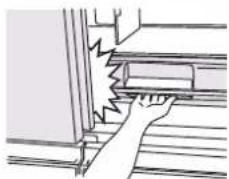
2
Pull out the Vacuum Case.

※ The hissing sound indicates that vacuum is being released. Thus, the Vacuum Case cannot be drawn out while the sound is heard. Draw it out after the sound is no longer heard.
When closing the door
1
Push the Vacuum Case back to the end.

2
Press down the handle to lock.
Caution
● The Vacuum Case is not put in the vacuum state unless the handle is pushed down securely.
- Closing the door of the Refrigerator Compartment without locking the handle may


damage parts or food or form a clearance between the doors, which reduces cooling performance.
Request
- If a part of the gasket is stuck together, the vacuum state cannot be maintained. If it is stuck together, please remove it. Since it is difficult to see the left and right sides and the bottom, remove the Vacuum Chilled Case and check it. → Pg.70
- Dew and/or frost may be formed in the sealed Vacuum Compartment due to moisture contained in food or in the air. Soak a soft cloth in lukewarm water and wipe off the dew and/or frost with the cloth. (Attached dew, frost or ice does not reduce performance.)
- If you want to avoid dew, frost or ice, stored food should be wrapped with plastic wrap.
● Wipe water or soup spilled in the compartment soon, if any.
● The platinum catalyst needs no replacement. Do not remove it.

Dew, frost or ice

ICE COMPARTMENT (AUTOMATIC ICE MAKER)
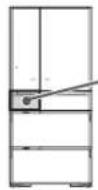
Ice Compartment
Water Supply Container
(Approx. 1.0 L)
Add water line
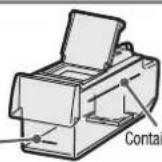
Container-full line
Ice Case

(Keep the ice scoop here when you are not using it


Control Panel

Automatic Ice Maker

How to make Ice
Perform "Ice Maker Cleaning" when making ice for the first time or for the first time in a week or more.
→Pg.68
1
Touch MENU button on the Control Panel to turn on the indicator lamp.
All indicator lamps turn on, and then the current settings are displayed.
2
Touch Ice Maker button to turn on "On" indicator lamp.
The "On" mode is set to "On" (light on) at the time of purchase.
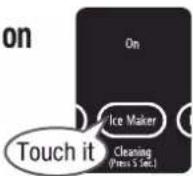
3
Take off the Water Supply Container.

4
Open the lid and add water.
※ Do not pour water into it beyond the full water line.

Container-full line
5
Replace the Water Supply Container.
Push it straight beyond the "Container set position" line completely.
Ice cubes are not produced unless the water supply tank is pushed into the rearmost position.
Push it inside until it stops.
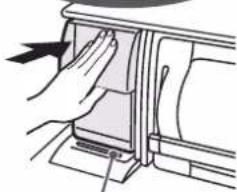
Container set position
※ Water may spill out if the water supply container is inclined. Wipe off spilled water immediately.
6
Ice-Making starts automatically.
- When ice cubes reach the Container-full line, the automatic ice-making function is suspended. The function automatically resumes when ice gets low.
- When the Ice Case contains no ice cube, you may hear a large sound when ice cubes fall from the Ice Tray.
Request
● WARNING: fill with potable water only.
● Water for ice making is according to your drinking standard. Quality of tap water may vary in different countries. Please check and verify with your local authority.
- Change water and clean the container at least once a week for hygiene purposes. → Pg.69
- If the ice made of mineral water containing a lot of mineral ingredients is put into water, white powder may come out, however this is due to those mineral ingredients and harmless.
● Furthermore, these types of water are easily contaminated with bacteria. Please wash the container usually once 3 days.


Mineral water
(Hardness: 100mg/L or less)

Filtered water or boiled water
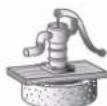
Well water
(Required to satisfy the appropriate
water quality standard)
- Do not use the following ones because they may cause malfunction, deformation or sticking ice.


Juice drink

Sports drink

Carbonated drink
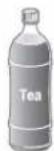
Tea
Stored ice amount and ice-making time
| Model | R-ZX740K type, R-WX740K type, R-WX670K type, R-WX620K type | |
| Stored ice amount | Normal operation | About 90 pcs |
| Ice is leveled | About 150 pcs | |
| Time for one-time ice making (12 cubes) | Normal “On” | About 110 minutes ~ 140 minutes |
| “Quick” | About 80 minutes | |
※ The above values are obtained with an ambient temperature of 30°C, the temperature in each compartment set to “■■” and no door opened/closed.
Notice
● Ice cubes stacked unevenly may suspend ice-making even if they are not enough. Make them flat.
● It may take longer time to make ice in the following cases:
- It is used for the first time (it may take 24 hours or more).
- When the temperature of the Freezer Compartment is set to " ■".
• Large volume of foods is stored in the refrigerator at a time.
- It is set to the "Energy Saving" mode.
• In case of power outage.
• The door is opened/closed frequently.
• After the ice tray is cleaned.
- When the door of the Freezer Compartment / Ice Compartment is not closed completely.
- With the low ambient temperature in winter, etc.
Request
- It is set to the "On" or "Quick" mode, do not put frozen food other than the ice cubes made by the Automatic Ice Maker in Ice Storage Space. (Doing so may prevent ice-making, damage parts or bring a part of the ice maker into contact with food, which may prevent the opening of the door.)
- Open or close the Ice Compartment door slowly. Failing to do so may cause ice cubes to drop from the Ice Case onto the Lower Freezer.

Frozen food
Is any frozen food stored in the inner part of the ice case?

Ice scoop
Is the Ice scoop placed in a given place?
Quick Ice Making
1
Touch MENU button on the Control Panel to turn on the indicator lamp.
All indicator lamps turn on, and then the current settings are displayed.
2
Touch Ice Maker button to turn on "Quick" indicator lamp.
Ice cubes are made in a shorter time than that of "On" operation. 12 ice cubes are made by one ice-making operation.

"Quick" operation ends automatically in about 7 hours, and it is changed to "On" mode.
Notice
- “Quick” indicator continues to be lit during the “Quick” operation. The [“eco” operation indicator lamp] is not turned on.
● While “Quick” is operating, cooling for the freezer compartment is given priority, so the temperature of the refrigerator compartment is likely to increase when the doors are opened and closed frequently.
Small Article Case (Only for R-ZX740K type, R-WX740K type)
Stored foods
Refrigerants or ice bars
Notice
- When putting something hot, ice in the Ice Storage Space may melt or ice-making may take a long time.
● Ice cream may be soft due to indirect cooling. - Be sure to close the lid. Do not put an object which is too large to close the lid.
Water Supply indicator
Water indicator lamp comes on when water in the water supply container is getting low. Replenish the container with water.
When you open/close the door at left door of the Refrigerator Compartment, the lamp Water will be turned off. If no water supplies, it will be turned on again. (after 3 hours as the maximum)

Notice
● Water indicator lamp remains off when "Off" is selected for automatic ice making.
● Water may come on regardless of water level if the water supply container is not placed properly. Push in the container straight and completely if the indicator lamp comes on.
● Even in the "On" mode, the Water indicator lamp may not be lit if the tank is full.
When the “On” indicator blinks, or the “■■■” and “■” Freezer indicators and the “■” Fridge indicator blink
If the ice maker's "On" indicator blinks, the ice tray might have come into contact with food inside the ice container.
Empty the Ice Case once, and then start the "Ice Maker Cleaning". → Pg.68

FREEZER COMPARTMENT

Upper Freezer
Use it to keep daily foods or partially used food.
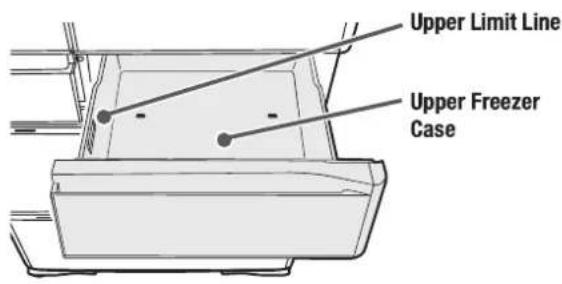
Caution
- Don't put foods beyond the upper limit line.
Lower Freezer
3-layer freezer case provides you with large storage space compartment and convenient reach of your freeze food items.
It is suitable for storing the food preserved for a long time and the food that melt easily such as ice cream.

Slimline Slide Case
(with an aluminum tray)
Delicious Freezing Space
Slide Case
Lower Freezer Case
Tall Storage Compartment
Caution
- Do not remove the Slimline slide case and the partition.
Stored foods
| Upper Freezer | Frozen packages, sealed containers, bread, etc. | |
| Lower Freezer | Slimline Slide Case | Small-item and frozen food, etc.Delicious Freezing Space When you want to freeze meat, fish or rice quickly |
| Slide Case | Freezing bag and airtight container etc. | |
| Lower Freezer Case | Frozen food and bread, ice cream etc.Tall Storage Compartment PET bottle for freezing, etc. | |
When storing food
Store food according to its type or size. As for the height of the foods to be stored, please use the reference standard line as a guide for upper freezing point, and the end face as a guide for other cases. Store food such that it does not come into contact with the upper case or partition.
Otherwise the door may not be closed completely, which leads to inefficient cooling action, and also may cause damage to the food or cases.
Caution
- Do not store any PET bottle in the Slimline slide case. It may not be taken out because it expands when it is frozen.
- Do not use with the slide case removed. Food may drop to the inner part of the case, and as a result, the door may not close completely.
● Store only food which can be frozen such as PET bottle which can be stored in freezer.

Adjusting temperature in a refrigerator compartment
The temperature is set to “■■” at the time of purchase. Use the setting on a daily basis.
If you feel the inside is not cooled enough in summer, select "■■■".

Touch MENU button on the Control Panel to turn on the indicator lamp.
All indicator lamps turn on, and then the current settings are displayed.
Touch Freezer button to set the temperature as you like.
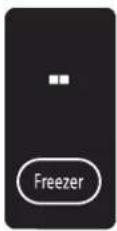
Guide for Freezer Compartment temperatures:
“■■■” sets a temperature lower than that for “■■” by about 2 to 4 °C.
“■” sets a temperature higher than that for “■■” by about 2 to 4 °C.
Request
- If the inside is too cool, use “■■” or “■”.
Notice
● The temperature may change depending on the operation states.
● If you adjust the temperature more finely. → Pg.62
● The “■■■” setting of the Freezer Compartment consumes more energy than the “■■” setting by approximately 20%.
● Changing the temperature setting of the Freezer Compartment also changes the temperature in the Ice Compartment.
Using the Delicious Freezing
The large aluminum tray helps freeze food more quickly.
Just by placing food in the Delicious Freezing Space, the sensor detects its temperature and automatically switches cooling operation.
Wrap a food item with food plastic film or put it in a freezing bag and then place it on the aluminum tray. Dividing a food item into small lumps and flattening them allows the center of each lump to be frozen quickly and facilitates the taking-out of the frozen food.
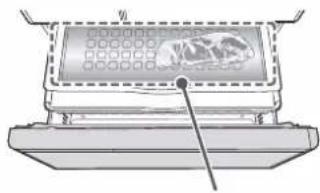
Delicious Freezing Space
Notice
● Food can be frozen more efficiently if put them in close contact each other on the large aluminum tray without stacking.
VEGETABLE COMPARTMENT
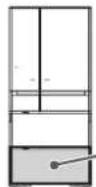
Vegetable Compartment
Platinum Catalyst Odor ingredients of meat or fish and/or ethylene gas from vegetables is decomposed into carbon dioxide to maintain the freshness of foods.

ve it. (only for R-ZX740K type, R-WX740K type)

Stored foods
| Upper space | Unfinished vegetables, small vegetables, fruits, etc. | |||||
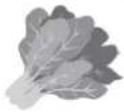
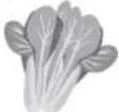
| Lower space | Leaf vegetables (spinach, Japanese Mustard Spinach etc.), large vegetables (cabbage, lettuce), etc. | |||||
 |  |  |  |  |  | |
| Tall Storage Compartment | Tall vegetables (cucumber, asparagus etc.), 2L PET bottle, etc. | |||||
Adjusting temperature of Vegetable Compartment [Vegetable Compartment (MAX)]
1
Touch MENU button on the Control Panel to turn on the indicator lamp.
All indicator lamps turn on, and then the current settings are displayed.
2
Touch Powerful button to turn on "Veg".
Food is cooled at temperatures lower than usual (Normally, approx. 4°C to 8°C, → "Veg": 2°C to 6°C)
※ The above temperatures are provided as a guide when the inside temperatures are stabilized at the ambient temperature of 32°C under the conditions that: The temperatures of the Refrigerator and Freezer Compartments are set to “■■” and the doors are closed without storing food.
![HITACHI R-ZX740RA - Adjusting temperature of Vegetable Compartment [Vegetable Compartment (MAX)] - 1](/content/2026/06/1398957/images/5c58e3897847f39a5e990e1fde49dad6ad2626485660377992b23a1f526020dd.jpg)
Notice
Although the indicator goes off about 40 seconds for energy savings, the setting is valid until it is cancelled. Meanwhile, note that while the "Veg" setting is on, the ["eco" Operation indicator lamp] does not turn on.
Cancel
Touch MENU button on the Control Panel to turn on the indicator lamp, and then touch Powerful button to turn off the "Veg" indicator lamp.
Notice
- If foods are kept in the "Veg" for a long time, vegetables high in water content may freeze.
- When setting "Energy Saving" mode during the "Veg" mode, the cooling function is shifted to weaker cooling effects from the "Veg".
→Pg.65
● Temperature in the case may be lowered when the outdoor temperature is low.
Request
In the following cases, cancel the "Veg" setting:
● You care about dents on or discoloration of the surfaces of low-temperature sensitive vegetables, such as eggplant.
● You care about dew condensation in the Vegetable Compartment.
Store food according to its type or size.
● Pay attention to the height of food to be stored.
• The door may not be closed securely, which leads to inefficient cooling. It may also damage food, the case and the Moisture Cover.
- Some PET bottle can't be stored, depending on its type.
- Do not use the refrigerator with the Upper Case removed.
- Doing so may cause food to drop into the rear of the case, which may prevent the closing of the door.
- Do not push more food or beverage than can be accommodated.
• The partition, the cases or the Moisture Cover may be damaged.

Tips for storing vegetables
■ Types of food recommended to be kept at room temperature
We recommend that the following types of food be kept in a cool location away from direct sunlight: garlic, onion, potatoes, sweet potatoes, squash, and whole (uncut) pumpkins.


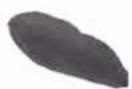

Risk of damage due to low temperatures
Some foods might change color or lose flavor if stored in the vegetable compartment for an extended period of time. Other types of food might lose their vitamin C content, grow mold, or spoil.
● Vegetables: Tomatoes, green pepper, cucumber, eggplants, green beans, sweet potatoes, okra, etc.
● Fruits: Bananas, pineapple, mangos, papayas, avocados, lemons, etc.

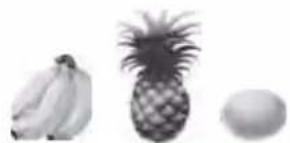
Above foods become delicious by cooling in the refrigerator for a short time before eating.
Request
- If the vegetable compartment contains only a few items, it might not be able to maintain a high level of moisture. In such cases, wrap the items to be stored, in plastic wrap to prevent them from drying out.
● The moisture level of the vegetable compartment is relatively high. As such, depending on the amount and types of vegetables stored in the compartment, moisture might condense on the surfaces of containers, on the moisture-retention unit and cover, or on items stored in the compartment. If you are concern about moisture condensing on the surface of foods, wrap foods in plastic wrap before storing them in this compartment. - If the moisture-retention unit is blocked (for example, by food in containers or bags), moisture is more likely to condense. Be sure to store food in a way that does not block the moisture-retention unit.
● Water accumulating in the container might cause food to spoil faster. Use a sponge or dishcloth to wipe up any water that accumulates.
● Dried food (rice, laver, etc.) stored in the vegetable compartment might absorb moisture. To prevent this, put the dried food in a sealed container or bag before storing it in the vegetable compartment.
Notice
The temperature of the space for tall items is slightly higher than that of other containers.
VARIOUS FUNCTIONS
Fine adjustment of the temperature (Refrigerator Compartment / Freezer Compartment)
Temperature settings for Refrigerator and Freezer Compartments can be more finely adjusted by 11 levels.
| 1 | Open the door of the Lower Freezer Compartment. | ||||||||||
| 2 | TouchMENUbutton on the Control Panel to turn on the indicator lamp.All indicator lamps turn on, and then the current settings are displayed. | ||||||||||
| 3 | Press downFridgebutton for 5 seconds or more until 1 beep is heard. | ||||||||||
| 4 | Close the door of the Lower Freezer Compartment. | ||||||||||
| 5 | TouchFridgeorFreezerbutton to make an adjustment.Each time you touch the button, the corresponding indicator lamp changes in the order shown below.Usually it is recommended to use it at the setting of “■■”.(LightingBlinkingTurned off) | ||||||||||
| Indicationlamp | |||||||||||
| Setting | MIN andunder | MIN. | → | → | → | MID. | → | → | → | MAX.MAX andmore | |
| To cancel | Follow the operations shown in Step 1, 2, 3 and 4.2 beeps sound and you can set the temperature by normal step (3 levels). | ||||||||||
Locking the Control Panel
Disenabling operations can prevent erroneous operations or misuse by children.
When this indicator lamp π° (Lock of the Control Panel) is illuminated, any other portion of the Control Panel will not be activated by touching it.
| Setting of the Control Panel's lock | "On" (locked) | "Off" (unlocked) |
| " Indicator lamp" | On | Off |
| Preset sound | Long beep | 2 beeps |
Notice
● The Auto Door function will not be disabled even when the Control Panel is locked. In order to stop Auto Door function, unlock the Control Panel, and touch the ☐ button for 3 seconds or more until it beeps twice.
→Pg.50, 51
- When connecting/disconnecting the power plug or after recovering from electric power failure, lock of the panel for operation may be released.
● The indication is turned off after about 40 seconds for energy saving. This setting is maintained until it is released.
Door Alarm
If any door is kept opened for 1 minute or more, it is notified with sound or light.
All the doors have the Door Alarm function. (However, for R-WX670K type, R-WX620K type, no Door Alarm is installed in the Upper Freezer.)
| Duration when door is open | 1 minute | 2 minutes | From 3 minutes onward |
| Alarm sound | Long beep (3 beeps) | Long beep (5 beeps) | Long beep (continuously), Louder |
| Display area | Blinking | Blinking | Blinking |
| For operation | Light ON | Light ON | Light ON |
Notice
● While the indicator lamp is blinking on the display area, the Control Panel remains inactive upon touching. Close the door before starting operation.
● Door alarm rings after 30 seconds when the door has been opened only in case the power "Energy Saving" mode set. However the indicator blinks after 1 minute of the opening.
Door Alarm and volume adjustment of the operation sound
You can set the sound level of the alarm louder or no alarm sound.
1
Touch MENU button on the Control Panel to turn on the indicator lamp.
2
Press down Fridge button for 3 seconds or more until the preset sound is heard.
The volume level of the operation sound is changed from "Standard" to "Louder" or "Sound off". Repeat the change of settings to set the operation sound you like (see the table shown below). The sound is set to "Standard" at the time of purchase.
| Volume level | Standard | Louder | Sound off | Standard |
| Preset sound | — | 2 long beeps | Long beep | 2 beeps |
Notice
- It is impossible to adjust the volume level of either door alarm or operation sound only.
- When the Door Alarm is disabled, characters on the Control Panel no longer blink.
● Even if the volume level is set to "Sound off", the alarm of the Ice Maker Cleaning is raised and the operation sound is heard when the Auto Door is set to "ON". - When connecting/disconnecting the power plug or after recovering from electric power failure, it will return to the standard setting where the Door Alarm sounds.
Triple Power Deodorizing Effect
A combination of 3 types of deodorizing materials leads to deodorize various odorous substances in the refrigerator including 4 major odors such as sulfur, nitrogen, aldehyde and oxidization odors.
Energy Saving
"eco" Operation indicator lamp
eco is automatically turned on and inform the energy saving operation when the operation is comparatively stable.
Open or close a door less frequently and quickly. Use this indicator wisely to save energy efficiently.
"eco" Operation indicator lamp

Notice
If eco isn't illuminated, check the following things.
• Immediately after it is installed, or plentiful foods are stored at a time
• If the door is frequently opened / closed (when the [Door Open & Close indicator lamp] is lit)
- If the door is not closed completely because any food/bag is wedged between the door and the body of the refrigerator.
- "Quick" or "Veg" is set.
• The ambient temperature of the refrigerator is about 35° C or higher.
Door Open & Close indicator lamp
When a door is opened or closed frequently, Door is automatically lit. Open or close a door less frequently and quickly. Use this indicator wisely to save energy efficiently.
[Door Open & Close indicator lamp]

Notice
• Door is turned off automatically after about 5 minutes.
- eco remains unlit when Door is lit.
Setting "Energy Saving" mode
Setting the "Energy Saving" mode reduces the ability to cool each compartment for energy savings.
Likewise, when the door of the Vegetable Compartment is left open for 30 seconds or more, the LED light in the compartment has reduced brightness for energy savings.
If a door is not opened or closed for a long time, the inside is cooled down slowly to further reduce power consumption.
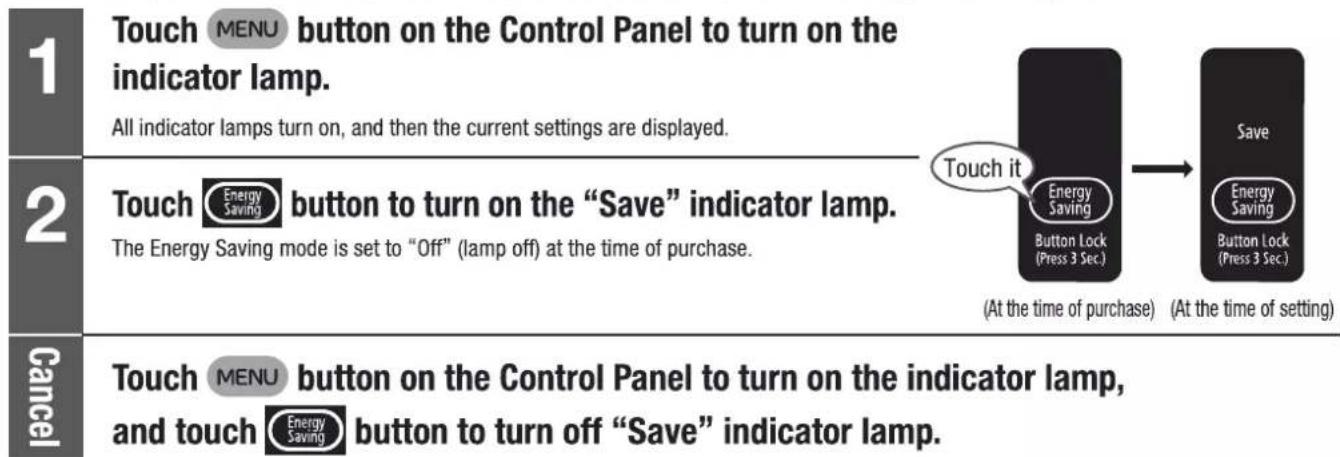
Notice
● Automatic temperature control lowers cooling loads, which may cause ice cream to get soft and frost to form on frozen food. It also requires longer freezing time and ice making time.
● The "Save" indicator lamp is turned on during the "Energy Saving" mode.
- When "Quick" is set in the Energy Saving mode, the Energy Saving mode is temporarily cancelled, and restored after the completion of the quick operation.
- When both "Save" and "Veg" modes are set concurrently, the cooling function will be weakened from the "Veg". → Pg.60
- When the temperature of the "Freezer Compartment" and/or "Refrigerator Compartment" is set to "■", the minimum level of cooling is not reduced to maintain the freshness of foods.
Set the condensation prevention heater to MIN. (Swing partition)
Setting the condensation prevention heater to MIN saves energy.
When dew is formed in the swing partition, set it to the standard.
The temperature settings for the swing partition can be adjusted by three levels (1 to 2), and level 2 is the most energy saving.
![graph LR A["MIN setting of the heater"] --> B["Standard"] B --> C["MIN setting level 1"] C --> D["MIN setting level 2"] D --> E["Standard"] F["Preset sound"] --> G["—"] G --> H["Long beep"] H --> I["Long beep (2 beeps)"] I --> J["2 beeps"] K["(At the time of purchase)"] --> L](/content/2026/06/1398957/images/03f68d0876511d9f8839c3bb06b9974f7d0e9d94633f264d1fae03fdab26d437.jpg)
1
Open the door of the Lower Freezer Compartment.
2
Touch MENU button on the Control Panel to turn on the indicator lamp.
All indicator lamps turn on, and then the current settings are displayed.
3
Press down Powerful button for 3 seconds or more until the preset sound is heard.
The setting of MIN level of the dew condensation prevention heater will be switched.
Repeat the above-stated operation to set it to the level you prefer (see the table above).
4
Close the door of the Lower Freezer Compartment.
Notice
● The setting will be returned to the standard when the power plug is disconnected and connected or power failure recovery takes place.
MAINTENANCE

Warning
● Make sure to unplug the power plug when maintaining the refrigerator.
When dirt is found
● Wipe off it immediately. It is recommended to clean the hidden places once a year.
Power plug
Once or twice a year
Unplug the power plug and remove dust with a dry cloth.
To prevent fire or electric shock. → Pg.42

Door gaskets
Use a soft cloth wet by lukewarm water to wipe off.
Wipe it thoroughly because it can become easily dirty.
Once a month

Surface of door
Once a month
Wipe the surface of door using a soft cloth wet by lukewarm water, and then wipe off water with a dry cloth.
Remaining adhesives on glass surfaces, if any, can be removed clearly by using a plastic eraser to rub it and then wiping it off with a dry cloth.

Each shelf/pocket
Once per three months
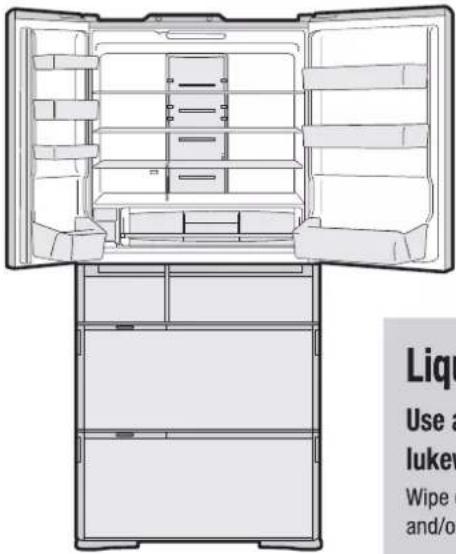
Use a soft cloth wet by lukewarm water to wipe off.
For how to remove → Pg.70
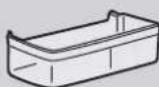
Liquid receivers
Once a month
Use a soft cloth wet by lukewarm water to wipe off.
Wipe off them if liquid collects and/or they becomes dirty.
Liquid receivers

The back/floor of the refrigerator
Remove the leg covers, raise the adjustable mounts from the floor, pull the refrigerator toward you, and then wipe off dirt.
Once or twice a year

- The back of the refrigerator easily becomes dirty because fine dust is accumulated on it by convection of air. Lay the protection board etc. on the floor which can be easily scratched.
- If you care about vibrating sound, or about discoloration or dirt caused by humidity on a wall behind, install the refrigerator so as to form a gap of 2 cm or more.
Case
Use a soft cloth wet by lukewarm water to wipe off.
Once per three months
When the lower case of the Vegetable Compartment is washed with water, turn it upside down to drain water, and then wipe off water with a dry cloth. Don't use thick-pile toothbrush or scrubbing brush to wash. It may cause damage to case or moisture unit.
For how to remove → Pg.71
※ Do not wash the platinum catalyst with water.
Request
Do not use the following items because it may cause damage and discoloration of the door, paintwork, plastic parts and glass surface




Alkaline glass detergent, Mild alkaline kitchen detergent (other than neutral), Chlorine bleaching agent
Scrubber, Polishing sponge, Chemical wipe
Polishing powder, Washing powder
Benzin, Thinner, Alcohol
Hot water
Check the "Liquid Property field" of your detergent displayed in accordance with Household Goods Quality Labeling Act.
● Make sure to wipe off spilled cooking oil, citrus fruits juice and food soup. Because it may cause damage and discoloration of the door, paint work and plastic parts.
- Do not wipe off lubricant applied to movable contact surfaces of cases and rails for the slide door.
- When a magnet or suction cup is attached on the side surface of the body or the surface of a door, it may leave some mark.
- When unplugging the power plug, the settings of the Control Panel may be released. So check the settings.
1
Pull out the Vacuum Case.
For how to remove, → Pg.70
Be sure to remove foods contained in the Vacuum Case.
2
Wipe off following parts with a soft cloth which is steeped in lukewarm water.
※ Do not use the detergents, etc.

Request
● Wipe the ceiling of the compartment (platinum catalyst and LED light) gently. Failing to do so may cause damage.
- If detergents and others except lukewarm water are used to clean the vacuum compartment gasket, the vacuum compartment gasket may be damaged, deformed or change in color, which may cause the vacuum state unable to keep well.
3
Attach the Vacuum Case.
For how to attach, → Pg.70
Loosened vacuum compartment gasket or loose-fitting door of the Vacuum Case may cause the vacuum state unable to keep well.
When the Vacuum Compartment Gasket is dirt
1
Remove the vacuum compartment gasket from the Vacuum Case.
Grasp the tab of the vacuum compartment gasket on the observer's upper right and remove it by hand carefully.

2
Rinse dirty portion in water using a soft sponge, etc.
※ Do not use the detergents, etc.
3
Wipe off excess moisture with a dry cloth and dry it out naturally.
4
Wipe off dirt in the vacuum compartment gasket mounting groove.
Groove for attaching the vacuum compartment gasket.

5
Attach the vacuum compartment gasket.
Align the vacuum compartment gasket tab with the notch of the mounting groove.
R-ZX740K type R-WX740K type Align the indentations of the gasket with the projection (6 locations) of the case and attach firmly.
R-WX670K type R-WX620K type Align the hollows of the gasket between the projections (6 locations) of the case and attach firmly.


Auto Drawer
Clean the auto door unit when food falls onto or is caught in the upper part of the auto door unit and when liquid is deposited on the auto door unit.
1
Unplug the power plug.
2
Remove each case of the Lower Freezer or the Vegetable Compartment. → Pg.71
3
Remove all foods which drop or are caught in.
4
Wipe off deposited liquid using a soft and dry cloth.
Caution
● Make sure that water never splash to the Auto Drawer unit. Otherwise, it may cause malfunction.
- Do not disassemble the Auto Drawer unit. Otherwise, it may cause injury and/or malfunction.
Exercise caution not to move the linkage section. Failing to do so may cause a failure.

Warning
● Make sure to disconnect the power plug from the power outlet before starting maintenance to avoid injury.

MAINTENANCE (CONTINUED)
Ice Maker Cleaning
When using for the first time
When not used for more than one week

Warning
- Do not place your hand in the mechanical section of the automatic ice maker.
(Rotation of the ice tray may cause injury.)

Wash the Ice Tray or water paths with water.
Preparation
Be sure to check the followings before starting the operation.
Go to the next step after checking them.
Water supply container
• Water is filled in it up to the limit line.
- It is set correctly beyond the tank set position line.
Ice case
• If there remains ice, remove it.

1
Close all the doors.
2
Touch MENU button on the Control Panel to turn on the indicator lamp.
All indicator lamps turn on, and then the current settings are displayed.
3
Hold down Ice Maker button for 5 seconds or more until the alarm sounds.
When the 3 indicator lamps "Quick", "On" and "Off" start to blink and alarm starts to sound, stop holding the button. "Ice Maker Cleaning" starts (for about 4 minutes).
• The indicator lamp will flash and the buzzer will sound for about 4 minutes.
- "Ice Maker Cleaning" can't be interrupted.
- If you open any of the refrigerator doors during Ice Maker Cleaning, the cleaning may not work properly. Do not open or close the door until cleaning is completed.
- Door alarm sounds even if alarm is disabled. → Pg.63

4
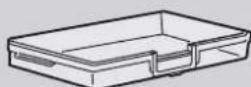
Place a clean towel, etc. on the bottom in the Ice Case so that the cutout of the Ice Case can be blocked after the alarm and blinking of the indicator lamp end.
Place a water-absorbing towel on the bottom in the Ice Case to prevent trapped water during the ice maker cleaning from spilling out of the cutout of the Ice Case.
R-ZX740K type, R-WX740K type

R-WX670K type, R-WX620K type
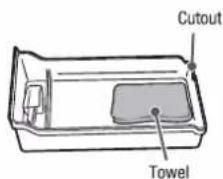
5
Wipe off water inside the Ice Case completely, and then set it to the Ice Compartment.
Remove the towel with which you have wiped off water. There is no problem with using water remaining in the water supply container, if any. After “Ice Maker Cleaning”, it is set to “On” mode, etc.

1
Remove the water supply container, and then the lid.
Take up the near side of the lid toward in the direction of the arrow, and then remove it.
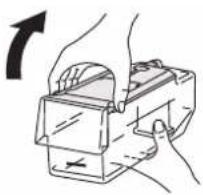
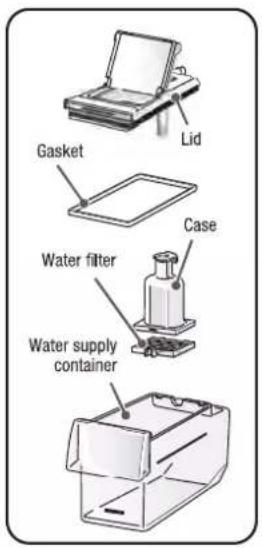
2
Remove the gasket from the lid and then the case.
Turn the case and remove it from the lid.
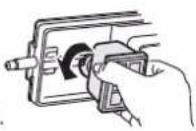
3
Remove the water filter from the case.
Pinch the tab of the water filter with fingers to unset it from the fork, and then remove the case.
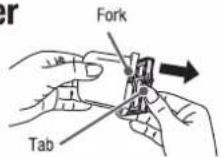
4
Rinse each part of the water supply container in water.
Wash it with a soft wash sponge etc. Do not use the detergents etc.

Notice
- Replace the water filter normally every 3 - 4 years.
→Pg.78
5
Attach each part to the water supply container, pour water in and then set it.
Insert the lid from its rear side and close it in the direction of the arrow.

Notice
If you intend not to use the Automatic Ice Maker for an extended period of time, care the water supply tank, dry it adequately, and replace it in a predetermined position (dry out the water filter, among others).
1
Touch MENU button on the Control Panel to turn on the indicator lamp.
All indicator lamps turn on, and then the current settings are displayed.
2
Touch Ice Maker button to turn on "Off" indicator lamp.
It stops water supply to the ice tray.
※ When "Off" indicator lamp blinks, wait for about 1 minute for it to turn on, and then follow the next steps. Note that the frame cannot be pulled

3
Open the door of the Ice Compartment, and take out the ice tray.
1 Push the level laterally. 2 draw the frame.
3 Raise the cover (▲ part) in the direction of the arrow.
4 Remove the ice tray from the frame.

4
Empty the ice tray and wash it lightly in the stream.
Do not use a sponge / cleanser, etc. Be sure not to scarify.
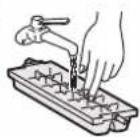
5
Open the Ice Compartment, and then attach the ice tray.
1 Set the ice tray
2 Hold down the cover to the end until it snaps.
3 Push the frame into the rear until the lever slides right.
4 Move the frame back and forth to check that it is fixed securely.

Notice
- If the ice tray frame cannot be pushed into the rear, the motor that drives the ice-tray may have operated since ice-making is not set to "Off". Remove the ice tray and then push the frame alone into the rear, close the Ice Compartment door, touch (in Make) button to enable "Off". After about one minute, the ice-tray driving motor gets ready, allowing you to mount the ice-tray.
6
Touch MENU button on the Control Panel to turn on the indicator lamp, and then touch Ice Maker button to turn on the "On" indicator lamp.
Automatic Ice Making starts.
HOW TO REMOVE/ATTACH PARTS
Caution
● Before removing parts, take out all the foods on the parts.
- Do not remove parts except the ones listed here.
Please contact with a Hitachi customer service centre for cleaning such parts after removing them.
- Do not remove the platinum catalysts in the Vacuum and Vegetable Compartments. Do not wash them with water.


Height adjustable upper and middle shelf
Request
Before removing the upper shelf, remove the middle shelf.
1 Slightly lift up the back of the shelf and draw it.
2 Raise the shelf, as shown in the drawing.
3 Rotate and remove it.


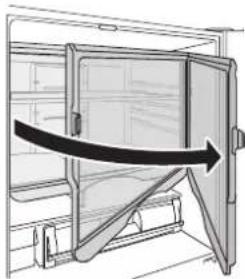
When installing the shelf, slide it until it reaches to the interior wall, then slightly lift up the back of the shelf and push it in.
(hitch the forks of the shelf to the parts on the back of the shelf)
Notice
Be careful to attach/remove the glass shelf because it is heavy. If it drops, it may break and cause bruise or injury.

Fixed shelf
Draw the shelf, and pull off the 2 pins on the lower right and remove it.

Notice
The shape of the shelves varies by model.

Height adjustable lower shelf
Slightly lift up and pull out.
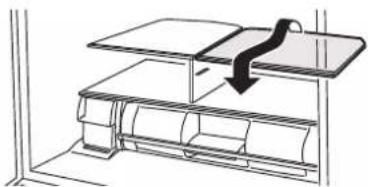
Notice
The shape of the shelves varies by model.

Door pocket
Lift up the door pocket while tapping the left/right of its bottom surface, and remove it.
(It is fixed a little tightly.)
Caution
Insert the door pocket fully to the end when installing it.
If it drops, it may break and cause bruise or injury.


Vacuum Case
How to remove
Pull out the Vacuum Case by slightly lifting up and moving up and down.
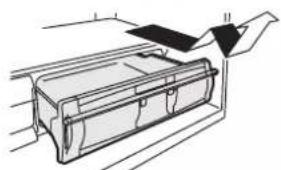
How to attach
Insert the Vacuum Case so that both right and left convex ribs on the case can slide under the guide rail of the Vacuum Container.
Lastly, hold down the handle to lock.
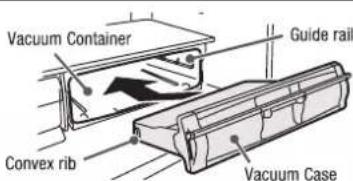
Request
Check that it is fixed properly by taking it in and out a few times.
F Ice Case (Ice Compartment) · Upper Freezer case (Upper Freezer)
Draw the door fully and lift up the case towards you.
Put the case bottom on the frame and set the case.
● Before taking out the Ice Case of R-ZX740K type, R-WX740K type close the lid of the Small Article Case by pulling it to the front.
Underside of the case
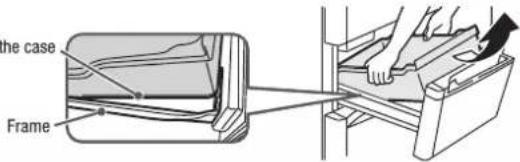
[Only for R-ZX740K type, R-WX740K type]
Remove the lid of the Small Article Case as follows:
(Mount it in the reverse order of removal)
1 Slide the lid halfway and deflect the side of the Ice Case to remove the fork.

2 Slide the lid toward the rear and pull it out.

G Slide case and lower freezer case (Lower Freezer)
1 Draw the door fully, and draw the Slide case respectively.
Caution

2 Lift up the Lower freezer case.
Caution
● The partition of the Lower Freezer can't be removed.
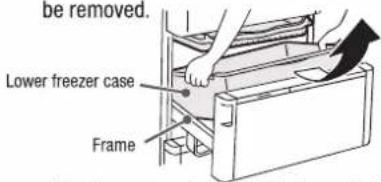
Caution
- Do not peel off the adhesive seal.
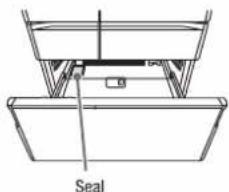
When installing it, insert the pins on the left/right of the Lower freezer case into the square holes on the frame to install it. Moreover, hitch the fork on the left/right of the Slide case to the outside of the Lower freezer case.
H Upper Case, Lower Case (Vegetable Compartment)
1 Draw the door fully and pull up both hands further to pull it out slowly and to place it on the floor.
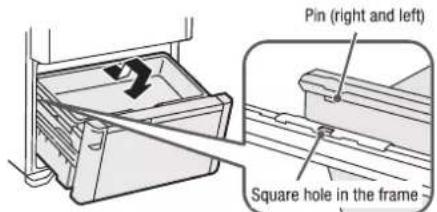
Caution
- When opening the door, do not place your foot near the door. Doing so may get your foot caught between the door and the floor.
● Be careful. Water may drip from the backside of the lower case.
Wrong setting may cause abnormal noise or half-closed door when opening or closing the door.
Request
● The partition cannot be removed.
- Improper installation of the Upper Case may damage parts, including cases.
Once the Upper Case is installed, slide it in the front-rear direction to confirm that it is mounted properly.
3 Lift up the Lower Case.


How to attach the slide door (Ice Compartment/Upper Freezer/Lower Freezer/Vegetable Compartment)
Ice Compartment/Upper Freezer

Lower Freezer/Vegetable Compartment

TROUBLESHOOTING
Check the following points before asking repair. Contact your dealer or our customer center if the problem still exists after checking them.
| When this happens | Check Item | Action and Reasons | |
| Initial stage | Not cooled well. | Haven't 24 hours passed since the installation? | Cooling may take more than 24 hours at installation. Place food at appropriate intervals, refrain from opening and closing a door as much as possible and wait. Cooling takes more time during summer or in case of a lot of food being stored. |
| No ice is made. | Haven't 24 hours passed since the installation? | As the entire refrigerator is not cooled immediately after installation, it takes more than 24 hours for the first ice to be made. Place food at appropriate intervals, refrain from opening and closing a door as much as possible and wait. | |
| Control Panel | The Control Panel does not respond. | Isn't lit in the Display Section?If so, the Operation Section is locked. | Cancel the lock of the Control Panel. → Pg.62 |
| Is Refrigerator Compartment Door open? | Operate after closing it. | ||
| Isn't a water drop or dirt attached to the Control Panel? | Wipe off dirt with a wet cloth and then wipe off moisture with a dry cloth. | ||
| Are you wearing gloves or applying a plaster? | Touch directly with your finger. | ||
| Did you touch adjacent Control Panel wrongly? | Touch the target Control Panel only. | ||
| The Operation Section is unlit. | —— | The Operation Section goes out about 40 seconds after the completion of operation for energy savings. → Pg.49To turn it on, touch MENU or open a door of the Refrigerator Compartment. | |
| Automatic ice making | Ice cannot be made at all. | Isn't "Off" lit in the Display Section?Ice making is set to Stop Ice Making. | Set it to "On" or "Quick" mode. → Pg.56, 57 |
| Isn't "Water" lit in the Display Section?The water in the water supply tank is low. | Pour water into the water supply container. → Pg.56, 57 | ||
| Isn't the water in the water supply tank low? | If the water in the tank is low, ice may not be made.Add water until water level reaches to the "Container-full line" of the water supply container. → Pg.56 | ||
| Is the water supply container pushed firmly until it is beyond the "Container set position" line? | Push it beyond the "Container set position" line. → Pg.56 | ||
| Do you push the frame into the rear until the lever slides right? | Push the frame into the rear until the lever slides right. → Pg.69 | ||
| Is anything other than ice stored in the ice case? | Remove it from the Ice Case. | ||
| It takes a long time to make ice. | Is the ice case filled with ice over the limit line of stored ice amount? | Level the ice. → Pg.57 | |
| Do you open the door frequently or store a large amount of food at a time? | The inside is not cooled down enough.Minimize the number of times of opening and closing the door until it cools fully. Allow clearance as much as possible between each stored food. | ||
| Isn't the surrounding temperature low? | Ice making takes more than four hours during winter. Refrain from opening and closing a door as much as possible and wait. | ||
| Haven't you just changed the setting from "Off" to "On"? | Ice-making may take time immediately after changing the setting.Refrain from opening and closing a door as much as possible and wait. | ||
| Does any food or package caught in the door of the Freezer or Ice Compartments prevent the door from closing completely? | Remove caught food, if any, and close the door securely. | ||
| Isn't the "Energy Saving" mode "ON"? | Exit the "Energy Saving" mode. → Pg.65 | ||
| Projection is generated on ice. | —— | It is frozen water collected in the ice tray groove.It does not indicate any trouble. | |
| Stored ice becomes small. Ice sticks together. | Have the ice cubes been sitting in the ice container for a long time? | If ice cubes are left unused, they will gradually grow smaller or stick together. If you can separate the ice cubes by using the ice scoop, this is not an issue. | |
| Do you open the door frequently or store a large amount of food at a time? | Open/close the door quickly or reduce frequency of opening and closing the door. | ||
| Hasn't a door of the Refrigerator Compartment or a drawer been closed incompletely temporarily? | Close the door completely. | ||
| Small ice is made. | Isn't the water in the water supply tank low? | If the water in the tank is low, ice may not be made.Add water until water level reaches to the "Container-full line" of the water supply container. → Pg.56 | |
| Connected ice is made. | Do you push the frame into the rear until the lever slides right? | Push the frame into the rear until the lever slides right. → Pg.69 | |
| Isn't the ice Tray damaged? | A damaged Ice Tray precludes the removal of ice cubes from the Ice Tray, resulting in broken ice cubes or ice cubes sticking to each other.Contact your distributor for the replacement of the Ice Tray. | ||
| —— | Water in the groove in the Ice Tray may be frozen and sticks to ice cubes. It does not indicate any trouble. | ||
| There is white impurity in ice. | —— | It is because the fine air bubble in water is contained in ice. | |
| Did you use mineral water to make ice? | Mineral contained in water may freeze and become white impurity in ice. It may remain after thawing in water, but it is harmless. | ||
| Ice tray frame cannot be drawn. | Is "Off" set? | The ice tray cannot be drawn when the auto ice maker is operating.Set it to "Off". When the "Off" indicator lamp is blinking, wait for 1 minute until "Off" is lit, and then draw the ice tray. → Pg.69 | |
| When you do not make ice | —— | Set "Off".See "Stop Ice Making". → Pg.57 | |
| Refrigerator does not cool | Is not cooled down. Ice cream is soft. | Does any food or package caught in the door prevent the door from closing completely? | Remove caught food, if any, and close the door securely. Pay attention to the height of food when placing it in the refrigerator. |
| Is food squeezed in? or Is a large amount of food put in at one time? | Allow clearance between each food in each compartment. | ||
| Is the case in each compartment fixed securely? | Install them correctly. → Pg.71 | ||
| Food cannot be cooled enough, depending on the installation place or surrounding situation. | Check to see if the refrigerator is installed properly. → Pg.46 | ||
| Isn't the "Energy Saving" mode "ON"? | Exit the "Energy Saving" mode. → Pg.65 | ||
| Isn't the temperature set to " ■"? | If a compartment is not be cooled enough, change the temperature setting. → Pg.52, 59 | ||
| Does the temperature around the refrigerator become high due to weather (ex: in summer)? | |||
| Haven't you left a door open for a long time or opened or closed it frequently? | Temperature in the refrigerator rises little by little while its door is open. If the door is opened/closed frequently or left open for a long time, temperature cannot easily lower. Reduce the number of times of opening and closing the door, or open/close the door quickly. | ||
| Isn't the indication on the Control Panel changing quickly? | The refrigerator is in the demo mode. Please cancel the mode. → Refer to the below | ||
| Frost and/or dew occurs | Frost, dew or ice adheres to the inside of the refrigerator or the frame of the drawer. | Was the door or the drawer not temporarily shut completely? | Check that any food or package caught in the door, and then close it completely. |
| Haven't you left a door open for a long time or opened or closed it frequently? | When a door is opened or closed, water in the air may cling to the walls or parts in the Freezer in the form of frost or ice. Open or close the door quickly, or reduce frequency of opening and closing the door. Wipe off the frost or dew with a dry cloth. | ||
| Dew adheres to the outside of the refrigerator. | Is the air surrounding the refrigerator humid? | Dew may adhere to those parts when the indoor humidity is high (exc rainy day). Wipe off the dew with a dry cloth. | |
| Isn't the heater for preventing dew condensation set to Low? | When the air surrounding the refrigerator is humid, dew may be formed. Set the heater for preventing dew condensation to Standard. Wipe off the dew with a dry cloth. → Pg.65 | ||
| Isn't the temperature set to " ■■■ " ? | When the temperature is set to " ■■■", dew may be formed on the surface of a door. Set the temperature to " ■■". Wipe off the dew with a dry cloth. | ||
| There is condensation on the back of the refrigerator or on the wall. | Is the ambient of the refrigerator humid? Is there sufficient space between the back of the refrigerator and the wall? | Make sure there is at least 2 cm of space between the back of the refrigerator and the wall. → Pg.46 | |
| Dew condensation occurs in the Refrigerator Compartment. | Haven't you left a door open for a long time or opened or closed it frequently? | Condensation may form on the wall and or around the cold air blowout port when the door is opened and closed frequent or the humidity is high around the refrigerator. No trouble. Wipe it off with a dry cloth. | |
| Lamp at Display Section is blinking | 3 or more of the temperature adjustment lamps of freezing/ refrigerating are blinking. | Check the ON/OFF of 6 lamps of the freezing " ■■■ / ■■ / ■" and the refrigerating " ■■■ / ■■ / ■" one by one. | Contact with the customer service with checking ☑ to the blinking lamps. If you record, it can be accurately informed.  |
| "On" Indicator blinks, or the " ■■" and " ■" indicators and the " ■" indicator blink | Don't you put food or ice other than that made by the Automatic Ice Maker in the Ice Compartment? | Some foods, etc. may come into contact with the ice tray. Empty the Ice Compartment and do the "Ice Maker Cleaning". → Pg.68 | |
| -1°C blinking | Have you just had your service engineer member inspect your refrigerator? | It may be in the operation check mode for service engineer. It will return to the normal mode after about 15 minutes. There is no problem with using the refrigerator. | |
| Auto Door blinking | Have you just had your service engineer member inspect your refrigerator? | It may be in the operation check mode for service engineer. It will return to the normal mode after about 10 minutes. There is no problem with using the refrigerator. | |
| Quick On Off All indicator lamps blink | Haven't your held "or water" for five seconds or more? | It is in process of Ice Maker Cleaning. The blink will stop in about four minutes. Do not open any door of the refrigerator during blinking. | |
| "Off" Indicator blinking | Haven't you just set "Off"? | The Automatic Ice Maker is working. Blinking stops in about one minute. The frame of the Freezer cannot be removed during blinking. | |
| All displays blinking | Isn't the door opened? Isn't the door closed incompletely due to food being caught? | Close a door when it is open. If a door is closed incompletely due to food being caught, remove the caught food and close it securely. | |
| Blinks other than those above | —— | Consult your dealer. | |
| The indication on the Control Panel is changing quickly. | —— | The refrigerator is in the demo mode. Please cancel the mode. In the demo mode, the refrigerator does not perform the cooling operation. Open the right and left doors of the Refrigerator Compartment and the door of the Lower Freezer. Touch MENU on the Control Panel to turn on the indicator lamp. Press and hold the button for 10 seconds or more until the preset sound is heard. All the indicator lamps are lit for a few seconds, the demo mode is cancelled and the cooling operation is started. Close the right and left doors of the Refrigerator Compartment and the door of the Lower Freezer. | |
TROUBLESHOOTING (CONTINUED)
| When this happens | Check Item | Action and Reasons | |
| Refrigerator cools overly | Refrigerator cools overly. Food freeze. | "■■■" is selected in the temperature setting. | Switch it to "■■". [→Pg.52, 59] |
| The surrounding temperature is lower than 5°C. | When the ambient temperature is low, the inside of the refrigerator may cool overly. Switch the temperature setting to "■". | ||
| Is it placed in front of the Cold Air Blowout Port? | Do not place food in front of the cold air blowout port. A lid or plastic wrap can prevent freezing. | ||
| Abnormal operating sound is generated | Annoying sound is generated by the refrigerator. | Does the floor bend? | Install a sturdy board with a thickness of 1 cm and then install the refrigerator. [→Pg.46] |
| Does the refrigerator come in contact with the wall or furniture, etc.? | Install the refrigerator with clearance around it. | ||
| Is the refrigerator cooled down enough? | You may feel that the operation sound is loud because the compressor operates in high-speed under the following conditions: the refrigerator does not cool fully on the occasion such as using it for the first time, opening/closing the door frequently, the surrounding temperature is high. | ||
| Isn't "Spot Cool" / "Quick" set? | When it is set to "Spot Cool" / "Quick", operation sound of the compressor or the fan motor gets louder because of high-speed revolution. | ||
| Operation sound lasts long. | —— | As the compressor operates slowly for energy savings, you may hear an operating noise for a long time. | |
| Operation sound sometimes becomes louder. | —— | The operating power varies in response to changes in the inside temperature of the refrigerator, and thus you may sometimes hear a large noise. | |
| When other sounds such as shown in the right table are generated by the refrigerator. | Sound like water flowing (trickling) Sound like collision (tapping) Sound like water boiling (bubbling up) Sound like meat roasting (sizzling) | These sounds are caused when the refrigerant flows or water flows/ evaporates to remove frost. This is not malfunction. | |
| Sound like squeaking (cracking) (knocking) | This sound is heard when the parts squeaks due to changes in temperature in the refrigerator or atmospheric pressure in the Vacuum Compartment. This is not malfunction. | ||
| Sound like something is caught (clacking) Sound like roaring (honking) Sound caused immediately after closing the door (booming) | These sounds are caused when the electric parts to control the refrigerator temperature operates. This is not malfunction. | ||
| Sounds caused by the Automatic ice maker (zooming) (rattling) (clunking) | These sounds are made when ice is separated from the ice tray of the auto ice maker or water is supplied to the ice tray. This is not malfunction. To stop the sound, touch the button to change it to "Off". [→Pg.57] | ||
| Sound occurs sometimes (clacking) | This sound is caused when the refrigerator starts the operation to cool. | ||
| Door is not in a horizontal state | Door is not in a horizontal state. | Is the installation site level? | This does not affect the refrigerator performance. Adjust the refrigerator adjustable mount to keep it level if you want to correct it. [→Pg.46] |
| Does the soft floor material sink in around the legs due to the weight of stored items? | Lay a firm board which has more than 1cm thickness on the floor if the refrigerator itself inclines. | ||
| Refrigerator becomes hot | The side of the refrigerator becomes hot. Hot air comes from the bottom of the refrigerator. | —— | Hot air may come from the bottom of the refrigerator to exhaust the heat generated when the cooling device operates. The temperature may rise to 50-60°C immediately after installation or during summer. It does not pose safety or performance problems, but avoid touching it. |
| There is something strange with the Vacuum Compartment | Hissing sound does not occur when opening.  | Is the setting of the Vacuum Compartment to "Off (Non-vacuum)"? | Change the setting to "-1°C (Subzero)" or "+1°C (Chiller)". [→Pg.55] |
| Is the handle pulled up? | Hold down the handle to lock. | ||
| Is the handle held down to the end and locked? | The vacuum function will not work unless it is locked. Press the handle until it stops to lock it. | ||
| Isn't the Vacuum Compartment Gasket removed? | Install the Vacuum Compartment Gasket. [→Pg.67] | ||
Is there anything that is caught stuck to the gasket of the vacuum compartment or its retainer? Is the gasket or its retainer dirty?  — —  | Remove any packaging material of foods or other things which are caught in. If the gasket is dirty, clean it. [→Pg.67] | ||
Is there any stuck parts on gaskets?  | If a part of the gasket is stuck together, the vacuum ompartment will not be able to maintain a vacuum state. If there is a part stuck together, peel such part off. Since it is difficult to see the left and right side faces and the bottom, such part shall be confirmed with removing the vacuum compartment. [→Pg.70] If the gasket is dirty, clean it. [→Pg.67] If it is damaged or deformed, replace it. [→Pg.78] | ||
| Was the door of the Vacuum Compartment or the Refrigerator Compartment opened / closed just before? | It takes about three to four minutes for the Vacuum Case to be vacuumed after the vacuum pump starts to operate. Wait for more than four minutes after opening or closing. | ||
| There is something strange with the Vacuum Compartment | It is not clear whether the Vacuum Compartment has been vacuumized. | Do you hear a sound when opening the Vacuum Compartment? | The Vacuum Compartment has been vacuumized properly if a vacuum releasing sound (hissing sound) is heard when opening it. |
| The handle cannot be locked. | Is there any food etc. caught in the inner part of the Vacuum Compartment Case or the vacuum compartment gasket? | Remove any food if it is caught in. | |
| Is the Vacuum Case set in place? | Mount the Vacuum Case as shown in "How to attach the Vacuum Case". → Pg.70 | ||
| Booming sound and vibration occur around the Vacuum Compartment. | —— | This sound is caused when the vacuum pump operates.You can stop the vacuum pump operation when you want to stop the sound (ex: night time).Change the setting of the Vacuum Compartment to "Off (Vacuum off)" (Non-vacuum). → Pg.55 | |
| Isn't something caught in the Vacuum Case or the gasket of the Vacuum Compartment dirty?Do you push down the handle until it stops to lock it? | A sound may be heard or vibration may be felt more frequently.Remove any packaging material of foods or other things which are caught in.Clean the vacuum compartment gasket if it is dirty. → Pg.67Push down the handle until it stops to lock it. | ||
| Dew, frost or ice is formed inside the Vacuum Compartment or around the Vacuum Case. | Don't you place food contain lot of water?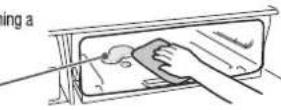 Dew and/or frost — Dew and/or frost — | ||
| Food in the Vacuum Compartment freezes. | Is the Vacuum Compartment set to "-1°C (Subzero)" or "Off (Vacuum off)" (Non-vacuum)? | Set the "+1°C (Chiller)". → Pg.55 | |
| It smells strange | Plastic smells | —— | This smell occurs because a lot of plastic parts are used in the refrigerator, but the smell decreases gradually while cooling.This is not malfunction. |
| Ice smells | Do the water supply container and/or water filter become dirty? Or does ice become old? | Wash them regularly to prevent "slime" and/or "fur". → Pg.69 | |
| —— | Chlorine may strongly smell because chlorine in tap water is condensed. | ||
| It smells in the refrigerator | Is any food which strongly smells stored without any wrapping? | The deodorizing function cannot completely remove all smells.Seal that kind of food with plastic film etc. | |
| Vegetable Compartment | Dew condensation occurs in the Vegetable Compartment. | Don't you place a large amount of vegetable containing much water? | As the Vegetable Compartment is more humid than the other compartments, dew may be condensed in the case or ceiling of the Vegetable Compartment or on the surface of food, depending on the amount or type of vegetable stored there.This is not abnormal state. To avoid dew condensation, wrap a vegetable with plastic food wrap before storing it in the Vegetable Compartment. Heavy dew condensation may cause water to be pooled in the Vegetable Compartment. Wipe it off with a soft cloth. |
| Isn't the Moisture Unit blocked with food bags or containers? | A blocked Moisture Unit is likely to cause dew condensation. Move the food bags or containers that block the Moisture Unit to other portions.Wipe off the dew condensation with a soft cloth. | ||
| The Vegetable Compartment door doesn't close / When the Vegetable Compartment door is opened, the upper case doesn't go back to the locking position. | Is any food, etc. caught between the upper case and the lower case?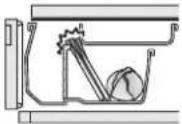 | Remove it if any. | |
Isn't a plastic bottle and/or food item in contact with the handle of the Upper Case? | Store PET bottle, food, etc. so that they don't come in contact with the locking handle. | ||
Isn't food caught between the Upper Case and Moisture Cover? | Remove it, if any.Do not close the door with force while the food is in contact with the Moisture Cover. | ||
| Auto Refrigerator Door | Noise is loud.There is an abnormal noise. | Hitting sound (thumping sound) | This is the operating sound of the Auto Refrigerator Door.This is not malfunction. |
| Buzzing sound (whir) | This is the operating sound of the Auto Refrigerator Door.This is not malfunction. | ||
| Operation sound in the Vegetable Compartment is heard louder than it at the Lower Freezer. | Operation sound in the Vegetable Compartment is heard louder than it at the Lower Freezer. And it varies depending on the quantity of the stored food.This is not malfunction. | ||
| Auto Door won't open even if touching the Open Button. | Is theAuto Doorlight not lit? Turn on the light. | Turn on theAuto Doorindicator lamp.→Pg.50 | |
| Isn't the Ice Compartment or the Upper Freezer opened? | Close the slide door and then touch the Control Panel of the Auto Door. | ||
| The Auto Refrigerator Door does not close. | Is any food or food bag caught on the compartment? | Remove foods and others that are caught in. | |
| Did a power failure occur or did the compartment knock against any obstacle during electrical operation? | Auto Refrigerator Door stops on the way, so push in the door with hand. | ||
| Auto Refrigerator Door does not open widely. | Don't stored beverages or foods make contact with the wall in the Refrigerator Compartment? | Remove beverages or foods that make contact with the wall. | |
| Is the installation site level? | Opening angle of the Auto Refrigerator Door may vary or the door may go back a little after it is opened automatically depending on installation conditions of the refrigerator, but this is not malfunction. | ||
| Auto Refrigerator Door moves even if it is locked on the Control Panel. | —— | Auto Refrigerator Door can not be locked from the Control Panel.In order to stop Auto Refrigerator Door, unlock the Control Panel first, and then touchbutton for 3 seconds or more until it beeps twice.→Pg.50,62 | |
| Auto Drawer | Noise is loud.There is an abnormal noise. | Hitting sound (thumping sound) | This is the operating sound of the Auto Drawer.This is not malfunction. |
| Buzzing sound (whirring, grunt) | This is the operating sound of the Auto Drawer.This is not malfunction. | ||
| Operation sound of the Vegetable Compartment is louder than that of the Lower Freezer. | Operation sound of the "vegetable compartment" is louder than the "lower freezer".The operation sound depends on the amount of food stored. This is not malfunction. | ||
| The compartment does not open even if the electrical drawer switch is pressed. | Is theAuto Doorlight not lit? Turn on the light. | Turn on theAuto Doorindicator lamp.→Pg.50 | |
| Is either one of the lower freezer or the vegetable compartment open? | Close the open electrical drawer compartment and then press drawer switch for the compartment you want to open. | ||
| The Auto Drawer does not open/close. | Is any food, food bag or plastic wrap, etc. caught on the compartment? | Remove foods and others that are caught in. | |
| Did a power failure occur or did the compartment knock against any obstacle during electrical operation? | The door does not open/close smoothly because the electrical drawer function is stopped before the operation completes.Manually push in the door with strength. Otherwise, unplug the power plug with the door drawn, and connect it after 10 seconds. | ||
Isn't the food caught between the Upper Case and the Moisture Cover?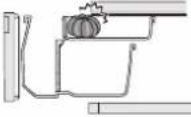 | Remove it, if any.Do not close the door with force while the food is in contact with the Moisture Cover. | ||
| The Auto Drawer does not open much. | —— | The Auto Drawer is pulled out by approx. 15 cm or more. The length may vary depending on installation conditions of the refrigerator, or the Auto Drawer may go back a little after the door is opened automatically. This is not malfunction. | |
| Auto Drawer moves even if it is locked on the panel for operation. | —— | Auto Door can not be locked from the panel for operation. In order to stop Auto Door function, unlock it first on the panel for operation, and then touchbutton for 3 seconds or more until it bleeps.→Pg.50,62 | |
| Others | You feel electricity a little when touching the main body of the refrigerator. | —— | The refrigerator may be charged with static electricity, but there is no problem with the safety. |
| Radio and/or television are disturbed by noises. | —— | It is caused by the electromagnetic radiation slightly generated from this refrigerator. Install the refrigerator away from the television, radio and interphone. It is recommended to connect the power plug to the power outlet separated from the antenna terminal. | |
| There are thin lines like scratches on the plastic parts. | —— | Those lines are caused by the liquid resin flowing when plastic is molded. They are especially conspicuous for the transparent parts, but there is no problem with the strength and they can never lead to any cracks. | |
| There are waving and/or distortions on the door surface, the side and the top surface of the refrigerator. | —— | Slight waving and/or distortions are generated in the manufacturing process of the refrigerator. They may be conspicuous according to the position of the light source and/or the brightness etc., which is not malfunction. There is no problem with the performance. | |
| There is a small hole inside the door. | —— | This hole is used to escape the air inside when filling the heat insulation material into the door during the production process. It is neither a flaw nor abnormal thing.  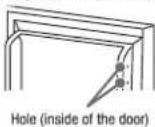 * Some products have an adhesive seal to conceal the hole. Please do not peel it off. * Some products have an adhesive seal to conceal the hole. Please do not peel it off. | |
| The electric supply failed. | —— | Reduce the number of times of opening and closing the door and avoid storing food additionally until the electric supply is restored. Please check each setting on the panel for operation after the power comes back on. | |
| The refrigerator is not expected to use for a long term. | —— | Remove all the items in the refrigerator. Unplug the refrigerator to take care of the inside or the automatic ice maker. [→Pg.66-69] Leave all the doors open to dry the refrigerator for 2 or 3 days. | |
| Remove frost. | —— | Any operation to remove frost is not required because this refrigerator remove frost automatically. Thawed water is collected in the evaporating tray and automatically evaporates. | |
| Transporting and moving care. | —— | See "Transporting your refrigerator (transport for moving)" [→Pg.78] | |
| Glass is broken (door glass, glass shelf) | —— | Do not touch a broken glass, but contact your dealer for repair soon. | |
| When a door is shut, another is naturally opened. | —— | Did you shut the door too strongly? Compartments are connected each other by cool air paths therefore the wind pressure caused by shutting a door may open another door for just a moment. | |
| A door is heavy to open just after shutting it. | —— | Have you leave the door open long time? It is because that the air taken inside is cooled and its pressure reduces temporarily. Don't leave a door open long time. Open and shut it at each time. | |
| Bothered by vibration noise, discoloration and dirt on the back wall due to moisture. | —— | Keep it away from the back wall (2 cm or more). [→Pg.46] | |
| When a midge fly, etc. enters in the refrigerator | Are there fruit flies around it? | Keep the environment clean. Put something a fruit fly hates or fruit fly traps or something like that. | |
| Is there any food with strong flavor in the refrigerator? | Cover food with the lid so that fruit flies can't be attracted by the flavor. | ||
| Is the door left open for a long time? | Please close the door as soon as possible. | ||
Transporting your refrigerator (transport for moving)
| 1 | Take out foods or ice. |
| 2 | Empty the water from the water supply container/ice tray. |
| 3 | Pull off the power plug.No problem just before moving. |
| 4 | Remove the leg covers, and raise the adjustable mounts. → Pg.46 |
| 5 | Use a tape to secure the door/power cord. |
| 6 | Place a sheet or cloth for protection when moving / transporting it.To prevent damage to the floor material or water from spilling out. |
| 7 | Place a sheet or cloth for protection first, and then lay it back to drain water. Such as old cloth |
| 8 | Make sure to hold the handles when carrying it with 2 persons or more.Do not lay it down horizontally for transportation (which may cause failure of the refrigerator). |
| 9 | See “Preparation before use” for installing the refrigerator in a new location. →Pg.46, 47 |
AVAILABLE PARTS
If you order any part listed below, specify the model of your refrigerator to a dealer for purchasing genuine parts.
| Subject | Product Name | Model | Product Model | |
| Ice smells● Water filter may be old and dirty (available about 3 or 4 years, as a guide) | Water filter for the automatic ice maker | Common for all models | RJK-30 | 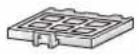 |
| Vacuum state can't be maintained● It may be damaged, deformed or discolored. | Vacuum compartment gasket | R-ZX740K type R-WX740K type | R-WX7400G 311 |  |
| R-WX670K type | R-XG6700G 311 | |||
| R-WX620K type | R-XG6200G 311 | |||
有關碳氫化合物的冰箱 / 可容納的食品重量
ABOUT NON-CFC REFRIGERATORS/STORABLE WEIGHT
有關碳氫化合物的冰箱 About non-CFC refrigerators
● 本冰箱所使用冷媒及其他斷熱材料皆無使用氟氯化碳,而是使用碳氫化合物。碳氫化合物不會破壞地球臭氧層、對地球溫室效應的影響非常小,屬於環保物質。
● 碳氫化合物為可燃型物質。冷媒密封於冷媒迴路管中,在一般的使用情況下應該不會發生外洩。
但萬一有冷媒管線損壞的情況發生、請遠離火源及避免使用電器用品、將門窗打開以利空氣流通。之後,請立即與經銷商或日立技術中心聯絡。
- Instead of CFCs, hydrocarbons are used in the coolants and insulation materials used in this refrigerator. Hydrocarbons do not damage the ozone layer, and they are environmental-friendly materials, having an exceptionally small affect on global warming.
● Hydrocarbons are flammable. The coolants are sealed in the coolant circuitry, and with normal operation they will not leak, but should the circuitry be damaged, refrain from using flames or other electrical products, and open windows for ventilation. After that, please contact the dealer or Hitachi customer service centre.
可容納的食品重量 Storable weight
可容納於層架或收納盒内的食品重量如下:
The following table shows the weight of food that can be stored on the shelves and in the cases.
| 零件名稱 Name of parts | R-ZX740K型號R-ZX740K TypeR-WX740K 型號R-WX740K Type | R-WX670K型號R-WX670K Type | R-WX620K型號R-WX620K Type | ||
| 冷藏室Refrigeratorcompartment | 可調式層架上段 | Height adjustable upper shelf | 23.0kg | 21.0kg | 19.5kg |
| 可調式層架中段 | Height adjustable middle shelf | 23.0kg | 21.0kg | 19.5kg | |
| 可調式層架下段,固定層架 | Height adjustable lower shelf, Fixed shelf | 23.0kg | 21.0kg | 18.5kg | |
| 真空冰溫室上方的層架 | Upper shelf of the vacuum compartment | 12.0kg | 11.0kg | 10.0kg | |
| 真空冰溫室盒 | Vacuum compartment case | 5.5kg | 5.0kg | 4.5kg | |
| 冰箱門置物架(右側)合計 | Total for the right door pockets | 26.0kg | 26.0kg | 20.0kg | |
| 冰箱門置物架(左側)合計 | Total for the left door pockets | 14.5kg | 11.0kg | 11.0kg | |
| 製冰室Ice compartment | 製冰盒 → 19頁Ice case → Pg.57 | ||||
| 小物品收納空間 | Small Article Case | 1.0kg | — | — | |
| 上層冷凍室Upper freezer | 上層冷凍盒 | Upper Freezer case | 9.0kg | 9.0kg | 8.0kg |
| 下層冷凍室Lower freezer | 上層滑動盒 | Slimline slide case | 6.0kg | 5.5kg | 5.3kg |
| 中層滑動盒 | Slide case | 8.0kg | 7.0kg | 6.5kg | |
| 下層冷凍盒 | Lower freezer case | 19.0kg | 17.0kg | 15.5kg | |
| 蔬果保鮮室Vegetable compartment | 上層滑動盒 | Upper Case | 8.5kg | 7.5kg | 7.0kg |
| 下層置物盒 | Lower Case | 24.0kg | 22.0kg | 18.0kg | |
關於廢棄之重要警告 Severe warning signs for Disposal
隔熱材料中含有環戊烷 (Cyclopentane)。
當要處理隔熱材料中之氣體時,必須依照特殊的廢棄處理程序。
要廢棄本產品時,為了不會對環境造成不良影響,請詢問當地的相關機關。
Cyclopentane is used in the insulation material.
The gases in insulation material require a special disposal procedure.
Please contact your local authorities in regard to the environmentally safe disposal of this product.
AFTER-SALES SERVICE
關於售後服務
Please contact the following Hitachi Service Centre if power cord is damaged or service is required.
If some malfunction occurs during operation, unplug the power plug immediately and contact the service centre to have the refrigerator repaired.
電源線受損或需要維修時,請直接洽詢下列日立服務中心。
使用中出現異常現象時,請立即拔掉電源插頭以及聯絡售後服務中心以進行修理。
• Australia
Hitachi Australia Pty. Ltd.
Locked Bag 2052, North Ryde, NSW 1670, Australia
Suite 801, Level 8, 123 Epping Road, North Ryde, NSW,
2113, Australia
Tel: +1-800-448-2244
- Malaysia
Arcelik Hitachi Home Appliances Sales Malaysia Sdn. Bhd.
Lot 12, Jalan Kemajuan, Bangi Industrial Estate,
43650 Bandar Baru Bangi,
Selangor Darul Ehsan, Malaysia
Tel : +60-3-8926-4168
Fax: +60-3-8926-3013
- 日立多門電冰箱
- REFRIGERATOR-FREEZER
- 節省能源的使用方法
- TIPS FOR USING THE REFRIGERATOR WISELY FOR ENERGY SAVINGS
- 常見問題 FREQUENTLY-ASKED QUESTIONS (FAQS)
- CONTENTS
- BEFORE USE
- GENERAL USE
- MAINTENANCE
- TROUBLESHOOTING
- SAFETY SUGGESTIONS
- WARNING
- CAUTION
- INSTALLATION
- HANDLING THE POWER AND POWER CABLE
- DURING USE
- CONCERNING THE REFRIGERANT (BE CAREFUL OF THE FOLLOWING RELATED TO THE USE OF FLAMMABLE GAS.)
- IN CASE OF EMERGENCY
- WHEN DISCARDING THE UNIT
- WHEN MOVING THE REFRIGERATOR
- 1
- PLEASE ARRANGE IT AS SHOWN BELOW
- 2
- FIXING THE REFRIGERATOR ON THE LEVEL OR ADJUSTING ITS HORIZONTAL LEVEL
- MAKE SURE TO USE A SUPPLIED TOOL AND 2 CUSHIONS
- NOTICE
- 4 INSERT THE FORK OF THE LEG COVER INTO THE MOUNTING HOLES TO ATTACH THE COVER
- CLEANING THE INSIDE OF THE REFRIGERATOR → PG.66\~69
- PLUG THE POWER CORD
- COOLING INSIDE THE REFRIGERATOR STARTS
- LEARN NAME & FUNCTION OF EACH PART
- NAME OF EACH COMPARTMENT, TEMPERATURE GUIDE, AND EXAMPLES OF STORED FOOD
- AUTO DOOR
- SETTING THE AUTO DOOR
- USING THE AUTO REFRIGERATOR DOOR
- REQUEST
- MANUALLY OPEN AND CLOSE THE REFRIGERATOR DOOR
- USING THE AUTO DRAWER
- PRESS THE AUTO DRAWER TO AUTOMATICALLY OPEN THE DRAWER
- REFRIGERATOR COMPARTMENT
- ADJUSTING TEMPERATURE IN A REFRIGERATOR COMPARTMENT
- ADJUST THE HEIGHT OF A POCKET/SHELF
- WHEN KEEPING FOOD AT LOWER TEMPERATURES (USING THE "SENSOR COOLING" FUNCTION)
- SENSOR COOLING" HAS TWO FUNCTIONS
- HOW TO ENABLE "SENSOR COOLING
- WHEN YOU WANT TO QUICKLY COOL THE FOODS. (USING THE "SPOT POWERFUL COOLING" FUNCTION)
- WHEN YOU WANT TO QUICKLY COOL THE FOODS, OPERATE TO STRENGTHEN THE COOLING OF THE "AUTOMATIC RAPID COOLING SPACE
- HOW TO ENABLE "SPOT POWERFUL COOLING
- VACUUM COMPARTMENT
- KEY POINTS FOR USING APPROPRIATE TEMPERATURES
- WHEN OPENING/CLOSING THE DOOR OF THE VACUUM CASE
- WHEN OPENING THE DOOR
- WHEN CLOSING THE DOOR
- ICE COMPARTMENT (AUTOMATIC ICE MAKER)
- HOW TO MAKE ICE
- TOUCH MENU BUTTON ON THE CONTROL PANEL TO TURN ON THE INDICATOR LAMP
- TOUCH ICE MAKER BUTTON TO TURN ON "ON" INDICATOR LAMP
- 3
- TAKE OFF THE WATER SUPPLY CONTAINER
- 4
- OPEN THE LID AND ADD WATER
- 5
- REPLACE THE WATER SUPPLY CONTAINER
- 6
- ICE-MAKING STARTS AUTOMATICALLY
- STORED ICE AMOUNT AND ICE-MAKING TIME
- QUICK ICE MAKING
- WATER SUPPLY INDICATOR
- FREEZER COMPARTMENT
- UPPER FREEZER
- LOWER FREEZER
- 3-LAYER FREEZER CASE PROVIDES YOU WITH LARGE STORAGE SPACE COMPARTMENT AND CONVENIENT REACH OF YOUR FREEZE FOOD ITEMS
- STORED FOODS
- WHEN STORING FOOD
- USING THE DELICIOUS FREEZING
- VEGETABLE COMPARTMENT
- ADJUSTING TEMPERATURE OF VEGETABLE COMPARTMENT [VEGETABLE COMPARTMENT (MAX)]
- STORE FOOD ACCORDING TO ITS TYPE OR SIZE
- ● PAY ATTENTION TO THE HEIGHT OF FOOD TO BE STORED
- DO NOT USE THE REFRIGERATOR WITH THE UPPER CASE REMOVED
- DO NOT PUSH MORE FOOD OR BEVERAGE THAN CAN BE ACCOMMODATED
- TIPS FOR STORING VEGETABLES
- TYPES OF FOOD RECOMMENDED TO BE KEPT AT ROOM TEMPERATURE
- RISK OF DAMAGE DUE TO LOW TEMPERATURES
- VARIOUS FUNCTIONS
- FINE ADJUSTMENT OF THE TEMPERATURE (REFRIGERATOR COMPARTMENT / FREEZER COMPARTMENT)
- LOCKING THE CONTROL PANEL
- DOOR ALARM
- DOOR ALARM AND VOLUME ADJUSTMENT OF THE OPERATION SOUND
- TRIPLE POWER DEODORIZING EFFECT
- ENERGY SAVING
- ECO" OPERATION INDICATOR LAMP
- DOOR OPEN & CLOSE INDICATOR LAMP
- SETTING "ENERGY SAVING" MODE
- SET THE CONDENSATION PREVENTION HEATER TO MIN. (SWING PARTITION)
- WHEN DIRT IS FOUND
- POWER PLUG
- DOOR GASKETS
- SURFACE OF DOOR
- EACH SHELF/POCKET
- LIQUID RECEIVERS
- THE BACK/FLOOR OF THE REFRIGERATOR
- CASE
- PULL OUT THE VACUUM CASE
- WIPE OFF FOLLOWING PARTS WITH A SOFT CLOTH WHICH IS STEEPED IN LUKEWARM WATER
- ATTACH THE VACUUM CASE
- WHEN THE VACUUM COMPARTMENT GASKET IS DIRT
- REMOVE THE VACUUM COMPARTMENT GASKET FROM THE VACUUM CASE
- RINSE DIRTY PORTION IN WATER USING A SOFT SPONGE, ETC
- WIPE OFF EXCESS MOISTURE WITH A DRY CLOTH AND DRY IT OUT NATURALLY
- WIPE OFF DIRT IN THE VACUUM COMPARTMENT GASKET MOUNTING GROOVE
- ATTACH THE VACUUM COMPARTMENT GASKET
- AUTO DRAWER
- UNPLUG THE POWER PLUG
- REMOVE EACH CASE OF THE LOWER FREEZER OR THE VEGETABLE COMPARTMENT. → PG.71
- REMOVE ALL FOODS WHICH DROP OR ARE CAUGHT IN
- WIPE OFF DEPOSITED LIQUID USING A SOFT AND DRY CLOTH
- MAINTENANCE (CONTINUED)
- ICE MAKER CLEANING
- WHEN USING FOR THE FIRST TIME
- WHEN NOT USED FOR MORE THAN ONE WEEK
- PREPARATION
- WATER SUPPLY CONTAINER
- ICE CASE
- REMOVE THE WATER SUPPLY CONTAINER, AND THEN THE LID
- REMOVE THE GASKET FROM THE LID AND THEN THE CASE
- REMOVE THE WATER FILTER FROM THE CASE
- RINSE EACH PART OF THE WATER SUPPLY CONTAINER IN WATER
- ATTACH EACH PART TO THE WATER SUPPLY CONTAINER, POUR WATER IN AND THEN SET IT
- TOUCH ICE MAKER BUTTON TO TURN ON "OFF" INDICATOR LAMP
- OPEN THE DOOR OF THE ICE COMPARTMENT, AND TAKE OUT THE ICE TRAY
- EMPTY THE ICE TRAY AND WASH IT LIGHTLY IN THE STREAM
- OPEN THE ICE COMPARTMENT, AND THEN ATTACH THE ICE TRAY
- TOUCH MENU BUTTON ON THE CONTROL PANEL TO TURN ON THE INDICATOR LAMP, AND THEN TOUCH ICE MAKER BUTTON TO TURN ON THE "ON" INDICATOR LAMP
- HOW TO REMOVE/ATTACH PARTS
- HEIGHT ADJUSTABLE UPPER AND MIDDLE SHELF
- 1 SLIGHTLY LIFT UP THE BACK OF THE SHELF AND DRAW IT
- 2 RAISE THE SHELF, AS SHOWN IN THE DRAWING
- 3 ROTATE AND REMOVE IT
- FIXED SHELF
- HEIGHT ADJUSTABLE LOWER SHELF
- DOOR POCKET
- VACUUM CASE
- F ICE CASE (ICE COMPARTMENT) · UPPER FREEZER CASE (UPPER FREEZER)
- DRAW THE DOOR FULLY AND LIFT UP THE CASE TOWARDS YOU
- REMOVE THE LID OF THE SMALL ARTICLE CASE AS FOLLOWS
- G SLIDE CASE AND LOWER FREEZER CASE (LOWER FREEZER)
- H UPPER CASE, LOWER CASE (VEGETABLE COMPARTMENT)
- HOW TO ATTACH THE SLIDE DOOR (ICE COMPARTMENT/UPPER FREEZER/LOWER FREEZER/VEGETABLE COMPARTMENT)
- TROUBLESHOOTING (CONTINUED)
- TRANSPORTING YOUR REFRIGERATOR (TRANSPORT FOR MOVING)
- AVAILABLE PARTS
- 有關碳氫化合物的冰箱 / 可容納的食品重量
- ABOUT NON-CFC REFRIGERATORS/STORABLE WEIGHT
- 有關碳氫化合物的冰箱 ABOUT NON-CFC REFRIGERATORS
- 可容納的食品重量 STORABLE WEIGHT
- 關於廢棄之重要警告 SEVERE WARNING SIGNS FOR DISPOSAL
- AFTER-SALES SERVICE
- 關於售後服務
Marque : HITACHI
Modèle : R-ZX740RA
Catégorie : Réfrigérateur