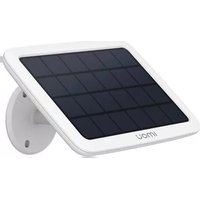
Solar Panel for Cell 2 - Panneau solaire IMOU - Notice d'utilisation et mode d'emploi gratuit
Retrouvez gratuitement la notice de l'appareil Solar Panel for Cell 2 IMOU au format PDF.


| Type de produit | Panneau solaire pour caméra de sécurité |
| Marque | Imou |
| Modèle compatible | Cell 2 |
| Matériau du panneau | Silicium monocristallin |
| Puissance maximale | 5 W |
| Dimensions | 200 x 130 x 15 mm |
| Poids | 200 g |
| Indice de protection | IP65 (résistant aux intempéries) |
| Alimentation | Énergie solaire, sortie 5V / 1A |
| Connectique | Câble de charge magnétique dédié |
| Fonctions principales | Recharge de la batterie de la caméra en continu |
| Autonomie apportée | Jusqu'à 3 jours d'ensoleillement pour une charge complète |
| Installation | Montage mural ou sur support |
| Angle d'orientation | Orientation ajustable (90°) |
| Entretien et nettoyage | Nettoyer la surface avec un chiffon doux et humide |
| Sécurité | Protection contre les surtensions et les courts-circuits |
| Pièces détachées et réparabilité | Câble de charge remplaçable |
| Garantie | 1 an |
| Contenu de l'emballage | Panneau solaire, câble de charge, kit de montage |
FOIRE AUX QUESTIONS - Solar Panel for Cell 2 IMOU
Questions des utilisateurs sur Solar Panel for Cell 2 IMOU
0 question sur cet appareil. Repondez a celles que vous connaissez ou posez la votre.
Poser une nouvelle question sur cet appareil
Téléchargez la notice de votre Panneau solaire au format PDF gratuitement ! Retrouvez votre notice Solar Panel for Cell 2 - IMOU et reprennez votre appareil électronique en main. Sur cette page sont publiés tous les documents nécessaires à l'utilisation de votre appareil Solar Panel for Cell 2 de la marque IMOU.
MODE D'EMPLOI Solar Panel for Cell 2 IMOU
imou
Enjoy Smart Life
Quick Start Guide
Version 1.0.0

natural_image
Simple grayscale illustration of a house with a window and a leafy plant, next to a fence (no text or symbols)lmou
Safety Instructions
- Transport, use and store the device under the allowed humidity and temperature.
- Do not use the solar panel when the battery is not in the camera.
- Keep the panel away from any liquid to avoid damage to the internal components.
- Do not place the device in a damp, dusty, extremely hot or cold environment, and avoid places with strong electromagnetic radiation.
- Do not heat the solar panel or put it into fire.
- Do not puncture, hit, or put heavy load on the solar panel.
- Avoid severe physical shock on the solar panel.
- Do not disassemble or bend the solar panel in any way.
- Do not contact the solar panel with strong corrosive objects.
About the Guide
• This quick start guide is for reference only.
- All the design and software here are subject to change without prior written notice.
- All trademarks and registered trademarks mentioned are the properties of their respective owners.
- Please visit our website, contact the supplier or customer service if there is any problem occurring when using the device.
- If there is any uncertainty or controversy, we reserve the right of final explanation.
Application

natural_image
Line drawing of a solar panel connected to a wall-mounted device (no text or symbols)i The camera needs to be purchased separately.
Install Bracket
1

②

3

4

Attach Solar Panel

natural_image
Pure mechanical diagram showing a lever and shaft assembly without any text, numbers, or symbolsAdjust Panel Angle

natural_image
Diagram showing a solar panel installation with a sun icon, illustrating the process from lighting to viewing (no text or symbols present)i Adjust the panel angle to make it face the sun as much as possible. Clean the dust or debris on the panel regularly to ensure best performance.
Marque : IMOU
Modèle : Solar Panel for Cell 2
Catégorie : Panneau solaire