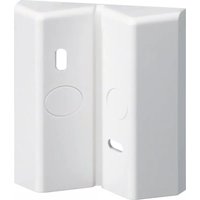
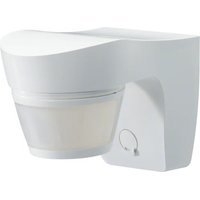
EE855 - Détecteur de mouvements HAGER - Notice d'utilisation et mode d'emploi gratuit
Retrouvez gratuitement la notice de l'appareil EE855 HAGER au format PDF.


| Type de produit | Détecteur de mouvements |
| Marque | Hager |
| Modèle | EE855 |
| Dimensions (L x H x P) | 100 x 80 x 80 mm |
| Poids | 100 g |
| Alimentation | 220-240 V AC, 50/60 Hz |
| Type de détection | Infrarouge passif (PIR) |
| Portée de détection | 12 m (max.) |
| Angle de détection | 180° |
| Réglage de la temporisation | 5 secondes à 10 minutes |
| Réglage de la sensibilité | Oui (via potentiomètre) |
| Protection crépusculaire | Oui, seuil de luminosité réglable |
| Indice de protection | IP44 (résistant aux intempéries) |
| Température de fonctionnement | -20°C à +50°C |
| Installation | Murale ou en saillie |
| Puissance maximale de charge | 1000 W (incandescent), 400 W (LED) |
| Entretien et nettoyage | Nettoyer avec un chiffon doux et sec. Ne pas utiliser de solvants. |
| Sécurité | Couper l'alimentation avant toute intervention. |
| Pièces détachées | Non disponibles séparément. |
| Réparabilité | Non réparable par l'utilisateur. Contacter un professionnel. |
FOIRE AUX QUESTIONS - EE855 HAGER
Questions des utilisateurs sur EE855 HAGER
0 question sur cet appareil. Repondez a celles que vous connaissez ou posez la votre.
Poser une nouvelle question sur cet appareil
Téléchargez la notice de votre Détecteur de mouvements au format PDF gratuitement ! Retrouvez votre notice EE855 - HAGER et reprennez votre appareil électronique en main. Sur cette page sont publiés tous les documents nécessaires à l'utilisation de votre appareil EE855 de la marque HAGER.
MODE D'EMPLOI EE855 HAGER
:hager
NL EN
Motion detectors comfort 140°, 220°
Caution!
This device is to be installed only by a professional electrician fitter according to local applicable installation standards.
Do not plug in or unplug this product when it is live.
EE85., EE86.
For use in Australia and New Zealand

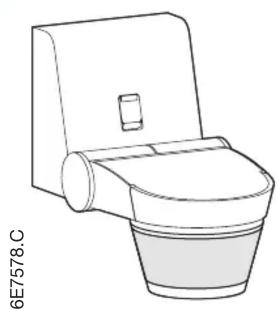
Description

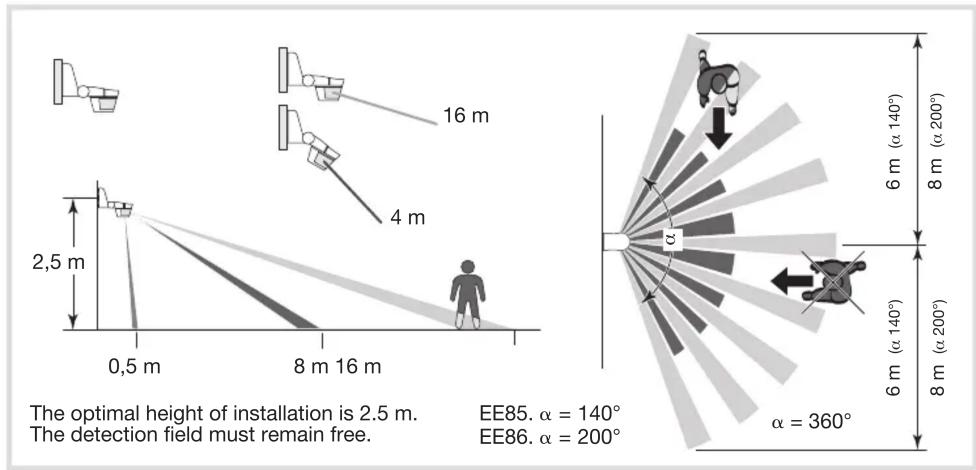
Detection zone
Installation

DETECTOR 140°
EE850 White
EE851 Charcoal

DETECTOR 220°
EE860 White
EE861 Charcoal

ACCESSORY FOR CORNER FIXING
EE855 White
EE856 Charcoal
Setting
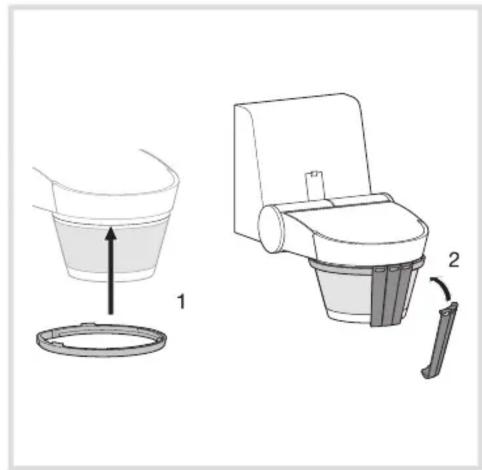
Shutters
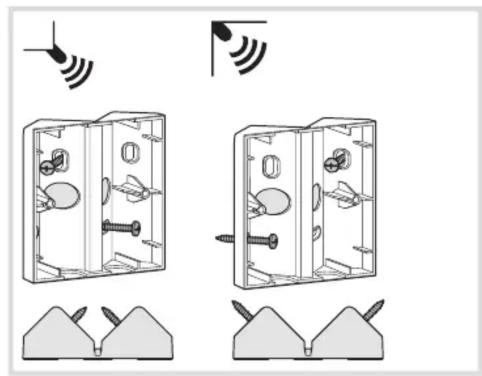
Accessories for corner fi xing
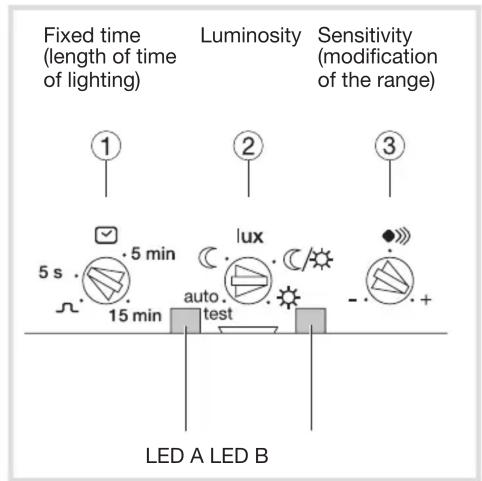
Product presentation and operating principles
This detector allows automatic control of a light source for a defined length of time when a movement is detected in the surveillance zone. The LED A indicates a movement. It is inhibited by default except in Test mode.
Settings and Test
The detectors have 2 modes of operation: Fixed time and Control by timer.
Power supply
The detector switches the light on for 40 s. After 40 s, it activates the Normal mode.
Testing and validating the detection zone
Put the potentiometer ② on Test mode and if necessary, use the shutters to define the detection zone.
The Test mode is available for 3 min. Every movement detected switches on the light for 1s. After 3 min without detection of movement, the product returns to normal operation.
Limiting the detection zone
You can limit the detection zone by using the shutters provided or by tilting the head.

"Normal" operation (on/off)
The lighting is activated whenever the level of luminosity defined by the potentiometer ② is judged to be insufficient and a movement is detected.
After detection, the light stays on for the length of time predefined by the potentiometer ①. The fixed timing is reset after each detection. Please note: when the potentiometer is on “auto test”, the settings are predefined.
Control by timer
An impulse is generated every 10 s whenever the level of luminosity is judged to be insufficient and a movement is detected when the potentiometer ① is on .
This pulse mode is not suitable for connections to power devices (except at low power loads).
Using the remote control (option, ref. EE806)
The detector receives instructions from the remote control when the Lux potentiometer is on the “auto test” position.
If the potentiometer is put on another value, the local setting resumes.
The LED B of the detector lights up to confirm the signal with the remote control.
It flashes quickly for 2 s when an instruction is received and 5 s for a reset.
When an instruction is not authorised, the LED lights up for 1 s.
The available settings are:
- fixed time
- level of luminosity
- sensitivity
- on / off
- holidays (simulation of presence)
- activation of the detection A.
Montage
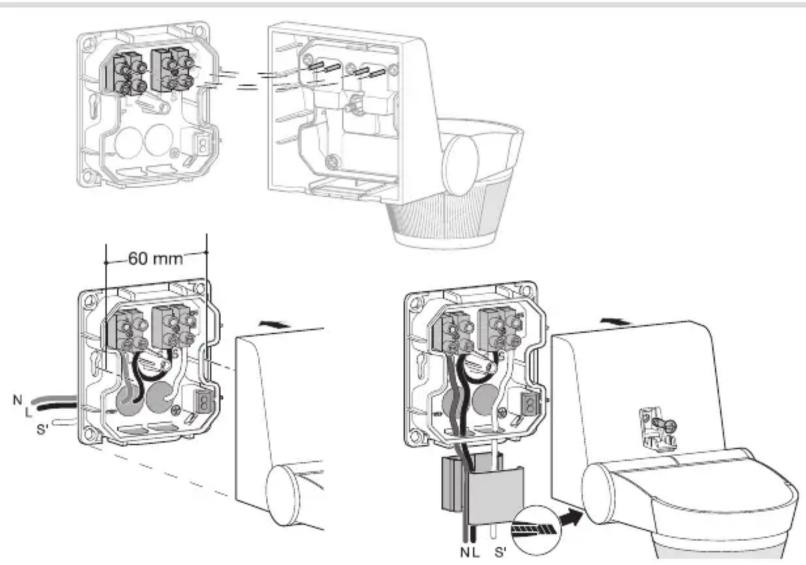
Surface-mounting or ceiling-mounted :
- fix the wall plate using the screws provided
- connect the wall plate terminal block (see cabling plans in annex)
- fully insert the detector on the wall plate
- tighten the screws to ensure the product is sealed.
For corner fixing, the wall plate is to be fixed between the accessory and the detector. Cable entry (breakable partitions) are possible:
- by the back (box mounting) or by the bottom.
Wiring and connections (provide installation with fixed wiring)

Operating precautions
In order to obtain optimal detection conditions, it is recommended that the following advice:
- the detection is sensitive to solar radiation and bad weather. Detection performance is optimal up to 35 °C and above 40 °C.
- It is preferable to maintain à distance of 1 m. between a light source and the detector.
When mounting on a box, make sure that you do not distort the wall plate through excessive tightening of the screws.
| Action Settings Potentiometer | ||
| Use Auto settings (factory) or set by the remote control to switch the light automatically for a given time. | Auto SettingsPut the Lux potentiometer on “auto test”.The settings are predefined: Lux = (operating at night only)time = 3 min,sensitivity = max.Remote control settings(Manual Settings inhibited). |  |
| Automatically switch on the light for a defined time. | Installer settings | 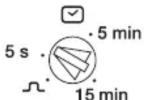 |
| Control a timer, a bell etc. | Impuls ΠAuto settings are usable with time = 1s. (cannot be changed) |  |
| Test and validate the detection zone. | Test modeMove the potentiometer 2 to “auto test”. On this position, the remote control can be used. |  |
| Adjust the sensitivity. Allows setting the range to avoid disturbance. | [1000] | |
:hager

EN NL
Bewegingsmelders comfort 140°, 220°
Opgelet!
Het toestel mag alleen door een elektroinstallateur worden geïnstalleerd volgens de installatienormen die van toepassing zijn in het land.
De contactpennen van het product niet vast- of loskoppelen wanneer het onder spanning staat.

140°-BEWEGINGSMELDER
EE850 Wit
EE851 Zwart

220°-BEWEGINGSMELDER
EE860 Wit
EE861 Zwart

TOEBEHOREN VOOR
HOEKMONTAGE
EE855 Wit
EE856 Zwart
EE85., EE86.
Beschrijving

Instelling

Detectiezone

Afdekplaten

Installatie

Toebehoren voor hoekmontage

Beschrijving van het product en werkingsprincipe
Deze bewegingsmelder dient voor het automatisch aansturen van een lichtbron gedurende een ingestelde tijd als een beweging wordt gedetecteerd in zijn waarnemingsveld. De LED A signaleert een beweging. Deze wordt geremd in standaardmodus behalve in Testmodus.
Instellingen en test
De bewegingsmelders hebben 2 werkingsmodi: vertraagd en aansturing van een tijdschakelaar.
Inschakeling
De bewegingsmelder doet het licht branden gedurende 40 s. Na 40 s. wordt de normale modus geactiveerd.
Testen en valideren van de detectiezone
Plaats de potentiometer ② in de testmodus en gebruik zo nodig de afdekplaten om de detectiezone te beperken.
De testmodus is beschikbaar gedurende 3 min. Bij elke gedetecteerde beweging wordt het licht gedurende 1 s ingeschakeld. Als er 3 minuten lang geen beweging wordt gedetecteerd, keert het product terug naar de normale werking.
Beperken van de detectiezone
U kunt de detectiezone beperken met behulp van de meegeleverde afdekplaten of door inclinatie van de detectiekop.

"Normale" werking (aan/uit)
De verlichtingsuitgang wordt aangestuurd zodra de via de potentiometer ingestelde lichtsterkte niet meer voldoende is en er een beweging wordt gedetecteerd.
Na detectie van een beweging blijft het licht branden gedurende de via de potentiometer ① vooraf ingestelde tijd.
De uitschakelvertraging wordt opnieuw geactiveerd bij elke detectie van een beweging. Opmerking: als de potentiometer zich in de stand "auto test" bevindt, zijn de instellingen vooraf vastgelegd.
Aansturing van een tijdschakelaar
Om de 10 s wordt een impuls gegenereerd zodra de lichtsterkte niet meer voldoende is en er een beweging wordt gedetecteerd als de potentiometer ① Π op staat.
Deze impulsmodus is niet geschikt voor het aansluiten van vermogensapparatuur (voorbehouden aan lasten met een laag vermogen).
Gebruik van de afstandsbediening (optie, art-nr. EE806)
De bewegingsmelder ontvangt de bevelen van de afstandsbediening als de Lux-potentiometer zich in de stand "auto-test" bevindt. Staat de potentiometer op een andere waarde, dan keert de bewegingsmelder terug naar de lokale instelling.
LED B van de bewegingsmelder gaat branden om het signaal met de afstandsbediening te bevestigen. Ze knippert snel gedurende 2 s bij ontvangst van een bevel en gedurende 5 s voor een reset. Bij een niet-toegelaten bediening gaat de LED gedurende 1 s branden.
De beschikbare instellingen zijn:
- tijdvertraging
- lichtsterkteniveau
- gevoeligheid
- aan/uit
- vakantie (aanwezigheidssimulatie)
Montage
Opbouwmontage of plafondmontage:
- bevestig de wandplaat met behulp van de meegeleverde schroeven
- de klemmenstrook aansluiten op de muurplaat (zie bedradingsschema's in de bijlage)
- de melder volledig in de muurplaat steken
- vastschroeven totdat de afdichting van het product gegarandeerd is.
Bij de hoekmontage wordt de wandmontageplaat tussen het toebehoren en de bewegingsmelder gemonteerd.
Kabelinvoer (indrukbare wanden) mogelijk:
- via achterzijde (montage op inbouwdoos) of via onderzijde.
Bekabelingen en aansluitingen (een installatie realiseren met vaste bekabeling)
Installatiekanalen Ateha
art-nr. ATA 12200
of ATA 63000
Veiligheidsmaatregelen
Voor een optimale detectie is het raadzaam dat u de volgende aanbevelingen in acht neemt:
- de melder is gevoelig voor zonnestralen en slecht weer, de detectie is optimaal tot 35°C en 40°C.
- De aanbevolen afstand tussen de lichtbron en de bewegingsmelder bedraagt 1 m.
Zorg dat bij een montage in een box de wandplaat niet vervormd wordt door het te vast aandraaien van de bevestigingsschroeven.
| Actie Instellingen Potentiometer | ||
| Maak gebruik van de auto-instellingen (fabrieksinstellingen) of van de afstandsbediening om het licht gedurende een bepaalde tijd automatisch in te schakelen. | Auto-instellingenPlaats de Lux-potentiometer op “auto test”. De instellingen zijn vooraf vastgelegd:Lux = (C (werkt alleen ‘s nachts)tijd = 3 min gevoeligheid = max.Instellingen afstandsbediening(Handmatige of autoinstellingen gesperd). | 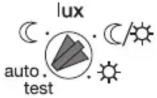 |
| Het licht automatisch inschakelen gedurende een ingestelde tijd. | Instellingen installateur | 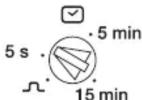 [IMAGE] [IMAGE] |
| Aansturen van een tijdschakelaar, bel enz. | Impuls JlDe auto-instellingen zijn beschikbaar met tijd = 1s.(Kan niet worden gewijzigd). | 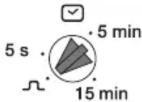 [IMAGE] [IMAGE] |
| Detectiezone testen en valideren. | TestmodusVerplaats de potentiometer 2tot “auto test”. In deze stand kan de afstandsbediening worden gebruikt. |  [IMAGE] [IMAGE] |
| Gevoeligheid aanpassen. | Hiermee kan het bereik worden ingesteld om storingen te voorkomen. | [0001] |


- HAGER
- CAUTION
- DETECTOR 140°
- DETECTOR 220°
- ACCESSORY FOR CORNER FIXING
- PRODUCT PRESENTATION AND OPERATING PRINCIPLES
- SETTINGS AND TEST
- POWER SUPPLY
- TESTING AND VALIDATING THE DETECTION ZONE
- LIMITING THE DETECTION ZONE
- NORMAL" OPERATION (ON/OFF)
- CONTROL BY TIMER
- USING THE REMOTE CONTROL (OPTION, REF. EE806)
- THE AVAILABLE SETTINGS ARE
- MONTAGE
- WIRING AND CONNECTIONS (PROVIDE INSTALLATION WITH FIXED WIRING)
- OPERATING PRECAUTIONS
- OPGELET
- BESCHRIJVING VAN HET PRODUCT EN WERKINGSPRINCIPE
- INSTELLINGEN EN TEST
- INSCHAKELING
- TESTEN EN VALIDEREN VAN DE DETECTIEZONE
- BEPERKEN VAN DE DETECTIEZONE
- NORMALE" WERKING (AAN/UIT)
- AANSTURING VAN EEN TIJDSCHAKELAAR
- GEBRUIK VAN DE AFSTANDSBEDIENING (OPTIE, ART-NR. EE806)
- DE BESCHIKBARE INSTELLINGEN ZIJN
- BEKABELINGEN EN AANSLUITINGEN (EEN INSTALLATIE REALISEREN MET VASTE BEKABELING)
- VEILIGHEIDSMAATREGELEN
Marque : HAGER
Modèle : EE855
Catégorie : Détecteur de mouvements