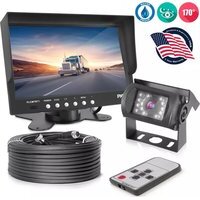
PLCMTR71 - Caméra de recul Pyle - Notice d'utilisation et mode d'emploi gratuit
Retrouvez gratuitement la notice de l'appareil PLCMTR71 Pyle au format PDF.


| Marque | Pyle |
| Modèle | PLCMTR71 |
| Type de produit | Caméra de recul |
| Angle de vue | 170° grand angle |
| Vision nocturne | Oui (infrarouge) |
| Résolution | 720 x 480 pixels (PAL) |
| Format vidéo | CVBS composite |
| Alimentation | 12 V CC (courant automobile) |
| Consommation | Environ 1,5 W |
| Dimensions (L x l x H) | Environ 30 x 30 x 25 mm |
| Poids | Environ 50 g |
| Indice de protection | IP68 (étanche) |
| Sortie vidéo | Câble RCA mâle |
| Longueur de câble | Environ 1,5 m |
| Fonctions principales | Guidage de stationnement, miroir, inversion d'image |
| Entretien et nettoyage | Nettoyer la lentille avec un chiffon doux |
| Sécurité | Ne pas plonger dans l'eau ; utilisation prévue sur véhicule |
| Pièces détachées | Contacter le service après-vente Pyle |
| Réparabilité | Non réparable par l'utilisateur |
| Informations générales | Conforme aux normes CE et FCC |
FOIRE AUX QUESTIONS - PLCMTR71 Pyle
Questions des utilisateurs sur PLCMTR71 Pyle
0 question sur cet appareil. Repondez a celles que vous connaissez ou posez la votre.
Poser une nouvelle question sur cet appareil
Téléchargez la notice de votre Caméra de recul au format PDF gratuitement ! Retrouvez votre notice PLCMTR71 - Pyle et reprennez votre appareil électronique en main. Sur cette page sont publiés tous les documents nécessaires à l'utilisation de votre appareil PLCMTR71 de la marque Pyle.
MODE D'EMPLOI PLCMTR71 Pyle

natural_image
Front view of a PYLE monitor displaying two children on a forest road, with no visible text or symbols on the device itself.
natural_image
Two black industrial lighting devices: a circular device with illuminated light source and a coiled cable with connectors (no text or symbols visible)PLCMTR71
Commercial Grade Safety Camera & Video System
Please read instructions carefully before installation and use. Installation should be performed by a professional installer.
To ensure your safety, the driver should not watch videos or operate features on the monitor while driving. There are no serviceable parts in this unit, do not disassemble or try to repair this unit. If the unit malfunctions please return to your vendor or send to a Pyle repair facility. Please observe and obey the local laws and regulations when installing the unit. Upon Installation, please make sure as to not to interfere with any of the vehicle's safety features, wiring, components, etc. We are not responsible for any damages, injury, malfunctions or otherwise noted due to faulty or non-professional installation.
Connection
Connect the camera's threaded locking 4-pin cable connectors into the female receiving connection of the included 4-pin extension cable. The extension cable then connect to your compatible video monitors with 4-pin receiving connector. The threaded locking cable connectors of the camera serve to provide power and video for the camera.
Please remember to disconnect your vehicle's battery prior to any connection / installation. Use the included wiring harness to provide power and video signals to your monitor. There are colored wires to assist in the video camera system setup. See the wiring diagram for connections between cameras, monitor and your vehicle
When turning the vehicle's ignition key or turning to the accessory or ON position, power is supplied to the camera system through the control box and the monitor will be in stand-by mode.
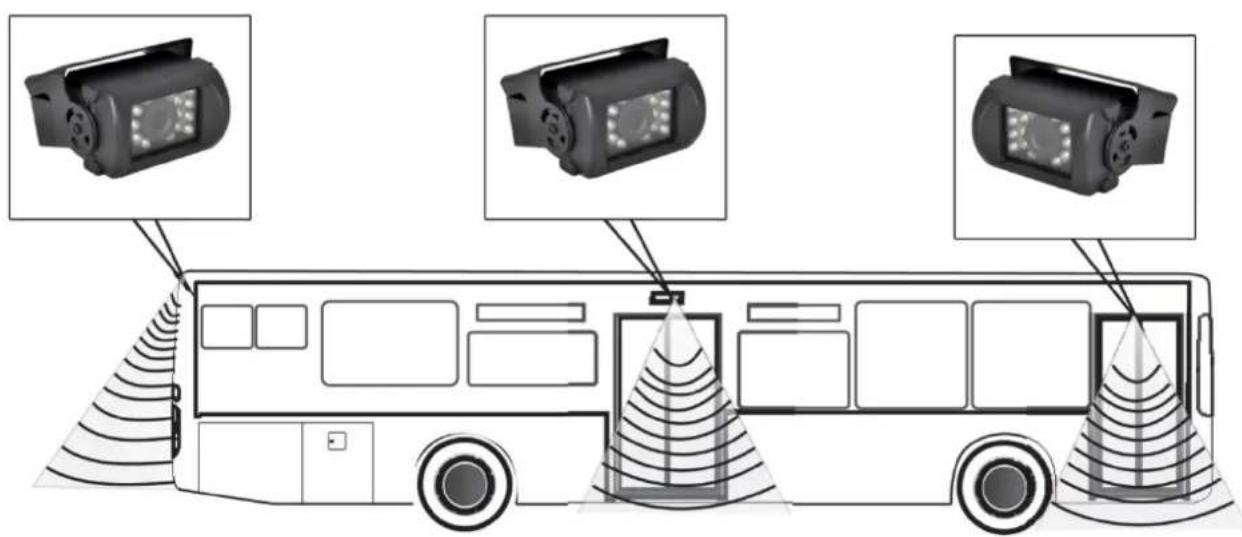
Versatile Mounting Installation
Wiring & Connection

flowchart
graph LR
    A["Display Monitor"] --> B["Power & Video Wiring Harness"]
    C["Video Connectors"] --> D["Power: DC 12V"]
    C --> E["GND"]
    C --> F["+12V Reverse"]
    G["Camera (4-Pin Connection)"] --> H["Output Display"]
Red: Power 12/24V
Black: GND
Green: +12V Reverse
*When the Green - Reverse Trigger - is connected, the system will automatically revert to this connection once the vehicle is placed into reverse gear. This is connected to the camera via 4-Pin connection.
*The monitor controls allow the user to adjust picture settings horizontal or vertical based on the mounting location of the camera.
*Please note: The monitor may include a 'volume' function in the menu settings. This feature is not available for this model.
The video monitor is provided power and camera video signals via the video and power wiring harness. From the monitor, you will be able to control Ch. 1, Ch. 2, input video cameras (V1, V2).
The power and video wiring harness includes an RCA (video) connector for you to install an additional video input source.
Monitor Controls
| 1 | Power |
| 2 | V1 / V2 |
| 3 | '- Down Adjustment |
| 4 | Menu |
| 5 | '+' Up Adjustment |
*Please note, in cold weather and low temperatures, the display monitor may require some time to 'warm up' to clearly display a picture on the display.

Monitor Stand Mounting

natural_image
Mechanical component with mounting base and threaded fasteners, no visible text or symbols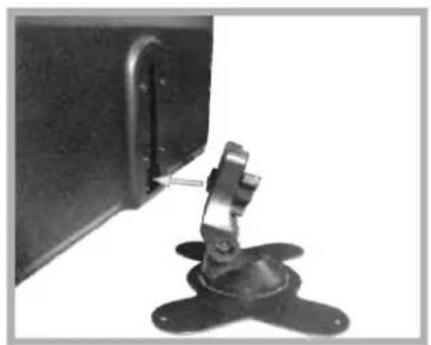
natural_image
Close-up of a black metal bracket with a mechanical clamp and mounting base (no visible text or symbols)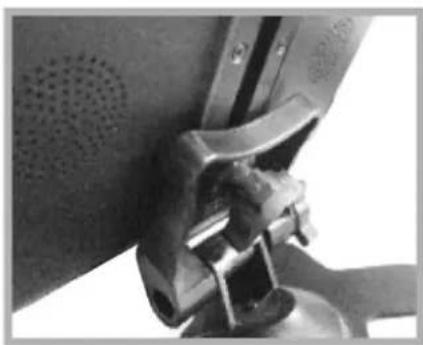
natural_image
Close-up of a mechanical component with perforated surface and lever mechanism (no visible text or symbols)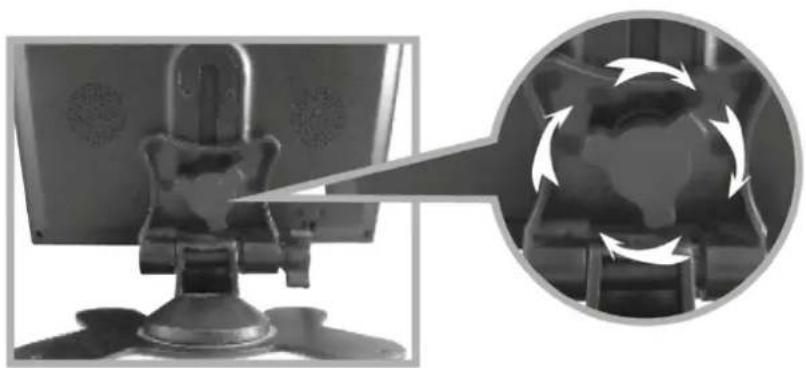
natural_image
Diagram showing a computer monitor with a globe and a magnified circular view of the globe's rotation (no text or symbols)- Set the mount stand in the desired location, then use screws to secure the mount stand into location. Please make sure as to set a location free from vehicle obstruction including any wiring, or location where it may obstruct the driver's view, driving conditions, etc.
- Attach the metal buckle piece on top of the fan shaped mount stand, and slide it into the receiving slot in back of the display monitor assembly. This metal buckle should slide in and up to the monitor assembly.
- Set the desired position/height of the buckle into the monitor assembly.
- Tighten the clamp-style knob in the back of the stand mount to secure the monitor in the desired position.
- The angle / tilt position of the stand mount is also adjustable. Located toward the base of the stand mount is another clamp-style knob.
*Be sure to mount the video monitor from speakers or other devices which may distort the output display. Keep the monitor away from the speaker's or other device's magnetic field.
*Install the monitor on a surface that can bear the capacity of over 9 lbs.
*Don't install the monitor in the line of ventilation areas (keep away from extreme hot and extreme cold temperatures).
*The monitor is not waterproof, avoid exposure to excess liquids or harsh cleaning chemicals/detergents.
*Holes in the back of the display monitor serve as ventilation ducts. To ensure operation of the unit, and protect from overheating, these holes must not be blocked, to reduce risk of electric shock or fire.
Model: PLCMTR71
Weatherproof Rearview Backup Camera & Monitor Video System, Commercial Grade,
7" Monitor, Dual DC 12-24V for Bus, Truck, Trailer, Van
Commercial Grade Camera & Monitor Video System
Includes All Necessary Cables & Wiring
Reverse Image (Backup Camera) Ability
Used for Parking, Docking, Driving Safety
Monitor:
7" TFT/LCD Active Matrix Video Monitor
Aspect Ratio: 16:9 Widescreen Format
PAL/NTSC Video Format Compatible
4-Pin Video Connector
Resolution: 480 x 234
Universal Stand & Anti-Glare Sun Visor
Designed for Car/Truck use 12 & 24 Volt Systems
DC Reverse 12-24 Volt Trigger with Auto Activation feature
OSD Menu Control - Contrast, Brightness, Color
Monitor Dimensions (W x H x D): 6.77" x 4.52" x 0.87"
What's in the Box:
Camera, LCD Monitor
Universal Stand/Mount
4-Pin 50' Foot (15 Meter) Connection Cable
Power & Wiring Harness
Remote Control
Camera:
Includes (1) Universally Mountable Camera
Weatherproof Rearview Camera System
Marine Grade Construction, IP68 Rating
Built-in Night Vision Illumination LEDs
Low Lux Light Performance
Min. Illumination: 0.2Lux
Image sensor: Color CMD
Effective Pixels: 580 x 540
Resolution: 420 Lines
Lens Angle: 170 Degree
Auto Image Adjustment
Video Output 1.0V pp-75 Ohm
Designed for Car/Truck use with 12 & 24 Volt Systems
Camera Dimensions (W x H x D): 3.18" x 2.95" x 2.17"
If you are experiencing any problems with your camera and monitor system please contact support@pyleaudio.com.
Pyle Service Center
1600 63rd St.
Brooklyn, NY 11204
(718) 535-1844 ext. 279
www.pyleaudio.com
Marque : Pyle
Modèle : PLCMTR71
Catégorie : Caméra de recul