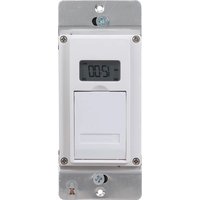
EJ600 - Minuteur électrique INTERMATIC - Notice d'utilisation et mode d'emploi gratuit
Retrouvez gratuitement la notice de l'appareil EJ600 INTERMATIC au format PDF.


| Type de produit | Minuterie électronique |
| Marque | Intermatic |
| Modèle | EJ600 |
| Dimensions (L x l x h) | 7 x 5 x 3 cm |
| Poids | 100 g |
| Alimentation | 120 V AC, 60 Hz |
| Type d'affichage | Affichage LED numérique |
| Fonctions principales | Programmation horaire, minuterie, temporisation |
| Nombre de programmes | 4 programmes (2 ON / 2 OFF) |
| Puissance maximale | 15 A / 1800 W (résistif) |
| Certification | UL |
| Entretien et nettoyage | Nettoyer avec un chiffon doux et sec ; ne pas utiliser de liquides |
| Sécurité | Fonction de verrouillage enfant, protection contre les surcharges |
| Pièces détachées et réparabilité | Pile de secours remplaçable (CR2032) |
| Garantie | 1 an |
FOIRE AUX QUESTIONS - EJ600 INTERMATIC
Questions des utilisateurs sur EJ600 INTERMATIC
0 question sur cet appareil. Repondez a celles que vous connaissez ou posez la votre.
Poser une nouvelle question sur cet appareil
Téléchargez la notice de votre Minuteur électrique au format PDF gratuitement ! Retrouvez votre notice EJ600 - INTERMATIC et reprennez votre appareil électronique en main. Sur cette page sont publiés tous les documents nécessaires à l'utilisation de votre appareil EJ600 de la marque INTERMATIC.
MODE D'EMPLOI EJ600 INTERMATIC

NTERMATIC®
Libertyville Illinois 60048
www.intermatic.com
EJ600 Series
Digital In-Wall Astronomic Timer
Installation and User Guide
RATINGS
| Operating Voltage | 120 VAC, 60 Hz |
| Resistive | 12 A |
| Incandescent | 15 A (Single-gang)12 A (Multi-gang) |
| Ballast (fluorescent) | 500 VA |
| Motor | 1/2 HP |
| Operating Temperature | 32°F to 104°F (0°C to 40°C) |
| Dimensions | 4 1/8" H x 1 3/4" W x 1 7/16" D |
SAFETY SECTION

WARNING
Risk of Fire or Electric Shock
- Disconnect power at the circuit breaker(s) or disconnect switch(es) before installing or servicing.
- Installation and/or wiring must be in accordance with national and local electrical code requirements.
- Do not replace, recharge, disassemble, heat above 212° F ( 100° C), crush, or incinerate the Lithium battery. Keep out of reach of children.
- Do not use timer to control devices that could have dangerous consequences due to inaccurate timing, such as: sun lamps, saunas, heaters, slow cookers, appliances, radios, televisions, stereos, etc.
- Only suitable for up to 3-gang installations.
NOTICE
- Dispose of product per local regulations for disposal of Lithium batteries.
PRODUCT DESCRIPTION
The EJ600 Series In-Wall Timers provide schedule customization with automatic dusk/dawn, random, and Daylight Saving Time (DST) programming options for up to 14 ON/OFF events. The EJ600 Series are incandescent/ fluorescent compatible and have a built-in rechargeable, non-serviceable battery backup.
TIMER INTERFACE

INSTALLATION
- Disconnect the power at the circuit breaker(s) or disconnect switch(es).
- Remove wall switches, if applicable.
- Strip the existing wire ends to 7/16".
-
Wire the timer into the wall box.
-
For an example of single-pole wiring, refer to "Single-Pole Wiring".
- For an example of three-way wiring, refer to "Three-Way Wiring".
- For other three-way wiring scenarios, go to www.intermatic.com.
Single-Pole Wiring
![graph TD A["120 V Power Source"] --> B["Line"] B --> C["Black"] C --> D["Timer"] D --> E["Red"] D --> F["Blue"] F --> G["Green"] G --> H["Load"] I["Neutral"] --> J["White"] J --> D style D fill:#f9f,stroke:#333 style E fill:#ccf,stroke:#333 style F fill:#ccf,stroke:#333 style G fill:#ccf,stroke:#333…](/content/2026/06/1392746/images/05a35c8b5f05f46fe95c842f0c76a257b6551cf151f17fec44c67aa3d08514a2.jpg)
| Wire Description | |
| Blue Connects to black wire from Load | |
| White Connects to white (neutral) wire from Load and Power Source | |
| Black Connects to black (hot) wire from Power Source | |
| Green Connects to ground | |
| Red Not used in single-pole installations |
Three-Way Wiring
![graph TD A["Line"] --> B["120 V Power Source"] B --> C["Neutral"] C --> D["Timer"] D --> E["Blue"] E --> F["Common Terminal"] F --> G["Red"] G --> H["100 ft. MAX"] H --> I["Existing Remote Switch"] I --> J["No Longer Used"] J --> K["Load"] D --> L["White"] D --> M["Green"]](/content/2026/06/1392746/images/a9f9ccec9f4f8c7439667656ec78daec505bdf63ca5ec9ae825e16ca4aadbf1e.jpg)
| Wire Description |
| Blue Connects to black wire from Load and common terminal of remote switch |
| White Connects to white (neutral) wire from Load and Power Source |
| Black Connects to black (hot) wire from Power Source |
| Green Connects to ground |
| Red Connects through remote switch to blue (Load) wire |
Note: For other three-way wiring scenarios, go to www.Intermatic.com
Notes:
- Connect the timer on the line-side.
- Consult a qualified electrician:
- If you have trouble differentiating the wiring colors for the building.
- When using a single-pole switch at the remote location for new construction or to replace a dimmer switch, a lighted switch, or a three-way switch without screw terminals.
Finalizing Installation
- Make sure the twist-on wire connectors (provided) are secure, then tuck the wires into the timer wall box, leaving room for the timer.
- Using the provided screws, secure the timer to the wall box.
- Cover the timer with the wall plate and secure using the provided screws.
- For three-way wiring, install the remote switch in a wall box. Cover the switch with the wall plate and secure.
- Reconnect the power at the circuit breaker(s) or disconnect switch(es).
TESTING THE TIMER
- Make sure the timer displays MAN mode during testing.
- For three-way wiring, test the remote switch in each of its two positions by pressing ON/OFF several times. The timer should "click" and the controlled light or device (load) should turn ON or OFF.
- For three-way wiring, if the timer clicks, but the load does not operate:
a. Disconnect the power at the circuit breaker(s) or disconnect switch(es).
b. Re-check your wiring and make sure the load is functional.
c. Reconnect power at the circuit breaker(s) or disconnect switch(es).
d. Retest.
- For three-way wiring, if the timer clicks, but the load only operates when the remote switch is in one of its two positions, repeat Step 3, a-d, paying close attention to the wiring that connects with the red and blue wires of the timer.
Note: Consult a qualified electrician if the switch and timer fail to operate as intended.
When the controlled device turns ON and OFF as appropriate, congratulations, the timer is successfully installed and ready for programming!
NOTES
Read these notes before continuing with the timer programming process.
- Your timer contains a built-in, non-replaceable, rechargeable battery to maintain the date and time of day information for at least 4 consecutive days of AC power interruption. All other user settings are maintained indefinitely without AC power. The built-in battery will fully charge within a day of connection to AC power. After an extended power outage, if the display is flashing “12:00 AM”, you will need to re-enter the calendar, time, and day information.
• The CAL and CLK settings must be pro-
grammed before ON or OFF events can be set. - Each ON or OFF setting is an event. Each event must be programmed separately.
- All menus loop (repeat options when you get to the end of the menu).
- When advancing to the next setting, the timer automatically saves the data from the previous screen regardless of setting changes. All settings save automatically after five minutes.
PROGRAMMING
Follow these steps for initial setup and programming of the EJ600 Series timers.
Reset
- Press and hold NEXT/ON/OFF and RESET for five seconds.
- Release RESET.
- When the display flashes 12:00 am, release NEXT/ON/OFF to complete the reset.
Initial Setup
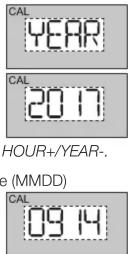
- Press MODE until CAL and YEAR alternate on the display.
- Press M+/ZONE+/YEAR+ until the current year displays.
Note: To scroll backward through the years, press HOUR+/YEAR-.
- Press NEXT/ON/OFF. A date (MMDD) displays. CAL
- Press M+/ZONE+/YEAR+ until the correct month displays.
Note: To scroll through the months, press M+/ZONE+/YEAR+.
- Press DAY/DST until the correct day displays.
Note: To scroll through the days, press DAY/DST.
6. Press NEXT/ON/OFF. DST and AUTO alternate on the display.
- If you live in a state that DOES NOT observe DST, press DAY/DST to change DST to MAN, then press NEXT/ON/OFF.
- If you observe DST, press NEXT/ON/OFF to set.
- Press M+/ZONE+/YEAR+ to select a ZONE.
Note: Your ZONE is astronomically based on how far North, Center or South you are in North America. Canada, select North. Mexico, select South.


- Press NEXT/ON/OFF. The sunrise hour displays.
- To offset the hour, press HOUR+/YEAR-.
- To offset the minutes, press M+/ZONE+/YEAR+.
- Press NEXT/ON/OFF to confirm the sunrise time. Use the same process when adjusting the time for DUSK.


Setting the Time of Day
- Press MODE until CLK displays on the screen.
• To set the hour, press HOUR+/YEAR-.
• To set the minutes, press M+/ZONE+/YEAR+.
• To set the hour, press HOUR+/YEAR-.
• To set the minutes, press M+/ZONE+/YEAR+.


Programming Events
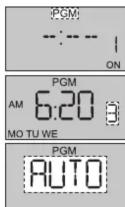
- Press MODE until PGM appears on the display.
- Press DAY/DST to select the time for an ON event:
• Fixed Time (HH:MM, e.g., 12:00 a.m.) - SNST (sunset)


Note: Events are automatically scheduled to occur daily.
3. Customize occurrence as desired:
a. Select individual days:
- Press DAY/DST to cycle through the options until the desired day(s) appear.
- Press NEXT/ON/OFF to confirm your selection and advance to setting an OFF event.
b. Set a fixed time:
- Press HOUR+/YEAR- to change the hour
- Press M+/ZONE+/YEAR+ to change the minutes.
-
Press NEXT/ON/OFF to confirm your selection and advance to setting an OFF event.
-
Press DAY/DST to select the time for an OFF event:
-
SNUP (sunup)
• Fixed Time (HH:MM, e.g., 12:00 a.m.)
Note: Events are automatically scheduled to occur daily.
- Repeat Step 3 to customize the OFF event, as desired.
- Press NEXT/ON/OFF to continue programming ON and OFF events.
- Press MODE to exit the programming menu. The display shows AUTO mode and the current time.
Setting a Mode
| AUTO | Timer operates per your programmed schedule of ON/OFF events. |
| RAND | Timer varies your programmed schedule +/- 20 minutes from the programmed time. |
| MAN | Operates like a manual ON/OFF switch, disregards any programmed events. |
Changing Events
- Press MODE until PGM appears on the display.
- Press NEXT/ON/OFF to view/select ON events (ON 1-7) or OFF events (OFF 1-7).
- Update events using the steps outlined in the "Programming Events" section.
TROUBLESHOOTING
| Observed Problem | Possible Cause What To Do | |
| Timer does not switch ON/OFF but display looks normal. | Timer is not set in AUTO, RAND, or MAN mode. | Press MODE to select the operational mode you want to use. |
| Timer is blank until a button is pushed and the display changes between ON and OFF when the door is pressed, but the light stays OFF or flickers. | There may be no power (fuse or circuit breaker blown) | Make sure the fuse is not blown and that the circuit breaker is on. Replace the fuse, if necessary. |
| The timer may have a loose wire connection. | Contact a qualified electrician. | |
| The light may have burned out bulbs. | Confirm the bulbs are functional. Replace bulbs, as necessary. | |
| Timer resets to 12:00. | Timer is installed in conjunction with a contactor or motor load. | Install a line filter. |
| Timer won't enter Auto or Random mode when you press Mode. | The time of day and/or event times are not programmed. | Reviewyour program settings and revise them as necessary. |
| Timer switches at incorrect times or skips some of the programmed times. | The active schedule has a conflicting setting. | Review the settings and revise them as necessary. |
| Timer is in Random mode, which varies switching times up to ± 15 minutes. | Select the Auto Mode. | |
| The Astronomic and Defined switching times are in conflict, your DST may or may not be turned on, and/or your Astronomic Zone is not set to Center, North, or South. Note: Your timer automatically skips any conflicting ON event as summer approaches to prevent unwanted operation of lights or other controlled devices. | Reviewyour program settings and revise them as necessary. | |
| Switching inductive loads, such as electrical contactor or motor load. | Add a noise filter e.g., ET-NF. Connect filter across load's coil. |
| Observed Problem | Possible Cause What To Do | |
| Load only operates when the remote (three-way) switch is in one position or the timer ignores the remote switch. | The remote switch is wired incorrectly. | Recheck the wiring, specifically for the jumper. |
| The timer ignores a three-way remote switch even though it is wired correctly or the load turns off immediately after being turned ON. | The remote switch or timer is wired wrong.There is an excessive length of wire (greater than 100 feet).There is buried wire to the remote switch.The remote switch is not functioning properly or worn out. | Contact a qualified electrician. |
| Timer shows ON but the light or other controlled device is OFF. | The light or controlled device itself may be switched OFF. | Make sure the light or controlled device is switched ON and plugged in. |
Note: When installing a timer with a contactor or motor load, a line filter is recommended.
LIMITED WARRANTY
Warranty service is available by either (a) returning the product to the dealer from whom the unit was purchased or (b) completing a warranty claim online at www.intermatic.com. This warranty is made by: Intermatic Incorporated, 1950 Innovation Way, Suite 300, Libertyville, IL 60048. For additional product or warranty information go to: http://www.Intermatic.com or call 815-675-7000.


- NTERMATIC®
- EJ600 SERIES
- INSTALLATION AND USER GUIDE
- SAFETY SECTION
- WARNING
- RISK OF FIRE OR ELECTRIC SHOCK
- NOTICE
- PRODUCT DESCRIPTION
- INSTALLATION
- NOTES
- FINALIZING INSTALLATION
- TESTING THE TIMER
- PROGRAMMING
- RESET
- INITIAL SETUP
- SETTING THE TIME OF DAY
- PROGRAMMING EVENTS
- CHANGING EVENTS
- LIMITED WARRANTY
Marque : INTERMATIC
Modèle : EJ600
Catégorie : Minuteur électrique