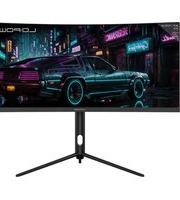
M30UWFC - Moniteur LC-Power - Notice d'utilisation et mode d'emploi gratuit
Retrouvez gratuitement la notice de l'appareil M30UWFC LC-Power au format PDF.


| Type de produit | Moniteur |
| Marque | LC-Power |
| Modèle | M30UWFC |
| Taille de l'écran | 30 pouces (ultra-large) |
| Résolution | 2560 x 1080 pixels (WQHD) |
| Format d'image | 21:9 |
| Type de dalle | IPS |
| Taux de rafraîchissement | 75 Hz |
| Temps de réponse | 1 ms (MPRT) |
| Luminosité | 300 cd/m² |
| Connectivité | HDMI 1.4, DisplayPort 1.2, USB-C, prise casque |
| Haut-parleurs intégrés | Oui, 2x 3W |
| Dimensions (avec pied) | 710 x 450 x 220 mm |
| Poids (avec pied) | 6,8 kg |
| Alimentation | 100-240 V AC, 50/60 Hz |
| Consommation électrique | 35 W (typique), <0,5 W (veille) |
| VESA | 75 x 75 mm |
| Angle de vision | 178° horizontal / 178° vertical |
| Fonctions principales | OSD, réglage de luminosité/contraste, mode jeu, filtre lumière bleue |
| Entretien et nettoyage | Utiliser un chiffon doux et sec. Ne pas utiliser de produits abrasifs. |
| Sécurité | Fixation murale recommandée, utiliser une prise de terre. |
| Pièces détachées et réparabilité | Adaptateur secteur, câbles HDMI et DisplayPort. Réparation par un professionnel. |
FOIRE AUX QUESTIONS - M30UWFC LC-Power
Questions des utilisateurs sur M30UWFC LC-Power
0 question sur cet appareil. Repondez a celles que vous connaissez ou posez la votre.
Poser une nouvelle question sur cet appareil
Téléchargez la notice de votre Moniteur au format PDF gratuitement ! Retrouvez votre notice M30UWFC - LC-Power et reprennez votre appareil électronique en main. Sur cette page sont publiés tous les documents nécessaires à l'utilisation de votre appareil M30UWFC de la marque LC-Power.
MODE D'EMPLOI M30UWFC LC-Power
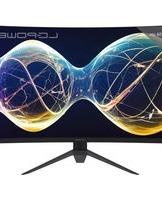
LCPOWER™
LC-M30UWFC
CURVED GAMING MONITOR

natural_image
Modern monitor displaying a glowing moon with lightning patterns over a dark sky, mounted on a tripod stand (no text or symbols visible)USER MANUAL
TABLE OF CONTENTS
-
Safety precautions
-
Rocker switch and indicator light
-
Maintenance
-
Cable connection
-
Product introduction
-
OSD menu
-
Installation
-
Basic parameters
-
Adjustment
1. Safety precautions
- Keep the monitor away from water sources or damp places, such as bath rooms, kitchens, basements and swimming pools.
- Make sure the monitor is placed on a flat surface. If the monitor falls down, it may cause injury or a damage to the device.
- Store and use the monitor in a cool, dry and well ventilated place, and keep it away from emission and heat sources.
- Do not cover or block the vent hole in the rear casing, and do not use the product on a bed, sofa, blanket or similar objects.
- If the monitor will not be used for a long period, please unplug it from the electrical outlet.
- Please use a reliable, properly earthed socket, do not overload the socket, or it may cause fire or electric shock.
- Do not put foreign matters into the monitor, or it may cause short circuits resulting fire or electric shock.
- Do not disassemble or repair this product by yourself to avoid electric shock.
- If faults occur, please contact the after-sales service directly.
- Do not pull or twist the power cable forcedly.
2. Maintenance
CAUTION: Unplug the power cable from the outlet before cleaning the monitor.
- To clean your screen, slightly moisten a soft, clean cloth with water.
- Please use a special screen-cleaning tissue if possible.
- Do not use benzene, thinner, ammonia, abrasive cleaners or compressed air.
- Inappropriate cleaning solutions may damage the monitor or leave a milky film on the screen or the housing.
- Unplug the monitor if you are not going to use it for a longer time period.
- Do not expose the monitor to dust, liquids or a humid environment.
- In case the monitor gets in touch with any liquid, wipe it down immediately using a dry cloth. In case any liquid gets spilled into the ventilation holes, do not use the monitor anymore.
Please contact a professional service technician.
Legal note:

HIGH-DEFINITION MULTIMEDIA INTERFACE
The terms HDMI, HDMI High-Definition Multimedia Interface, HDMI Trade Dress and the HDMI Logos are trademarks or registered trademarks of HDMI Licensing Administrator, Inc.
3. Product introduction
Packing list: Display / base parts and screws / DP cable / power adapter / user manual
- Please check that the package of the monitor contains all parts. If any part is missing, please contact your retailer.
• Note: Additional screws may be used as spare parts.

natural_image
Empty white rectangle with a thin black border (no text or symbols)Monitor

natural_image
Line drawing of a mechanical tool or device with a circular base and handle (no text or symbols)Stand

natural_image
Simple line drawing of a tripod-like structure with two legs and a central circular element (no text or symbols)Base
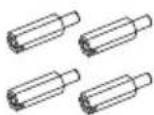
Mounting studs x4
natural_image
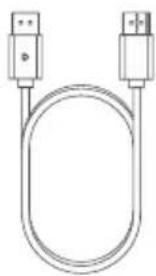
Line drawing of a U-shaped cable with two USB connectors (no text or symbols)DP signal cable

Power cable
natural_image
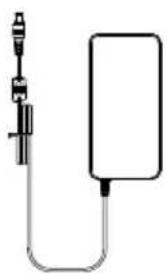
Simple line drawing of a medical or laboratory device with a vertical tube and connected tubing (no text or symbols)Power adapter
User manual
4. Installation
Installation of the base
- Open the package to take out the protective styrofoam parts and put them on a flat tabletop.

- Remove the stand and the base. Lock them with the thumb screw attached to the base, as shown in the figure below.

natural_image
Diagram of a scientific instrument with a magnified inset showing its tip and base (no text or symbols present)- Put the assembled base into the corresponding slot on the backside part of the housing, gently press the bracket down to lock it.

- Place the monitor upright on the assembled base.
Note: Do not squeeze the screen directly with your hands during the process of installation or placing the monitor upright to prevent the panel from breaking.

natural_image
Line drawing of a monitor with a vertical stand and circular screen, no text or symbols presentWall mounting assembly
- Open the package to take out the styrofoam parts and put them on a flat tabletop.

- Take out the mounting studs and screw them into the threaded holes.
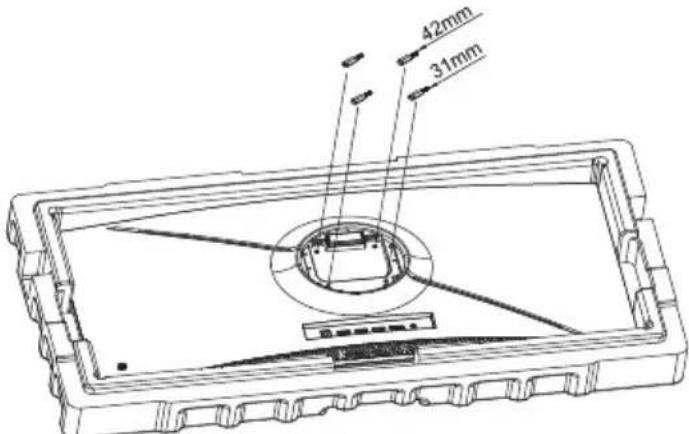
- Mount the wall mount assembly (75 x 75 mm; optionally available) to the back side of the monitor.
- Note: Hang the assembled product on a stable wall. Do not pinch the screen with your hands


natural_image
Simple geometric diagram with a rectangle and diagonal hatching, no text or symbols present.
Note: In order to prevent the monitor from falling when it is used on the wall, please install it properly and securely. Do not hang any additional objects on the wall bracket.
5. Adjustment


natural_image
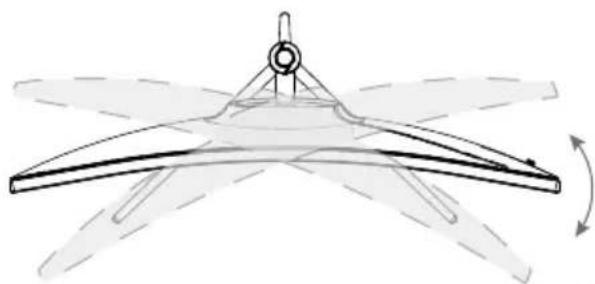
Diagram of a mechanical or aerodynamic system with directional arrows indicating motion (no text or symbols)Rotation angle ± 25° (± 2,5°)
6. Rocker switch and indicator light
Description of the rocker switch

| Button | Function |
| 1 | Power: Press to turn on/off the monitor. |
| 2 | Menu: Press to enter sub-menus/quickly enter the main menu. |
| 3 | Down: Press to move down in the menu/quickly enter the Gameplus mode. |
| 4 | Exit/hot key: Press to return to the previous menu/quickly adjust the input signal. |
| 5 | Up: Press to move up in the menu/quickly enter the contextual modes. |
Explanation of indicator light

natural_image
Line drawing of a flat-screen monitor with a stand and three legs (no text or symbols)Indicator light: A steady blue light indicates that the power is on and that the monitor is operating normally. A steady red light indicates that no horizontal or vertical sync signal or no video input signal is detected, and that the monitor is in standby. Make sure your computer is turned on and functioning properly and check that all video cables are fully plugged in and connected to the monitor.
7. Cable connection
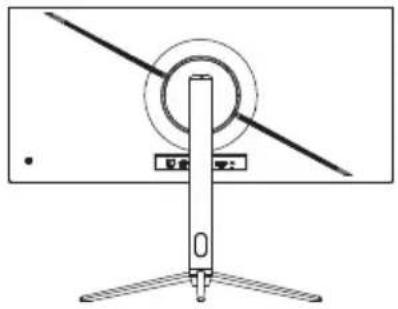
natural_image
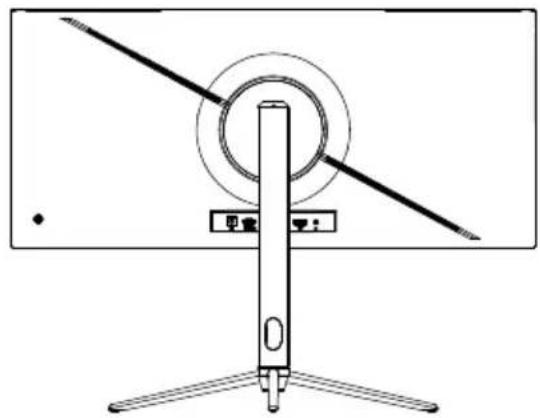
Line drawing of a monitor with a circular screen and a vertical stand (no text or symbols)* The interface configuration at the back of the monitor may vary by model.
- Note: If the power cable or signal cable are damaged, they must be replaced immediately.
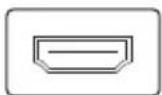
HDMI Port

Use a HDMI cable to connect the monitor to the HDMI port of the computer.

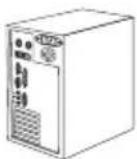

DP Port
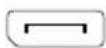
Use the DP cable (preferred) to connect the monitor to the DP port of the computer.

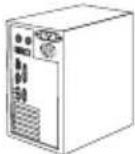

Power Connection

Please connect the power cable to the power adapter, then connect the power adapter to the power port of the monitor and a properly grounded power outlet.
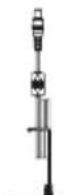


Audio Out

Connect audio playback devices such as earphones or speakers to the Audio Out port of the monitor.


OR

8. OSD Menu
- The color and shape of the OSD menu may be slightly differing according to your model.
- The OSD menu may change by updated functions.
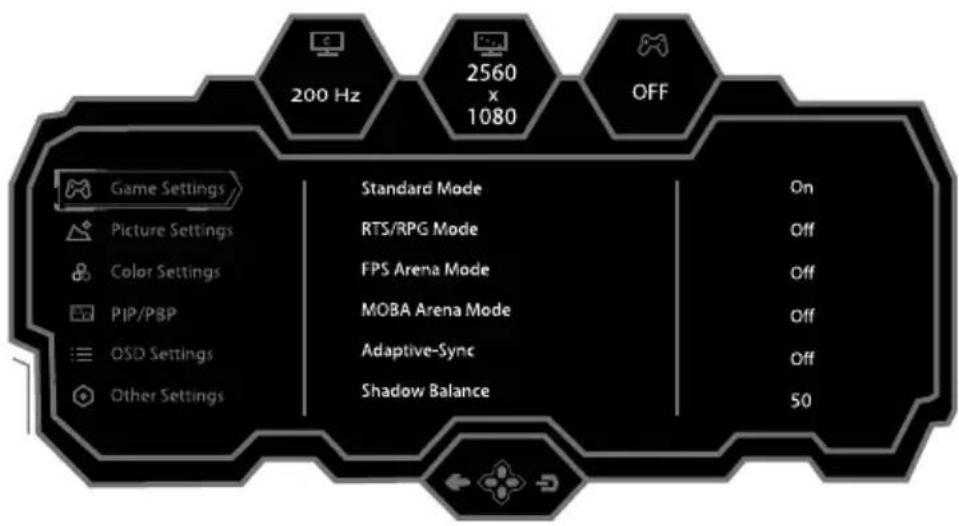
The On-Screen Display (OSD) menu allows you to adjust the settings of your display. Turn the monitor on and move the rocker switch to the right to display the navigation interface.
- Push the rocker switch to the right to enter the OSD main menu or to enter sub-menus.
-
Push the rocker switch ▲ or ▼ to scroll through the functions.
-
Select the desired function, then push the rocker switch ▶ to enter the submenu.
-
Push the rocker switch ▲ or ▼ to scroll through sub-menus, and push the rocker switch ▶ to select and confirm the desired function.
-
Push the rocker switch ◀ to exit from the menu screen.
9. Basic parameters
- The function list in this manual is for reference only and may vary by model.
| Main Menu | Sub Menu | Option |
| Game Settings | Standard Mode | Off/On |
| RTS/RPG Mode | Off/On | |
| FPS Arena Mode | Off/On | |
| MOBA Arena Mode | Off/On | |
| Adaptive-Sync | Off/On | |
| Shadow Balance | 0-100 | |
| Response Time | Off/Normal/Fast/Ultrafast | |
| Refresh Rate | Off/On/Position | |
| Game Crosshair | Off/Crosshair1/Crosshair2/Crosshair3/Crosshair4/Crosshair5/Crosshair6 | |
| Game Time | Off/On: 15:00/30:00/45:00/60:00/Position | |
| Dynamic Brightness | Off/Normal/Expert/Elaboration | |
| MPRT | Off/On | |
| Ambient Lighting | Off/On | |
| Picture Settings | Brightness | 0-100 |
| Contrast | 0-100 | |
| DCR | Off/On | |
| Contextual Mode | Off/Movie Mode/Reading Mode/Night Mode/Eye Care Mode | |
| Low Blue Light | 0-100 | |
| Sharpness | 0-5 | |
| Gamma | 1,8/2,0/2,2/2,4/2,6/S. curve | |
| Aspect Ratio | Wide Screen/4:3/1:1/Auto | |
| Color Settings | Warm | Off/On |
| Natural | Off/On | |
| Cool | Off/On | |
| User1 | Off/On: 0-100 (R/G/B) | |
| User2 | Off/On: 0-100 (R/G/B) | |
| User3 | Off/On: 0-100 (R/G/B) | |
| Hue | 0-100 (R/G/B/C/M/Y) | |
| Saturation | 0-100 (R/G/B/C/M/Y) | |
| PIP/PBP | PIP/PBP Mode | Off/PIP Mode/PBP 2Win 1:1/PBP 2Win 2:1/PBP 2Win 1:2 |
| Sub-signal Source | DP1/DP2/HDMI1/HDMI2 | |
| Audio Source | Auto/DP1/DP2/HDMI1/HDMI2 | |
| PIP Position | Top right / Top left / Bottom right / Bottom left | |
| PIP Size | Small/Medium/Large | |
| Window Swap | Off/On | |
| OSD Settings | Language | 简体中文/English/한국어/Portugues do Brasilazil/Deutsch/Nederlands/Suomi/Français/Ελληνικά/Indonesia/Italiano/日本語/Malaysia/Polski/Português/Русский/Espanol/Українська//繁体中文/Türkçe and more |
| OSD Time Out | 5-60 | |
| OSD H-Position | 0-100 | |
| OSD V-Position | 0-100 | |
| OSD Transparency | 0-5 | |
| Hotkey1 Setting | Brightness/Contrast/Volume/Mute/Shadow Balance/Game Crosshair/Refresh Rate/Game Time/Adaptive-Sync/Contextual Mode/Input Signal/Dynamic Brightness | |
| Hotkey2 Setting | ||
| Hotkey3 Setting | ||
| OSD Lock | Off/On | |
| Other Settings | Input Signal | Auto/DP1/DP2/HDMI1/HDMI2 |
| Volume | 0-100 | |
| Mute | Off/On | |
| Auto Power | Off/On | |
| Eyeshield reminder | Off/On | |
| Reset | No/Yes | |
| Information | Input Source / Resolution / Mode | |
| Product model | LC-M30UWFC | |
| Product name | Liquid Crystal Display | |
| Screen size | 29,5" / 74,93 cm | |
| Aspect ratio | 21:9 | |
| Viewing angle | 178° (H) / 178° (V) | |
| Contrast ratio | 3000:1(typ.) | |
| Color | 16,7 M | |
| Resolution | 2560 x 1080 pixels | |
| Refresh rate | 200 Hz | |
| Power input | 12,0 V--- 4,0 AThe standard voltage and power supply may vary with countries, please refer to the label at the back of the product. | |
| Product dimensions | Without stand | 701,1 x 121,7 x 317,6 mm |
| With stand | 701,1 x 269,3 x 536,3 mm | |
| Tilting angle | Forward tilting -5° ± 2,0°; Backward tilting 20° ± 2.0° | |
| Height range | 115 ± 5mm | |
| Rotation angle | ± 25° (± 2,5°) | |
| Environmental conditions | Usage | Temperature: 0°C ~ 40°C (32°F ~ 104°F)Humidity: 10 % ~ 90 % RH (non-condensing) |
| Storage | Temperature: -20° ~ 60° (-4°F ~ 140°F)Humidity: 5 % ~ 95 % RH (non-condensing) | |
LCPOWER™
Silent Power Electronics GmbH
Formerweg 8
47877 Willich
Germany
www.lc-power.com
- LCPOWER™
- LC-M30UWFC
- CURVED GAMING MONITOR
- TABLE OF CONTENTS
- Safety precautions
- Maintenance
- Product introduction
- Installation
- Installation of the base
- Wall mounting assembly
- Adjustment
- Rocker switch and indicator light
- Cable connection
- HDMI Port
- DP Port
- Power Connection
- Audio Out
- OSD Menu
- Basic parameters
Marque : LC-Power
Modèle : M30UWFC
Catégorie : Moniteur