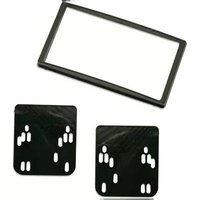
95-7329 - Kit d'encastrement Metra - Notice d'utilisation et mode d'emploi gratuit
Retrouvez gratuitement la notice de l'appareil 95-7329 Metra au format PDF.


| Type de produit | Kit d'encastrement pour autoradio |
| Marque | Metra |
| Modèle | 95-7329 |
| Véhicules compatibles | Certains modèles Chrysler, Dodge, Jeep (vérifier le guide d'application) |
| Type d'installation | Encastrement dans le tableau de bord |
| Format de l'autoradio compatible | Double DIN (standard) |
| Matériau | Plastique ABS moulé, peinture texturée |
| Couleur | Noir |
| Dimensions (L x H x P) | Environ 180 x 100 x 50 mm (pièce principale) |
| Poids | Environ 0,3 kg |
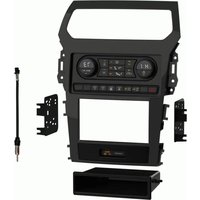
| Contenu de l'emballage | Support de montage, cadre de finition, vis, instructions |
| Alimentation requise | Aucune (pièce mécanique) |
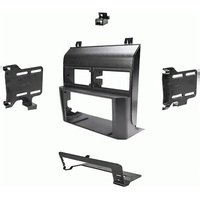
| Fonctions principales | Adapter un autoradio aftermarket au tableau de bord d'origine |
| Entretien et nettoyage | Nettoyer avec un chiffon doux et sec; éviter les solvants |
| Sécurité | Installation conforme aux instructions pour éviter les risques de blessure |
| Pièces détachées et réparabilité | Pièces non disponibles séparément; kit complet à remplacer |
| Garantie | 1 an (standard Metra) |
| Informations générales | Conçu pour une installation facile sans modification du tableau de bord |
FOIRE AUX QUESTIONS - 95-7329 Metra
Questions des utilisateurs sur 95-7329 Metra
0 question sur cet appareil. Repondez a celles que vous connaissez ou posez la votre.
Poser une nouvelle question sur cet appareil
Téléchargez la notice de votre Kit d'encastrement au format PDF gratuitement ! Retrouvez votre notice 95-7329 - Metra et reprennez votre appareil électronique en main. Sur cette page sont publiés tous les documents nécessaires à l'utilisation de votre appareil 95-7329 de la marque Metra.
MODE D'EMPLOI 95-7329 Metra
APPLICATIONS
Kia Rondo 2007-2010
95-7329
KIT FEATURES
- Double DIN radio provision
- Stacked ISO mount unit provision
KIT COMPONENTS
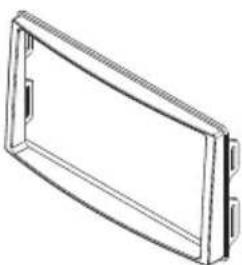
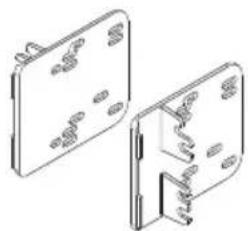
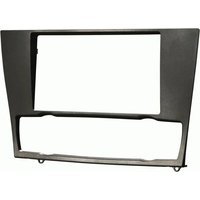
• A) Double DIN trim plate • B) Double DIN brackets
A
B

WIRING & ANTENNA CONNECTIONS (sold separately)
WiringHarness:
• 70-1004 Hyundai/Kia harness 2004-up
• 70-7303 Hyundai/Kia harness 2009-up
Antenna Adapter:
• 40-KI11 Hyundai/Kia antenna adapter
TOOLS REQUIRED
- Small flat blade screwdriver • Panel removal tool • Phillips screwdriver

METRA. THE WORLD'S BEST KITS. TM

1-800-221-0932

metraonline.com
© COPYRIGHT 2004-2011 METRA ELECTRONICS CORPORATION
Table of Contents
Dash Disassembly
– Kia Rondo 2007-2010 ....3
Kit Assembly
- Double DIN head radio provision ....4
- Stacked ISO mount unit provision ....5
CAUTION: Metra recommends disconnecting the negative battery terminal before beginning any installation. All accessories, switches, and especially air bag indicator lights must be plugged in before reconnecting the battery or cycling the ignition.
Note: Refer to the instructions included with the aftermarket radio.

KNOWLEDGE IS POWER
Enhance your installation and fabrication skills by enrolling in the most recognized and respected mobile electronics school in our industry. Log onto www.installerinstitute.com or call 800-354-6782 for more information and take steps toward a better tomorrow.

Metra recommends MECP certified technicians
Kia Rondo 2007-2010
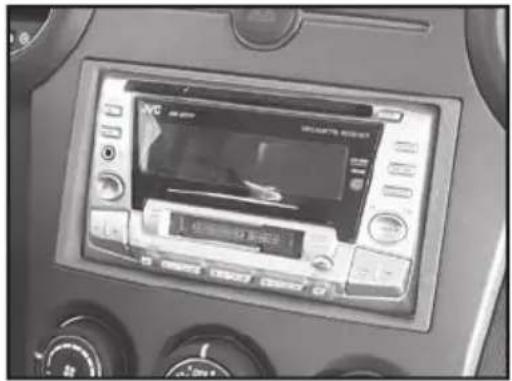
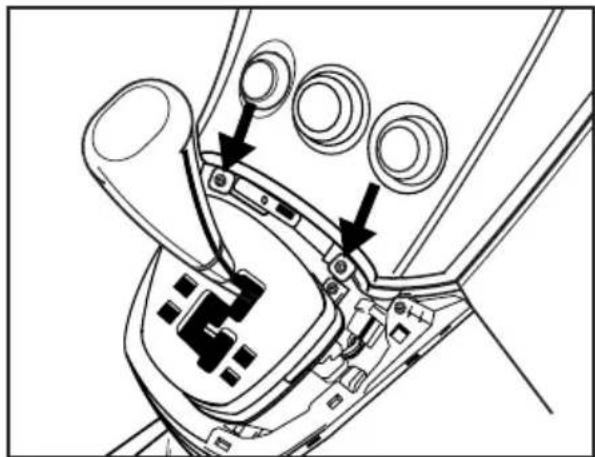
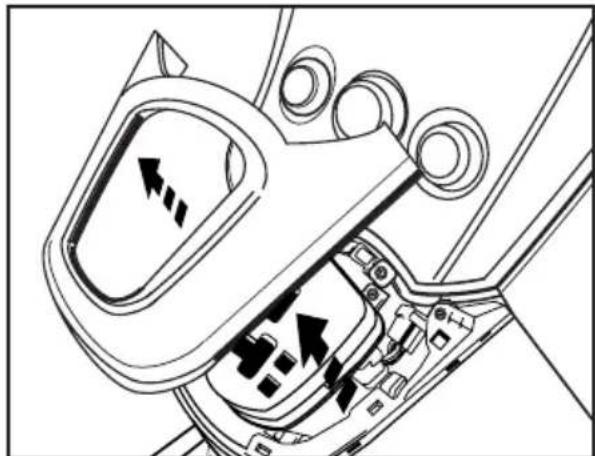
- Unclip and remove the panel surrounding the shifter. (Figure A)
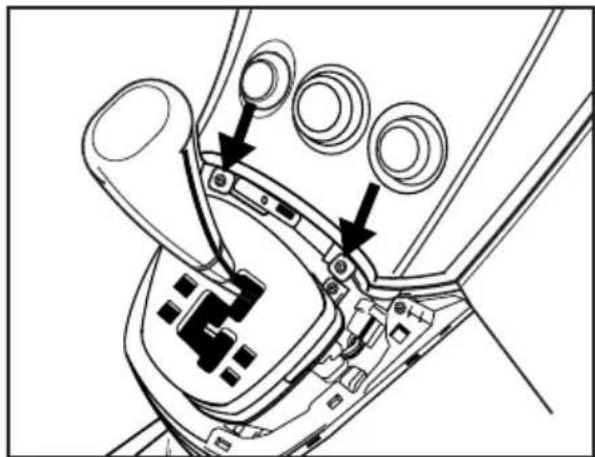
- Remove (2) Phillips head screws securing the radio trim panel. Unplug and remove panel. (Figure B)
- Remove (4) Phillips screws securing the radio. Unplug and remove the radio. (Figure C)
Continue to kit assembly
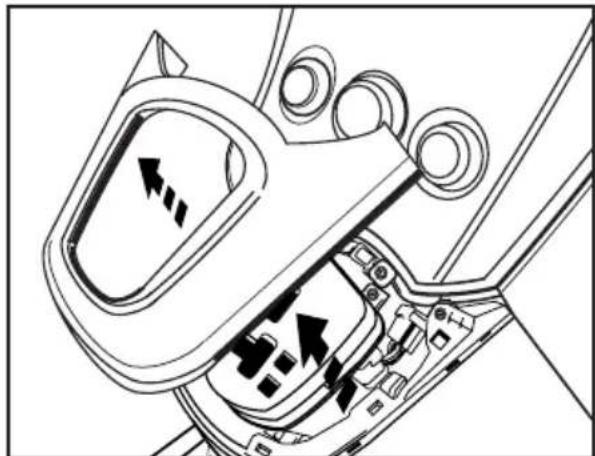
(Figure A)
(Figure B)
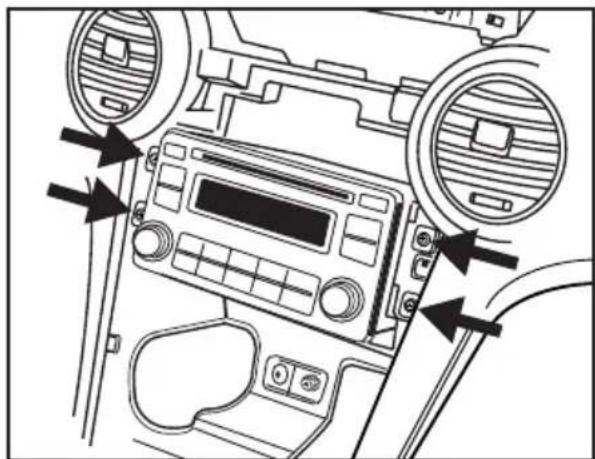
(Figure C)
Double DIN radio provision
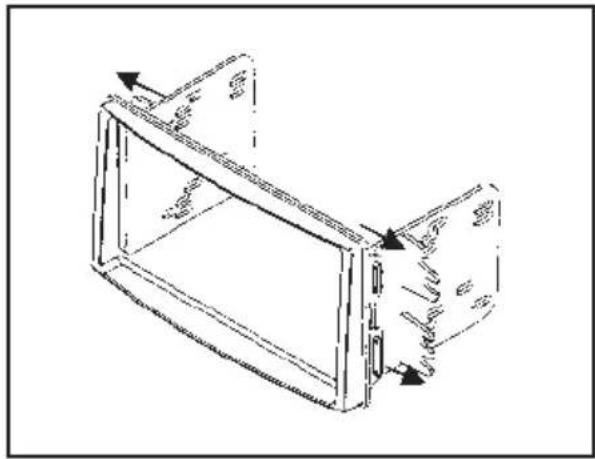
- Snap the Double DIN brackets to the inside edge of the Double DIN trim plate. (Figure A)
2 Slide the Double DIN radio into the bracket/trim plate assembly and secure the radio to the assembly using the screws supplied with the radio. (Figure B) - Locate the factory wiring harness in the dash. Metra recommends using the proper mating adapter from Metra or AXXESS. Re-connect the negative battery terminal and test the unit for proper operation.
- Reassemble dash in reverse order of disassembly.
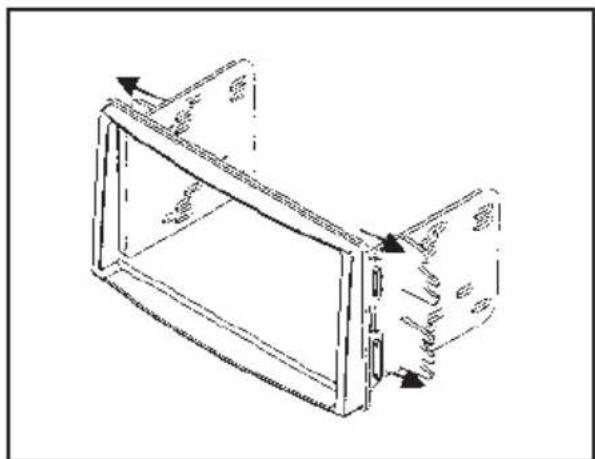
(Figure A)

(Figure B)
Stacked ISO mount unit provision
- Snap the Double DIN brackets to the inside edge of the Double DIN trim plate. (Figure A)
- Slide the stacked ISO units into the bracket/radio housing assembly and secure the units to the kit using the screws supplied with the units. (Figure B)
- Locate the factory wiring harness in the dash. Metra recommends using the proper mating adapter from Metra or AXXESS. Re-connect the negative battery terminal and test the unit for proper operation.
- Reassemble dash in reverse order of disassembly.

(Figure A)
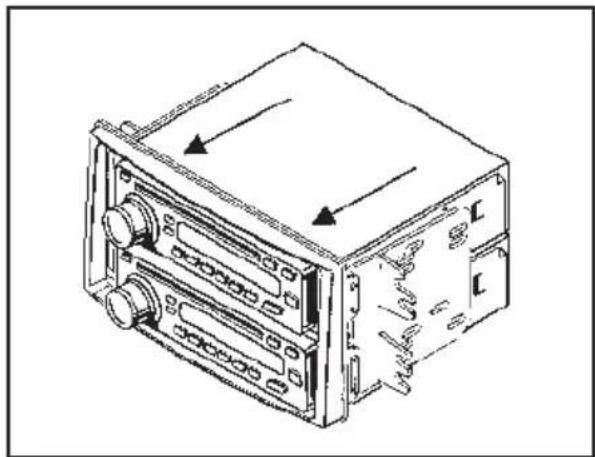
(Figure B)
Notes
Notes
APLICACIONES
Kia Rondo 2007-2010
95-7329
CARACTERÍSTICAS DEL KIT
- Provisión de radio doble DIN
- Provisión de unidad de montaje ISO vertical

COMPONENTES DEL KIT
• A) Placa de moldura doble DIN • B) Soportes doble DIN
A

B
CABLEADO Y CONEXIONES DE ANTENA (se venden por separado)
Arnés de cableado:
- 70-1004 Arnés Hyundai/Kia 2004 y más recientes
• 70-7303 Arnés Hyundai/Kia 2009 y más recientes
Adaptador de antena:
• 40-KI11 Adaptador de antena Hyundai/Kia
HERRAMIENTAS REQUERIDAS
- Destornillador cabeza plana • Herramienta de remoción de panel • Destornillador Phillips

METRA. THE WORLD'S BEST KITS. TM

1-800-221-0932

metraonline.com
© COPYRIGHT 2004-2011 METRA ELECTRONICS CORPORATION
Indice
Desmontaje del tablero
– Kia Rondo 2007-2010 ....3
Ensamble del kit
- Provisión de radio doble DIN ....4
- Provisión de unidad de montaje ISO vertical....5
PRECAUCIÓN: Metra recomienda desconectar el terminal negativo de la batería antes de comenzar cualquier instalación. Todos los accesorios, interruptores y, especialmente, las luces indicadoras de airbag deben estar enchufados antes de volver a conectar la batería o comenzar el ciclo de ignición.
Nota: Remítase a las instrucciones incluidas con el radio de posventa.

EL CONOCIMIENTO ES PODER
Mejore sus habilidades de instalación y fabricación inscribiéndose en la escuela de dispositivos electrónicos móviles más reconocida y respetada de nuestra industria. Regístrese en www.installerinstitute.com o llame al 800-354-6782 para obtener más información y avance hacia un futuro mejor.

Metra recomienda técnicos con certificación del Programa de Certificación en Electrónica Móvil (Mobile Electronics Certification Program, MECP).
Kia Rondo 2007-2010
- Desenganche y quite el panel que rodea la palanca de velocidades. (Figura A)
- Quite los (2) tornillos de cabeza Phillips que sujetan el panel de la moldura del radio. Desconecte y retire el panel. (Figura B)
- Retire los (4) tornillos Phillips que sostienen el radio. Desconecte y quite el radio. (Figura C)
Continuará al ensamble del kit
(Figura A)
(Figura B)

(Figura C)
Provisión de radio doble DIN
- Coloque a presión los soportes Doble DIN en el borde interior de la placa de la moldura de Doble DIN. (Figura A)
2 Deslice el radio doble DIN en el soporte/ensamble de la placa de la moldura y sujete el radio al ensamble utilizando los tornillos suministrados con el radio. (Figura B) - Ubique el arnés del cableado de fábrica en el tablero. Metra recomienda usar el adaptador de acoplamiento adecuado de Metra o AXXESS. Vuelva a conectar el terminal negativo de la batería y pruebe la unidad para verificar que funcione correctamente.
- Vuelva a montar el tablero en forma inversa al desmontaje.
(Figura A)
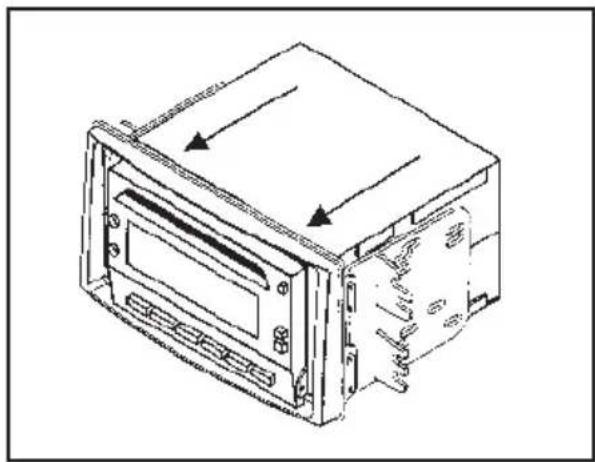
(Figura B)
Provisión de unidad de montaje ISO vertical
- Coloque a presión los soportes Doble DIN en el borde interior de la placa de la moldura de Doble DIN. (Figura A)
- Deslice las unidades ISO verticales en el soporte/ensamble de alojamiento del radio y sujete las unidades al kit utilizando los tornillos suministrados con las unidades. (Figura B)
- Ubique el arnés del cableado de fábrica en el tablero. Metra recomienda usar el adaptador de acoplamiento adecuado de Metra o AXXESS. Vuelva a conectar el terminal negativo de la batería y pruebe la unidad para verificar que funcione correctamente.
- Vuelva a montar el tablero en forma inversa al desmontaje.

(Figura A)

(Figura B)
Notas
Notas


- APPLICATIONS
- KIA RONDO 2007-2010
- 95-7329
- KIT FEATURES
- KIT COMPONENTS
- WIRING & ANTENNA CONNECTIONS (SOLD SEPARATELY)
- TOOLS REQUIRED
- TABLE OF CONTENTS
- DASH DISASSEMBLY
- KIT ASSEMBLY
- KNOWLEDGE IS POWER
- DOUBLE DIN RADIO PROVISION
- STACKED ISO MOUNT UNIT PROVISION
- NOTES
- APLICACIONES
- CARACTERÍSTICAS DEL KIT
- COMPONENTES DEL KIT
- CABLEADO Y CONEXIONES DE ANTENA (SE VENDEN POR SEPARADO)
- HERRAMIENTAS REQUERIDAS
- INDICE
- DESMONTAJE DEL TABLERO
- ENSAMBLE DEL KIT
- EL CONOCIMIENTO ES PODER
- PROVISIÓN DE RADIO DOBLE DIN
- PROVISIÓN DE UNIDAD DE MONTAJE ISO VERTICAL
- NOTAS
Marque : Metra
Modèle : 95-7329
Catégorie : Kit d'encastrement