
MC-8082PRR - Four à micro-ondes LG - Notice d'utilisation et mode d'emploi gratuit
Retrouvez gratuitement la notice de l'appareil MC-8082PRR LG au format PDF.


| Type de produit | Four à micro-ondes |
| Marque | LG |
| Modèle | MC-8082PRR |
| Capacité | 28 litres |
| Puissance micro-ondes | 800 W |
| Puissance grill | 900 W |
| Dimensions (L × H × P) | 455 × 260 × 340 mm |
| Poids net | 11,5 kg |
| Alimentation | 230 V / 50 Hz |
| Fonctions principales | Décongélation automatique, cuisson par micro-ondes et grill, réchauffage rapide, cuisson combinée |
| Programmes automatiques | Oui, 10 programmes prédéfinis |
| Type de commande | Électronique tactile et rotative |
| Affichage | LED numérique |
| Matériau de l'intérieur | Émail antibactérien |
| Sécurité enfant | Oui, verrouillage tactile |
| Arrêt automatique | Oui, après ouverture de la porte |
| Plat tournant | Oui, diamètre 315 mm |
| Entretien et nettoyage | Nettoyer avec un chiffon humide et du détergent doux. Ne pas utiliser de produits abrasifs. |
| Pieces détachées | Disponibles via le service après-vente LG |
| Réparabilité | Indice de réparabilité de 8,0/10 (estimation LG) |
FOIRE AUX QUESTIONS - MC-8082PRR LG
Questions des utilisateurs sur MC-8082PRR LG
0 question sur cet appareil. Repondez a celles que vous connaissez ou posez la votre.
Poser une nouvelle question sur cet appareil
Téléchargez la notice de votre Four à micro-ondes au format PDF gratuitement ! Retrouvez votre notice MC-8082PRR - LG et reprennez votre appareil électronique en main. Sur cette page sont publiés tous les documents nécessaires à l'utilisation de votre appareil MC-8082PRR de la marque LG.
MODE D'EMPLOI MC-8082PRR LG


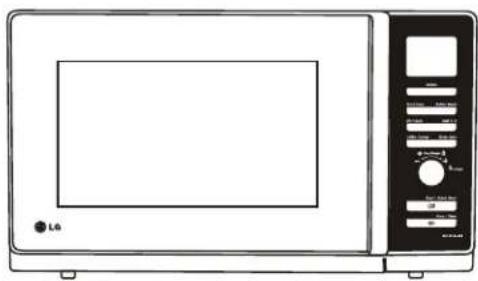

Manuel de l'utilisateur
Veuillez lire attentivement ce manuel avant d'utiliser cet appareil.
MC-8082PRR
Sommaire
Sommaire ____ 2
Précautions 3-4
Consignes de sécurité 5
Déballage et installation 6-7
Sécurité enfants 8
Démarrage rapide 9
Rôtissoire 9
Cuisson aux micro-ondes 10
Niveaux de puissance micro-ondes 11
Cuisson au gril 12
Cuisson combinée gril 13
EZ Clean / EZ Clean 14
Speed Hot Air Preheat / Préchauffage rapide à air chaud 15
Speed Hot Air Cooking / Cuisson rapide à air chaud 16
Convection Combination Cooking / Cuisson combinée par convection 17
Convection Preheat / Préchauffage par convection 18
Convection Cooking / Cuisson par convection 19
Various Cook Functions / Différentes fonctions de cuisson 20
Nutri Care (Steam Cook, Health Plus, Soups, Continental) / 21-42
Nutri Care (cuisson vapeur, Health Plus, soupes, continental)
Indian Rasoi (Indian Cuisine, Tandoor Se, Sweet Corner, Chatpat Corner) / 43-70
Indian Rasoi (cuisine indienne, Tandoor Se, Sweet Corner, Chatpat Corner)
24 Hours (Breakfast, Snacks, Child Favourite, Bakery) 71-91
24 heures (petit-déjeuner, snacks, préférés des enfants, pâtisserie)
Just 4 U (Baby Food, Cake, Sea Food) / Just 4 U (aliments pour bébé, gâteaux, fruits de mer) 92-101
Utility Corner (Utility Corner, Fermentation) / Coin utilitaire (coin utilitaire, fermentation) 102-105
Body Care / Soins du corps 106-107
Important Safety Instructions / Instructions de sécurité importantes 108-109
Technical Specifications / Two recipes for starter / Spécifications techniques / Deux recettes pour débutants ____ 110
Precautions to avoid possible exposure to excessive microwave energy. / Précautions pour éviter une exposition possible à une énergie micro-ondes excessive.
Precautions / Précautions
Vous ne pouvez pas faire fonctionner votre four avec la porte ouverte en raison des verrouillages de sécurité intégrés au mécanisme de la porte. Ces verrouillages de sécurité coupent automatiquement toute activité de cuisson lorsque la porte est ouverte ; ce qui, dans le cas d'un four à micro-ondes, pourrait entraîner une exposition nocive à l'énergie micro-ondes. Il est important de ne pas altérer les verrouillages de sécurité.
En raison des verrouillages de sécurité dans le système de porte, vous ne pouvez pas faire fonctionner le four avec la porte ouverte. Ces verrouillages de sécurité arrêtent automatiquement le processus de cuisson lorsque la porte est ouverte. Sinon, vous pourriez être exposé de manière excessive aux micro-ondes. Par conséquent, ne manipulez pas les verrouillages de sécurité.
Ne placez aucun objet entre la face avant du four et la porte, et ne laissez pas de résidus d'aliments ou de nettoyant s'accumuler sur les surfaces d'étanchéité.
Ne faites pas fonctionner votre four s'il est endommagé. Il est particulièrement important que la porte du four se ferme correctement et qu'il n'y ait aucun dommage : (1) à la porte (déformée), (2) aux charnières et aux loquets (cassés ou desserrés), (3) aux joints de porte et aux surfaces d'étanchéité.
Votre four ne doit être réglé ou réparé que par un personnel de service qualifié.
Avertissement
Assurez-vous que les temps de cuisson sont correctement réglés, car une cuisson excessive peut provoquer un incendie des aliments et endommager votre four.
Lors du chauffage de liquides, par exemple soupes, sauces et boissons dans votre four à micro-ondes, un surchauffage du liquide au-delà du point d'ébullition peut se produire sans signe de bouillonnement. Cela pourrait entraîner un débordement soudain du liquide chaud. Pour éviter cette possibilité, les mesures suivantes doivent être prises :
Lorsque vous chauffez des liquides dans votre four, ils peuvent devenir trop chauds sans que des bulles ne soient visibles.
1. Évitez d'utiliser des récipients à parois droites et à col étroit. 2. Ne pas surchauffer. 3. Remuez le liquide avant de placer le récipient dans le four et à nouveau à mi-temps de cuisson. 4. Après chauffage, laissez reposer dans le four pendant un court instant, remuez ou secouez à nouveau soigneusement et vérifiez la température avant consommation pour éviter les brûlures (en particulier pour le contenu des biberons et des pots pour bébés). Soyez prudent lors de la manipulation du récipient. 5. Nettoyez l'intérieur du four avec un chiffon humide après utilisation. 6. Ne faites jamais fonctionner le four sans le plateau en verre et le support à rouleaux / récipient métallique, car cela pourrait provoquer des étincelles.
Avertissement
Laissez toujours reposer les aliments après cuisson par micro-ondes et vérifiez leur température avant consommation, en particulier pour le contenu des biberons et des pots pour bébés.
Après cuisson par micro-ondes, laissez toujours reposer les aliments couverts pendant un certain temps. Vérifiez la température des aliments avant de les consommer. Soyez particulièrement prudent avec les aliments et le lait pour bébés.
Précautions
Comment fonctionne le four à micro-ondes
Les micro-ondes sont une forme d'énergie similaire aux ondes radio, aux ondes télévisuelles et à la lumière du jour ordinaire. Normalement, les micro-ondes se propagent vers l'extérieur en traversant l'atmosphère et disparaissent sans effet. Cependant, les fours à micro-ondes ont un magnétron conçu pour utiliser l'énergie des micro-ondes. L'électricité fournie au tube magnétron est utilisée pour créer de l'énergie micro-ondes.
Ces micro-ondes pénètrent dans la zone de cuisson par des ouvertures à l'intérieur du four. Un plateau tournant est situé au fond du four. Les micro-ondes ne peuvent pas traverser les parois métalliques du four, mais elles peuvent pénétrer des matériaux tels que le verre, la porcelaine et le papier, qui sont les matériaux utilisés pour fabriquer les plats de cuisson adaptés aux micro-ondes.
Les micro-ondes ne chauffent pas les ustensiles de cuisson, bien que les récipients finissent par chauffer à cause de la chaleur générée par les aliments.
Un appareil très sûr
Votre four à micro-ondes est l'un des appareils électroménagers les plus sûrs. Lorsque la porte est ouverte, le four cesse automatiquement de produire des micro-ondes. L'énergie des micro-ondes est entièrement convertie en chaleur lorsqu'elle pénètre dans les aliments, ne laissant aucune énergie résiduelle qui pourrait vous nuire lorsque vous mangez.
Précautions de sécurité
Utilisez une prise de terre ou une prise exclusive de 230 V avec terre. Ne pliez pas et ne cassez pas le cordon d'alimentation. Ne tirez pas sur le cordon d'alimentation. N'utilisez pas plusieurs prises dans une même prise en même temps. Ne branchez pas et ne débranchez pas le cordon d'alimentation avec les mains mouillées. Ne vaporisez pas d'eau à l'intérieur ou à l'extérieur du four à micro-ondes. Débranchez le cordon d'alimentation pendant le nettoyage ou l'entretien de l'appareil. Ne chauffez pas les aliments plus que nécessaire. N'utilisez pas le four à micro-ondes pour d'autres usages que la cuisson ou la stérilisation, comme le séchage de vêtements. N'insérez pas d'épingle ou de fil d'acier à l'intérieur ou à l'extérieur du boîtier. Soyez prudent lors du retrait des aliments, car l'eau ou la soupe à haute température peut déborder et provoquer des brûlures.
Ne branchez pas le cordon d'alimentation si la prise est desserrée ou si la fiche est endommagée. N'utilisez pas le four si des corps étrangers sont fixés sur la porte. Ne placez pas le récipient d'eau sur l'appareil. Ne posez pas d'objets lourds sur l'appareil et ne le couvrez pas d'un chiffon pendant l'utilisation. N'installez pas l'appareil dans un endroit humide ou exposé aux éclaboussures d'eau. Ne laissez pas les enfants s'accrocher à la porte du four. Ne faites pas chauffer de fruits non pelés ou de bouteilles avec un couvercle. Ne touchez pas les aliments ou les accessoires immédiatement après la cuisson. Débranchez le four s'il n'est pas utilisé pendant une longue période. Installez le four à micro-ondes dans un endroit bien ventilé et plat.
Il y a un risque d'explosion si des bouteilles fermées, des aliments scellés, des œufs, des châtaignes, etc. sont cuits à l'intérieur du four.
Il y a un risque d'explosion si des bouteilles fermées, des aliments scellés, des œufs ou des noix de cajou, etc. sont cuits dans le four.
Déballage et installation
En suivant les étapes de base de ces deux pages, vous pourrez vérifier rapidement que votre four fonctionne correctement. Veuillez porter une attention particulière aux conseils concernant l'emplacement d'installation de votre four. Lors du déballage de votre four, assurez-vous de retirer tous les accessoires et l'emballage. Vérifiez que votre four n'a pas été endommagé pendant la livraison.
À l'aide des deux pages suivantes, vous pouvez déterminer si votre four fonctionne correctement. Faites attention à l'endroit où vous installez votre four. Lors du déballage de votre four, retirez tous les accessoires et l'emballage. Vérifiez que votre four n'a pas été endommagé pendant la livraison.
1 Déballez votre four et placez-le sur une surface plane et de niveau.
Remarque : Les accessoires illustrés ci-dessus dépendent du modèle.
Placez le four à l'endroit de votre choix, à une hauteur de plus de 85 cm, mais assurez-vous qu'il y a au moins 30 cm d'espace au-dessus et 10 cm à l'arrière pour une ventilation adéquate. L'avant du four doit être à au moins 8 cm du bord de la surface pour éviter tout basculement. Une sortie d'évacuation est située sur le dessus ou sur le côté du four. Le blocage de la sortie peut endommager le four.

Ce four ne doit pas être utilisé à des fins de restauration commerciale.

Branchez votre four sur une prise domestique standard. Assurez-vous que votre four est le seul appareil connecté à la prise. Si votre four ne fonctionne pas correctement, débranchez-le de la prise électrique puis rebranchez-le.
Branchez votre four sur une prise domestique standard. Assurez-vous que votre four est le seul appareil connecté à la prise. Si votre four ne fonctionne pas correctement, débranchez-le de la prise électrique puis rebranchez-le.

Ouvrez la porte de votre four en tirant sur la poignée de la porte. Placez l'anneau rotatif à l'intérieur du four et placez le plateau en verre dessus.
Ouvrez la porte de votre four en tirant sur la poignée de la porte. Placez l'anneau rotatif à l'intérieur du four et placez le plateau en verre dessus.

Remplissez un récipient adapté au micro-ondes avec 300 ml (1/2 pinte) d'eau. Placez-le sur le plateau en verre et fermez la porte du four. Si vous avez des doutes sur le type de récipient à utiliser, veuillez vous référer à la page 26.
Remplissez un récipient adapté au micro-ondes avec 300 ml d'eau. Placez-le sur le plateau en verre et fermez la porte du four. Si vous avez des doutes sur le type de récipient à utiliser, veuillez vous référer à la page 26.


Remplissez un récipient adapté au micro-ondes avec
Appuyez sur DÉMARRER
une fois pour régler 30 secondes de temps de cuisson.
Lorsque vous appuyez sur le bouton, vous entendrez un BIP et votre four démarrera automatiquement.
Appuyez une fois sur le bouton DÉMARRER pour régler 30 secondes de temps de cuisson. Lorsque vous appuyez sur le bouton, vous entendrez un BIP et votre four démarrera automatiquement.

L'AFFICHEUR décomptera à partir de 30 secondes. Lorsqu'il atteint 0, il émettra des BIPS. Ouvrez la porte du four et testez la température de l'eau. Si votre four fonctionne, l'eau doit être chaude. Soyez prudent en retirant le récipient, il peut être chaud.
L'AFFICHEUR décomptera à partir de 30 secondes. Lorsqu'il atteint 0, il émettra des BIPS. Ouvrez la porte du four et testez la température de l'eau. Si votre four fonctionne, l'eau doit être chaude. Soyez prudent en retirant le récipient, il peut être chaud.

VOTRE FOUR EST MAINTENANT INSTALLÉ.
Verrouillage enfant

Votre four est doté d'un dispositif de sécurité qui empêche son fonctionnement accidentel. Une fois le verrouillage enfant activé, vous ne pourrez plus utiliser aucune fonction et aucune cuisson ne pourra avoir lieu. Cependant, votre enfant peut toujours ouvrir la porte du four.
Votre four est doté d'un dispositif de sécurité spécial qui l'empêche de fonctionner par inadvertance. Lorsque le verrouillage enfant est activé, le four ne démarrera pas. Cependant, l'enfant pourra ouvrir la porte extérieure.
Appuyez sur STOP/CLEAR.
Maintenez enfoncé STOP/CLEAR jusqu'à ce que "L" apparaisse à l'écran et qu'un bip retentisse. Le verrouillage enfant est maintenant activé.
Pour annuler le verrouillage enfant, maintenez enfoncé STOP/CLEAR jusqu'à ce que "L" disparaisse. Vous entendrez un bip lorsqu'il sera désactivé.


Dans l'exemple suivant, je vais vous montrer comment régler 2 minutes de cuisson à puissance élevée.
L'exemple suivant montre comment régler 2 minutes pour cuire des aliments à un niveau de puissance élevé.
Démarrage rapide
Démarrage rapide

La fonction DÉMARRAGE RAPIDE vous permet de régler des intervalles de 30 secondes de cuisson à puissance élevée en touchant le bouton DÉMARRAGE RAPIDE.
Vous pouvez cuire des aliments à puissance élevée par intervalles de 30 secondes en appuyant sur le bouton DÉMARRAGE RAPIDE.
Appuyez sur STOP/CLEAR.
Appuyez sur STOP/CLEAR.
Appuyez quatre fois sur DÉMARRAGE RAPIDE pour sélectionner 2 minutes à puissance élevée. Votre four démarrera avant que vous ayez fini la quatrième pression.

Démarrage / Démarrage rapide

Pendant la cuisson rapide, vous pouvez prolonger le temps de cuisson jusqu'à 99 minutes 59 secondes en appuyant à plusieurs reprises sur le bouton DÉMARRAGE RAPIDE ou en utilisant le bouton rotatif.
Pendant la cuisson rapide, vous pouvez prolonger le temps de cuisson jusqu'à 99 minutes 59 secondes en appuyant à plusieurs reprises sur le bouton DÉMARRAGE RAPIDE ou en utilisant le bouton rotatif.
Rôtisserie
Ne faites jamais fonctionner le four en mode micro-ondes ou combiné avec la broche de rôtisserie dans la cavité lorsque le four est vide.
- Placez les aliments sur la broche en vous assurant que la broche passe par le centre des aliments. Si nécessaire, attachez les aliments à la broche avec du fil.
- Insérez l'extrémité de la broche (D) dans la mâchoire de rôtisserie (A) sur le côté gauche de la paroi du four. Poussez-la vers la gauche en tournant légèrement la broche jusqu'à ce qu'elle s'insère dans la mâchoire (A).
- Soutenez l'autre extrémité de la broche (E) dans le creux du support de rôtisserie (B).
- Placez soigneusement le plat en verre résistant à la chaleur dans le four à micro-ondes, sur le plateau tournant en verre.
Remarque : Cette rôtisserie peut supporter de petits morceaux d'aliments végétariens et non végétariens. Les gros morceaux peuvent toucher le plateau en verre.
Remarque : La rôtisserie est utile pour cuire de petits morceaux d'aliments végétariens et non végétariens. Les gros morceaux peuvent toucher le plateau en verre.
![graph TD A["Rotisserie-Jaw"] --> B["C"] B --> C["D"] C --> D["E"] D --> E["B"] E --> F["F"] F --> G["Rotisserie-Holder"]](/content/2026/06/1389546/images/ec006f9b3ca164f86a628d6ee9fb6e14da1f3e83967130bb178a387b72588ced.jpg)
Cuisson à puissance micro-ondes
Dans l'exemple suivant, je vais vous montrer comment cuire des aliments à une puissance de 720 W (80 %) pendant 5 minutes et 30 secondes.
Dans l'exemple suivant, je vais vous montrer comment cuire des aliments à une puissance de 720 W (80 %) pendant 5 minutes et 30 secondes.

Votre four dispose de cinq réglages de puissance micro-ondes.
Votre four dispose de cinq réglages de puissance micro-ondes.
| Power Levelपावर स्तर | % | Power Outputपावर मात्रा |
| HIGHउच्चताम | 100% | 900W(max.) |
| MEDIUM HIGHमध्यम उव्ल | 80% | 720W |
| MEDIUMमध्यम | 60% | 540W |
| DEFROST(MEDIUM LOW)मध्यम न्यून | 40% | 360W( *** ) |
| LOWन्यूनतम | 20% | 180W |
Assurez-vous d'avoir correctement installé votre four comme décrit précédemment dans ce manuel.
Assurez-vous d'avoir correctement installé votre four comme décrit précédemment dans ce manuel. Appuyez sur STOP/CLEAR.
Appuyez sur MODE.
Appuyez sur MODE.
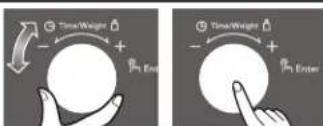
Tournez le bouton DIAL pour confirmer le mode micro-ondes.
Tournez le bouton DIAL pour confirmer le mode micro-ondes.
(Le mode MICRO (☑) est automatiquement disponible lorsque le bouton MODE est sélectionné.)
Tournez le bouton DIAL jusqu'à ce que l'affichage indique « 720W ».
Tournez le bouton DIAL jusqu'à ce que l'affichage indique « 720W ».
Appuyez sur DIAL pour confirmer la puissance.
Appuyez sur DIAL pour confirmer la puissance.
Tournez le bouton DIAL jusqu'à ce que l'affichage indique "5:30".
Tournez le bouton DIAL jusqu'à ce que l'affichage indique "5:30".
Appuyez sur START.
Pendant la cuisson, vous pouvez augmenter ou diminuer le temps de cuisson en tournant le bouton DIAL.
Pendant la cuisson, vous pouvez augmenter ou diminuer le temps de cuisson en tournant le bouton DIAL.





Votre four à micro-ondes est équipé de 5 niveaux de puissance pour vous offrir une flexibilité et un contrôle maximaux sur la cuisson. Le tableau ci-dessous montre des exemples d'aliments et leurs niveaux de puissance recommandés pour ce four à micro-ondes.
Votre four à micro-ondes est équipé de 5 niveaux de puissance pour vous offrir une flexibilité et un contrôle maximaux sur la cuisson. Le tableau ci-dessous montre des exemples d'aliments et leurs niveaux de puissance recommandés pour ce four à micro-ondes.
Niveau de puissance micro-ondes
| POWER LEVELपावर स्तर | USEप्रयोग पावर स्तर (%) पावर मात्रा | POWER LEVEL (%) | POWER OUTPUT |
| HIGH * Boil Water /उच्चतम | पानी उबालना�* Cook poultry pieces, fish, vegetables / मुर्गा, मछली वराबिजियो पकाना�* Cook tender cuts of meat / मौंस के नर्मे टुकड़े पकानाना | 100% | 900W(max) |
| MEDIUM * Reheating(High * Roast meat and poultry / मौंस व मुर्गा भूननामध्यम उच्च | (Liquid) / भोजन दोबारा गर्म करना (तरल) / मौंस व मुर्गा भूनना�* Cook mushrooms and shellfish / मशरूम व खोल वालीमछली पकाना�* Cook foods containing cheese and eggs / मोजनजिसमें अण्डे व चीज डाली गई हों | 80% | 720W |
| MEDIUM * Reheating(Mध्यम | (Mashed potato, Plated meal, Ready meal)मोजन दोबारा गर्म करना (मसले हुए आलू प्लेट में रखा हुआखाना, तैयार खानाप्र prepare eggs / अण्डे पकाना�* Cook custard / कस्टर्ड पकानाप्र prepare rice, soup / चावल व सूप पकानाना | 60% | 540W |
| DEFROST(MEDIUM LOW)डिफ्रॉस्ट (मध्यम न्यून) | * All thawing / सभी खाथ पदार्थाँ को सामान्य तापमान पर लानाप्र Melt butter and chocolate / चौकलेट व मक्स्कन पिघलनाप्र Cook less tender cuts of meat / मौंस के कन नरम दुकड़े पकानाना | 40% | 360W( ** ) |
| LOW * Soften butter(न्यूनतम | & cheese / मक्खन व चीज को नरम करनाप्र Soften ice cream / आइसक्रीम को नरम करनाप्र Raise yeast dough / आटे में खमीर उठाना | 20% | 180W |

Cuisson au gril
Dans l'exemple suivant, je vais vous montrer comment utiliser le gril pour cuire des aliments pendant 12 minutes et 30 secondes.
Dans l'exemple suivant, je vais vous montrer comment utiliser le gril pour cuire des aliments pendant 12 minutes et 30 secondes.

Cette fonction vous permet de dorer et de rendre croustillants les aliments rapidement.
Cette fonction vous permet de dorer et de rendre croustillants les aliments rapidement.
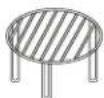
La grille doit être utilisée pendant la cuisson au gril.
La grille doit être utilisée pendant la cuisson au gril.
Appuyez sur STOP/CLEAR.


Appuyez sur MODE.


Tournez le DIAL pour sélectionner GRILL.
L'indication suivante s'affiche : "☐"
L'indication suivante s'affiche à l'écran : "☐".
Appuyez sur DIAL pour confirmer le mode.

Tournez le DIAL jusqu'à ce que l'écran affiche "12:30".
Tournez le DIAL jusqu'à ce que l'écran affiche "12:30".

Appuyez sur START.
Pendant la cuisson, vous pouvez augmenter ou diminuer le temps de cuisson en tournant le DIAL.
Pendant la cuisson, vous pouvez augmenter ou diminuer le temps de cuisson en tournant le DIAL.
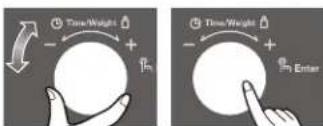
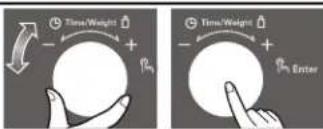
Dans l'exemple suivant, je vais vous montrer comment programmer votre four avec une puissance micro-ondes de 180 W (20 %) et le gril pour un temps de cuisson de 25 minutes.
L'exemple suivant montre comment régler votre four avec une puissance micro-ondes de 180 W (20 %) et le gril pour un temps de cuisson de 25 minutes.
Cuisson combinée gril

Votre four dispose d'une fonction de cuisson combinée qui vous permet de cuire les aliments avec le chauffage et les micro-ondes en même temps ou en alternance. Cela signifie généralement que la cuisson prend moins de temps. Cette fonction est fournie sur votre four afin que vous puissiez, grâce à son utilisation, cuire les aliments avec le chauffage et les micro-ondes en même temps ou en alternance. En général, cela signifie que le temps de cuisson est réduit.
Vous pouvez régler trois niveaux de puissance micro-ondes (20 %, 40 % et 60 %) en mode combiné.
Appuyez sur STOP/CLEAR.
Appuyez sur MODE.
Tournez le DIAL pour sélectionner GRILL COMBI jusqu'à ce que l'affichage indique "540W". Les indications suivantes sont affichées : "≈", "\~".
Tournez le DIAL pour GRILL COMBI jusqu'à ce que l'affichage indique "540W".
Les indications suivantes sont affichées : " ≡", " △". Appuyez sur DIAL pour confirmer le mode.
Tournez le DIAL jusqu'à ce que l'affichage indique "180W".
Appuyez sur DIAL pour confirmer la puissance.
Tournez le DIAL jusqu'à ce que l'affichage indique "25:00".
Tournez le DIAL jusqu'à ce que l'affichage indique "25:00".
Appuyez sur START.
Pendant la cuisson, vous pouvez augmenter ou diminuer le temps de cuisson en tournant le DIAL. Soyez prudent lorsque vous retirez vos aliments car le récipient sera chaud !




EZ Clean
Dans l'exemple suivant, je vais vous montrer comment éliminer les odeurs dans le four.

Le four dispose d'une fonction spéciale pour éliminer les odeurs dans le four en une seule touche.
Élimine les odeurs du four en une seule touche. Le four dispose d'une fonction spéciale.
Vous pouvez utiliser la fonction EZ Clean sans aliments dans le four.
Vous pouvez utiliser la fonction EZ Clean sans aliments dans le four.
Retirez la plaque et les autres accessoires pendant l'opération EZ-Cleaning, puis remettez-les en place après avoir terminé l'opération EZ-Cleaning.
Veuillez retirer la plaque et les autres accessoires pendant l'opération EZ-Cleaning, puis les remettre en place une fois l'opération terminée.
Appuyez sur STOP/CLEAR.

Appuyez sur MODE.

Tournez le DIAL pour sélectionner EZ CLEAN jusqu'à ce que l'affichage indique "220°C". Les indications suivantes s'affichent : "☐", "☐".
Tournez le DIAL pour sélectionner EZ CLEAN jusqu'à ce que l'affichage indique "250°C".
Les indications suivantes s'affichent : "☒", "☒".

Appuyez sur DIAL pour confirmer le mode.
Appuyez sur START.
(Le temps décompte automatiquement)
(Le temps décompte automatiquement)


Le four a une plage de température de 100°C à 250°C. (180°C est automatiquement disponible lorsque le mode air chaud rapide est sélectionné.)
La température de cuisson dans le four peut être réglée de 100°C à 250°C. Lorsque le mode Speed Hot Air est sélectionné, 180°C est automatiquement disponible.
Appuyez sur STOP/CLEAR.


Appuyez sur MODE.


Tournez le DIAL pour sélectionner SPEED HOT AIR.
Les indications suivantes sont affichées : "\~\~", "♣".
Les indications suivantes sont affichées sur l'écran : "\~\~", "♣".
Appuyez sur le DIAL pour confirmer le mode.

Tournez le DIAL jusqu'à ce que l'écran affiche "230°C".
Tournez le DIAL jusqu'à ce que l'écran affiche "230°C".
Appuyez sur le DIAL pour confirmer la température.
Appuyez sur le DIAL pour confirmer la température.

Appuyez sur START.
Le préchauffage démarre et "Pr-H" s'affiche.
Le préchauffage démarre et "Pr-H" s'affiche.

Speed Hot Air Cooking
Dans l'exemple suivant, je vais vous montrer comment programmer votre four avec la cuisson à air chaud rapide à 230 °C pendant 20 minutes.
L'exemple suivant montre comment régler le four sur la cuisson à air chaud rapide à 230 °C pendant 20 minutes.

Le four a une plage de température de 100 °C à 250 °C. (180 °C est automatiquement disponible lorsque le mode air chaud rapide est sélectionné.)
Le four a une plage de température de 100 °C à 250 °C. Lorsque le mode air chaud rapide est sélectionné, 180 °C est automatiquement disponible.
Cette fonction vous permet de combiner la convection avec le gril.
Cela réduira votre temps de cuisson.
Appuyez sur STOP/CLEAR.
Appuyez sur MODE.
Tournez le DIAL pour sélectionner SPEED HOT AIR.
Les indications suivantes s'affichent : "☐", "☐".
Les indications suivantes s'affichent à l'écran : "☐", "☐".
Appuyez sur DIAL pour confirmer le mode.
Tournez le DIAL jusqu'à ce que l'écran affiche "230°C".
Appuyez sur DIAL pour confirmer la température.
Tournez le DIAL jusqu'à ce que l'écran affiche "20:00".
Appuyez sur START. / Appuyez sur START.
Pendant la cuisson, vous pouvez augmenter ou diminuer le temps de cuisson en tournant la MOLETTE.


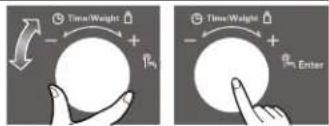
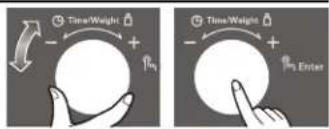


Dans l'exemple suivant, je vais vous montrer comment programmer votre four avec une puissance micro-ondes de 540 W (60 %) et une température de convection de 200 °C pour un temps de cuisson de 25 minutes.
L'exemple ci-dessous montre comment régler le four avec une puissance micro-ondes de 540 W et une température de convection de 200 °C pour un temps de cuisson de 20 minutes.
Cuisson combinée convection

Le four a une plage de température de 100 °C à 250 °C. (180 °C est automatiquement disponible lorsque le mode combiné convection est sélectionné.)
Le four a une plage de température de 100 °C à 250 °C. Lorsque le mode combiné convection est sélectionné, 180 °C est automatiquement disponible.
Vous pouvez régler trois niveaux de puissance micro-ondes (20 %, 40 % et 60 %) en mode combiné.
Appuyez sur STOP/CLEAR. / Appuyez sur STOP/CLEAR.
Appuyez sur MODE. / Appuyez sur MODE.
Tournez la MOLETTE pour sélectionner CONV. COMBI jusqu'à ce que l'affichage indique "540W". / Tournez la MOLETTE pour sélectionner CONV. COMBI jusqu'à ce que l'affichage indique "540W". Les indications suivantes sont affichées : "", "".
Les indications suivantes sont affichées sur l'écran : "", "". Appuyez sur la MOLETTE pour confirmer le mode. / Appuyez sur la MOLETTE pour confirmer le mode.
Tournez la MOLETTE pour sélectionner la puissance "540W". (540W est automatiquement disponible lorsque le mode CONV. COMBI est sélectionné.) Appuyez sur la MOLETTE pour confirmer le mode.
Tournez la MOLETTE jusqu'à ce que l'affichage indique "200°C". Appuyez sur la MOLETTE pour confirmer la température.
Tournez la MOLETTE jusqu'à ce que l'affichage indique "25:00".
Appuyez sur START. / Appuyez sur START. Pendant la cuisson, vous pouvez augmenter ou diminuer le temps de cuisson en tournant le DIAL. Pendant la cuisson, tournez le DIAL pour augmenter ou diminuer le temps de cuisson. Soyez prudent en retirant vos aliments car le récipient sera chaud ! Soyez prudent en retirant vos aliments car le récipient sera chaud !






Préchauffage par convection
Dans l'exemple suivant, je vais vous montrer comment préchauffer le four à une température de 230°C. Dans l'exemple suivant, je vais vous montrer comment préchauffer le four à une température de 230°C.

Le four à convection a une plage de température de 40°C et de 100°C à 250°C (180°C est automatiquement disponible lorsque le mode convection est sélectionné). Le four à convection a une plage de température de 40°C et de 100°C à 250°C (180°C est automatiquement disponible lorsque le mode convection est sélectionné).
* Le four a une fonction de fermentation à une température de 40°C. Lorsque vous utilisez cette fonction, si la température du four dépasse 70°C, l'écran affiche le code d'erreur "F-14". Vous pouvez attendre que le four refroidisse. Le four a une fonction de fermentation à une température de 40°C. Lorsque vous utilisez cette fonction, si la température du four dépasse 70°C, l'écran affiche le code d'erreur "F-14". Vous pouvez attendre que le four refroidisse.
Votre four mettra quelques minutes pour atteindre la température sélectionnée.
Votre four mettra quelques minutes pour atteindre la température sélectionnée.
Une fois qu'il a atteint la bonne température, votre four émettra un BIP pour vous faire savoir qu'il a atteint la bonne température. Placez ensuite vos aliments dans le four, puis dites à votre four de commencer la cuisson.
Une fois qu'il a atteint la bonne température, votre four émettra un BIP pour vous faire savoir qu'il a atteint la bonne température. Placez ensuite vos aliments dans le four, puis appuyez sur START pour commencer la cuisson.
Appuyez sur STOP/CLEAR. / Appuyez sur STOP/CLEAR. Appuyez sur MODE. / Appuyez sur MODE.
Tournez le DIAL pour sélectionner CONV. / Tournez le DIAL pour sélectionner CONV. L'indication suivante s'affiche : " ✉" L'indication suivante s'affiche : " ✉"
Appuyez sur DIAL pour confirmer le mode. / Appuyez sur DIAL pour confirmer le mode.
Tournez le DIAL jusqu'à ce que l'écran affiche "230°C". Tournez le DIAL jusqu'à ce que l'écran affiche "230°C".
Appuyez sur DIAL pour confirmer la température. Appuyez sur DIAL pour confirmer la température.
Appuyez sur START. / Appuyez sur START. Le préchauffage démarrera avec l'affichage de "Pr-H". Le préchauffage démarrera avec l'affichage de "Pr-H".

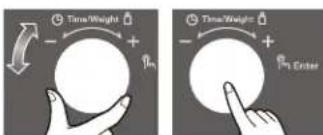

Dans l'exemple suivant, je vais vous montrer comment préchauffer le four d'abord, puis cuire des aliments à une température de 230°C pendant 50 minutes.
Dans l'exemple suivant, je vais vous montrer comment préchauffer le four d'abord, puis cuire des aliments à une température de 230°C pendant 50 minutes.
Cuisson par convection

Le four à convection a une plage de température de 40°C à 250°C (180°C est automatiquement disponible lorsque le mode convection est sélectionné).
Le four a une plage de température de 150°C à 250°C. Lorsque le mode convection est sélectionné, une température de 180°C est automatiquement disponible.
Si vous ne réglez pas de température, votre four sélectionnera automatiquement 180°C. La température de cuisson peut être modifiée en tournant le bouton.
Si vous ne réglez pas de température, votre four sélectionnera automatiquement 180°C. La température de cuisson peut être modifiée en tournant le bouton.
La grille doit être utilisée pendant la cuisson par convection.
La grille doit être utilisée pendant la cuisson par convection.

Appuyez sur STOP/CLEAR.
Appuyez sur MODE.
Tournez le bouton pour sélectionner CONV. L'affichage suivant est indiqué : "✉"
L'affichage suivant est indiqué : "✝"
Appuyez sur le bouton pour confirmer le mode.
Tournez le bouton jusqu'à ce que l'affichage indique "230°C".
Appuyez sur DIAL pour confirmer la température.
Tournez DIAL jusqu'à ce que l'affichage indique "50:00".
Appuyez sur START.
Pendant la cuisson, vous pouvez augmenter ou diminuer le temps de cuisson en tournant DIAL.



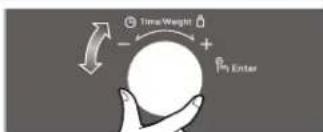

Diverses fonctions de cuisson
Veuillez suivre les étapes ci-dessous pour utiliser les fonctions de cuisson (Nutri Care, Indian Rasoi, 24 Hours, Just 4 U, Utility Corner et Fast) de votre micro-ondes.
Veuillez suivre les étapes ci-dessous pour utiliser les différentes fonctions de cuisson (Nutri Care, Indian Rasoi, 24 Hours, Just 4 U, Utility Corner et Fast) de votre micro-ondes.
| COOK MODE | Nutri Care Indian Rasoi | 24 Hours Just 4 U | Utility Corner | Body Care | ||
| STEP-1 | Press Stop/Clear | Press Stop/Clear | Press Stop/Clear | Press Stop/Clear | Press Stop/Clear Press Stop/Clear | |
| STEP-2 | Press Nutri Care | Press Indian Rasoi | Press 24 Hrs | Press Just 4 U | Press Utility Corner Press Body Care | |
| STEP-3 | Turn DIAL to select any of St(1~12), HP(1~9), So(1~9), Co(1~8) food category. | Turn DIAL to select any of IC(1~23), tS(1~9), SC(1~9), CC(1~8) food category. | Turn DIAL to select any of bF(1~8), Sn(1~9), CF(1~7), bA(1~11) food category. | Turn DIAL to select any of bb(1~5), CA(1~6), SF(1~5) food category. | Turn DIAL to select any of UC (1~6), FE (1~4) food category. | Turn DIAL to select bC (1~3) category. |
| STEP-4 | Press Enter | Press Enter | Press Enter | Press Enter | Press Enter Press Enter | |
| STEP-5 | Turn Dial to set Weight | Turn Dial to set Weight | Turn Dial to set Weight | Turn Dial to set Weight | Turn Dial to set Weight Turn Dial to set Weight | |
| STEP-6 | Press Start | Press Start | Press Start | Press Start | Press Start Press Start |
| COOK MODE | Nutri Care Indian Rasoi | 24 Hrs Just 4 U | Utility Corner | Body Care | ||
| STEP-1 | Stop/Clear दबाएं | Stop/Clear दबाएं | Stop/Clear दबाएं | Stop/Clear दबाएं | Stop/Clear दबाएं Stop/Clear दबाएं | |
| STEP-2 | Nutri Care दबाएं | Indian Rasoi दबाएं | 24 Hrs दबाएं | Just 4 U दबाएं | Utility Corner दबाएं Body Care दबाएं | |
| STEP-3 | St(1~12), HP(1~9), So(1~9), Co(1~8) श्रेणी में से कोई भी व्यजन चुनने के लिए डायल घुमाएं। | IC(1~23), tS(1~9), SC(1~9), CC(1~8) श्रेणी में से कोई भी व्यजन चुनने के लिए डायल घुमाएं। | bF(1~8), Sn(1~9), CF(1~7), bA(1~11) श्रेणी में से कोई भी व्यजन चुनने के लिए डायल घुमाएं। | bb(1~5), CA(1~6), SF(1~5) श्रेणी में से कोई भी व्यजन चुनने के लिए डायल घुमाएं। | UC (1~6), FE (1~4) श्रेणी में से कोई भी व्यजन चुनने के लिए डायल घुमाएं। | bC (1~3) श्रेणी चुनने के लिए डायल घुमाएं। |
| STEP-4 | Enter दबाए | Enter दबाए | Enter दबाए | Enter दबाए | Enter दबाए | Enter दबाए |
| STEP-5 | वजन सैट करने के लिए डायल घुमाएं | वजन सैट करने के लिए डायल घुमाएं | वजन सैट करने के लिए डायल घुमाएं | वजन सैट करने के लिए डायल घुमाएं | वजन सैट क्रने के लिए डायल घुमाएं | वजन सैट क्रने के लिए डायल घुनाएं |
| STEP-6 | Start दबाएं | Start दबाएं | Start दबाएं | Start दबाएं | Start दबाएं | Start दबाएं |
Remarque :
Pendant la cuisson, vous pouvez prolonger le temps de cuisson à tout moment en tournant le bouton vers la gauche ou la droite. Il n'est pas nécessaire d'arrêter le processus de cuisson.
Pendant la cuisson, il suffit de tourner le bouton vers la gauche ou la droite pour modifier le temps. Il n'est pas nécessaire d'arrêter le processus de cuisson.
Nutri Care
- Cuisson à la vapeur (St)
- Health Plus (HP)
- Soupes (So)
- Continental (Co)
Steam Cook
| Menu Weight Limit Utensil Instructions | ||||||
| St1 | Keema Balls | 0.1~0.3kg | Microwave safe flat glass dish & Microwave safe idli steamer* | |||
| For | 0.1 kg | 0.2 kg | ||||
| Chicken Kheema | 75 gms | 125 gms | ||||
| Boiled & Mashed Potato | ||||||
| Ginger, Garlic Paste, Salt, Garam Masala, Hara Dhania Lemon Juice | As per your taste | |||||
| Besan | 1 tsp | 2 tsp | ||||
| Method: 1. Mix all the ingredients together. Make balls from it.Place the balls in greased MWS flat glass dish. Keep In Idli Steamer. Select Menu and weight and press start.. | ||||||
| St2 | Gajar ka Halwa | 0.3kg Microwave Safe Glass Bowl & Microwave safe idli steamer* | For | 0.3 kg | ||
| Grated Gajar | 300 gms | |||||
| Ghee | 2 tbsp | |||||
| Milk Powder | 4 tbsp | |||||
| Khoya | 5 tbsp | |||||
| Sugar | 4 tbsp | |||||
| Elaichi Powder and Dry Fruits | As per your taste | |||||
| Method: 1. In a MWS glass bowl take all the ingredients & mix well.2. Add some water to the MWS idli steamer.3. Keep the MWS glass bowl in the steamer & press start. | ||||||
| St3 | Shakarkandi | 0.2~0.5kg | Microwave safe Idli Steamer* & Microwave safe flat glass dish | |||
| Shakarkandi | 0.2 kg 0.3 kg 0.4 kg 0.5 kg | |||||
| Salt & Chat Masala As per your taste | ||||||
| Method: 1. In MWS idli steamer add water. Keep the peeled off shakarkandi in MWS flat glass dish & put in the idli steamer. Select menu & weight & press start.2. After steaming sprinkle some salt & chaat masala & serve | ||||||
* Fourni avec le kit de démarrage.
Steam Cook
| Menu Weight Limit Utensil Instructions | ||||||
| St4 | Methi Muthiya | 0.1~0.3kg | Microwave Safe Idli Steamer* | |||
| For | 0.1 kg | 0.2 kg | ||||
| Methi Leaves | 1/2 cup | 3/4 cup | ||||
| Atta | 1/4 cup | 1/2 cup | ||||
| Besan | 2 tbsp | 3 tbsp | ||||
| Suji | 1 tbsp | 1 1/2 tbsp | ||||
| Soda Bicarb | 1/4 tsp | 1/2 tsp | ||||
| Ginger garlic chilli paste, Dhaniya Powder, Haldi, Salt, Sugar | As per your taste | |||||
| Method: 1. Mix all the ingredients. Add some water and make a soft dough. Make small rolls from this mixture.Place rolls in Idli steamer. Select menu and weight.Press start. | ||||||
| St5 | Rajmah | 0.1~0.3kg MicrowaveSafe Glass Bowl & Microwave Safe Idli Steamer* | For | 0.1 kg | 0.2 kg | |
| Soaked Rajmah (overnight) | 100 gms | 200 gms | ||||
| Finely chopped onion | 3/4 cup | 1 cup | ||||
| Tomato Puree | 1/2 cup | 3/4 cup | ||||
| Oil | 1 tbsp | 1 tbsp | ||||
| Dhaniya, Joera Powder, Garama Masala, Kasuri Melhi, Sail, Rod Chill power | As per your taste | |||||
| Method: 1. In MWS glass bowl take all the ingredients. Add the water as well in the glass bowl. Mix well, add water to the steamer. Keep the MWS glass bowl in the steamer. Select menu & weight & press start. | ||||||
* Fourni avec le kit de démarrage.
Steam Cook
| Menu Weight Limit Utensil Instructions | ||||||
| St6 | Momos | 0.1~0.3kg | Microwave safe idli steamer* | For | 0.1 kg 0.2 kg 0.3 kg | |
| Maida | 100 g 200 g 300 g | |||||
| Salt | As per your taste | |||||
| Water | For making dough | |||||
| Baking powder | 1⁄4 tsp | 1⁄2 tsp | ||||
| For filling | ||||||
| Boiled mix veg (carrot, peas, capsicum, potato) | 1 cup | 11⁄2 cup | ||||
| Soya sauce, Chilli sauce | As per your taste | |||||
| Salt, pepper, garam masala | As per your taste | |||||
| Method:1.In a bowl take maida, add salt, baking powder and water, prepare a soft dough. Keep it for 15 minutes.2.Roll out the dough into thin chapattis and add the filling in the centre and wrap it like a bag. Prepare all the momos in the same way.3.In the idli steamer, add water, keep the momos on idli stand and cover.4.Select menu and weight, press start. Serve with schzewan sauce. | ||||||
| St7 | Steamed Veg | 0.1~0.3kg | Microwave safe glass bowl & Microwave Safe Idli Steamer* | For | 0.1 kg | 0.2 kg |
| Chopped vegetables ( Capsicum, carrots, peas, beans) | 100 g | 200 g | ||||
| Method:1.In the idli steamer, add water. Put the chopped vegetables in the MWS glass bowl & cover.2.Select menu and weight and press start. Sprinkle salt and pepper as per taste and serve. | ||||||
| St8 | Sweet Corn | 0.1~0.3kg | Microwave safe glass bowl & Microwave Safe Idli Steamer* | For | 0.1 kg | 0.2 kg |
| Sweat corn | 100 g | 200 g | ||||
| Salt, Red chilli powder, Chaat masala, Lemon juice | As per taste | |||||
| Method:1.In the idli steamer, add water. Put the chopped sweet comsin the MWS glass bowl & cover.2.Select menu and weight and press start.Sprinkle salt, red chilli powder, chaat masala and lemon juice and serve. | ||||||
* Fourni avec le kit de démarrage.
Steam Cook
| Menu Weight Limit Utensil Instructions | ||||||
| S19 Micravave Ka Saag | 0.1~0.3kg | safe idli steamer* & Microwave safe glass bowl & Microwave safe bowl | For | 0.1 kg | 0.2 kg | 0.3 kg |
| Sarson (washed & separated leaves) | 75 g | 150 g | 200 g | |||
| Palak (washed & separated leaves) | 20 g | 50 g | 100 g | |||
| Oil | 1 tbsp | 11/2 tbsp | 2 tbsp | |||
| Onion garlic paste | 1 tsp | 11/2 tsp | 2 tsp | |||
| Tomato (chopped) | 1/2 cup | 1 cup | 11/2 cup | |||
| Salt, Red chilli powder | As per your taste | |||||
| Water | As required | |||||
| Method:1.In the idli steamer, add water.Place sarson and palak in the MWS glass bowl & cover.Select menu and weight and press start.2.When beeps, remove the steamer, grind it with water3.In a MWS bowl add oil, onion garlic paste, tomato, salt and red chilli powder and press start. Mix well.4.When beeps, add grind sarson and palak, water(as required) to the MWS bowl. Mix well and press start.Serve it with makki ki roti. | ||||||
| S110 | Matar Mushroom | 0.1~0.3kg | Microwave safe idli steamer* & Microwave safe glass bowl & Microwave safe bowl | For | 0.1 kg | 0.2 kg |
| Matar | 50 g | 100 g | ||||
| Mushroom (chopped) | 50 g | 100 g | ||||
| Oil | 1 tbsp | 11/2 tbsp | ||||
| Onion (chopped) | 1/2 cup | 1 cup | ||||
| Tomato puree | 2 tbsp | 21/2 tbsp | ||||
| Salt, Red chilli powder, Garam masala | As per taste | |||||
| Method:1.In the idli steamer, add water. Put the matar and choppedmushroom in the MWS glass bowl and cover. Select menuand weight and press start.2.When beeps, remove the steamer.3.In a MWS bowl add oil, onion, tomato puree, salt, red chillipowder, garam masala and press start. Mix well.4.When beeps, add steamed matar and mushroom to theMWS bowl and add little water, press start. Mix well andadd chopped coriander leaves and serve with roti. | ||||||
* Fourni avec le kit de démarrage.
Steam Cook
| Menu Weight Limit Utensil Instructions | |||||||
| St11 | Kothimbir Vadi | 0.1~0.3kg | Microwave safe idli steamer* | For | 0.1 kg | 0.2 kg | 0.3 kg |
| Kothimbir (Hara Dhanlya) | 100 g | 200 g | 300 g | ||||
| Besan | 1/2 cup | 1 cup | 11/2 cup | ||||
| Suji | 2 tbsp | 3 tbsp | 4 tbsp | ||||
| Red chilli powder, salt, garam masala | As per taste | ||||||
| Baking powder | 1/2 tsp | 1/2 tsp | 1 tsp | ||||
| Method:1. Mix all the ingredients together & make vadis out of it.2. In idli steamer, add water. Place the vadis in the idli stand & cover. Select menu & weight & press start.3. Allow to stand for 3 minutes. | |||||||
| St12 | Steamed Peas | 0.1~0.3kg | Microwave safe idli steamer* | For | 0.2 kg 0.3 kg0.1 kg | ||
| Shelled peas | 100 g | 200 g | 300 g | ||||
| Salt & Chaat masala | As per taste | ||||||
| Butter | 1/2 tbsp | 1 tbsp | 11/2 tbsp | ||||
| Method:1. In idli steamer, add water. Put the peas in the MWS glass bowl & cover. Select menu & weight & press start.2. When beeps, remove & add butter, salt & chaat masala & serve. | |||||||
* Fourni avec le kit de démarrage.
Health Plus
Health Plus
| Menu Weight Limit Utensil Instructions | ||||||
| HP1 | Kala Chana | 0.1~0.3kg Microwave safe bowl | Kala Chana (soaked overnight) | 0.1 kg | 0.2 kg | 0.3 kg |
| Water | 200 ml | 400 ml | 600 ml | |||
| Oil | 1 tbsp | 2 tbsp | 3 tbsp | |||
| Onion Chopped | 1/2 cup | 1 cup | 1 1/2 cup | |||
| Salt, Chat Masala, Red Chilli Powder, Hara Dhania | As per your taste | |||||
| Method: 1. Soak chana overnight, in a MWS bowl put soaked chanas with water & cover. Select menu and weight and press start.2. When beeps, remove & drain the water.3. In a MWS bowl add oil, chopped onion,salt, chaat masala, red chilli powder and hara dhania and press start. Mix well. Press start.4. When beeps, add chanas to the bowl along with little hot water and press start. Mix well. Give standing time of 3 minutes. Serve hot. | ||||||
| BP2 | Karela Subzi | 0.3kg | Microwave safe bowl | For | 0.3 kg | |
| Chopped karela | 300 g | |||||
| Oil | 2 tbsp | |||||
| Water | As required | |||||
| Chopped onion | 1/2 cup | |||||
| Rai, jeera, hing & haldi | For tempering | |||||
| Salt, sugar, garam masala, dhania powder, jeera powder | As per taste | |||||
| Grated coconut | For garnishing | |||||
| Method: 1. In a MWS bowl add oil, rai, jeera, hing, haldi, chopped onion. Select menu and press start.2. When beeps, add the chopped karela & cover. Press start.3. When beeps, add some water, salt, sugar, garam masala, dhania powder, jeera powder and cover. Press start.Allow it to stand for 5 mins. Garnish with grated coconut and serve. | ||||||
Health Plus
Health Plus
| Menu Weight Limit Utensil Instructions | ||||||
| HP-3 | Moong Dal | 0.2 kg | Microwave safe bowl | Moong Dal soaked in water (for 1 hour) | 0.2 kg | |
| Water | 400 ml | |||||
| Oil | 2 tbsp | |||||
| Jeera | 1 tsp | |||||
| Hari Mirch | 2-3 nos. | |||||
| Curry Leaves | 5-6 nos. | |||||
| Salt, Dhania-Jeera Powder, Haldi, Hing, Kasuri Methi, Lemon Juice, Hara Dhania | As per your taste | |||||
| Method: 1. Take 200 gms dal in Microwave Safe bowl, add Water, Haldi & Hing.2. Select menu press start to cook.3. When beeps, take another bowl add oil, jeera, hari mirch, curry leaves & press start.4. When beeps, add dal, salt, dhania jeera powder, hara dhania, kasuri methi (optional), water (if required) & lemon juice and press start to cook. | Vitibi: 1. பாइक्रोवेव रोफ बाउल में 200 श्राम दाल लें और पानी, हल्दी तथा हौंग झालें।2. नीनू दुणकर पकाने के लिए स्टार्ट दबाएं।3. 'बीप' सुनाई देने पर दूरागा बाउल तें और तेल, जीरा, हरी मिर्य, करी पता झाले तथा स्टार्ट दबाएं।4. 'बीप' सुनाई देने पर दाल, नमक, धनिया जीरा पाउडर, हरा धनिया, कन्सूरी मेथी (वैकल्पिक), पानी (यदि आवश्यक हो) तथा नौंबू रस झालें और पकाने के लिए स्टार्ट दबाएं। | |||||
| HP4 | Lemon Chicken | 0.1~0.3 kg Microwave safe bowl | For | 0.1 kg | 0.2 kg | |
| Boneless Chicken | 100 g | 200 g | ||||
| Soya sauce | 1/2 tbsp | 1 tbsp | ||||
| Com flour | 1/2 tbsp | 1 tbsp | ||||
| Water | 1/2 cup | 1/2 cup | ||||
| Salt, pepper & sugar | As per taste | |||||
| Garlic paste | 1 tbsp | As per taste | ||||
| Lemon juice | 2 tsp | 3 tsp | ||||
| Oil | 1/2 tbsp | 1 tbsp | ||||
| Method: 1. Mix boneless chicken, soysauce, salt & pepper, garlic paste & lemon juice in a bowl. Refrigerate for 1/2 hour.2. In a MWS bowl add oil, marinated chicken pieces, sugar, com flour mixed with water. Cover. Select menu & weight & press start.3. When beeps, mix well. Cover & press start.Allow to stand for 3 minutes. | Vitibi: 1. बोनतैर चिकन, शोषा रौरा, नमक, मिर्य, तहरान पेट तथा नौंबू रस एक बाउल में लेकर अखी तरह मिला लें।2. माइक्रोवेव रेफ बाउल में तैल, नसाला लगे हुए चिकन के टुकडे, चौनी, पानी के राथ गौगा हुआ मक्ता का आदा झाले।3. धीन' लुनाई देने पर अष्टी तरह मिलाए और दककर स्टार्ट दबाएं।3 निनट तक रखा खृने दें। | |||||
Health Plus
Health Flush
| Menu Weight Limit Utensil Instructions | ||||||
| HP5 | Machi Kali Mirch | 0.1~0.3kg | Microwave safe bowl | For | 0.1kg | 0.2kg |
| Pomfret (fish category) | 100g | 200g | ||||
| Salt, Lemon juice, Kli mich powder | To marinate as per taste | |||||
| Oil, chopped onion, chopped tomato, chopped garlic | As required | |||||
| Method: 1. Take Pomfret slices as per weight either (0.1kg/0.2kg/0.3kg) and marinate with salt, lemon juice, kali mirch as per taste for 1 hour.2. In a MWS bowl add oil, chopped onion, chopped tomato, chopped garlic. Mix well.Select menu & weight & press start.3. When beeps, mix well, add marinated fish and salt to taste, some water & cover. Press start. Allow to stand for 5 mins. | ||||||
| Ghiya Raila | 0.1~0.3kgHP6 | Microwave safe bowl | Grated Ghiya | 0.1kg | 0.2kg | |
| Water | 50ml | 75ml | ||||
| Salt | To taste | |||||
| Curd | 2tbsp | 3tbsp | ||||
| Salt, Sugar, Mustard Powder & Green Chilli | As per your taste | |||||
| Method: 1. In a Microwave Safe bowl add grated ghiya, water and salt. Select menu and press start to cook.2. Strain ghiya and take it in Microwave Safe bowl and add curd, mustard powder, Salt, Sugar, Green Chilli to taste. Served Chilled. | ||||||
Health Plus
Health Plus
| Menu Weight Limit Utensil Instructions | ||||||
| HP7 | Nutrinuggets | 0.1~0.3kg | Microwave safe bowl | For | 0.1kg | 0.2kg |
| Soaked and boiled nutrinuggets | 50g | 100g | ||||
| Potato | 50g | 100g | ||||
| Oil | 1tbsp | 11⁄2tbsp | ||||
| Jeera | As per taste | |||||
| Chopped onion | 1/2cup | 1cup | ||||
| Tomato puree | 2tbsp | 3tbsp | ||||
| Salt, garam masala, red chilli powder, haldi, dhania powder | As per taste | |||||
| Water | 2cup | 21⁄2cup | ||||
| Chopped coniander leaves | For garnishing | |||||
| Method: 1. In a MWS bowl add oil, jeera, onion. Select menu and weight and press start. Mix well.2. When beeps, add tomato puree, nutrinuggets, potato, salt, red chilli powder, haldi, dhania powder and add1⁄2 the amount of water mentioned per weigh(For eg. For 100g, add 1 cup of water) and press start. Mix well.3. When beeps, add the remaining amount of water and press start. Mix well. Allow to stand for 3 minutes.Gamish with coriander leaves & serve hot with roti. | ||||||
| HP8 | Curd Brinjal | 0.1~0.3kg | Microwave safe bowl | For | 0.1kg | 0.2kg |
| Brinjal | 100g | 200g | ||||
| Curd | 100g | 200g | ||||
| Oil | 1tbsp | 2tbsp | ||||
| Curry leaves | A few sprigs | |||||
| Mustard & cumin seeds | 1tsp | 2tsp | ||||
| Salt | As per taste | |||||
| Chopped giner | 1tsp | 2tsp | ||||
| Method: 1. In a MWS bowl add oil & brinjal. Cover. Select menu & weight & press start.2. When beeps, remove & in another MWS bowl add oil, mustard & cumin seeds, curry leaves & chopped ginger.Press start.3. When beeps, add brinjal, curd & salt. Mix well & press start. | ||||||
Health Plus
Health Plus
| Menu Weight Limit Utensil Instructions | ||||||
| HP9 | Bathua Raita | 0.1~0.3kg | Microwave safe bowl | For | 0.1 kg | 0.2 kg |
| Chopped bathua | 25 g | 25 g | ||||
| Water | 50 ml | 75 ml | ||||
| Beaten curd | 2 tbsp | 3 tbsp | ||||
| Salt, roasted cumin seed powder | As per taste | |||||
| Method: 1. In a MWS bowl add chopped bathua leaves. Cover. Select menu & weight & press start.2. When beeps, remove.3. In a bowl add water, beaten curd, bathua leaves & mix well. Add salt & roasted cumin seed powder.4. Mix well & refrigerate it for some time & serve. | ||||||
Soup
| Menu Weight Limit Utensil Instructions | ||||
| So1 | Sweet Corn Soup | 0.3 kg | Microwave safe glass bowl | For 0.3 kgSweet Corn 200 gWater 2 cupsOil 1 tbspCorn flour 2 tbspSalt, sugar,kali mirch, chopped onion and green chilli As per tasteMethod: 1. Grind sweet corn with some water. Put in MWS glass bowl along with 2 cups water. Select menu & press start. Strain the stock.2. When beeps, remove in another MWS glass bowl add oil, green chilli and onion. Press start.3. When beeps, add the stock in it. Mix corn flour with 1⁄2 cup water and add to the stock.Add 2 cups water as your requirement, salt, sugar, kali mirch and press start. Serve hot. |
| So2 | Mushroom Soup | 0.2 kg | Microwave safe glass bowl | For 0.2 kgMushrooms 100 gPotato 1 No.Cabbage (chopped) 50 gOnion (chopped) 1 smallTomato sauce 2 tbspCorn flour 2 tbspSalt, sugar, pepper (black) As per tasteOil 2 tbspWater 1 cupMethod: 1. In MWS glass bowl put potato in small pieces, chopped cabbage and onion with 1 cup of water. Select menu and press start.2. When beeps, take the bowl out & grind the stock. After grinding the stock, strain it and add water (if required).3. In another bowl add oil, chopped mushroom. Add strained stock. Mix corn flour with 1⁄2 cup water & add to the stock.Add salt, black pepper, sugar and tomato sauce and press start. Serve hot garnish with grated cheese. |
| So3 | Tomato Soup | 0.2 kg Microwave SafeGlass Bowl | For | 0.2 kg |
| Chopped Tomato | 100 gms | |||
| Chopped Carrot | 25 gms | |||
| Chopped Onion | 1 small | |||
| Chopped Ginger | 1 tsp | |||
| Chopped Garlic | 1 tsp | |||
| Salt, Sugar, Pepper | As per your taste | |||
| Comflour | 2 tbsp | |||
| Water | 1 cup | |||
| Oil / Butter | 2 tbsp | |||
| Method: From Stock (Boiled Vegetables)1. In MWS glass bowl add chopped tomato, chopped onion, ginger, garlic and carrot with 1 cup of water. After that put the MWS bowl in Microwave. Select the menu and then press start.2. When, beep, grind and strain the whole and add water as per your requirement.3. In another MWS glass bowl add oil/butter and stock, add sugar, salt, black pepper as per your taste and cornflour paste which is made up by mixing the half cup of cold water and add the grinded stock & press start.4. Serve hot and garnish with bread croulons, coriander (groen dhania) and fresh cream. | Vitibi: स्टॉंक (उवली हुई साजियों) से1. माइक्रोवें रोफ ल्तारा बाउल में करे हुए टगाटर, पाज, ऊदरक, लहसुन और गाजर दो कप पानी के साथ डालें। फिर उस बाउल को ओवन में रखकर मीनू और वजन गिर्धारित करें और स्टाट दबाए।2. बीप सुनाई देने पर पूरे को पीसकर निचोड़ लें और अपनी आवश्ककता के अनुसार पानी निला लें।3. दूलरे माइक्रोवें सेफ बाउल में तेल/मक्ष्न और स्टॉंक डालें, चीनी, नाफ्क, स्वादानुसार काली गिर्ब और कॉर्नफ्लोर फेस्ट जो आष्य कप तंडा पानी डालकर बनाई जाती है और पिसे दुए स्टॉंक (उबली हुई तानग्रो) को जातकर स्टाट दबाए।4. गर्म-गर्म गरोरों और ब्रेंड के टुक्ली, हरे धनिया तथा ताजा क्रीन से सजाए। | |||
Soup
| Menu Weight Limit Utensil Instructions | |||
| So4 | Chicken Soup | 0.3 kg Microwave SafeGlass Bowl | For 0.3 kgBoneless Chicken 300 gmsGinger Paste 1 tspGarlic Paste 1 tspSalt & Pepper Powder As per your tasteComflour Paste 2 tbsp + 1/2 cup of waterOil 2 tbspWater 2 cupsMethod: 1. In Microwave safe glass bowl put water & add chicken pieces.Select menu & press start.2. When beeps, remove.3. In another microwave safe glass bowl add oil, ginger-garlic paste, chicken stock, salt, pepper, cornflour paste, green chillies & 1 cup water. Press start. विधि: 1. माइक्रोवेव सेक ग्लास बाउल में पानी लेकर चिकन के टुकड़े ढालें।मीनू चुनकर त्टार्ट दबाएं।2. बीप शुनाई देने पर बाहर निकाल लें।3. एक दूसरे माइक्रोवेव सेक ग्लास बाउल में तेल, अपरक-लाहसून पेस्ट,चिकन स्टोंक, नमक, लाल निर्च, मक्ली के आर्ट की पेस्ट, हरी मिर्च और एक कण पानी झालकर रटार्ट दबाएं। |
| So5 | Chicken Tortilla Soup | 0.3 kg | Microwave safe glass bowlFor 0.2 kgChicken pieces (boneless) 200 gGinger garlic paste 1 tspWater 2 cupsSalt, pepper powder, green chillies As per tasteOil 2 tbspTortilla pieces 10-15 nos.Method: 1. In a MWS bowl put water and chicken pieces. Cover and keep it in Microwave. Select menu and press start to cook.2. When it gives a beep, remove.3. In another bowl add oil and ginger garlic paste & press start.4. When it gives a beep, add chicken stock, salt, pepper powder, green chilli. Press start.5. Serve with tortilla pieces. विधि: 1. माइक्रोवेव रोफ ग्लास बाउल में पानी और चिकन के टुकड़े ढालें और डककर ओवन में रख दें। मीनू शुनकर पकने के लिए स्टार्ट दबाएं।2. बीप सुनाई देने पर बाहर निकाल लें।3. दूसरे बाउल में तेल और अपरक लह्युन पेस्ट झालकर रटार्ट दबाएं।4. बीप आने पर जिकन के टुकड़े, नमक, मिर्च पाउडर, हरी मिर्च और एक कण पानी झालकर रटार्ट दबाएं।5. टौरटिला के टुकड़ो के राथ परोरों। |

| Menu Weight Limit Utensil Instructions | ||||
| So6 | Wonton Soup | 0.3 kg | Microwave safe glass bowl | |
| For 0.3 kg | ||||
| Chopped cabbage, carrot, capsicum, french beans 100 g each | ||||
| Ginger paste 1 tsp | ||||
| Garlic paste 1 tsp | ||||
| Spinach in pieces 10 leaves | ||||
| Oil 2 tbsp | ||||
| Salt, sugar, pepper powder As per taste | ||||
| Water 2 cups | ||||
| Ready wonton 6-7 pieces | ||||
| Method: 1. In MWS glass bowl add oil and vegetables, ginger-garlic paste. Select with & press start.2. When beeps, add salt, pepper, sugar & water as per your requirement and put in Microwave and press start.3. When beeps, mix well & press start.Add wonton & serve.How to make Wonton:Maida -1 cup, Salt - 1 pinch, Oil - 1 tspMethod: Mix all the ingredients in the bowl and make dough with too warm water. After that cover the bowl and leave the mixture for 10-15 minutes.For Stuffing:Cabbage, carrot, capsicum which is cut in long piecesMethod: Mix all the ingredients for stuffing. Make a small puree of wonton and put the small quantity of stuffing in between them and then cover the puree and press it. | ||||
Soup
| Menu Weight Limit Utensil Instructions | ||||
| So7 | Chicken Shorba | 0.3 kg | Microwave safe glass bowl | For 0.3 kgBoneless chicken 300 gOil 1/2 tbspChopped garlic 1 tspSalt & pepper powder As per tasteMaida 2 tbspWater 2 cupsFresh cream For garnishingMethod: 1. In a MWS bowl add chicken pieces, chopped garlic and water. Select menu and press start. 2. When beeps, remove & strain stock. In another MWS glass bowl add oil, cumin seeds and malda and press start. 3. When beeps, add the chicken stock, salt, pepper and press start. Gamish with fresh cream and serve hot. विति: 1. माइकोपेय सेफ बालत में बिकन के टूकडे, कटा हुआ लहसुन और पानी झाले। मीनू चुनकर स्टाट दवाए।2. बीप सुगई देने पर बाहर निकालकर स्टांक को निचोड ले। दूरारे माइकोपेय सेफ र्सास बाउल में तेल, जीरा और मैदा डालकर स्टार्ट दवाए।3. बीप सुगई देने पर शिकन स्टांक, नानक, गिर्च डाले और र्टार्ट दवाए। ताजा क्रीम से सजाए और गरम-गरम परोसे। |
| So8 | Tamatar Shorba | 0.3 kg | Microwave safe glass bowl | For 0.3 kgChopped tomato 300 gOil 1/2 tbspGinger garlic paste 1 tbspJeera, bay leaf, salt, garam masala, sugar As per tasteWater 2 cupsCoriander leaves For garnishingMethod: 1. In a MWS glass bowl add tomatoes cut into quarters with some water, select menu and press start. 2. When beeps, grind and strain the whole stock and add water as your requirement. 3. In another MWS glass bowl add 1/2 tbsp oil, ginger garlic paste, jeera, bay leaf and press start. Mix well. 4. When beeps, add the strained stock, season with salt, garam masala and press start. Add sugar if very sour. Garnish with coriander leaves and serve hot. विति: 1. माइकोपेय तोफ र्लाण बालत में थोड़े पानी के राथ चार-चार टुकडों में कटा हुआ टमाटर डाले और स्टार्ट दवाए।2. ब्रीप सुगई देने पर पीलकर लारे स्टांक को निचोड़ ले और आवश्यकतापुतार पानी झाले।3. एक अन्य माइकोपेय सेफ न्लास बापल में आषा वनवा तेल, ऊदरक लहसुन पेट्ट, जीरा, बेल लीफ डालकर स्टार्ट दवाए। अख्ची तरह मिलाएं।4. ब्रीप सुगई देने पर निचोड़ा हुआ र्टांक, नानक और गरम मराला डालकर स्टार्ट दवाए। यादि छढ़ा हो तो वौभी झाले। बनिये की पतिर्मों ते स्णाकर गरम-गरम परोसे। |

| Menu Weight Limit Utensil Instructions | ||||
| So9 | Rasam | 0.3 kg | Microwave safe bowl | For 0.3 kgTomato 300 gTamarind pulp 50 gSalt & Jaggery As per tasteGreen chillies 2 nos.Chopped onions 3 nos.Coriander & curry leaves For garnishingChopped garlic 2-3 flakesCoriander seeds, cumin seeds, cinnamon, hing As per tasteWater 2 cupsMethod:1.In a MWS bowl add chopped tomato & water. Select menu & press start.When beeps, remove & cool. Grind & strain it.In a MWS bowl add oil, coriander seeds, cumin seeds, cinnamon, hing, chopped garlic, green chillies, salt & jaggery & strained tomato stock. Press start.When beeps, add water (if required) & tamarind pulp. Press start.Gamish with coriander & curry leaves & serve. |
| Vitibi:1. माइक्रोवेव सैफ ब्रापल में कटे हुर टमाटर और पानी डालें। मीनू चुनकर स्टार्ट दबाएं।बीप आने पर बाहर निकालकर ठंडा कर लें। पीसकर निवोड़ लें।3. माइक्रोवेव सौफ बालल में तेल, धनिया, जीरा, दालचीगी, हीग, कता हुआ लाहगुन, हरी मिर्च, नमक और जैगरी तथा निचोड़ा हुआ स्टांक डालकर स्टार्ट दबाएं।बीप सुनाई देने पर आवश्यकतानुसार मानी और इमली का गृदा डालकर स्टार्ट दबाएं।धनिश और करी पता से सजाकर परोसें। | ||||
Continental
| Menu Weight Limit Utensil Instructions | ||||||
| Co1 | Pasta | 0.1~0.3kg | Microwave safe bowl | For | 0.1kg | 0.2kg |
| Penne pasta | 100g | 200g | ||||
| Water | 400ml | 800ml | ||||
| Oil | 1⁄2tbsp | 1tbsp | ||||
| Capsicum (cut in thin strips) | 1no. | 2nos. | ||||
| Tomato (cut in thin strips) | 1no. | 2nos. | ||||
| Mushrooms (sliced) | 1⁄2cup | 1cup | ||||
| Tomato puree | 1⁄2cup | 1cup | ||||
| Salt, pepper, oregano | As per taste | |||||
| Method: 1. In a MWS bowl add penne pasta, water & few drops of oil. Select menu & weight & press start.When beeps, remove. Wash the pasta under running water & separate them.In a MWS bowl add oil, capsicum, tomato, mushrooms, tomato puree, salt, pepper, oregano. Mix well. Cover & press start.When cooking ends, remove mix the boiled pasta with the sauce & serve. | Nivichi: 1. माइक्रोवेव सेफ बाउल में पन पारता, पानी और तेल की कुछ बूर्दे जाले। मीनू और बजना चुनकर स्टार्ट दबाएं।2. बीप सुनाई देने पर बाहर निकालें। पास्ता को बहते हुए पानी में धीएं और उन्हें अलग कर लें।3. एक अन्य माइक्रोवेव रोक बाउल में तेल, शिंगला गिर्च, टमाटर, महरूग, टोमेटो पूरी, नाफक, गिर्च तथ औरगेनो डाले। अख्छी तरह मिलाकर ढक दें और स्टार्ट दवा दें।4. पुक जाने के बाद बाहर निकालें, और उवले हुए पारता को रोसा के साथ मिलाएं और परोसे। | |||||
| Co2 | Veg Au Gratin | 0.3kg | Microwave safe flat glass dish & High rack | For | 0.3kg | |
| Mix vegetables (cut gajar, gobhi, french beans, sweet corns, peas etc.) | 300g | |||||
| Maida | 2tbsp | |||||
| Butter | 2tsp | |||||
| Milk | 1cup | |||||
| Hot water | 1/2cup | |||||
| Grated cheese | 4tbsp | |||||
| Salt, sugar, pepper | As per taste | |||||
| Method: 1. In a MWS flat glass dish take butter, vegetables & maida, mix well.Select menu and press start.When beeps, add milk, hot water, salt, sugar & pepper.Mix well & press start.When beeps, mix well and spread grated cheese on it, place the dish on high rack & press start. | Nivichi: 1. माइक्रोवेव सेफ ग्लात बाउल में मक्षण, सबियां और मैदा डालें, अख्छी तरह गिलाएं।2. मीनू चुनकर स्टार्ट दवाएं।3. बीप सुनाई देने पर दुष्ठ, गर्न पानी, नाफक, चीनी और गिर्च जालकर अख्छी तरह गिलाएं और स्टार्ट दवाएं।4. बीप सुनाई देने पर अच्छी तरह मिलाएं और उसके ऋमर कसा हुआ यीज फैलाएं, विश को हाई रैक के ऋपर रखें और स्टार्ट दवाएं। | |||||
Continental
| Menu Weight Limit Utensil Instructions | ||||||
| Co3 | Macaroni | 0.1~0.3kg | Microwave safe bowl | For | 0.1kg | 0.2kg |
| Macaroni | 100g | 200g | ||||
| Water | 400ml | 800ml | ||||
| Oil | 1/2 tbsp | 1tbsp | ||||
| Chopped tomato | 1/2 cup | 1cup | ||||
| Chopped capsicum | 1no. | 2nos. | ||||
| Chopped onion | 1/2 cup | 1cup | ||||
| Salt, pepper, oregano | As per taste | |||||
| Tomato puree | 1/2 cup | 1cup | ||||
| Method: 1. In a MWS bowl add macaroni, water & few drops of oil.Select menu & weight & press start.When beeps, remove, Wash under running water & separate them.In a MWS bowl add oil, chopped tomato, onion, capsicum, tomato puree, salt, pepper & oregano. Mix well. Cover & press start.When cooking ends, add boiled macaroni to the sauce & serve. | ||||||
| Co4 | Baked Mushrooms | 0.1~0.3kg | Microwave safe flat glass dish & High rack | For | 0.1kg | 0.2kg |
| Mushrooms | 50g | 100g | ||||
| White sauce | 50g | 100g | ||||
| Cheese (grated), salt, pepper | As per taste | |||||
| Method: 1. In MWS flat glass dish put all the ingredients except cheese, mix well.Select menu and weight & press start.When beeps, keep on high rack. Spread grated cheese on the top of the mixture and press start. | ||||||
Continental
| Menu Weight Limit Utensil Instructions | |||||
| Co5 | Lasaneya | 0.3 kg | Microwave safe flat glass dish | For | 0.3 kg |
| Lasagne sheets (cooked) | 150 g | ||||
| White sauce | 1 cup | ||||
| Pizza sauce | 1/2 cup | ||||
| Mix veg (boiled) - Egg plant, zucchini, broccoli, mushrooms, sweet corns | 2 cups | ||||
| Oil | 2 tbsp | ||||
| Oregano, salt & pepper | As per taste | ||||
| Grated cheese | 4 tbsp | ||||
| Method: 1. Except lasagne and cheese add all the ingredients in MWS flat glass dish. Select menu and press start.2. When beeps, in same dish arrange lasagne sheets in the bottom. Then spread vegetable mixture on it and make layers of sheets and vegetable mixture.3. When beeps, spread the grated cheese and press start. | tivichi: 1. तासाने और वीज को छोड़कर समी सागवियां माइकोवेव सेफ फलैट र्लास डिश में अक्षी तरह मिला लें। मीनू चुनकर स्टार्ट दबाए।2. बीप सुनाई देने पर उरी डिश में तासाने शौट्सा को नीचे व्यवरिथित कर दें। फिर उत्ताके ऊपर साभिजों के मिश्रण को फैलाए और शौट्सा तथा सब्ली मिश्रण की परैं बनाए।3. बीप सुनाई देने पर कर्ता हुआ बीज फैलाकर स्टार्ट दबाएं। | ||||
| Co6 | Potato dumpling | 0.1 ~ 0.3 kg | Microwave safe idli steamer* & Microwave safe flat glass dish | For | |
| Maida | |||||
| Boiled & grated potato | |||||
| Grated paneer | |||||
| Salt, pepper, nutmeg powder | As per taste | ||||
| Finely chopped spinach | |||||
| Butter & finely chopped garlic | |||||
| Pizza sauce | |||||
| Method: 1. Mix all the ingredients together for making dough for dumplings. Make 9-10 balls out of the dough.2. In the idli steamer, add water. Place the dumplings on the idli stand and cover. Select menu and weight & press start.3. When beeps, take out the dumplings from the steamer.4. Allow them to cool. In a microwave safe flat glass dish add butter and put the dumplings in it and press start. | tivichi: 1. पकौडी बनागे के लिए तानी रानमी को एक राथ मिलाकर लौदा तैयार कर लें। फिर उत्तारो 9-10 छोटे छोटे गोले बना लें।2. इडली स्टीमर में पानी डालें। पकौडियों को इडली स्टेख पर रखकर ढक दें। मीनू और वजन चुनकर स्टार्ट दबाए।3. बीप सुनाई देने पर, पकौडियों को स्टीमर से बाहर निकाल लें।4. फिर उनको ठंडा होने दें। माइकोवेव सेफ फलैट र्लास डिश में मृकखन डाले और उरामें पकौडियों को रखकर र्टार्ट दबाए। | ||||
* Fourni avec le kit de démarrage.
Continental
| Menu Weight Limit Utensil Instructions | ||||
| Co7 | Sweet & Sour Veg | 0.3 kg | Microwave safe bowl | For 0.3 kgCut Vegetables (Baby corns cut lengthwise, Broccoli florets Mushroom pieces, Pineapple slices, Capsicum) 300 gOil 11/2 tbspChopped spring onion & garlic 1 cupRed chilli paste 1/2 tspTomato Ketchup 1/4 cupVinegar As per tasteSugar 1 tspSalt As per tasteAjinomoto 1/4 tspSoya sauce 1 tspPineapple juice 1/2 cupWater 1 cupComflour 2 tbsp mixed with 1/2 cup waterMethod: 1. In a MWS bowl add oil, chopped spring onions & garlic, red chilli paste. Select menu & press start.2. When beeps, mix well & cut vegetables, tomato ketchup, vinegar, salt, sugar, ajinomoto, soya sauce, pineapple juice, water & cornflour. Mix well, press start. विधि: 1. गाइक्रोवेव सेक बाउल में तेल, कटी हुई स्थिंग प्पाज और लहसुन. लाल मिर्चे पेंट डाले। मीनू चुनकर स्टार्ट दयाए।2. बौग आरे पर अच्छी तरह मिलाए और कटी हुई तान्जिया, टोमेटो केचप, शिरका, नमक, चौनी, अजीनोंटो, रोया रोर, पाइनएप्तका रस, पानी और नक्की का आटा डाले। अच्छी तरह मिलाकर स्टार्ट दयाए। |
Continental
| Menu Weight Limit Utensil Instructions | ||||
| Co8 | Veg in Hct Garlic Sauce | 0.3 kg | Microwave safe bowl | For 0.3 kgMix veg - Cauliflower florets, capsicum, baby corns, beans 300 gmsOil 11/2 tbspChopped garlic, giner, green chillies 2 tbspCorn flour 2 tbspPepper, salt, sugar A pinchAjinomoto A pinchOregano (optional) As per tasteWater 3 cupsMethod: 1. Cut the capsicum & cauliflower into medium sized pieces, baby corns & french beans into small sized pieces.2. In a MWS bowl add oil, chopped onion, ginger, green chillies. Select menu & press start.3. When beeps, mix & add vegetables, pepper, salt, sugar, cornflour mixed with 1/2 cup water, ajinomoto, water. Press start. Stand for 5 minutes.4. Sprinkle oregano & serve. विधि: 1. शिमला मिर्व और बन्दगोमी को मध्यम आकार के टूकड़ों में कार्टे, बेभी क्उन्स और फ्रच बीन्स को छोटे-छोटे टुकड़ों में कार्टे।2. माइक्रोदेव रोफ याउल गे तेल, कटी हुई प्पाज, अदसक, हरी गिर्च, झाले। गीनू और वजन वुनकर स्टार्ट दबाएं।3. बीप सुनाई देने पर मिलाए और संखियां, निर्च, गनक, चीगे, आषे कय पानी में मिला हुआ मककी का आटा, अजीनोमोटो तथा पानी डालकर स्टार्ट दबाएं और मिनट तक रखा रहने दें।54. औरगेनो छिङ्ठक कर परोरो। |
Indian Rasoi
- Cuisine indienne (IC)
- Tandoor se.. (tS)
- Coin sucré (SC)
- Coin Chatpat (CC)
Cuisine indienne भारतीय व्यंजन
| Menu Weight Limit Utensil Instructions | ||||||
| IC1 | Mix Veg | 0.1~0.3 kg Microwave safe bowl | Oil | 1 tbsp | 11/2 tbsp | 2 tbsp |
| Onion, Garlic, Carrot, Capsicum, Cabbage | 100 gm | 200 gm | 300 gm | |||
| Salt, Red Chilli Powder | To taste | |||||
| Corn Flour | 1 tsp | 2 tsp | 4 tsp | |||
| Water | 3/4 cup | 1 cup | 11/2 cup | |||
| Soya Sauce | 1 tsp | 2 tsp | 3 tsp | |||
| Tomato Sauce | 1 tsp | 2 tsp | 3 tsp | |||
| Vinegar | 1/2 tsp | 1/2 tsp | 3/4 tsp | |||
| Brown Sugar | 1/2 tsp | 1/2 tsp | 1/2 tsp | |||
| Ajinomoto | 1 pinch | |||||
| Method:1.In a MWS bowl mix all the vegetables and keep aside.2.In another bowl add oil, all other ingredients. Mix it well and press Start by selecting the desired weight. When beep sounds, stir the bowl.3.Now add vegetables to the gravy and continue cooking it again. | विधि :1. माइक्रोवेव रोफ बाउल में शामी राज्जियों को मिला लें और उनको अलग सख दें।2. एक दूसरे बाउल में तेल काले और उसमें शागी चीपों को डालकर अक्षी तरह रो निला लें तथा एक्षिक कजन चुनकर स्टाट दबाएं। बीप सुनाई देने पर बाउल को हिलाएं।3. अव राज्जियों को प्रेवी के साथ मिलाएं और कुकिंग चालू रखें। | |||||
| IC2 | Veg Biryani | 0.1~0.3 kg Microwave safe bowl | For | 0.1 kg | 0.2 kg | 0.3 kg |
| Basmati Rice (soaked for 1 hour) | 100 g | 200 g | 300 g | |||
| Water | 200 ml | 400 ml | 600 ml | |||
| Ghee | 1 tbsp | 2 tbsp | 3 tbsp | |||
| Laung, Elaichi, Dalchini, Black Pepper, Tej Patta, Salt & Sugar | As per taste | |||||
| Mix Vegetables - (Gobhi, Mutter, Gajar, French Beans) | 1/2 Cup | 1 Cup | 11/2 Cup | |||
| Method:1.In a MWS bowl add oil, laung, dalchini, elaichi, tej patta, pepper, corns, mix vegetables. Select menu & weight & press start.2.When boeps, add water, soaked rice & salt. Mix well & cover. Press start.3.Allow to stand for 5 minutes when cooking ends. Serve hot with raita or salad. | विधि :1. माइक्रोवेव रोफ बाउल में तेल, तॉन, दालचीपी, इलापचौ, तेजपत्ता, निर्च, मक्का के दर्ने, मिश्रित संजियां ढाले। मीनृ एपं वजन चुनकर स्टाट दबाएं।2. बीप चुनाई देने पर पानी, गीगे डुए चावल और गनक डाले। अक्षी तरह मिलाकर कक दें और स्टाट दबाएं।3. पकने के बाद 5 निन्ट ताक रखा रहने दें। रावता या सलाद के साथ रने गर्म मरोरें। | |||||
Cuisine indienne भारतीय व्यंजन
| Menu Weight Limit Utensil Instructions | ||||||
| IC3 | Kadhal Paneer | 0.1 - 0.3 kg Microwave safe bowl | For | 0.1 kg | 0.2 kg | 0.3 kg |
| Paneer | 100 g | 200 g | 300 g | |||
| Onion Paste | 3 tbsp | 4 tbsp | 5 tbsp | |||
| Tomato Puree | 11/2 tbsp | 2 tbsp | 3 tbsp | |||
| Ginger-Garlic Paste, Salt & Sugar | To taste | |||||
| Red Chilli Powder, Halid Kasuri Methi, Garam Masala | To taste | |||||
| Butter | 11/2 tbsp | 2 tbsp | 3 tbsp | |||
| Fresh Cream | 1 tbsp | 11/2 tbsp | 2 tbsp | |||
| Method:1.In MWS Bowl take oil, onion paste, ginger garlicpaste and mix well. Select menu & weight and press start.2.When beep, add tomato puree, butter, fresh cream, haldi, red chilli powder, garam masala, kasuri methi, salt, sugar and paneer cubes, mix well and press start, garnish with hara dhania and serve hot. | ||||||
| IC4 | Dal Tadka | 0.2 kg | Microwave safe bowl | Dal (soaked for 1 hour) | 200 g | |
| Water | 400 ml | |||||
| Oil | 2 tbsp | |||||
| Rai, roasted Jeera, Kasuri Methi, Hara Dhania, Hing, Haldi Geen Chilli | To taste | |||||
| Salt | To taste | |||||
| Method:1.Take 200 gms dal in Microwave Safe bowl, add Water, Haldi & Hing.2.Select menu press start to cook.3.When beeps, take another bowl add oil, roasted jeera, hari mirch, curry leaves, add dal, salt, dhania jeera powder, hara dhania, kasuri methi (optional), water (if required) and lemon juice. Press start. | ||||||
Cuisine indienne भारतीय व्यंजन
| Menu Weight Limit Utensil Instructions | ||||||
| IC5 | Sambhar | 0.2 kg | Microwave safe bowl | Arhar Dal (Soaked for 2 hrs) | 200 g | |
| Oil | 2 tbsp | |||||
| Onion chopped | 1 medium | |||||
| Tomato chopped | 1 medium | |||||
| Mixed Vegetables chopped - Drumsticks, ghiya, Brinjals, Red Pumpkin | 1 cup | |||||
| Boiled Water | 400 ml | |||||
| Imli pulp, Green Chilli, Sambhar Masala, Salt, Gud | As per your taste | |||||
| Method: 1. Soak dal for 2 hours, In Microwave Safe Bowl take dal, haldi, onion, green chilli, tomato, mix vegetables and boiled water. Select menu and press start.2. When beeps, in another Microwave Safe Bowl take oil, add rai, hing, curry leaves, dhania, red chilli. Press start.3. When beeps, mash dal very well and add to tadka.Add imli pulp sambhar masala, gud and some water (if required). Press start. Stand for 5 mins. Garnish with coconut and hara dhania and serve with Idll. | ###: 1. दाल को 2 धण्टे मिंगोए। माइक्येव सेक बाउल में दाल, हल्ती, प्ताप, हरी मिर्न, तमाठर लें। मिश्रित साजियों और उपते हुए पानी को अव्ची तह्छ मिलाएं। बौनु, बुने और स्पार्ट नथरें।2. बीप शुनाई देने पर एक दूरसे पाइकोबेव रोफ बाउल में तेल लें। ऊरामें राई, हीग, करी पता, धनिया, लाल मिर्न ढालें। स्टार्ट दयाएं।3. बीप शुनाई देने पर दाल को अध्ची तह्छ कुचले और उरामे तह्छका लगा ले। फिर इमली, शौरर मासाला, गुज़ और अवश्यकतानुरार पानी लिलाए। स्टार्ट द्वाएं। 5 मिनट तक पकने दें। नारियल और हर धनिया से सजाएं और इकली के साथ परोसे। | |||||
| Kadhai Chicken | 0.1~0.3 kgIC6 | Microwave safe bowl | For | 0.1 kg | 0.2 kg | |
| Boneless chicken | 100 g | 200 g | ||||
| Oil | 1⁄2 tbsp | 1 tbsp | ||||
| Methidana | 1⁄4 tsp | 1⁄4 tsp | ||||
| Onion slices | 1 no. | 2 nos. | ||||
| Chopped garlic | 1 tsp | 2 tsp | ||||
| Dhania powder, red chilli powder salt | As per taste | |||||
| Tomato puree | 1⁄4 cup | 1⁄2 cup | ||||
| Hara dhania | A few sprigs | |||||
| Capsicum | 1 no. | 2 nos. | ||||
| Ginger (linely sliced) | 1 tbsp | 2 tbsp | ||||
| Cream | For garnishing | |||||
| Method: 1. In Microwave Safe Bowl add oil, onion slices, garlic, dhania powder, red chilli powder, chicken & salt. Cover. Select menu & weight and press start.2. When beeps, mix well & add tomato puree, hara dhana, capsicum & ginger. Mix well & cover and press start. Stand for 3 minutes.3. Add cream. Mix well. Serve hot. | ###: 1. माइक्योंय तेक बाउल में तेल, पाज़ की स्लाइस, लह्तुना, धनिया पाउडर, लाल मिर्च पाउडर, चिकन और नामक डालकर ढक दें। मीनु एवं प्रजन चुनकर स्टार्ट द्वाए।2. बीप शुनाई देने पर अव्ची तह्छ मिलाएं और टोनेटो पूरी. हरा धनिया, शिमला मिर्च और अदरक झाले। अच्छी तह्छ मिलाकर ढक दें और सहार्ट द्वाए। 3 मिनट तक रख्या रन्ने दें।3. क्रीम डालकर अच्छी तह्छ मिलाएं और गर्मम-गरम परोसे। | |||||
Cuisine indienne भारतीय व्यंजन
| Menu Weight Limit Utensil Instructions | ||||||
| IC7 | Dum Aloo | 0.1 - 0.3 kg Microwave safe bowl | For | 0.1 kg | 0.2 kg | 0.3 kg |
| Boiled Aloo (small) | 100 g | 200 g | 300 g | |||
| Oil | 2 tbsp | 3 tbsp | 3 tbsp | |||
| Jeera, pepper seeds, cloves, hing | As required | |||||
| Onion paste | 1 tbsp | 11/2 tbsp | 11/2 tbsp | |||
| Ginger & garlic paste | 1 tsp | 11/2 tsp | 11/2 tsp | |||
| Tomato puree | 1 tbsp | 2 tbsp | 3 tbsp | |||
| Curd | 1/2 cup | 1 cup | 1 cup | |||
| Turmeric powder, red chilli powder, degli mirch, salt, garam masala, saunl powder | As per taste | |||||
| Method: 1. In a MWS bowl add oil, jeera, pepper seeds, cloves, hing, onion paste, ginger garlic paste. Mix well. Select menu & weight & press start.When beeps, mix well & add tomato puree & boiled potatoes. Mix well & cover. Press start.When beeps, mix well & add curd. Cover & press start.Allow to stand for 3 minutes. | ||||||
| IC8 | Bhindi Fry | 0.2 ~ 0.4 kg | Microwave safe bowl | For | 0.2 kg | 0.3 kg |
| Bhindi (cut lengthwise) | 200 g | 300 g | ||||
| Ajwain | As per taste | |||||
| Oil | 2 tbsp | 11/2 tbsp | ||||
| Chopped onion | 1/2 cup | 1 cup | ||||
| Salt, red chilli powder, dhania powder, garam masala, haldi | As per taste | |||||
| Method: 1) In a MWS bowl add oil, ajwain & chopped onion & mix well. Select menu & weight & press start.When beeps, add bhindi, salt, red chilli powder, dhania powder, garam masala & hadli. Cover & press start.Allow to stand for 3 minutes. | ||||||
Cuisine indienne भारतीय व्यंजन
| Menu Weight Limit Utensil Instructions | |||||||
| IC9 | PanchmelKi Subzi | 0.1~0.3kg | Microwave safe bowl | For | 0.2kg 0.3kg0.1kg | ||
| Chopped vegetables (Gavarifali, chawii, shimla mirch, kheera, gajar) | 200g 300g100g | ||||||
| Oil | 1tbsp 2tbsp 1/2 tbsp | ||||||
| Jeera | 1/2 tsp | 1 tsp | 1 tsp | ||||
| Onlon | 1/2 cup | 1/2 cup | 1 cup | ||||
| Ginger & green chilli paste | 1 tsp | 11/2 tsp | 2 tsp | ||||
| Coriander powder, amchur, haldi & salt | As per taste | ||||||
| Method:1.In a MWS bowl add oil, jeera, onion, ginger & green chilli paste.Minab:1. মাইঞ্চোঘেব রেফ বাউল মে তেল, জীরা, পাজ, অদরক ঔর হয়ী মির্চ কী পেরট ডালকর অব্ধী তরহ মিলা লে।2. মৌগু ওর বজন সুনকর স্টার্ট দবাএ।3. বীপ সুনাঈ দেনে পর, অচ্চী তরহ মিলাকর কটী হূই সাব্বিয়া ওর ভোজা পানো বালে। ঢাককর স্টার্ট দবাএ।4. বীপ সুনাঈ দেনে পর, অচ্চী তরহ মিলাএ ওর ধনিযা পাউডর, অনচুর, হত্দী তথা নমক ডালকর স্টার্ট দবাএ।5 মিন্ট তক রবা রছনে দে। | |||||||
| IC10 | Jeera Aloo | 0.1~0.3kg | Microwave safe bowl | For | 0.1kg 0.2kg 0.3kg | ||
| Potato (boiled) | 100g 200g 300g | ||||||
| Oil | 1/2 tbsp 1 tbsp 1 tbsp | ||||||
| Jeera | 1/2 tsp 1 tsp 1 tsp | ||||||
| Salt | As per taste As per taste As per taste | ||||||
| Red chilli powder, haldi, garam masala, dhania powder, coriander leaves | As per taste As per taste As per taste | ||||||
| Method:1.In a MWS bowl add oil, jeera, salt, dhania powder, garam masala, coriander leaves, red chilli powder. Select menu and weight & press start.When beeps, add potatoes to the bowl and press start.Squeeze lemon juice & serve. | Minab:1. মাইঞ্চোঘেব রেফ বাউল মে তেল, জীরা, নমক, ঘনিযা পাউডর, গরণ মসালা, ধনিযা কী পতিয়া, লাল মির্চ পাউডর ডালে। মৌগু ওর বজন সুনকর স্টার্ট দবাএ।2. বীপ সুনাঈ দেনে পর, বাউল মে আলু ডালকর স্টার্ট দবাএ। নীঃ কারস নিবোড়েঁ ওর পরোসে। | ||||||
Cuisine indienne भारतीय व्यंजन
| Menu Weight Limit Utensil Instructions | ||||||
| IC11 | Kadhi | 0.3~0.5kg | Microwave safe bowl | For | 0.3kg | 0.4kg |
| Besan | 25g | 50g | ||||
| Curd / matha | 1/2cup | 1cup | ||||
| Oil | 1tbsp | 11⁄2tbsp | ||||
| Rai, cumin seeds | As per taste | |||||
| Chopped onions | 1cup | 11⁄2cup | ||||
| Salt, red chilli powder, haldi, coriander powder, amchur | As per taste | |||||
| Water | 2cups | 3cups | ||||
| Method: 1. In a MWS bowl add oil, rai, jeera, chopped onion. Select menu & weight & press start.2. When beeps, mix & add besan, curd/matha, salt, red chilli powder, haldi, coriander powder, amchur powder, water (1/2 the amount mentioned per weight). Mix & press start.3. When beeps, mix & add remaining water & press start. Pour tempering & serve. | ###: 1. গাদ্রমোয়ে সোফ বাউল মে সেল, রাঈ, জীরা, কল্টী হুই পাজ ঝালে। নীনু ঔর বজন যুনকর স্টার্ট দবাএ।2. বৌপ সুনার্ব দেনে পর নিলাএং ওর বেসন, দবী/মড়, নমক, লাত মির্চ পাউডর, হলী ওর বনিষা পাউডর, আমুর পাউডর, বজনানুসার নির্ধারিত মাত্রা কা আলা পানী লালে। মিলাকর স্টার্ট দবাএ।3. বৌপ সুনার্ব দেনে পর নিলাএং ওর বচে হুর পানী কো ঝালকর স্টার্ট দবাএ। তাকার ঝালকর পরারো। | |||||
| IC12 | Baati | 0.2~0.4kg | High rack & Multi Cook Tawa | For | 0.2kg 0.3kg 0.43kg | |
| Atta | 150g 200g 250g | |||||
| Besan | 50g 100g 150g | |||||
| Ginger garlic paste | 1tbsp 2tbsp 21⁄2tbsp | |||||
| Haldi & salt | As per taste | |||||
| Oil | 1⁄2tbsp 1tbsp | |||||
| Water | For kneading | |||||
| Method: 1. Mix atta, besan, ginger garlic paste, salt & turmeric powder, little oil. Add water for kneading the dough. Make big balls out of the dough.2. Grease the tawa & place the baati over it. Place the tawa on high rack. Select menu & weight & press start.3. When beeps, turn the side & press start. | ###: 1. আলা, বেসন, অদরক লড়ুন পের্ট, নমক তথা হল্লী কা পাউডর, শোঞা তোল মিলাএ। পানী ঝালে ঔর সুধফর লীপা বনা লে। ফির উরা লীদে সে বছে-বড়ে গোলে বনা লে।2. তামে পর মিকানাঈ লাগাকর বাটী কো উসকে উপর রস্থে। ফির তামে কো ছাই রেক কে উপর রস্থে। মীনু ওর বজনা সুনকর স্টার্ট দবাএ।3. বৌপ সুনার্ব দেনে পর, বাটী কো পালট দে ওর স্টার্ট দবাএ। | |||||
Cuisine indienne भारतीय व्यंजन
| Menu Weight Limit Utensil Instructions | ||||
| IC13 | Dalma | 0.3 kg | Microwave safe bowl | For 0.3 kg |
| Moong dal (soaked for 1 hour) 300 g | ||||
| Water 600 ml | ||||
| Chopped vegetables (drumsticks, potato, raw banana, pumpkin, brinjal, tomato) 2 cups | ||||
| For tadka | ||||
| Oil 2 tbsp | ||||
| Bay leafs, jeera, dry chillies, salt, haldi As per taste | ||||
| Grated coconut 4 tbsp | ||||
| Chopped onion 1 no. | ||||
| Method: 1. In a MWS bowl add soaked moong dal, chopped vegetables & water. Mix well. Select menu & press start.2. When beeps, in another bowl add oil, bay leafs, jeera, dry chillies, salt, haldi, grated coconut & chopped onion.Mix well & press start.3. When beeps, mix well add the tadka ingredients to the dal.Mix well & press start. | ||||
Cuisine indienne
भारतीय व्यंजन
| Menu Weight Limit Utensil Instructions | ||||
| IC14 | Gujarati Tuvar Dal | 0.3 kg | Microwave safe bowl | For 0.3 kgTuvar dal / Arhar dal (soaked for 2 hours) 300 gWater 600 mlOil 1 tbspMustard seeds 1/2 tspJeera 1/2 tspFinely chopped ginger 1 tbspSlit green chillies 3 nos.Curry leaves A fewChopped tomato 2 nos.Chopped onion 1 no.Hing A pinchSalt, turmeric powder, red chilli powder As per tasteJaggery (Gud) As per tasteMethod: 1) In a MWS bowl add tuvar dal, salt, hing, turmeric powder, water. Mix well. Select menu & press start.2) When beeps, remove the dal.3) In another MWS bowl add oil, mustard seeds, jeera, finely chopped ginger, slit green chillies, curry leaves, chopped onions, rod chilli powder. Mix well & press start.4. When beeps, remove the bowl & add these ingredients to the dal. Add tomato, jaggery & mix well. Press start.Squeeze lemon juice & serve. विधि: 1. माइक्रोवेंव रोफ बाउल में तुबर दाल, नमक, हौग, हत्दी पाउडर डालें और अच्छी तरह मिलाएं। मौनू तुनकर स्टार्ट दबाएं।2. बीप सुनाई देने पर दाल को बाहर निकाल जें।3. एक अन्य नाइक्रोवेंव रोफ बाउल में तेल, रार्साँं के बीज, जीरा, दारीक कटी हुई अदरक, लम्बी कटी हुई हरी मिर्च, करी पते, कटी हुई याज लाल मिच पाउडर झालें और अच्छी तरह मिलाकर स्टार्ट दबाएं।4. बीप सुनाई देने पर बाउल को बाहर निकालें और इरा रामग्री को दाल में झाल दें। टगाटर और जैगरी झालकर अच्छी तरह मिलाएं। स्टार्ट दबाएं। गौनू निचोडकर परोसें। |
Cuisine indienne भारतीय व्यंजन
| Menu Weight Limit Utensil Instructions | ||||||
| IC15 | Beans Porial | 0.1~0.3kg | Microwave safe bowl | For | 0.2kg 0.3kg0.1kg | |
| French beans (cut evenly) | 200g 300g100g | |||||
| Oil | 1 tsp 2 tsp1 tsp | |||||
| Mustard seeds | 1⁄2 tsp 1⁄2 tsp1⁄4 tsp | |||||
| Urad dhal | 1⁄2 tsp 1⁄2 tsp1⁄4 tsp | |||||
| Grated coconut | 2 tbsp 3 tbsp1 tbsp | |||||
| Green chillies | 2 nos. 3 nos.1 no. | |||||
| Salt | As per taste | |||||
| Method:1) In a MWS bowl add oil, mustard seeds & urad dhal.Select menu & weight & press start.2) When beeps, add beans, sprinkle little water & cover.Press start.3) When beeps, mix well & add grated coconut, green chillies & salt. Cover & press start.Allow to standfor 3 minutes. | 1. মাইকোপের সেফ বাউল মে তেল, সরসৌ কে বীজ ঔর উড়ন্দ দাল লে।মৌনু ঔর বজন চুনকর স্টার্ট দবাএ।2. বীপ সুনাঈ দেনে পর বীন্তা ঝালে, থাজা মানী ফিজকে ওর ঢলকর স্টার্ট দবাএ।3. বীপ সুনাঈ দেনে পর অন্ধী তরহ মিলাএং ঔর করা হুআ গারিয়া, হরী মির্চ ঔর নমক ডালকর স্টার্ট দবাএ ঔর 3 মিন্ট তক রঞ্চা রহনে দে। | |||||
| IC16 | Goan Potato Curry | 0.3~0.5kg | Microwave safe bowl | For | 0.4kg 0.5kg0.3kg | |
| Boiled potato | 400g 500g300g | |||||
| Boiled mix veg (capsicum, cauliflower, carrot, peas) | 150g 200g100g | |||||
| Chopped onion | 1 no. | 2 nos. | ||||
| Oil | 11⁄2tbsp | 2 tbsp | ||||
| Mustard seeds | 1 tsp | 11⁄2 tsp | ||||
| Grated coconut | 2 tbsp | 21⁄2tbsp | ||||
| Coconut milk | 1 cup | 11⁄2cup | ||||
| Tomato puree | 1⁄2cup | 1 cup | ||||
| Kaju powder | 1 tbsp | 2 tbsp | ||||
| Salt, red chilli powder | As per taste | |||||
| Fresh cream | 2 tbsp | 3 tbsp | ||||
| Coriander | A few sprigs | |||||
| Method:1. In a MWS bowl add oil, mustard seeds & chopped onion.Select menu & press start.2. When beeps, add grated coconut, coconut milk, tomato puree, kaju powder, salt, red chilli powder & press start.3. When beeps, mix well & add boiled potato & mix vegetables & fresh cream. Press start. Give standing time of 3 minutes.4. Gamish with chopped coriander leaves & serve. | 1. মাইকোপের সেফ বাউল মে তেল, সরসৌ কে বীজ ঔর কটী হুই প্যাজ ঝালে ঔর মৌনু চুনকর স্টার্ট দবাএ।2. বীপ সুনাঈ দেনে পর, করা হুজা নারিয়া, নারিয়া দুচ, টোয়েটো প্লুরী, কাজু, পাউড়র, নমক, বাল মির্চ পাউড়র ঢালকর স্টার্ট দবাএ।3. বীপ সুনাঈ দেনে পর, অন্ধী তরহ মিলাএ ঔর উবলে হুর আতু, মিশ্রিত সঠিভিয়া ঔর তাজা ক্রীম ডালকর স্টার্ট দবাএ।3. মৌন্ট তক রঞ্চা।4. কটে হুর হরে খানিয়ে কী পতিয়ো সে সজাকর মরাসে। | |||||
Cuisine indienne भारतीय व्यंजन
| Menu Weight Limit Utensil Instructions | ||||||
| IC17 | Kashmiri Kaju Paneer | 0.1 ~ 0.3 kg | Microwave safe bowl | For | 0.2 kg 0.3 kg0.1 kg | |
| Paneer pieces | 200 g 300 g100 g | |||||
| Kaju | 1⁄2 cup 1⁄2 cup1⁄4 cup | |||||
| Sliced onions | 1⁄2 no. | 1 nos. | ||||
| Chopped ginger | 1 tsp | 2 tsp | ||||
| Chopped garlic | 1 tsp | 2 tsp | ||||
| Chilli powder | As per taste | |||||
| Knus Khus paste | 1⁄2 tbsp | 1 tbsp | ||||
| Tomato puree | 1⁄2 cup | 1 cup | ||||
| Milk | 1⁄2 cup | 1 cup | ||||
| Garam masala & salt | As per taste | |||||
| Method: 1. In a MWS bowl add oil, onion slices, chopped ginger & garlic. Select category & weight and press start.2. When beeps, mix well, add khus paste, kaju paste, tomato puree, chilli powder, garam masala & salt and press start.3. When beeps, mix well, add paneer pieces and milk. Press start. Stand for 3 minutes. | ###: 1. माद्वकोमेव रैफ बाउल में तेल, प्याज गी रस्ताद्रिज, कटा हुआ अदरक और लहतून आले। वर्ग एवं कजन दुनकर स्टार्ट दबार।2. बीप सुनाई देने पर, अख्ची तरह मिलाएं, खचा और कापू का पेस्ट, टॉमेतो प्यूरी, निली पाठडर, नरम मसाला और नमक छालकर स्टार्ट दबाएं।3. बीप सुनाई देने पर, अख्ची तरह मिलाएं, पनीर के दुकड़े और दूध डाले। र्यार्ट दबाए और 3 शिन्ट तक रखा रहने दे। | |||||
| Menu Weight Limit Utensil Instructions | ||||
| IC18 | Vag Handva | 0.3 kg | Microwave safe flat glass dish & High rack | For 0.3 kgSuji 200 gBesan 100 gOil 1 tbspSalt, red chilli powder, turmeric powder, mustard seeds As per tasteGinger garlic paste 1 tbspChopped green chillies 3 nos.Chopped vegetables (carrots, green peas) 1⁄2 cupCurd 1 cupEno 1⁄4 tspMethod: 1. In a bowl add suji, besan, oil, salt, red chilli powder, turmeric powder, mustard seeds, ginger garlic past, chopped green chillies, chopped vegetables, curd.Add water to adjust the batter to medium consistency.Add Eno to the batter. Mix well.Pour the batter into the MWS flat glass dish & cover. Select menu & press start.When beeps, remove the cover & grease with few drops of oil. Place the dish on high rack. Press start. विवि: 1. माइकोपेव सेफ बाउल में सूजी, बेसन, तेल, नमक, लाल मिर्च पाउडर, हल्दी पाउडर, शररो के बौज, अदरक लहसुन पेरट, कटी हुई हरी गिर्व, कटी हुई सांख्यां और दही झाले।2. निश्रण को च्यवस्थित करणे के लिए लगातार धीरे धीरे चताते हुए पानी जाले। मिश्रण में ईनो डालकर अस्की तरह मिलाए।3. अब इल निश्रण को माइकोपेव सेफ प्लैट ग्लास डिश में डालकर ढक दें। मीू चुनकर स्टार्ट दवाएं।4. बीप सुनाई देने पर, ढककन ह्टाकर कुछ बूदें तेल डालकर विकना कर लें। डिश को हाई ईक के ऊपर रखकर स्टार्ट दवाएं। |
| Menu Weight Limit Utensil Instructions | ||||||
| IC19 | Butter Chicken | 0.3~0.5kg | Microwave safe bowl | For | 0.4kg 0.5kg0.3kg | |
| Chicken (boneless) | 400g 500g300g | |||||
| Ginger garlic paste | 2 1/2 tbsp 3 tbsp2 tbsp | |||||
| Tomato puree | 1/2 cup | 1cup | ||||
| Chopped onions | 1no. | 1no. | ||||
| Garam masala, dhania powder, jeera powder, kasuri methi, red chilli powder | As per taste | |||||
| Kaju paste | 2tbsp | 2 1/2 tbsp | ||||
| Fresh cream | 1cup | 1 1/2 cup | ||||
| Butter | 2tbsp | 3tbsp | ||||
| Oil | 2tbsp | 2 1/2 tbsp | ||||
| Slit green chillies | 3nos. | 4nos. | ||||
| Method:1.In a MWS bowl add oil, ginger garlic paste, chopped onions, garam masala, dhania powder, jeera powder.Mix well. Select menu & weight & press start.When beeps, mix well, add tomato puree, red chilli powder, kasuri methi, chicken pieces. Mix well & cover. Press start.When beeps, mix well, add kaju paste, cream & butter.Mix well & cover. Press start.Garnish with slit chillies & press start. | ||||||
| IC20 | Veg Tahiri | 0.1~0.3kg | Microwave safe bowl | For | 01kg | 0.2kg |
| Basmati rice (soaked for 1 hour) | 100g | 200g | ||||
| Water | 200ml | 400ml | ||||
| Oil | 1tbsp | 1 1/2 tbsp | ||||
| Jeera, laung, tej patta, salt, garam masala, haldi, red chilli powderMix veg - Gobhi, maer, gajar, tomato, potato etc. | As per taste | |||||
| 1/2cup | 1cup | |||||
| Method:1.In a MWS bowl add oil, jeera, laung, tej patta & mix vegetables.Select menu & weight & press start.When beeps, mix well & add rice, water, salt, garam masala, haldi, red chilli powder. Press start. Mix well. Stand for 5 minutes. Serve hot. | ||||||
| Menu Weight Limit Utensil Instructions | |||||||
| IC21 | Gosht DumBiryani | 0.1~0.3kg | Microwave safe bowl | For | 0.1kg | 0.2kg | 0.3kg |
| Basmati rice (soaked for 1 hour) | 100g | 200g | 300g | ||||
| Boneless mutton | 100g | 200g | 300g | ||||
| Oil | 1tbsp | 11/2 tbsp | 2tbsp | ||||
| Chopped onion | 1/2cup | 1cup | 1cup | ||||
| Ginger garlic paste | 1tbsp | 11/2 tbsp | 11/2 tbsp | ||||
| Jeora, laung, tej patta, salt, red chilli powder, garam masala | As per taste | ||||||
| Water | 200ml | 400ml | 600ml | ||||
| Method:1.In a MWS bowl add oil, jeera, laung, tej patta onion, ginger garlic paste, mutton & cover. Select menu & weight & press start.2.When beeps, mix well, add rice, water, salt, red chilli powder, garam masala & cover. Press start. Stand for 5 minutes. Serve hot. | |||||||
| IC22 | MalabarBiryani | 0.1~0.3kg | Microwave safe bowl | For | 0.1kg | 0.2kg | 0.3kg |
| Basmati rice (soaked for 1 hour) | 100g | 200g | 300g | ||||
| Boneless chicken | 100g | 200g | 300g | ||||
| For Marinade | |||||||
| Salt, red chilli powder, turmeric powder | As per taste | ||||||
| Oil | 1tbsp | 11/2 tbsp | 2tbsp | ||||
| Salt, biryani masala | As per taste | ||||||
| Curd | 1tbsp | 11/2 tbsp | 2tbsp | ||||
| Sliced tomato | 1No. | 1No. | 2Nos. | ||||
| Sliced onion | 1No. | 1No. | 2Nos. | ||||
| Water | 200ml | 400ml | 600ml | ||||
| Method:1.Marinade the chicken & refrigerate it for 1 hour.2.In a MWS bowl add oil, onion, chopped coriander & mint leaves, biryani masala & salt. Mix, select menu & weight & press start.3.When beeps, remove the bowl & in another MWS bowl add soaked rice, water, tomato, curd, mix & cover. Press start.4.When beeps, add the marinated chicken to the first bowl. Cover & press start. Stand for 5 minutes. Serve hot. | |||||||
| Menu Weight Limit Utensil Instructions | ||||||
| IC23 | Veg Pulao | 0.1~0.3kg | Microwave safe bowl | For | 0.1 kg | 0.2 kg |
| Basmati rice (soaked for 1 hour) | 100 g | 200 g | ||||
| Water | 200 ml | 400 ml | ||||
| Oil | 1 tbsp | 11/2 tbsp | ||||
| Jeera, laung, tej patta, salt, garam masala, red chilli powder | As per taste | |||||
| Mix veg - Gobhi, malar, gajar, french beans etc. | 1/2 cup | 1 cup | ||||
| Method:1.In a MWS bowl add oil, jeera, laung, tej patta & mix vegetables. Select menu & weight & press start. When beeps, mix well & add rice, water, salt, garam masala, red chilli powder. Press start. Mix well. Stand for 5 minutes. | ||||||
| Menu Weight Limit Utensil Instructions | ||||||
| Paneer Tikka | 0.3 kgtS1 | Rotisserie | Paneer cubes | 300 g | ||
| Capsicum (big pieces), Tomato (big pieces) | 2 cups | |||||
| For Marinade | ||||||
| Hung curd | 4 tbsp | |||||
| Ginger garlic paste | 11/2 tbsp | |||||
| Salt, red hilli powder, Garam masala | To taste | |||||
| Lemon juice | 2 tbsp | |||||
| Red color (edible) | A pinch | |||||
| Oil | 2 tbsp | |||||
| Method:1. Mix all the ingredients of marinade thoroughly.2. Add paneer , capsicum, tomato pieces to it and refrigerate it for 1 hour.3. Arrange paneer, capsicum, tomato pieces on the rotisserie bars.Select menu & press start.When ready pour lemon juice& serve.Note:- While putting the paneer pieces on rotisserie bars, place them between the tomato & capsicum pieces.4. Serve with chutney & salad. | ||||||
| Veg Kebab | 0.1 - 0.3 kgtS2 | High Rack & Multi cook tawa | Boiled Vegetables - Potato, Cauliflower, Carrots, Green Peas | 0.1 kg | 0.2 kg | |
| Water | 3 tbsp | 4 tbsp | ||||
| Oil | 1 tbsp | 2 tbsp | ||||
| Comflour | 1 to 2 tbsp 3 to 4 tbsp | 2 to 3 tbsp | ||||
| Bread Crumbs | 1 tbsp | 11/2 tbsp | ||||
| Ginger Garlic Paste | 1/2 tsp | 1/2 tsp | ||||
| Chilli Paste | 1/2 tsp | 1 tsp | ||||
| Garam Masala | 1/4 tsp | 1/2 tsp | ||||
| Lemon Juice, Salt, Sugar | As per your taste | |||||
| Method:1. Mix Boiled vegetables & strained chana dal, ginger garlic paste, garam masala, dhania jeera powder, salt red chilli powder, bread crumbs & hara dhania together, apply little oil to your palms and shape as desired like tikki balls and roll over with cornflour. Cutlet rolls, brush with little oil.2. Keep multi cook tawa on high rack place kababs on it. Select menu & weight and press start. Keep on turning at beeps.3. Serve with chutney & salad. | ||||||
| Menu Weight Limit Utensil Instructions | ||||||
| tS3 | Murg Tandoori | 0.1~0.3kg | Microwave safe bowl & High rack & Multi cook tawa | For | 01 kg | 0.2 kg |
| Boneless chicken pieces | 100 g | 200 g | ||||
| For Marinade | ||||||
| Hung curd | 2 tbsp | 3 tbsp | ||||
| Ginger garlic paste | 1 tsp | 11/2 tsp | ||||
| Salt, red chilli powder, garam masala, chaat masala | As per taste | |||||
| Oil | 1 tbsp | 1 tbsp | ||||
| Lemon juice | 1 tbsp | 11/2 tbsp | ||||
| Red color (edible) | 1 pinch | |||||
| Method:1.Wash chicken pieces & mix with all the Ingredients of the marinade. Refrigerate it for 1 hour.2.In a MWS bowl add chicken pieces. Select menu & weight & press start.3.When beeps, arrange chicken pieces on greased tawa apply oil on each piece. Keep the tawa on high rack & press start.4.When beeps, turn over the pieces. Press start. | Vitibi:1.Sinikan ke dukcǎo kā o āoep and māsāle sāmī tātāo ke saay nīlāa e|�क पाण्टe ke līnē rāfējārār ke abndar rāxē|2.Vikhan ke dukcǎo kā o maājākāve vār fān bāuāl mān dān l | gōniū and vājān pūnakr stārē dābāe|3.Biap suanārī dāne par, vikhan ke dukcǎo kā o vikān teyā par vāvārīhīt kare, pravek dukcāe par bāuāla teetal lanāe| tāve kā hārī rāfē par rāxē or rāstārī dābāe|4.Biap suanārī dāne par, vikhan ke dukcǎo kā o pālārī and rāstārī dābāe| | |||||
| Fish Tandoori | 0.1~0.3kgtS4 | High Rack & Multi cook tawa | Fish Fillets | 0.1 kg | 0.2 kg | |
| For marinate hung curd | 1 tbsp | 11/2 tbsp | ||||
| Lemon juice | 1 tsp | 11/2 tsp | ||||
| Ginger Garlic Pasle | 1 tsp | 11/2 tsp | ||||
| Salt, Red Chilli Powder, Haldi, Garam Masala & Chat Masala | As per your taste | |||||
| Eatable Red Colour | A pinch | |||||
| Method:1.Wash the fish fillets, mix all the ingredients of marinade and coat this mixture to fish fillets evenly keep for one hour in refrigerator.2.Arrange the fish fillets on greased multi cook tawa. Apply little oil on each piece. Keep the multi cook tawa on high rack. Select menu & weight and press start.3.When beeps, turn the pieces and press start. | Vitibi:1.Mahllai ke dukcǎo kā o āoep, māsāle ke sāmī tātāo kā o aclān l tārān inlāa e| and mahllai dukcǎo par smāmān rāp se latpēt dā tāthā e|�क घपटe ke līnē rāfējārār ke abndar rāxē dā|2.Mahllai ke dukcǎo kā o leel latng e mlātāi kukcār nāe par vāvārīhīt kare| pravek dukcāe par bāuāla- yāoqāla teetal lanāe| mehttia kukcār tāve kā hārī rāfē par rāxē dā| nānju e| and vājān kukcār and rāstārī dābāe|3.Biap suanārī dāne par dukcǎo kā o pālārī and rāstārī dābāe| | |||||
| Menu Weight Limit Utensil Instructions | ||||
| tS5 | MuttonTikka | 0.3 kg | Microwave safe bowl& Rotisserie | For 0.3 kg |
| Mullon boneless pieces 300 kg | ||||
| For marinade | ||||
| Hung curd 4 tbsp | ||||
| Ginger Garlic Paste 2 tsp | ||||
| Salt, Red Chilli Powder, Haldi, Garam Masala & Chat Masala As per taste | ||||
| Oil 2 tbsp | ||||
| Lemon juice 2 tsp | ||||
| Ealable Red Colour 1 pinch | ||||
| Method: 1. Wash the mutton pieces & mix with ginger garlic paste,curd,salt, lemon juice, garam masala, chaat masala,red chilli powder, Refrigerate for 1 hour.2. In a MWS bowl take this mixture, Select menu & press start.3. When beeps, arrange the cooked mutton pieces onrotisserie & press start.Serve with nan or roti | ||||
| tS6 | Tandoori Subzi | 0.2 kg | Microwave safe bowl& High rack& Multi cook tawa | For 0.2 kg |
| Mix veg - Bhindi, cauliflower, brinjals, mushrooms, potato, paneer cubes 200 g | ||||
| Onion paste 2 tbsp | ||||
| Ginger garlic paste 1 tsp | ||||
| Tomato puree 1/2 cup | ||||
| Salt, red chilli powder, garam masala, chaat masala, haldi As per taste | ||||
| Oil 2 tbsp | ||||
| Hara dhanla For garnishing | ||||
| Method: 1. In a MWS bowl take oil, onion paste, ginger garlic paste.2. Select menu & press start.3. When beeps, add vegetables, red chilli powder, haldi,garam masala, chat masala, salt, tomato puree & mix well.Press start.4. When beeps, transfer this mixture to tawa, spread evenlyon greased tawa. Keep tawa on high rack & press start.Serve with tandoori nan. | ||||
| Menu Weight Limit Utensil Instructions | |||||||
| tS7 | Shaami Kabab | 0.1~0.3kg | Microwave safe bowl & High rack & Multi cook tawa | For | 0.1kg | 0.2kg | 0.3kg |
| Minced mutton | 100g | 200g | 300g | ||||
| Soaked bengal gram | 25g | 25g | 50g | ||||
| Roasted cumin seeds | As per taste | ||||||
| Salt, red chilli powder, chaat masala, coriander powder | As per taste | ||||||
| Chopped onion | 1/2 No. | 1No. | 2Nos. | ||||
| Chopped coriander leaves | A few springs | ||||||
| Oil | 1/4 tbsp | 1/2 tbsp | 1tbsp | ||||
| Method: 1. In a MWS bowl add minced mutton. Select menu and weight & press start.2. Grind the cooked mutton, bengal gram, cumin seeds, coriander powder, salt and chilli powder, chaat masala, chopped coriander and onion. Make long flat kababs of the paste.3. Place the kababs on greased multi cook tawa and high rack. Press start.4. Turn over the kababs and again press start.Note: For binding roll the kababs in maïda. | |||||||
| Hara Bhara Kabab | 0.3kgtS8 | High Rack & Multi cook tawa | For | 0.3kg | |||
| Potatoes (boiled & grated) | 300g | ||||||
| Peas (boiled & mashed) | 1cup | ||||||
| Palak leaves (boiled) | 11/2 cup | ||||||
| Coriander leaves | A few sprigs | ||||||
| Masuri methi | 2tbsp | ||||||
| Salt, red chilli powder, chaat masala, garam masala | As per taste | ||||||
| Oil | 11/2 tbsp | ||||||
| Method: 1. Mix all the ingredients together & make a dough. Make flat kababs out of it.2. Grease the multi cook tawa & place on high rack. Now arrange the kababs on the greased multi cook tawa. Select menu & press start.3. When beeps, turn over the kababs & again press start. Serve with coriander chutney or tomato sauce | |||||||
| Menu Weight Limit Utensil Instructions | ||||
| tS9 | AlooTikki | 0.3 kg High rack&Multi cook tawa | For | 0.3 kg |
| Potatoes | 300 g | |||
| Boiled peas | 1 cup | |||
| Chopped ginger | 3 tsp | |||
| Green chillies | 3 nos. | |||
| Chopped coriander leaves | 4 tbsp | |||
| Salt, red chilli powder, garam masala, chaat masala | As per taste | |||
| Method: 1. Mix boiled potatoes, peas, coriander leaves, chopped ginger, green chillies, salt, red chilli powder, garam masala & chaat masala together. Prepare tikkis out of the mixture.2. Grease the multi cook tawa, arrange the tikkis. Keep the tawa on high rack. Select menu & press start.3. When beeps, turn over the tikkis. Press start. | विधि: 1. उबले हुए आलू, गर्टर, धनिया की पतियां, कटी हुई अंदरक, हरी गिर्च, नगक, लाल गिर्च पाउडर, गरण गसाला और वाट मसाला एक साथ निता लें। फिर इस्त तैयार निश्रण से टिविकयों बना लें।2. मल्टी कुक तवा को चिकना करके उसा पर टिश्कियों को व्यवर्थित कर लें। तदे चो हाई रैक के ऊपर रख दें। गीनू चुनकर स्टार्ट दबाएं।3. बीप सुनाई देने पर टिकिकयों को पलटकर स्टार्ट दवाएं। | |||
| Menu Weight Limit Utensil Instructions | ||||||
| SC1 | Suji Halwa | 0.1~0.3kg | Microwave safe glass bowl | For | 01 kg | 0.2 kg |
| Suji | 100 g | 200 g | ||||
| Ghee (melted) | 2 tbsp | 3 tbsp | ||||
| Water | 300 ml | 600 ml | ||||
| Sugar | 100 gms | 200 gms | ||||
| Cashewnuts, kishmish, kesar, elaichi powder | As per taste | |||||
| Method: 1. In a MWS glass bowl add ghee & suji, mix well. Select menu & weight & press start.2. When beeps, stir well & press start.3. Add water, sugar, cashwnuts, kishmish, kesar, elaichi powder & press start. Mix well & serve. | ###: 1. মাইঞ্চোপেষ সেক বাউল নে ঘী ওর সুজী লেকর অন্ধী তরহ মিলাএ।মৌনু ওর বজন বুনকর স্টার্ট দবাএ।2. বৌপ শুনাঈ দেনে পর ইসকো অবঝী তরহ হিলাএ। ওর স্টার্ট দবাএ।3. পানী, চীনী, কাপু, কিশমিশা, কেলর ইলায়ী পাউডর ঝালকর অন্ধী তরহ মিলাএ ওর স্টার্ট দবাএ। | |||||
| SC2 | Besan Ladoo | 0.1~0.3kg | Microwave safe glass bowl | For | 01 kg | 0.2 kg |
| Besan | 100 g | 200 g | ||||
| Ghee (melted) | 2 tbsp | 4 tbsp | ||||
| Powder sugar | 50 g | 100 g | ||||
| Elaichi | 1 tsp | As per taste | ||||
| Method: 1. In MWS glass bowl add ghee & besan, mix well. Select menu & weight & press start.2. When beeps, stir it & press start.3. When beeps, stir it & press start.4. Allow it to cool. Add powdered sugar & elaichi powder.Make ladoos out of it.Note: If the ladoo mixture does not bind, grease your hands with ghee & prepare them. | ###: 1. মাইঞ্চোপেষ সেক স্লাস বাউল মে ঘী ওর বেসন লেকর অন্ধী তরহ মিলাএ। গৌনু ওর বজন বুনকর স্টার্ট দবাএ।2. বৌপ শুনাঈ দেনে পর ইসে হিলাএ। ওর স্টার্ট দবাএ।3. বৌপ শুনাঈ দেনে পর ইসে হিলাএ। ওর স্টার্ট দবাএ।4. ঠঠঞা হোনে দে। বূরা ওর ইলায়ী পাউডর ঝালৈ। অন্ধী তরহ মিলাকর লডঞ্চু বনাএ।নোট : যঞি ইস মিশ্ণ সে লডঞ্চু নর্থী বন পা রহে হী তো হয়েলিয়ী পর ওঝঞা ঘী লনগকর বনায়ী। | |||||
| Menu Weight Limit Utensil Instructions | ||||||
| SC3 | Kalakand | 0.2~0.4kg | Microwave safe flat glass dish | Grated paneer | 0.2kg | 0.3kg |
| Milkmaid | 100g | 200g | ||||
| Milk powder | 2tbsp | 3tbsp | ||||
| Comflour | 1tsp | 1tsp | ||||
| Elaichi powder | 1tsp | 1tsp | ||||
| Method: 1.In Microwave Safe Bowl take grated paneer, milkmaid,milk powder, cornfloor, Elaichi powder, kesar. Mix well.Select menu & weight and press start.When beeps, mix it again and press start.Garnish with dry fruits when set cut into pieces. | ||||||
| SC4 | Shahi Tukda | 0.1~0.3kg | High rack & Microwave safe flat glass dish | For | 0.1kg0.2kg0.3kg | |
| Bread slices | 2Nos.4Nos.8Nos. | |||||
| Milkmaid | 50ml100ml200ml | |||||
| Milk | 25ml50ml75ml | |||||
| Sugar | 1tbsp2tbsp3tbsp | |||||
| Badam, pista pieces | 1tbsp3tbsp5tbsp | |||||
| Kesar, elaichi powder | As per taste As per taste As per taste | |||||
| Method: 1.Arrange bread slices on high rack. Select menu & weight & press start.When beeps, tum the slices & press start.Mix milkmaid, milk, sugar, dry fruits & kesar elaichi powder. Place the bread slices in MWS flat glass dish.Pour the mixture.Press start.Serve hot. | ||||||
| Menu Weight Limit Utensil Instructions | |||||||
| SC5 | Kheer | 0.1~0.3kg | Microwave safe bowl | For | 0.1kg | 0.2kg | 0.3kg |
| Milk | 100ml | 200ml | 300ml | ||||
| Seviyan (roasted) | 10g | 20g | 30g | ||||
| Sugar | 50g | 100g | 150g | ||||
| Badam paste | 1tbsp | 11⁄2tbsp | 2tbsp | ||||
| Kesar & elaichi powder | As per taste | ||||||
| Method: 1. In a MWS bowl take milk & select menu & weight & press start.2. When beeps, add seviyan to the bowl & press start.3. When beeps, add almond paste, sugar, kesar & elaichi powder & press start. Garnish with dry fruits & serve hot or chilled. | Vitibi: 1. নাইকোষেষ সোক বাউল মে দৃষ লে র মীনু তথা দজন চুনকর র্যাট দবাএ।2. বৌম শুনাঈ দেনে পর বাউল মে সোধিয়ি ঝালে র র্যাট দবাএ।3. বৌম শুনাঈ দেনে পর বাদান কী মেস্ট, চৌনী, কেসর ঔর ইলাযদী পাতডর জালকর র্যাট দবাএ। রূত্বে মেবৌ রো সজাএঘ র গরম যা তঞ্চা করঞে পরোসে। | ||||||
| SC6 | Payasam | 0.1~0.3kg | Microwave safe bowl | For | 0.1kg | 0.2kg | 0.3kg |
| Rice (soaked for 1 hour) | 100g | 200g | 300g | ||||
| Milk + Water | 200ml | 400ml | 600ml | ||||
| Sugar | 75g | 150g | 200g | ||||
| Kesar, elaichi powder dry fruits | As per taste | ||||||
| Ghee | 1tbsp | 11⁄2tbsp | 2tbsp | ||||
| Method: 1. In a MWS bowl take ghee, soaked rice, milk & water & cover it.2. Select menu & weight & press start.3. When beeps, add more milk, dry fruits, kesar, elaichi powder. Mix well & press start. Stand for 5 minutes. Sprinkle kewada jal on it. Serve hot or chilled. | Vitibi: 1. নাইকোষেষ সোক বাউল মে দৌ, ভৌগে হূর চাবল, দুষ ঔর পানী ডালকর ঢক দে।2. মৌনু র বাজন চুনকর র্যাট দবাএ।3. বৌম শুনাঈ দেনে পর শুষ ওর দুষ, রূত্বে মেব, কেসর, ইলাযদী পাতডর ঝালে। অব্ধী তরহ মিলাকর র্যাট দবাএ। ৫ নিন্ট তক রঞা রানে দে। উসকে ঊপর কেপড়া জাল ষিড়কে। গরম যা তঞ্চা করঞে পরোসে। | ||||||
Sweets' Corner
| Menu Weight Limit Utensil Instructions | ||||||
| SC7 | Mysore Pak | 0.1 kg | Microwave safe flat glass dish & Microwave safe glass bowl | For | 0.1 kg | |
| Besan | 100 gms | |||||
| Sugar | 100 gms | |||||
| Ghee | 1/2 cup | |||||
| Water | 100 ml | |||||
| Cardamom powder | 1 tsp | |||||
| Method: 1. In a MWS flat glass dish add besan. Select menu & press start.2. When beeps, remove & in another MWS safe glass bowl add water & sugar. Press start.3. When beeps, add sugar to the besan stirring continuously. After this add melted ghee, stirring continuously. Pour the mixture in a MWS flat glass dish. Press start.4. Allow to cool. Cut it into square shape pieces & serve.Note: For stirring take the help of one more person. | ||||||
| SC8 | Nariyal Ki Burfi | 0.1~0.3 kg | Microwave safe bowl | For | 0.1 kg | 0.2 kg |
| Grated coconut | 100 g | 200 g | ||||
| Milkmaid | 1⁄2 cup | 1 cup | ||||
| Milk powder | 3 tbsp | 4 tbsp | ||||
| Ghee | 1 tsp | 2 tsp | ||||
| Elaichi powder | 1 tsp | 2 tsp | ||||
| Method: 1. In a MWS bowl add ghee & fresh grated coconut. Mix well.2. Select menu & weight & press start.3. When beeps, add milkmaid, milk powder, elaichi powder & press start.4. When beeps, remove & spread the mixture onto a greased thali & allow to set for 1 hour. Cut into rectangles & store in a air tight container | ||||||
Sweets' Corner
| Menu Weight Limit Utensil Instructions | |||||||
| SC9 | Sandesh | 0.2~0.4kg | Microwave safe bowl | For | 0.3kg0.2kg 0.4kg | ||
| Paneer | 300g200g400g | ||||||
| Milkmaid | 150g100g200g | ||||||
| Rose water | 11⁄2tbsp1tbsp2tbsp | ||||||
| Elaichi seeds | 1 tsp1⁄2 tsp 11⁄2 tsp | ||||||
| Chopped pista | A few | ||||||
| Method:1.In a MWS bowl add grated paneer & milkmaid. Mix well.2. Select menu & weight & press start.3. When beeps, stir well & press start.4. Allow to cool. Make balls out of the mixture & roll them in elaichi powder & chopped pista.1. माइकोपेव सेक बाउल में कसा हुमा पनीर और मिल्कमेड डालकर अक्षी तरह गिला लें।2. गौनू और वजन वुनकर स्टार्ट दबाएं।3. बीष सुनाई देने पर अक्षी तरह वलाएं और स्टार्ट दबाएं।4. ठंड़ा कर्ते के बाद मिश्रण के गोले बना लें और उन्हे इलायची पाउडर और कटे हुए पिरते में लगेट लें। | |||||||
Chatpat Corner
| Menu Weight Limit Utensil Instructions | ||||
| CC1 | Apple Tomato Chutney | 0.3 kg | Microwave Safe Glass Bowl | Apple pieces 100 gmsTomato pieces 100 gmsGreen chillies, Salt, Sugar As per your tasteOil 2 tbspFor Tempering: Rai, Jeera, Hing etc.Method : 1. In a MWS bowl put apple, tomato and keep it in Microwave.Select menu and press start to cook. When it gives a beep, remove and grind it in a mixer. In another bowl add oil and tempering and press start. When it gives a beep, add ground mixture and press start. Gamish with chopped corlander. |
| Method : 1. In a MWS bowl put apple, tomato and keep it in Microwave.Select menu and press start to cook. When it gives a beep, remove and grind it in a mixer. In another bowl add oil and tempering and press start. When it gives a beep, add ground mixture and press start. Gamish with chopped corlander. | ||||
| CC2 | Lemon Pickle | 0.3 kg | Microwave Safe Glass Bowl | Lemon pieces 150 gmsSugar 150 gmsChilli powder, Salt As per your tasteFor Tempering: Rai, Jeera, Hing etc. |
| Method : 1. Cut lemon and remove seeds. In MWS bowl add lemon pieces, sugar, salt and chilli powder. Select menu and press start. Store it in a bottle after it cools. | ||||
| Mix Veg. Pickle | 0.3 kgCC3 | Microwave Safe Glass Bowl | Mix Vegetable (Cauliflower, Carrot, Radish, Shalgam, Green peas) 250 gmsLemon juice 2 tbspSalt, Chilli powder, Salt, Sugar, Pickle Masala As per your tasteOil 2 tbspFor tempering: Rai, Jeera, Hing etc. As requiredMethod : 1. In a MWS bowl put vegetables cut in long strips.Cover and keep it in Microwave. Select menu and press start to cook. When it gives a beep, remove. In another bowl add oil and tempering and press start. When it gives a beep add masala, sugar, salt. Add vegetables to this when it cools. Mix well and store it in a fridge. | |
Chatpat Corner
| Menu Weight Limit Utensil Instructions | ||||
| CC4 | Pizza Sauce | 0.3 kg | Microwave Safe Glass Bowl | Tomato200 gOnion1 No.Salt, Sugar, Ajwain, Oregano, Basil leavesAs per your tasteGarlic pods7-8 nos.Oil2 tbspMethod: 1. In a MWS bowl put oil, tomato, onion, garlic pods and keep it in Microwave. Select menu & press start to cook. When it gives a beep, remove and grind it in a mixer. Now add salt, sugar, ajwain, basil leaves. Keep it in Microwave and press start. When it gives a beep, the sauce is ready. विधि: 1. माइक्रोवेव र्लारा बाउल में तेल, टमाटर, पाज, लहसुन की फलियाँ डालकर ओयन के अन्दर रख दें। मीनू चुनकर पकर्ने के सिए स्टार्ट दबाए। बीप सुनाई देने पर, बाहर निकाल और मिवशर में पीस लें। अब उसमें नमक, चीनी, अजवाइन, तुलसी के पते ढाले और ओयन में रखकर स्टार्ट दबाएं। बीप सुनाई देने पर सॉस तैयार हो जायेगी। |
| CC5 | Tomato Sauce | 0.5 kg | Microwave Safe Glass Bowl | Tomato500 gOnion1 No.Chilli powder, Sal, SugarAs per your tasteChopped ginger and garlic2 tbspGaram masala1 tspMethod: 1. In a MWS bowl put tomato pieces, cover and keep it in a Microwave. Select menu & press start to cook. When it gives a beep, remove and grind it in a mixer. Strain it. Again keep this in a Microwave and press start. When it gives a beep, add salt, sugar, garam masala and mix well. Again keep it in Microwave and press start. विधि: 1. माइक्रोवेव सेफ बाउल में कटे गुए टमाटर ढाले, ढककर ओयन मे रख दें। मीनू चुनकर पकर्ने के लिए स्टार्ट दबाए। बीप सुनाई देने पर, बाहर निकालकर गिवशर में पीस लें। निथोडकर दुबारा ओयन में रखे और स्टार्ट दबाएं। बीप सुनाई देने पर नमक, चीनी और गर्म मसाला ढालकर अच्छी तरक भिलाए। दुबारा ओयन में रखे और स्टार्ट दबाएं। |
| Masala Chutney | 0.3 kgCC6 | Microwave Safe Glass Bowl | Chana Daal, Urad Daal100 g eachGrated dry coconut100 gSesame, Salt, Sugar, Turmeric, Dhaniya powder, Jeera powder, Curry leaves, Methi seedsAs per your tasteOil1 tspMethod: 1. In a MWS bowl put daals and keep it in Microwave. Select menu & press start to cook. When it gives a beep, remove. Add the rest of the ingredients and keep it in Microwave and press start. Remove, cool it and grind it in a mixer. This chutney can be served with Idly, Paratha or Rice. विधि: 1. माइक्रोवेव सेफ बाउल में दालों को ढालकर ओयन में रखे। मीनू चुनकर पकर्ने के लिए स्टार्ट दबाए। बीप सुनाई देने पर बाहर निकाल लें। बाकी सारी रामग्री इरमें ढालकर फिर ओयन में रख दें और राट दबाए। बाहर निकालकर टेजा करे और इसो निवशर में पीस लें। रह चटनी इडली, पराठा या बाषल के साथ परोस सकते हैं। | |
Chatpat Corner
Chatpat Corner
| Menu Weight Limit Utensil Instructions | ||||
| CC7 | Gongura Chutney | 0.3 kg | Microwave Safe Glass Bowl | |
| Gongura 300 g | ||||
| Chopped onion 1 no. | ||||
| Chopped green chillies 5 nos. | ||||
| Mustard seeds 1 tbsp | ||||
| Oil 1 tbsp | ||||
| Salt & red chilli powder As per taste | ||||
| Method: 1. Grind all the ingredients together except mustard seeds & oil.2. In a MWS bowl add oil & mustard seeds. Select menu & press start.3. Mix the grind ingredients with the mustard seeds & serve. विधि: 1. सरसों के दानों और तेल को छोड़कर समी सामत्रियों को एक साथ पीसा लें।2. माइज्ञोदेव रोफ बाउल तेल और सरसों के दाने लें। गीनू जुनकर स्टार्ट द्वाए।3. पिसी हुई सामत्रियों को सरसों के दानों के राथ मिला लें और परोसे। | ||||
| CC8 | Coconut Chutney | 0.3 kg | Microwave Safe Glass Bowl | |
| For 0.3 kg | ||||
| Fresh grated coconut 300 g | ||||
| Chopped green chillies 2 nos. | ||||
| Chopped giner 1⁄21 tbsp | ||||
| Roasted split gram dal (optional) 1 tbsp | ||||
| Salt As per taste | ||||
| For tempering | ||||
| Oil 1 tsp | ||||
| Mustard seeds 1⁄4 tsp | ||||
| Broken dry red chillies 1 no. | ||||
| Curry leaves A few | ||||
| Method: 1. Grind grated coconut, chopped green chillies, ginger, roasted split gram dhal, salt together in a blender.2. In a MWS glass bowl add oil, mustard seeds, broken dry red chillies, curry leaves. Select menu & press start.3. Pour the tempering over the chutney & serve. विधि: 1. करता हुआ नारियाल. कटी हुई हरी मिर्च, अदरक, दली और भुनी हुई चने की दाल तथा नमक को एक साथ ग्राइडर में पीस लें।2. माइज्ञोदेव रोफ ग्लासा बाउत में तेल, सरसों के गीज, टूटी हुई गूल्डी लाल गिर्च, करी पता डालें। गीनू जुनकर स्टार्ट द्वाए।3. तड़के को चटनी के ऊपर डालकर परोसे। | ||||
24 Hours
- Breakfast (BF)
- Snacks (Sn)
- Child Favourite (CF)
- Bakery (BA)
Breakfast
| Menu Weight Limit Utensil Instructions | |||||||
| bF1 | Vag Sandwich | 0.1~0.3kg | High rack | ||||
| For | 0.1 kg | 0.2 kg | 0.3 kg | ||||
| Bread slices | 100 g (2 slices) | 200 g (4 slices) | 300 g (6 slices) | ||||
| Butter | 1 tbsp | 2 tbsp | 4 tbsp | ||||
| Sauce / spread | 1 1/2 tbsp | 3 tbsp | 4 tbsp | ||||
| Chopped vegetables (onion, tomato, capsicum) | 2 tbsp | 4 tbsp | 6 tbsp | ||||
| Grated cheese | 2 tbsp | 4 tbsp | 6 tbsp | ||||
| Salt & pepper | As per taste | ||||||
| Method: 1. On a bread slice apply butter, layer with sauce, spread chopped vegetables, sprinkle grated cheese.Cover it with the other bread slice.2. Keep the sandwich on high rack. Select menu & weight & press start.3. When beeps, change the side of the sandwich & again press start. | |||||||
| bF2 | Poha | 0.1~0.3kg | Microwave safe bowl | ||||
| For | 01 kg | 0.2 kg | 0.3 kg | ||||
| Poha (washed) | 100 g | 200 g | 300 g | ||||
| Oil | 1 tbsp | 1 1/2 tbsp | 1/2 tbsp | ||||
| Rai, jeera, hing, haldi, curry leaves | As per taste | ||||||
| Chopped onion | 1/2 cup | 1 cup | 1 cup | ||||
| Green chillies | 1 No. | 2 Nos. | 3 Nos. | ||||
| Salt, red chilli powder, garam masala, sugar | As per taste | ||||||
| Grated coconut & hara dhania | For garnishing | ||||||
| Method: 1. In a MWS bowl add oil, rai, jeera, curry leaves. Select menu & weight & press start.2. When beeps, add onion, green chillies, hing, haldi. Mix & press start.3. When beeps, add washed poha, salt, red chilli powder, garam masala & sugar. Mix & press start. Squeeze lemon juice. Garnish with grated coconut & hara dhania & serve. | |||||||
Breakfast
Breakfast
| Menu Weight Limit Utensil Instructions | ||||||
| bF3 | Upma | 0.1~0.3kg | Microwave safe bowl | For | 01 kg | 0.2 kg |
| Suji | 100 g | 200 g | ||||
| Oil | 1 tbsp | 2 tbsp | ||||
| Water | 200 ml | 400 ml | ||||
| Sat & sugar | As per taste | |||||
| Onion | 1 No. | 2 Nos. | ||||
| Green chilli | 2 No. | 3 Nos. | ||||
| Rai, jeera, hing, curry leacves, urad dal | As per taste | |||||
| Lemon juice | As per taste | |||||
| Method: 1. In a MWS bowl add oil, rai, jeera, urad dal, green chilli, suji. Mix wellSelect menu & weight & press start.When beeps, add onions, stir well & press start.When beeps, add water, sugar, salt, lemon juice. Mix well & press start. Stand for 5 minutes. | ||||||
| bF4 | Daliya | 0.1~0.3kg | Microwave safe bowl | For | 0.1 kg | 0.2 kg |
| Daliya | 100 g | 200 g | ||||
| Sugar or gud | 75 g | 150 g | ||||
| Ghee (melted) | 1 tbsp | 2 tbsp | ||||
| Water | 300 ml | 600 ml | ||||
| Elaichi powder, nutmeg powder, chashewnuts | As per taste | |||||
| Milk | As required | |||||
| Method: 1. In a MWS bowl, add dalia & ghee. Mix well.2. Select menu & weight & press start.When beeps, mix, add water, sugar or gud, elaichi,powder/nutmeg powder, cashewnuts. Mix well &press start.Stand for 5 minutes. Serve with hot milk.Note: If you are using gud for sweetness then add nutmeg powder & add elaichi powder if using sugarfor sweetness. | ||||||
Breakfast
| Menu Weight Limit Utensil Instructions | ||||||||||||||
| bF5 | Paratha 0 | 2 kg High Rack | &Multi cook tawa | Paratha Dough | 0.2 kg | |||||||||
| Stuffing : Alu, Muli, Methi, Paneer, whichever you like. | As per your taste | |||||||||||||
| Oil/Ghee | 2 tbsp | |||||||||||||
| Method:1. Select menu keep metal tray on high rack, press start.2. When beep keep paratha on tawa and brush with oil press start.3. When beep turn paratha and press start serve hot with chutney or ralta. | ###:1. ###### | ### ###### | ### ###### | ### ###### | ### ###### | ### ###### | ### ###### | ### ###### | ### ###### | ### ###### | ### ###### | ### ###### | ### ###### | ### ###### | ### ###### | ### ###### | ### ###### | ### ###### | ### ###### | ### ###### | ### ###### | ### ###### | ### ###### | ### ###### | ### ###### | ### ###### | ### ####### | ### ###### | ### ###### | ### ###### | ### ###### | ### ###### | ### ###### | ### ###### | ### ###### | ### ###### | ### ###### | ### ###### | ### ###### | ### ###### | ### ###### | ### ###### | ### ###### | ### ###### | ### ###### | ### ###### | ### ###### | ### ###### | ### ###### | ### ###### | ### ###### | ### ## ###### | ### ###### | ### ###### | ### ###### | ### ###### | ### ###### | ### ###### | ### ###### | ### ###### | ### ###### | ### ###### | ### ###### | ### ###### | ### ###### | ### ###### | ### ###### | ### ###### | ### ###### | ### ###### | ### ###### | ### ###### | ### ###### | ### ###### | ### ###### | ### ###### |### ###### | ### ###### | ### ###### | ### ###### | ### ###### | ### ###### | ### ###### | ### ###### | ### ###### | ### ###### | ### ###### | ### ###### | ### ###### | ### ###### | ### ###### | ### ###### | ### ###### | ### ###### | ### ###### | ### ###### | ### ###### | ### ###### | ### ###### | ### ###### | ### ###### | ## ###### | ## ###### | ## ###### | ## ###### | ## ###### | ## ###### | ## ###### | ## ###### | ## ###### | ## ###### | ## ###### | ## ###### | ## ###### | ## ###### | ## ###### | ## ###### | ## ###### | ## ###### | ## ###### | ## ###### | ## ###### | ## ###### | ## ###### | ## ###### | ## ###### | # ## ###### | ## ###### | ## ###### | ## ###### | ## ###### | ## ###### | ## ###### | ## ###### | ## ###### | ## ###### | ## ###### | ## ###### | ## ###### | ## ###### | ## ###### | ## ###### | ## ###### | ## ###### | ## ###### | ## ###### | ## ###### | ## ###### | ## ###### | ## ###### | ## ###### | | bF6 | Pongal | 0.1 - 0.3 kg Microwave safe glass bowl | For | 100 gm | 200 gm | 300 gm | ||||||
| Rice (soaked) | 50 gm | 100 gm | 150 gm | |||||||||||
| Moong dal (soaked) | 25 gm | 50 gm | 75 gm | |||||||||||
| Water (Hot) | 300ml | 500ml | 700ml | |||||||||||
| Jaggery(grated) | 100 gm | 200 gm | 300 gm | |||||||||||
| Ghee | 25 gm | 50 gm | 75 gm | |||||||||||
| Elaichi powder | 2 tsp2 tsp1 tsp | |||||||||||||
| Dry fruits | As per your taste | |||||||||||||
| Method:1. In MWS bowl put ghee , soaked Rice & Moong dal. Select menu & weight and press start.2. When Beeps, add hot water, cover it and press start.3. When beeps, remove cover add all the ingredients and mix well press start. | ###:1. ### ###### | ### ###### | ### ###### | ### ###### | ### ###### | ### ###### | ### ###### | ### ###### | ### ###### | ### ###### | ### ###### | ### ###### | ### ###### | ### ###### | ### ###### | ### ###### | ### ###### | ### ###### | ### ###### | ### ###### | ### ###### | ### ###### | ### ###### | ### ###### | ### ###### | ###:1. ### ###### | ### ###### | ### ###### | ### ###### | ### ###### | ### ###### | ### ###### | ### ###### | ### ###### | ### ###### | ### ###### | ### ###### | ### ###### | ### ###### | ### ###### | ### ###### | ### ###### | ### ###### | ### ###### | ### ###### | ### ###### | ### ###### | ### ###### | ### ####### | ### ###### | | ||||||||||||
| bF7 | Sabut Dana Khichdi | 0.1 - 0.3 kg | Microwave safe bowl | For | 0.2 kg 0.3 kg0.1 kg | |||||||||
| Sabudana (soaked for 2 hours) | 200 g 300 g100 g | |||||||||||||
| Oil | 11⁄4 tbsp 2 tbsp1⁄2 tbsp | |||||||||||||
| Rai, salt, lemon juice, chopped green chillies | As per taste | |||||||||||||
| Potatoes (boiled & chopped) | 1 No. | 2 Nos. | 3 Nos. | |||||||||||
| Coriander leaves | A few springs | |||||||||||||
| Method:1. In a MWS bowl add oil, rai, green chillies. Mix, Select menu & weight & press start.2. When beeps, mix, add boiled potatoes, soaked sago, coriander leaves. Mix & press start.Squeeze lemon juice & serve. | ###:1. ### ###### | ### ###### | ### ###### | ### ###### | ### ###### | ### ###### | ### ###### | ### ###### | ### ###### | ### ###### | ### ###### | ### ###### | ### ###### | ### ###### | ### ###### | ### ###### | ### ###### | ### ###### | ### ###### | ### ###### | ### ###### | ### ###### | ### ###### | ### ## ###### | ### ####### | ### ####### | ### ####### | ### ####### | ### ####### | ### ####### | ### ####### | ### ####### | ### ####### | ### ####### | ### ####### | ### ####### | ### ####### | ### ####### | ### ####### | ### ####### | ### ####### | ### ####### | ### ####### | ### ####### | ### ####### | ### ####### | ### ####### | ### ####### | ### ####### | ### ########## | ### ########## | ### ########## | ### ########## | ### ########## | ### ########## | ### ########## | ### ########## | ### ########## | ### ########## | ### ########## | ### ########## | ### ########## | ### ########## | ### ########## | ### ########## | ### ########## | ### ########## | ### ########## | ### ########## | ### ########## | ### ########## | ### ########## | ### ########## | ### ########## | ### ####### | ### ########## | ### ########## | ### ########## | ### ########## | ### ########## | ### ########## | ### ########## | ### ########## | ### ########## | ### ########## | ### ########## | ### ########## | ### ########## | ### ########## | ### ########## | ### ########## | ### ########## | ### ########## | ### ########## | ### ########## | ### ########## | ### ########## | ### ########## | ### ####### | ### ####### | ### ########## | ### ########## | ### ########## | ### ########## | ### ########## | ### ########## | ### ########## | ### ########## | ### ########## | ### ########## | ### ########## | ### ########## | ### ########## | ### ########## | ### ########## | ### ########## | ### ########## | ### ########## | ### ########## | ### ########## | ### ########## | ### ########## | ### ####### | ### ########## | ### ####### | ### ########## | ### ########## | ### ########## | ### ########## | ### ########## | ### ########## | ### ########## | ### ########## | ### ########## | ### ########## | ### ########## | ### ########## | ### ########## | ### ########## | ### ########## | ### ########## | ### ########## | ### ########## | ### ########## | ### ########## | ### ########## | ### ########## | ### ####### | ### ####### | ### ####### | ### ########## | ### ########## | ### ########## | ### ########## | ### ########## | ### ########## | ### ########## | ### ########## | ### ########## | ### ########## | ### ########## | ### ########## | ### ########## | ### ########## | ### ########## | ### ########## | ### ########## | ### ########## | ### ########## | ### ########## | ### ########## | ### ####### | ### ########## | ### ########## | ### ####### | ### ########## | ### ########## | ### ########## | ### ########## | ### ########## | ### ########## | ### ########## | ### ########## | ### ########## | ### ########## | ### ########## | ### ########## | ### ########## | ### ########## | ### ########## | ### ########## | ### ########## | ### ########## | ### ########## | ### ########## | ### ########## | ### ####### | ### ########## | ### ####### | ### ####### | ### ########## | ### ########## | ### ########## | ### ########## | ### ########## | ### ########## | ### ########## | ### ########## | ### ########## | ### ########## | ### ########## | ### ########## | ### ########## | ### ########## | ### ########## | ### ########## | ### ########## | ### ########## | ### ########## | ### ########## | ### ########## | ### ####### | ### ####### | ### ########## | ### ####### | ### ########## | ### ########## | ### ########## | ### ########## | ### ########## | ### ########## | ### ########## | ### ########## | ### ########## | ### ########## | ### ########## | ### ########## | ### ########## | ### ########## | ### ########## | ### ########## | ### ########## | ### ########## | ### ########## | ### ########## | ### ########## | ### ####### | ### ####### | ### ####### | ### ####### | ### ########## | ### ########## | ### ########## | ### ########## | ### ########## | ### ########## | ### ########## | ### ########## | ### ########## | ### ########## | ### ########## | ### ########## | ### ########## | ### ########## | ### ########## | ### ########## | ### ########## | ### ########## | ### ########## | ### ########## | ### ####### | ### ####### | ### ########## | ### ########## | ### ####### | ### ########## | ### ########## | ### ########## | ### ########## | ### ########## | ### ########## | ### ########## | ### ########## | ### ########## | ### ########## | ### ########## | ### ########## | ### ########## | ### ########## | ### ########## | ### ########## | ### ########## | ### ########## | ### ########## | ### ########## | ### ####### | ### ########## | ### ########## | ### ########## | ### ####### | ### ########## | ### ########## | ### ########## | ### ########## | ### ########## | ### ########## | ### ########## | ### ########## | ### ########## | ### ########## | ### ########## | ### ########## | ### ########## | ### ########## | ### ########## | ### ########## | ### ########## | ### ########## | ### ########## | ### ########## | ### ####### | ### ####### | ### ########## | ### ####### | ### ####### | ### ########## | ### ########## | ### ########## | ### ########## | ### ########## | ### ########## | ### ########## | ### ########## | ### ########## | ### ########## | ### ########## | ### ########## | ### ########## | ### ########## | ### ########## | ### ########## | ### ########## | ### ########## | ### ########## | ### ########## | ### ####### | ### ####### | ### ####### | ### ########## | ### ####### | ### ########## | ### ########## | ### ########## | ### ########## | ### ########## | ### ########## | ### ########## | ### ########## | ### ########## | ### ########## | ### ########## | ### ########## | ### ########## | ### ########## | ### ########## | ### ########## | ### ########## | ### ########## | ### ########## | ### ########## | ### ####### | ### ########## | ### ####### | ### ########## | ### ####### | ### ########## | ### ########## | ### ########## | ### ########## | ### ########## | ### ########## | ### ########## | ### ########## | ### ########## | ### ########## | ### ########## | ### ########## | ### ########## | ### ########## | ### ########## | ### ########## | ### ########## | ### ########## | ### ########## | ### ########## | ### ####### | ### ####### | ### ####### | ### ####### | ### ####### | ### ########## | ### ########## | ### ########## | ### ########## | ### ########## | ### ########## | ### ########## | ### ########## | ### ########## | ### ########## | ### ########## | ### ########## | ### ########## | ### ########## | ### ########## | ### ########## | ### ########## | ### ########## | ### ########## | ### ####### | ### ####### | ### ########## | ### ########## | ### ########## | ### ####### | ### ########## | ### ########## | ### ########## | ### ########## | ### ########## | ### ########## | ### ########## | ### ########## | ### ########## | ### ########## | ### ########## | ### ########## | ### ########## | ### ########## | ### ########## | ### ########## | ### ########## | ### ########## | ### ########## | ### ####### | ### ####### | ### ########## | ### ########## | ### ####### | ### ####### | ### ########## | ### ########## | ### ########## | ### ########## | ### ########## | ### ########## | ### ########## | ### ########## | ### ########## | ### ########## | ### ########## | ### ########## | ### ########## | ### ########## | ### ########## | ### ########## | ### ########## | ### ########## | ### ########## | ### ########## | ### ####### | ### ########## | ### ########## | ### ####### | ### ####### | ### ########## | ### ########## | ### ########## | ### ########## | ### ########## | ### ########## | ### ########## | ### ########## | ### ########## | ### ########## | ### ########## | ### ########## | ### ########## | ### ########## | ### ########## | ### ########## | ### ########## | ### ########## | ### ########## | ### ####### | ### ####### | ### ########## | ### ####### | ### ########## | ### ####### | ### ########## | ### ########## | ### ########## | ### ########## | ### ########## | ### ########## | ### ########## | ### ########## | ### ########## | ### ########## | ### ########## | ### ########## | ### ########## | ### ########## | ### ########## | ### ########## | ### ########## | ### ########## | ### ########## | ### ####### | ### ####### | ### ########## | ### ####### | ### ####### | ### ####### | ### ########## | ### ########## | ### ########## | ### ########## | ### ########## | ### ########## | ### ########## | ### ########## | ### ########## | ### ########## | ### ########## | ### ########## | ### ########## | ### ########## | ### ########## | ### ########## | ### ########## | ### ########## | ### ########## | ### ########## | ### ####### | ### ########## | ### ####### | ### ####### | ### ####### | ### ########## | ### ########## | ### ########## | ### ########## | ### ########## | ### ########## | ### ########## | ### ########## | ### ########## | ### ########## | ### ########## | ### ########## | ### ########## | ### ########## | ### ########## | ### ########## | ### ########## | ### ########## | ### ########## | ### ####### | ### ####### | ### ####### | ### ########## | ### ########## | ### ####### | ### ####### | ### ########## | ### ########## | ### ########## | ### ########## | ### ########## | ### ########## | ### ########## | ### ########## | ### ########## | ### ########## | ### ########## | ### ########## | ### ########## | ### ########## | ### ########## | ### ########## | ### ########## | ### ########## | ### ####### | ### ####### | ### ########## | ### ########## | ### ########## | ### ########## | ### ####### | ### ####### | ### ########## | ### ########## | ### ########## | ### ########## | ### ########## | ### ########## | ### ########## | ### ########## | ### ########## | ### ########## | ### ########## | ### ########## | ### \%###### | ### \%###### | ### \%###### | ### \%###### | ### \%###### | ### \%###### | ### \%###### | ### \%###### | ### \%###### | ### \%###### | ### \%###### | ### \%###### | ### \%###### | ### \%###### | ### \%###### | ### \%###### | ### \%###### | ### \%###### | ### \%###### | ### \%###### | ### \%###### | ### \%###### | ### \%###### | ### \%###### | ### \%###### | ### %###### | ### %###### | ### %###### | ### %###### | ### %###### | ### %###### | ### %###### | ### %###### | ### %###### | ### %###### | ### %###### | ### %###### | ### %###### | ### %###### | ### %###### | ### %###### | ### %###### | ### %###### | ### %###### | ### %###### | ### %###### | ### %###### | ### %###### | ### %###### | ### %###### | ### \%###### | ### \%###### | ### %###### | ### %###### | ### %###### | ### %###### | ### %###### | ### %###### | ### %###### | ### %###### | ### %###### | ### %###### | ### %###### | ### %###### | ### %###### | ### %###### | ### %###### | ### %###### | ### %###### | ### %###### | ### %###### | ### %###### | ### %###### | ### %###### | ### \%###### | ### \%###### | ### \%###### | ### \%###### | ### \%###### | ### \%###### | ### \%###### | ### \%###### | ### \%###### | ### \%###### | ### \%###### | ### \%###### | ### \%###### | ### \%###### | ### \%###### | ### \%###### | ### \%###### | ### \%###### | ### \%###### | ### \%###### | ### \%###### | ### \%###### | ### \%###### | ### \%###### | ### # | |||||||||||||
Petit-déjeuner
| Menu Weight Limit Utensil Instructions | ||||||
| bF8 | Paneer Sandwich | 0.1~0.3 kg | High rack | For | 01 kg | 0.2 kg |
| Bread slices | 2 nos. | 4 nos. | ||||
| Grated paneer | 100 g | 150 g | ||||
| Chopped onion | 2 tbsp | 3 tbsp | ||||
| Cheese spread | 2 tbsp | 3 tbsp | ||||
| Salt, pepper & mustard powder | As per taste | |||||
| Minced ginger | As per taste | |||||
| Method: 1. In a bowl mix grated paneer, chopped onion, cheese spread, minced ginger salt, pepper & mustard together.2. Spread the mixture on one bread slice & cover it with the other slice. Keep the sandwich on high rack.3. Select menu & weight & press start.4. When beeps, change the side & press start. | ||||||
En-cas
| Menu Weight Limit Utensil Instructions | ||||||
| Sn1 | Pav Bhaji | 0.1~0.3kg | Microwave safe bowl & High rack & Multi cook tawa | For | 01 kg | 0.2 kg |
| Mix veg (chopped) - Potato, Cauliflower, Capsicum, Green Peas | 100 g | 200 g | ||||
| Oil | 1 tbsp | 2 tbsp | ||||
| Chopped onion | 1 No. | 2 Nos. | ||||
| Chopped tomato | 1 No. | 2 No. | ||||
| Water | As per taste | |||||
| Pav bhaji masala | 1 tsp | 11/2 tsp | ||||
| Garlic paste | 1 tsp | 11/2 tsp | ||||
| Red chilli powder, salt, lemon juice, butter | As per taste | |||||
| Hara dhania | For garnishing | |||||
| Method:1.In a MWS bowl take oil, garlic paste, chopped onion, chopped tomato. Mix well & select menu & weight & press start.When beeps, add vegetables, water, red chilli powder, pav bhaji masala, salt. Mix well & press start.When beeps, remove mash it well, add butter & lemon juice.Gamish with coriander leaves.For grilling pav-bhaji buns: Cut each bun in centre,apply butter, arrange on tawa on high rack. Press start.Serve with bhaji. | ||||||
| Sn2 | Dhokla | 0.1~0.3kg | Microwave safe flat glass dish & Microwave safe bowl | For | 01 kg | 0.2 kg |
| Besan | 100 g | 200 g | ||||
| Warm water | 50 ml | 75 ml | ||||
| Curd | 2 tbsp | 3 tbsp | ||||
| Green chilli & ginger paste | 1 tsp | 11/2 tsp | ||||
| Salt & sugar | As per taste | |||||
| Fruit salt | 1 tsp | 11/2 tsp | ||||
| Oil, rai, curry leaves, water | For tempering | |||||
| Grated coconut | For garnishing | |||||
| Method:1:Mix besan, curd, sugar, salt, water, green chilli-ginger paste, yellow color, fruit salt together. Mix well. Keep for 5-10 minutes.Pour the mixture in MWS safe flat glass dish. Select menu & weight & press start.When beep, in another MWS bowl add oil, rai & curry leaves & press start. Add some water to the tempering.Add this tempering to the dhokla & cover. Stand for 5 minutes. Garnish with grated coconut & serve. | ||||||
| Menu Weight Limit Utensil Instructions | |||||||
| Sn3 | Peanuts | 0.1~0.3kg | Microwave safe glass bowl | For | 0.1kg | 0.2kg 0.3kg | |
| Peanuts | 200g 300g100g | ||||||
| Oil | As required | ||||||
| Method:1.In a microwave safe flat glass dish add little oil, peanuts.Mix well.2.Select menu & press start.3.When beeps, stir it & press start.4.Serve plain or with chaat masala. | ###:1. নাইকোঃের সোফ মলৈট গ্লারা ডিশ মে থোজা তেল ওর পীনাদ্রালেকর অবছী তরহ মিলা লে।2. মীনু চুনকর স্টার্ট ববাএ।3. বৌপ সুগাঈ দেং পর চলায় ওর স্টার্ট ববাএ।4. সাদা যা চাট মসালে কে সাথ পরোসে। | ||||||
| Sn4 | Murmura | 0.1kg | Microwave safe glass bowl | For | 0.1kg | ||
| Murmura | 100g | ||||||
| Roasted peanuts | As required | ||||||
| Oil | 1tbsp | ||||||
| Jeera | 1tsp | ||||||
| Salt, chaat masala | As per taste | ||||||
| Method:1.In a MWS glass bowl add oil, jeera. Select menu &press start.2.When beeps, add murmura. Mix & press start.3.When beeps, add roasted peanuts, salt, chaat masala& serve. | ###:1. মাইকোঃের সোফ স্টাস বাউল মে তেল, জীরা ঢালে। মীনু চুনকরস্টার্ট ববাএ।2. বৌপ সুগাঈ দেং পর, মুরমুরা ঝালে ওর নিলাক্র স্টার্ট দবাএ।3. বৌপ সুনাঈ দেং পর, মুনু হূর মীনদ্রস, নমক ওর বাট মসালা ঝালেওর পরোসে। | ||||||
En-cas
| Menu Weight Limit Utensil Instructions | |||||||
| Sn5 | Chana Chaat | 0.1~0.3kg | Microwave safe bowl | For | 0.1kg | 0.2kg | 0.3kg |
| Kala chana (soaked overnight) | 100g | 200g | 300g | ||||
| Water | 250ml | 500ml | 750ml | ||||
| Oil | 1tbsp | 2tbsp | 3tbsp | ||||
| Jeera, hing | 1tsp | 11/2 tsp | 2tsp | ||||
| Chopped onion | 1/2 cup | 1cup | 1cup | ||||
| Boiled potato | 1no. | 2nos. | 3nos. | ||||
| Salt, red chilli powder,chaat masala,lemon juice, imli chatni | As per taste | ||||||
| Method:1.In a MWS bowl add soaked chana, water & cover. Select menu & weight & press start.When beeps, remove & drain water from the chanas. In a MWS bowl add oil, jeera, hing & press start.When beeps, add boiled chanas, salt, red chilli powder, chaat masala, lemon juice, imli chatni, chooped onion, boiled potato.Mix well & serve. | |||||||
| Sn6 | Paneer Bhurji | 0.1~0.3kg | Microwave safe bowl | For | 0.1kg | 0.2kg0.3kg | |
| Paneer (mashed) | 100g | 200g | 300g | ||||
| Oil | 1tbsp | 11/2 tbsp | 2tbsp | ||||
| Chopped capsicum | 1no. | 2nos. | 3nos. | ||||
| Chopped onion | 1/2 cup | 1cup | 1cup | ||||
| Coriander leaves | A few sprigs | ||||||
| Coriader powder, jeera powder, red chilli powder, salt | As per taste | ||||||
| Method:1.In a MWS bowl add oil, onion & capsicum. Select menu & weight & press start.When beeps, mix well & add paneer, coriander leaves, coriander powder, jeera powder, red chilli powder & salt.Mix well & press start.Serve with toast or wrapped in roti. | |||||||
En-cas
En-cas
| Menu Weight Limit Utensil Instructions | |||||||
| Sn7 | Bharwaan Shimla Mirch | 0.1~0.3kg | Microwave safe bowl | For | 0.2kg 0.3kg0.1kg | ||
| Shimla (scooped) | 200g 300g100g | ||||||
| For stuffing | |||||||
| Boiled potatoes | 2 nos. 3 nos.1 no. | ||||||
| Boiled peas | 1 cup 1 cup 1/2 cup | ||||||
| Chopped green chillies | 1 no. | 2 nos | |||||
| Chopped giner | 1 tsp | 2 tsp | |||||
| Chopped coriander leaves | A few sprigs | ||||||
| Amchur powder, coriander powder, garam masala, jeera powder & salt | As per taste | ||||||
| Oil | 1/2 tbsp | 1 tbsp | |||||
| Method:1. Mix the boiled potato, peas, chopped green chillies, ginger & coriander leaves together. Add amchur powder, coriander powder, garam masala, jeera powder & salt.Mix well.2. Fill this stuffing in the scooped shimla mirch.3. Grease the shimla mirch with little oil. Keep the stuffed shimla mirch in a MWS bowl. Cover & press start. | |||||||
En-cas
| Menu Weight Limit Utensil Instructions | ||||
| Sn8 | Khandvi | 0.3 kg | Microwave safe bowl | For 0.3 kg |
| Besan 100 g | ||||
| Water 1 cup | ||||
| Curd 1 cup | ||||
| Salt As per taste | ||||
| Green chilli & ginger paste As per taste | ||||
| Chopped coriander leaves A few sprigs | ||||
| Rai seeds (spluttered) 1⁄2 tsp | ||||
| Grated coconut As required | ||||
| Method: 1. In a MWS bowl mix besan, water, curd, salt & green chilli & ginger paste together. Mix well. Cover. 2. Select menu & press start. 3. When beeps, stir well & press start. 4. Spread the batter on a greased smooth flat kitchen slab. Allow to cool, cut into lengthwise strips. 5. Roll the strips, garnish with spluttered rai, coriander leaves & grated coconut & serve. | ||||
En-cas
| Menu Weight Limit Utensil Instructions | ||||||
| Sn9 | Spicy Baby Com | 0.1~0.3kg | Microwave safe bowl | For | 0.1 kg | 0.2 kg |
| Baby corn (cut lengthwise) | 100 g | 200 g | ||||
| Lemon juice | As per taste | |||||
| Sugar, salt | As per taste | |||||
| Oil | 1 tsp | 11/2 tsp | ||||
| For paste | ||||||
| Chopped coriander leaves | 1 cup | 11/2 cup | ||||
| Chopped ginger | 1/2 tsp | 1 tsp | ||||
| Garlic cloves | 1 no. | 2 nos. | ||||
| Chopped green chillies | 1 no. | 2 nos. | ||||
| Chopped onion | 1/2 cup | 1 cup | ||||
| Cumin seeds | As required | |||||
| Method: 1. Grind chopped coriander leaves, ginger, garlic cloves, green chillies, onion & cumin seeds together to prepare the paste.2. In a MWS bowl add oil, baby corns, sugar, salt & paste. Mix well. Cover. Select menu & weight & press start.3. Allow to stand for 3 minutes. | ###: 1. \( \text{कटी हुई पानिया की पतियों, अदर्क, लाहसुन लॉन, हहरी मिर्व, प्याज और आजपड़न के बौण एक साथ पौलकर पेंट तैयार कर ले।2. माइब्रावेव रोक बाउल मे रेल, बेबी कौरी, चौनी, नमक और पेंट झालकर अच्छी तरह मिला ले। द्रककर भौनू और उल्लन चुने और स्टार्ट दयाए।3. 3 निन्ट तक स्वा रहीं दें। | |||||
Préféré des enfants
Préféré des enfants
| Menu Weight Limit Utensil Instructions | ||||||
| CF1 | Omelette | 0.2~0.4 kg | Microwave safe flat glass dish | For | 0.3 kg 0.4 kg0.2 kg | |
| Eggs | 3 Nos. 4 Nos.2 Nos. | |||||
| Oil | 1 tbsp 1 tbsp 1/2 tbsp | |||||
| Chopped onion, tomato, coriander leaves | 1 cup 1 cup 1/2 cup | |||||
| Salt, pepper | As per taste | |||||
| Method: 1. Beat the eggs well & add salt, pepper & coriander leaves.2. Add oil, tomato & onion to MWS flat glass dish. Select menu & weight & press start.3. When beeps, add the egg mixture. Cover & press start. | 1. अप्पों को अप्पी तरह फैटकर उसमें नामक, गिर्व और धनिया की पतिवां डाले।2. माइक्रोवेव रोफ पालेट ग्लारा डिश में तेल, टमाटर और पाज डाले।मीनू और वजन पुनकर रटाट दबाएं।3. बीप सुनाई देने पर, अप्पों के मिश्रण को डाले। ढककर स्टार्ट दबाएं। | |||||
| CF2 | Noodles | 0.1~0.3 kg | Microwave safe bowl | For | 01 kg | 0.2 kg |
| Sweet corn | 100 g | 200 g | ||||
| Water | 400 ml | 800 ml | ||||
| Oil | 1 tsp | 2 tsp | ||||
| Vinegar | 1/2 tsp | 1 tsp | ||||
| Soya sauce | 1/2 tsp | 1 tsp | ||||
| Chilli sauce | 1/2 tsp | 1 tsp | ||||
| Mix vegetables - Cabbage, capsicum, carrot, french beans | 1/2 cup | 1/2 cup | ||||
| Salt, sugar, kali mirch powder | As per taste | |||||
| Method: 1. In Microwave Safe Bowl take noodles, water, oil. Select menu & weight and press start.2. When beep, strain noodles & pour cold water over it. In Microwave Safe Bowl put some oil and finely chopped vegetables, add vinegar, soyasauce, chilli sauce, MSG salt & paper to taste press start.3. When beep, add noodles and mix well press start serve hot. | 1. माइक्रोवेव सेफ बाउल में नृडल्स, पानी, तेल डाले। मीनू एवं ढजन चुनकर रटाट दबाएं।2. जब 'बीप' सुनाई दें तो नृडल्सा को निथोड़े और औपर से ठळा पानी डाले। नाइक्रोवेव सेफ बाउल में धाङ्गा सा तेल और बारीक कटी हुई ताभियां डाले, फिर स्वादानुसार सिरका, सोया सांस, चिती सांस, एपएसजी साल्ट और मिर्व डाल दें। स्टाट दबाएं।3. 'बीप' सुनाई देने पर नृडल्स डाले और अप्पी तरह मिलाकर स्टार्ट दबाएं। गर्म-गर्म परोरों। | |||||
Préféré des enfants
Préféré des enfants
| Menu Weight Limit Utensil Instructions | ||||||
| CF3 | Com Chaat | 0.1~0.3kg Microwave safe bowl | For | 0.1kg | 0.2kg | 0.3kg |
| Sweet corn | 100g | 200g | 300g | |||
| Water | 50ml | 75ml | 100ml | |||
| Mix fruits (Pomegranate, cucumber, apple) | 1⁄2cup | 1cup | 11⁄2cup | |||
| Salt, red chilli powder, chaat masala, lemon juice | As per taste | |||||
| Method: 1.In a MWS bowl, add water & sweet coms & cover.Select menu & weight & press start.2.When beeps, add mix fruits, salt, red chilli powder,chaat masala, lemon juice. Mix well & serve. | ###: 1. गाइकोरेव सेफ बाउल में पानी और स्लीट कौर्सा डालकर वक दें। मीनु और वजण चुनकर स्टार्ट दबाएं।2. ब्रीप सुनाई देने पर मिश्रित कल, नमक, लाल मिर्च पाउडर, बाट मराता और नींबू रस डालकर अख्छी तरह गिलाएं और परसें। | |||||
| CF4 | Pizza* 0.3kg Low rack | &High rack | Pizza base | 1 Big Pizza base | ||
| Topping | 3 tbsp | |||||
| Mix Vegetables -Tomato, Capsicum, Onion | 1 cup | |||||
| Grated Cheese | 1/2cup | |||||
| Oregano & Chilli flakes (Optional) | As per your taste | |||||
| Method: 1. Select menu & press start to preheat2. Spread pizza topping on pizza base, spread chopped vegetables on it. Sprinkle grated cheese.3. When beeps, place he pizza on low rack & press start.4. When beeps, transfer the pizza on high rack & press start. | ###: 1. पहले गर्न करने के लिए मीनु चुनों और स्टार्ट दबाएं।2. पीजा बेता के ऊपर टोफिरा फैलाए। उराके ऊपर कटी हुई राखियों को फैलाए। फिर कुछ कसा हुआ बीज फिड़के।3. अव मीजा को लो रैक के ऊपर रखे और स्टार्ट दबाएं।4. बीप सुनाई देने पर, पीजा को हाई रैक पर विस्थापित कर दें और स्टार्ट दबाएं। | |||||
* Ne placez rien dans le four pendant le mode Préchauffage. / Ne placez rien dans le four pendant le mode Préchauffage.
Préféré des enfants
| Menu Weight Limit Utensil Instructions | ||||||
| CF5 03 kgGarlic Bread* | Low Rack & Multi cook tawa | Bread slices | 4 pcs | |||
| Butter | 5 tbsp | |||||
| Garlic paste | 2 tbsp | |||||
| Grated cheese | 4 tbsp | |||||
| Salt, kali mirchi powder, Oregano, chilli flakes | As per your taste | |||||
| Method:1. Mix butter, garlic paste, salt, kall mirchi powder and oregano together. Apply this mixture to both sides of bread slices. Select menu & press start.When beeps, keep the bread slices on low rack & press start.Note: Use French bread to make garlic bread. | ||||||
| CF6Vermicalli Khichdi | 0.1 - 0.3 kg | Microwave safe bowl | For | 0.1 kg | 0.3 kg0.2 kg | |
| Roasted vermicelli | 100 g | 300 g200 g | ||||
| Oil | 1 tbps | 2 tbps 11/2 tbps | ||||
| Rai, urad dal, curry leaves | As per taste | |||||
| Chopped onion | 1/2 cup | 1 cup1 cup | ||||
| Chopped tomato | 1 No. | 3 Nos.2 Nos. | ||||
| Salt, red chilli powder, haldi, garam masala | As per taste | |||||
| Water | 400 ml | 1200 ml800 ml | ||||
| Lemon juice | As per taste | |||||
| Method:1. In a MWS bowl add oil, rai, chana dal, curry leaves, chopped onion. Mix & select menu & weight & press start.When beeps, mix & add tomato. Press start.When beeps, mix & add vermicelli, water, salt, red chili powder, haldi, garam masala. Press start. Stand for 3 minutes.Squeeze lemon, mix & serve. | ||||||
| CF7Cheesy Nachos | 0.1 - 0.3Kg Microwave safe flat glass dish | For | 0.1 kg 0.2 kg 0.3 kg | |||
| Nachos | 100 g 200 g 300 g | |||||
| Grated cheese | 1/2 cup | 1 cup | 1 cup | |||
| Pizza sauce | 4 tbsp | 5 tbsp | 6 tbsp | |||
| Chopped onion, tomato | 1 cup 11/2 cup 2 cups | |||||
| Method:1. In a MWS flat glass dish add nachos, chopped onion, tomato, pizza sauce & grated cheese. Select menu & weight & press start. | ||||||
* Ne placez rien dans le four pendant le mode Préchauffage (Pre-h). / Ne placez rien dans le four pendant le mode Préchauffage (Pre-h).
| Menu Weight Limit Utensil Instructions | ||||
| bA1 | Brownie | 0.3 kg | Low rack & metal cake tin | For 0.3 kgMaida 125 gCondensed milk 150 gButter 100 gAlmonds, Wallnuts As per tasteSoda by carb 1/2 tspBaking powder 1 tspChocolate Essence 1 tspCoco powder 2 tbspMethod: 1. Sieve maida, baking powder and soda. In a bowl add milkmaid and butter and beat well.Add maida, coco powder, essence and mix. For spoon dropping consistency add milk or water.2. Select menu & press start. When beeps, put the tin with batter on low rack. Press start to bake. Remove when it gives a beep. तिवि: 1. मैदा, बेकिंग पाउडर और सोड़ा को छार्ग। मिल्कनेड और मकखन को बाउल में जालकर अच्ची तरह ते फौट लें। मैदा, ऋको पाउडर और इत्र झालकर मिलाएं। वम्मव से लगातार वलाते हुए दूम या पानी झालें।2. मीनू चुनकर स्टार्ट दबाएं। बीप सुनाई देने पर मिश्रण के टिन को ओंकन में लो रैक पर रख दें और बेक करने के लिए रटार्ट दबाए। बीप सुनाई देने पर बाहर निकाल लें। |
| bA2 | Cheese Straw | 0.2 kg | Low rack & metal cake tin | For 0.2 kgMaida 100 gGrated cheese 25 gButter 50 gCold water As requiredPepper powder 1/4 tspBaking powder 1/8 tspChilli powder 1/2 tspSalt 1/4 tspMethod: 1. Sieve maida, baking powder, chilli powder and pepper powder. In a bowl add maida and butter and cheese and rub it with fingertips till it resembles breadcrumbs.Add little cold water to make a soft dough. Roll it in to 1⁄2 c.m. roti and cut thin strips. Twist them and put in the metal cake tin.2. Select menu & press start. When beeps, put the tin on low rack. Press start to bake. Remove when it gives a beep. तिवि: 1. मैदा, बेकिंग पाउडर, चिली पाउडर और मिर्च पाउडर को छार्ग। मैदा, मकखन और चीज बाउल में झालकर उंगलियों के परयों से तव तक रगई जब तौक वह ब्रेड के रागलप न हो जाए। मुलायण लौदा बनाने के लिए शोड़ा सा चंडा पानी मिलाएं। इससे 1/2 सेमी. की रोटी बेले और पतली पाठियां कार्टों। फिर उनको एंतकर केक टिन में रखें।2. मीनू चुनकर स्टार्ट दबाए। बीप सुनाई देने पर टिन को ओंकन में लो रैक पर रख दें। अब बेक करने के लिए स्टार्ट दबाए। बीप सुनाई देने पर बाहर निकाल लें। |
Boulangerie
| Menu Weight Limit Utensil Instructions | ||||
| bA3 | Muffins | 0.3 kg | Low rack & metal muffin tray | For 0.3 kg |
| Maida 200 g | ||||
| Powdered sugar 100 g | ||||
| Butter 75 g | ||||
| Almonds, Wallnuts As per taste | ||||
| Egg 1 No. | ||||
| Baking powder 1/2 tsp | ||||
| Almond essence 1/2 tsp | ||||
| Method: 1. Sieve maida, baking powder . In a bowl add powdered sugar and butter and beat well. Add maida, essence and mix. For spoon dropping consistency add milk or water. Pour in to the greased muffin tray and sprinkle chopped almonds / walnuts.2. Select menu & press start. When beeps, put the tray on low rack. Press start to bake. Remove when it gives a beep. | ||||
| bA4 | Jeera Biscuits | 0.2 kg | Low rack & Multi cook tawa | For 0.2 kg |
| Maida 120 g | ||||
| Powdered sugar 50 g | ||||
| Butter 50 g | ||||
| Jeera / Ajwain As per taste | ||||
| Soda bi carb 1 pinch | ||||
| Baking powder 1.4 tsp | ||||
| Water As required | ||||
| Method: 1. Sieve maida, baking powder and soda. In a bowl add powdered sugar and butter and beat well. Add maida, jeera powder, ajwain and make a soft dough with little water.Roll a thick roti and cut cookies with the cutter.Prick with a fork. Arrange on tawa.2. Select menu & press start. When beeps, keep the tawa & press start to bake. Remove when it gives a beep.Allow them to cool. | ||||
| Marble Cake | 0.3 kgbA5 | Low rack & Metal cake tin | Malda150 gmsCondensed milk150 gmsButter100 gmsSoda Bicarb1/2 tspBaking powdr1 tspVanilla Essence1 tspCoco powder2 tbspMethod: 1. Sieve maida, baking powder and soda. in a bowl add milkmaid and butter and beat well. Add maida, essence and mix well. For spoon dropping consistency add milk or water. Divide the mixture in 2 parts. Add coco powder in 1 part. Put the plain batter and coco batter alternately in the tin. Run a spoon through the batter only once. Select menu, press start. When there is a beep put the metal cake tin on low rack. Press start to bake. Remove when it gives a beep. विधि: 1. मेंदा और बेक्लिंग पाउड़र और रोड़ा को छानें। मिल्कमेज और नक्त्छन को खाउल में लेकर अच्ची तरह मैंट ले। मैदा और इत्र डालकर मिला लें। चाम्मच से ब्राबर हिलते हुर दृष्य या पानी झालें। इस मिशप को दो हिस्तों में बाटें। एक हिस्से में कोको पाउड़र झालें। तादा चूर्ण और कोको वूर्ण क्रम्ह: टिन के अन्दर ढालें। सिर्फ एक भार वूर्ण को जाम्बव से पूर चलाएं। मीनू चुनकर स्टाट दबाएं। बीप सुनाई देने पर मैंटल केक टिन को ले रैक पर रख दें। बेक करने के रटाट दबाएं। बीप सुनाई देने पर बाहर निकाल लें। | |
Boulangerie
| Menu Weight Limit Utensil Instructions | ||||
| bA6 | Patties | 0.3 kg | Low rack & Multi cook tawa | For 0.3 kg |
| Maida 300 g | ||||
| Salt 1/2 tsp | ||||
| Cold fat (Butter or margarine) 150 g | ||||
| Cold water For making dough | ||||
| Dry mix vegetables for stuffing As required | ||||
 | Method: 1. Sieve the flour with salt. Divide the fat into three equal portions. Rub one portion into the flour to get a bread crumb texture, add salt & make a dough of rolling consistency with iced water.2. On a lightly floured marble top roll out the dough (about 1⁄2 cm thickness) into oblong shape (Fig.1). Take the second portion of fat; cut into small pieces; place them on 2/3rd of the rolled dough. Leave the remaining 1/3rd portion without fat.3. Bring up the bottom third of the pastry dough & fold like an envelope with its flap open (Fig.2). Then bring up the folded portion over again so as to close the envelope (Fig.3).4. Turn the pastry at right angles; seal open ends of the pastry & rib it (Fig.4). This means to depress it with rolling pin at intervals. Cover & cool in the fridge for 5-10 minutes.Repeat the step 2 with third portion of the fat & chill it for 30 minutes.5. Roll out the dough 1/4" thick & put the stuff. Fold it back.Prepare all the patties in same way.6. Select menu & press start. When beeps, arrange the patties on square rack & press start. | |||
| bA7 | Naan Khatai | 0.2 kg | Low rack & Multi cook tawa | For 0.2 kg |
| Maida 150 g | ||||
| Suji 50 g | ||||
| Powdered sugar 85 g | ||||
| Vanilla essence 1 tsp | ||||
| Butter 100 g | ||||
| Almonds & cashewnuts A few | ||||
| Method: 1. Cream the butter & sugar together till it turns fluffy.2. Add vanilla essence followed by maida & suji.3. Make a dough out of this mixture.4. Roll out a medium sized ball & put cashewnut on the top of each piece. Arrange them on multi cook tawa.5. Select menu & press start. When beeps, place the tawa on low rack & press start. | ||||
| bA8 | Whole Wheat Cookies | 0.3 kg | Low rack & Multi cook tawa | For 0.3 kg |
| Whole wheat flour 200 g | ||||
| Brown suger 100 g | ||||
| Granulated sugar 50 g | ||||
| Butter 100 g | ||||
| Egg 1 No. | ||||
| Vanilla essence 1/2 tsp | ||||
| Baking powder 1/2 tsp | ||||
| Method: 1. In a bowl cream brown sugar, butter, granulated sugar together and beat till fluffy. Add egg, vanilla essence, baking powder. Finally add flour and make a soft dough.2. Roll out the dough and cut with a cookie cutter.3. Select menu, press start. When beeps, put the cookies on multi cook tawa & keep on low rack. Press start to bake. Remove when it gives a beep. | ||||
Boulangerie
| Menu Weight Limit Utensil Instructions | ||||
| bA9 | Chena Poda | 0.2 kg | Low rack & Microwave safe flat glass dish | For 0.2 kg |
| Chena 200 g | ||||
| Sugar 100 g | ||||
| Suji 20 g | ||||
| Method: 1. Mix chena, sugar & suji together adding little water. 2. Transfer this mixture to MWS flat glass dish. 3. Select menu & press start. 4. When beeps, place the MWS flat glass dish on low rack. Press start. | ||||
| bA10 | Masala Biscuits | 0.2 kg | Low rack & Multi cook tawa | For 0.2 kg |
| Maida 100 g | ||||
| Butter 50 g | ||||
| Sugar 50 g | ||||
| Baking powder 1 tsp | ||||
| Salt, chilli powder, coriander powder As per taste | ||||
| Method: 1. Sieve maida & baking powder together. Cream butter & sugar together. 2. Add maida to the butter & cream mixture. Add salt, chilli powder & coriander powder. Mix them well adding little water (if required) to form a soft dough. 3. Roll out the dough & shape into biscuits with the help of a biscuit cutter. 4. Select menu & press start. 5. When beeps, keep the biscuits on the multi cook tawa & place the tawa on low rack & press start. | ||||
| Menu Weight Limit Utensil Instructions | ||||
| bA11 | Chocolate Cookies | 0.3 kg | Multi cook tawa & Low rack | For 0.3 kg |
| Maida 200 g | ||||
| Powdered sugar 100 g | ||||
| Butter 75 g | ||||
| Baking powder A pinch | ||||
| Cocoa powder 2-3 tbsp | ||||
| Vanilla essence ¼ tsp | ||||
| Method: 1. Sieve maida, cocoa powder & baking powder together.In a bowl cream butter & sugar together.Add maida to the creamed butter & sugar. Add vanilla essence.Mix well to make a soft dough.Roll out the dough on rolling board & cut with a cookie cutter.Select the menu & press start.When beeps, place the cookies on tawa & place the tawa on low rack.. Press start. | ||||
JUST 4 U
Juste pour toi
- Aliments pour bébés (bb)
- Gâteau (CA)
- Fruits de mer (SF)
Aliments pour bébés
| Menu Weight Limit Utensil Instructions | ||||||
| bb1 | Khichdi | 0.1~0.3kg | Microwave safe glass bowl | For | 0.2kg 0.3kg0.1kg | |
| Soaked rice | 75g 100g50g | |||||
| Moong daal | 25g | 50g | ||||
| Salt, jeera powder (optional) | As per taste | |||||
| Ghee | 1 tsp | 2 tsp | ||||
| Water | 3 cups | 5 cups | ||||
| Method:1. Soak rice for 1 hour. In a MWS glass bowl put ghee, rice and daal. Keep it in microwave.Select menu & weight & press start.When beeps, remove and add water, salt, jeera powder and cover. Put this in microwave and press start.When beeps, remove and add some water if required.Mix well and put this in microwave and press start. | Vitibi:1. चापलों को एक घण्टे तक निमोएं। माइकोलेव सेफ बाउल में धी, चावल और दाल लेकर ओवन में रख दें। मीनू और बजन भुनकर स्टार्ट दबाए।2. बीप सुनाई देने पर बाहर निकाले और पानी, नयक, औरा पाउड़र डालकर ढक दें। फिर ओवन में रखकर स्टार्ट दबाएं।3. बीप सुनाई देने पर बाहर निकाले और यदि आवश्यक हो तो थोज़ा पानी जलें और अच्छी तरह गिलाकर ओवन में रखें और स्टार्ट दबाएं। | |||||
| bb2 | Fruit Dessert | 0.2kg | Microwave safe glass bowl | For | 0.2kg | |
| Apple, banana | 200g | |||||
| Orange juice | 2tbsp | |||||
| Sugar | 2tbsp | |||||
| Method:1. Put the peeled apple & banana pieces, orange juice & sugar in a MWS glass bowl. Select menu & weight & press start.When beeps, remove & mash well. Cover & press start. | Vitibi:1. चिले हुए सेप के टुकडे, केले के टुकडे, सन्तरे का रत और चीनी माइकोव रोफ बाउल में लेकर ओवन में रख दें। मीनू और वजन भुनकर स्टार्ट दबाएं।2. बीप सुनाई देने पर बाहर निकालकर कुचलें। ढककर स्टार्ट दबाएं। | |||||
| bb3 | Raggi Kheer | 0.1kg | Microwave safe glass bowl | For | 0.1kg | |
| Raggi powder | 2tbsp | |||||
| Milk | 1cup | |||||
| Sugar | As per taste | |||||
| Ghee | 1tsp | |||||
| Water | 1⁄2cup | |||||
| Method:1. Put Raggi powder and water in MWS glass bowl and keep in microwave. Select menu and press start.When beeps, remove and add sugar, milk and ghee. Mix well. Put this in microwave and press start.When beeps, remove it. | Vitibi:1. राणी पाउडर और पानी माइकोवेव सेफ बाउल में लेकर ओवन में रख दें। गौनू भुनकर स्टार्ट दबाएं।2. बीप सुनाई देने पर, बाहर निकालें और चीनी, दूप्र और धी डलें। फिर इरांको ओवन में रखकर स्टार्ट दबाए।3. बीप सुनाई देने पर बाहर निकाल तें। | |||||
Aliments pour bébés
| Menu Weight Limit Utensil Instructions | |||||
| bb4 | Home made Cereal | 0.2 kg | Microwave safe glass bowl | For | 0.2 kg |
| Rice | 100 g | ||||
| Moong daal | 100 g | ||||
| Salt, jeera powder, almonds (optional) | As per taste | ||||
| Ghee | 2 tsp | ||||
| Groundnuts | 2 tbsp | ||||
| Poha | 2 tbsp | ||||
| Daliya | 2 tbsp | ||||
| Method: 1. Soak rice for 1 hour. In a MWS glass bowl put all the ingredients except water. Keep it in microwave.Select menu & weight and press start.2. When beeps, remove and grind it in a mixer to a powder.You can store this mixture in a fridge. Take2 tbsp of this powder, add water, salt, jeera powder and mix. Put this in microwave and press start.3. When beeps, remove it. | |||||
| bb5 | Apple Custard | 0.2 kg | Microwave safe glass bowl | For | 0.2 kg |
| Apple | 200 g | ||||
| Sugar | 2 tbsp | ||||
| Method: 1. Mix all the ingredients in a MWS glass bowl.Select menu & press start.2. When beeps, mix well & press start. | |||||
| CA1 | Walnut Cake | 0.3 kg | Low rack & metal cake tin | For 0.3 kg | |
| Maida 200 g | |||||
| Powdered sugar 100 g | |||||
| Butter 75 g | |||||
| Eggs 2 Nos. | |||||
| Wallnut pieces 3 tbsp | |||||
| Baking powder 1 tsp | |||||
| Vanilla essence 1 tsp | |||||
| Chopped dates 4 tbsp | |||||
| Method: 1. Sieve maida, baking powder. In a bowl add powdered sugar and butter and beat well. Add eggs and essence and again beat well. Add dates to maida. Mix well. Add walnuts.Add maida mixed with dates to this. For spoon dropping consistency add milk or water. Pour the mixture in a greased cake tin.2. Select menu, press start. When beeps, put the tin on low rack. Press start to bake. Remove when it gives a beep. | |||||
| CA2 | Swiss Roll | 0.2 kg | Low rack & metal cake tin | For 0.2 kg | |
| Maida 100 g | |||||
| Condensed milk 100 g | |||||
| Butter 75 g | |||||
| Soda bi carb 1/8 tsp | |||||
| Baking powder 1/2 tsp | |||||
| Vanilla Essence 1/2 tsp | |||||
| Mix fruit jam 2 tbsp | |||||
| Method: 1. Sieve maida, baking powder and soda. In a bowl add milkmaid and butter and beat well. Add maida, essence and mix. For spoon dropping consistency add milk or water. Place the butter paper at the bottom of the tin and pour the batter on it.2. Select menu, press start. When beeps, put the tin on low rack. Press start to bake. Remove when it gives a beep. Remove this cake on another butter paper and spread mix fruit jam over it. Roll it and cut slices. | |||||
Gâteau
| Menu Weight Limit Utensil Instructions | ||||
| CA3 | Carrot Cake | 0.3 kg | Low rack & metal cake tin | For 0.3 kg |
| Maida 100 g | ||||
| Powdered sugar 75 g | ||||
| Butter 75 g | ||||
| Eggs 2 Nos. | ||||
| Grated carrots 1 cup | ||||
| Baking powder 1 tsp | ||||
| Vanilla essence 1 tsp | ||||
| Chopped dates 2 Ibsp | ||||
| Method: 1. Sieve maida, baking powder. In a bowl add powdered sugar and butter and beat well. Add eggs and essence and again beat well. Add dates and carrot to maida. Mix well. Add maida mixed with dates and carrot to this. For spoon dropping consistency add milk or water. Pour the mixture in a greased cake tin.2. Select menu, press start. When there is a beep put the tin on low rack. Press start to bake. Remove when it gives a beep. | ###: 1. ###d ### #### #### #### #### #### #### #### #### #### #### #### #### #### #### #### #### #### #### #### #### #### #### #### #### #### #### #### #### #### #### #### #### #### #### #### #### #### #### #### #### #### #### #### #### #### #### #### #### #### #### #### #### #### #### #### #### #### #### #### #### #### #### #### #### #### #### #### #### #### #### #### #### #### #### #### #### #### #### #### #### #### #### #### #### #### #### #### #### #### #### #### #### #### #### #### #### #### #### #### #### ## #### #### #### #### #### #### #### #### #### #### #### #### #### #### #### #### #### #### #### #### #### #### #### #### #### #### #### #### #### #### #### #### #### #### #### #### #### #### #### #### #### #### #### #### #### #### #### #### #### #### #### #### #### #### #### #### #### #### #### #### #### #### #### #### #### #### #### #### #### #### #### #### #### #### #### #### #### #### #### #### #### #### #### #### #### #### #### #### #### #### #### #### #### #### #### #### #### #### ####### #### #### #### #### #### #### #### #### #### #### #### #### #### #### #### #### #### #### #### #### #### #### #### #### #### #### #### #### #### #### #### #### #### #### #### #### #### #### #### #### #### #### #### #### #### #### #### #### #### #### #### #### #### #### #### #### #### #### #### #### #### #### #### #### #### #### #### #### #### #### #### #### #### #### #### #### #### #### #### #### #### #### #### #### #### #### #### #### #### #### #### #### #### #### #### #### #### #### ###### #### #### #### #### #### #### #### #### #### #### #### #### #### #### #### #### #### #### #### #### #### #### #### #### #### #### #### #### #### #### #### #### #### #### #### #### #### #### #### #### #### #### #### #### #### #### #### #### #### #### #### #### #### #### #### #### #### #### #### #### #### #### #### #### #### #### #### #### #### #### #### #### #### #### #### #### #### #### #### #### #### #### #### #### #### #### #### #### #### #### #### #### #### #### #### #### #### #### #### ##### #### #### #### #### #### #### #### #### #### #### #### #### #### #### #### #### #### #### #### #### #### #### #### #### #### #### #### #### #### #### #### #### #### #### #### #### #### #### #### #### #### #### #### #### #### #### #### #### #### #### #### #### #### #### #### #### #### #### #### #### #### #### #### #### #### #### #### #### #### #### #### #### #### #### #### #### #### #### #### #### #### #### #### #### #### #### #### #### #### #### #### #### #### #### #### #### #### #### ####### 2. Select menu, press start. When there is a beep put the tin in microwave low rack. Press start to bake. Remove when it gives a beep. | |||
| CA4 | Chocolate Cake | 0.3 kg | Low rack & metal cake tin | For 0.3 kg |
| Maida 100 g | ||||
| Powdered sugar 80 g | ||||
| Butter 75 g | ||||
| Eggs 2 Nos. | ||||
| Chopped almonds 3 Ibsp | ||||
| Baking powder 1 tsp | ||||
| Chocolate essence 1 tsp | ||||
| Coco powder 2 Ibsp | ||||
| Method: 1. Sieve maida, baking powder. Mix coco powder with 1⁄2 cup hot water. In a bowl add powdered sugar and butter and beat well. Add eggs and essence and again beat well. Add almonds to maida. Mix well. Add maida mixed with almonds to this. Mix it well. Add coco solution to it and again mix well. For spoon dropping consistency add milk or water. Pour the mixture in a greased cake tin.2. Select menu, press start. When there is a beep put the tin in microwave low rack. Press start to bake. Remove when it gives a beep. | ###: 1. ###d ### #### #### #### #### #### #### #### #### #### #### #### #### #### #### #### #### #### #### #### #### #### #### #### #### #### #### #### #### #### #### #### #### #### #### #### #### #### #### #### #### #### #### #### #### #### #### #### #### #### #### #### #### #### #### #### #### #### #### #### #### #### #### #### #### #### #### #### #### #### #### #### #### #### #### #### ## #### ###### ###### ###### ## ## ## ## ## ## ## ## ## ## ## ## ## ## ## ## ## ## ## ## ## ## ## ## ## ## ## ## ## ## ## ## ## ## ## ## ## ## ## ## ## ## ## ## ## ## ## ## ## ## ## ## ## ## ## ## ## ## ## ## ## ## ## ## ## ## ## ## ## ## ## ## ## ## ## ## ## ## ## ## ## ## ## ## ## ## ## ## ## ## ## ## ## ## ## ## ## ## ## ## # | |||
| CA5 | Lamington Cake | 0.2 kg | Low rack & metal cake tin & Microwave safe bowl | For 0.2 kg |
| Maida 100 g | ||||
| Powdered sugar 75 g | ||||
| Butter 75 g | ||||
| Eggs 1 No. | ||||
| Baking powder 1 tsp | ||||
| Vanilla essence 1 tsp | ||||
| For Lamington solution - Coco powder 2 tbsp | ||||
| Water 2 cups | ||||
| Desiccated coconut As required | ||||
| Method: 1. Sieve maida, baking powder. In a bowl add powdered sugar and butter and beat well. Add eggs and essence and again beat well.Add maida to this. For spoon dropping consistency add milk or water. Pour the mixture in a greased cake tin.2. Select menu, press start. When there is a beep put the tin on low rack. Press start to bake. Remove when it gives a beep.3. In MWS bowl add water and coco powder and put in the microwave. Press start. When it gives a beep remove and cool. Cut the cake in to squares and dip the pieces in the coco solution on all sides. Roll these in the desiccated coconut and serve. | ||||
Gâteau
| Menu Weight Limit Utensil Instructions | ||||
| CA6 | Vanilla Cake | 0.3 kg | Metal cake tin & Low rack | Maida100 gmButter100 gmPowdered Sugar100 gmEggs2 nos.Baking powder1 tspVanilla essence1 tspMethod:1. Sieve maida with baking powder beat butter with sugar till light and fluffy. Add eggs, beat well add essence.Mix maida in it keep on adding milk and water till the tin is filled to the brim, grease the metal cake tin with butter and pour the cake mixture in it.2. Select menu, press start. When there is a beep put the tin on low rack. Press start to bake. Remove when it gives a beep. |
| Menu Weight Limit Utensil Instructions | ||||
| SF1 | Roasted Prawns | 0.3 kg | Microwave safe glass bowl | For 0.3 kgPrawns 300 gOnions 2 Nos.Tomato 1 No.Oll 2 tbspChilli powder, turmeric, ginger garlic paste, salt As per tasteGaram masala powder 1 tspDhaniya and jeera powder 2 tspCoriander leaves A few sprigsMethod: 1. In MWS bowl take oil and chopped onion. Select menu and press start.When beeps, remove and add prawn and tomato.Press start.When beeps, add all the other ingredients and mix well. Press start. When beeps remove and garnish with coriander leaves. विधि: 1. माइक्रोपेंग सेक बाउल में तेल और क्टी हुई प्याज ले। मीनू चुनाकर स्टार्ट दबाएं।2. बीप सुनाई देने पर बाहर निकाले और प्रौन और टमाटर जाले। इसको किर ओजन में रखकर स्टार्ट दबाएं।3. बीप गुनाई देने पर बाकी रामी रामग्री जाल दें और ऊच्ची तरह निलाए। बाउल को ओवत में रखकर स्टार्ट दबाए। बीप होने पर बाहर निकाले और धनिया के साथ सजाएं। |
| SF2 | Fish Cutlet | 0.3 kg | Microwave safe bowl &High rack &Multi cook tawa | For 0.3 kgFish fillet 300 gBoiled potato 2 Nos.Bread crumbs 1 cupOil 2 tbspChilli powder, turmeric, ginger garlic paste, salt As per tasteGaram masala powder 1 tspCoriander leaves A few sprigsMethod: 1. In a MWS bowl take fish fillet add 1 cup water. Select menu & press start. Mash the fish.Add all the other ingredients except oil and mix well with boiled and mashed fish. Make cutlets and roll them in bread crumbs.Put them on multi cook tawa, put some oil around the cutlets. Keep this on high rack and press start.When beeps, remove and turn them over. Press start.When beeps, remove and garnish with coriander leaves. विधि: 1. माइक्रोपेंग सेक बाउल में फिशा फिलैट लेकर 1 कप पानी डालें। मीनू हुनाकर स्टार्ट दबाएं। फिर माछली को सराल ले।2. तेल को छोड़कर रामी रामग्री डाल दें और उबले हुए आलू तथा मसली हुई मछली के साथ निला ले। क्टलेंटस बनाकर उन्दे ब्रैड क्रम्बस में लमें दें। उनको मल्टी कुक तये पर रखें, कटलैदस चारो तरफ थोड़ा तेल लगाएं. हाई रैक पर रख टार्ट दबाएं।3. बीप सुनाई देने पर उनको पलटकर किर स्टार्ट दबाएं।4. बीप सुनाई देने पर बाहर निकाले और धनिया की पतियों से सजाएं। |
Fruits de mer
| Menu Weight Limit Utensil Instructions | ||||
| SF3 | Crab Curry | 0.3 kg | Microwave safe glass bowl | For 0.3 kgCrab pieces 250 gGinger garlic paste 2 tbspWater 1 cupSalt, dhania-jeera powder, garam masala, chilli powder, turmeric As per tasteOil 2 tbspChopped onion 1/2 no.Coconut milk 2 tbspMethod : 1. In a MWS glass bowl add oil, onion, ginger garlic paste. Select menu and press start. When beeps, remove, mix well add crab and 1 cup water and press start. When beeps, add coconut milk, salt, garam masala, dhania jeera powder, chilli powder, turmeric powder and press start. Mix well & serve hot with rice. विति : 1. माइक्रोवेव रोफ न्लासा बाउल में तेल, पाज, अदरक तहशुन पेरट झालें। मीनू चुनकर स्टाट दबाएं।2. बीप सुनाई देने पर बाहर निकालकर अच्ची तरह मिलाएं। क्रेब और कप पानी डालकर स्टाट दबाएं।13. बीप सुनाई देने पर नारियल दृध, नमक, गरम मसाला, धनिया जीरा पाउडर, गिर्च पाउडर, हल्दी पाउडर डालकर स्टाट दबाएं। अच्ची तरह मिलाएं और वावल के साथ गरम—गरम फरोसें। |
| SF4 | Fish Masala | 0.3 kg | Microwave safe bowl | For 0.3 kgPomphret pieces 300 gOnlons 2 Nos.Tomato 1 No.Oil 2 tbspChilli powder, turmeric, ginger garlic paste, salt, saunf powder As per tasteGaram masala powder 1 tspDhaniya and jeer powder 2 tspCoriander leaves 2 tbspMethod : 1. In MWS bowl take oil and chopped onion. Select menu and press start. When beeps, remove and add pomphret pieces and tomato. Press start. When beeps, add all the other ingredients and 2 cups water and mix well. Press start.When beeps, remove and garnish with coriander leaves. विति : 1. माइक्रोवेव रोफ बाउल में तेल और कटी हुई प्याज तें। मीनू चुनकर स्टाट दबाएं।2. बीप सुनाई देने पर बाहर निकालें और पोम्फ्रेट के टुकर्डे और टमाटर डालकर स्टाट दबाएं।3. बीप सुनाई देने पर बाजी स्मी साम्पी और दो कप पानी डाल दें और अच्ची तरह मिलाकर स्टाट दबाएं। बीप होने पर बाहर निकालें और धनिया के साथ सआएं। |
| Menu Weight Limit Utensil Instructions | ||||
| SF5 | Kappa Ayala | 0.2 kg | Microwave safe glass bowl | For 0.2 kg |
| Surmany fish 200 g | ||||
| Kappa pieces 1 no. | ||||
| Coconut milk 1 cup | ||||
| Coconut oil 2 tbsp | ||||
| Chilli powder, turneric, ginger garlic paste, salt, pepper powder As per taste | ||||
| Onion 1 no. | ||||
| Dhaniya & jeera powder As per taste | ||||
| Coriander leaves A few | ||||
| Method: 1. In a MWS glass bowl add oil & chopped onion. Select menu & press start.2. When beeps, remove & add chopped kappa & fish pieces. Press start.3. When beeps, add all the other ingredients & press start. Garnish with coriander leaves & serve. | ||||
Coin utilitaires
- Coin utilitaires (UC)
- Fermentation (FE)
Coin pratique
| Menu Weight Limit Utensil Instructions | |||
| UC1 | Keep warm | 0.3 kg | Mircowavesafe bowlMethod: 1. Any cooked food with cover (rice, dal, subzi, halwa, upma etc.). Select menu & press start. विधि: 1. लोई गी गोजन (चाबल, दाल, राबी, हलबा, उपमा इत्यादि) लेकर झक दें। मीनू चुनकर रटार्ट दबाए। |
| UC2 | Steam clean | 0.3 kg | Mircowavesafe bowlMethod: 1. Take water in a MWS bowl, add vinegar & lemon juice in it. Select menu & press start. विधि: 1. माङ्क्रोवेव संफ बाउल में पानी लेकर उसमें सिरका और नीबू रस डालें। मीनू चुनकर स्टार्ट दबाएं। |
| UC3 | Defrost Veg | 0.2 ~ 0.5 kg | Mircowavesafe bowlMethod: Veg (Paneer, green peas, sweet corn etc.)1. Take vegetables in a MWS bowl. Select menu & weight & press start. विधि: शाकाहार (पनीर, हरी मटर, त्वीट लौंग इत्यादि)1. माङ्क्रोवेव संफ बाउल में सबिजयी लेकर मीनू एपं वजन चुनों और स्टार्ट दबाएं। |
| UC4 | Defrost Non-Veg | 0.5 ~ 1.0 kg | Mircowavesafe bowlMethod: Non-veg- (Chicken, mutton)1. Take in a MWS bowl, select menu & press start. विधि: मौसाहार (ीविकन, मटन इत्यादि)1. माङ्क्रोवेव संफ बाउल में विजन, मटन इत्यादि लेकर मीनू चुनों और स्टार्ट दबाएं। |
| UC5 | De-humidification | 0.3 kg | Mircowavesafe bowlMethod: Namkeen, biscuits, papad, bhujia, wafers etc.1. In a MWS bowl add the food to be dehumldified. Select menu & press start. विधि: नम्कीन, विस्कुट, पापड, मुजिया, वेफस इत्यादि।1. माङ्क्रोवेव रोफ बाउल में नमी रहित करने के लिए डालें। मीनू चुनकर रटार्ट दबाएं। |
| UC6 | Light Disinfect | 0.1 kg | Microwave safeglass utensil &Empty cavityMethod: 1. Sterilize Microwave safe glass utensil - Keep the empty utensil & select menu & press start.2. Clean the cavity - Keep the cavity empty. Select menu & press start.When time ends (beeps), clean the cavity with a damp cloth.Note : The oven has a special function Light Disinfect which allows to sterilize the MWS glass utensil thereby giving a hygiene & clean utensils/cavity. विधि: 1. माङ्क्रोवेव संफ र्तारा बर्तनों को कीटाणुमुक्त करना - खाली बर्तन को ओकन में रखकर मीनू चुनों और रटार्ट दबाएं।2. खोह की सफाई करना - खोह को खाली सखं। मीनू चुनकर स्टार्ट दबाएं।तमय की तमाप्ति पर (बीप सुणाई देने पर) खोह को गीले कमड़े ते साफ कर दें।नोट : ओकन में एक विशिष्ठ प्रकिया लाइट डिसड़न्कैक्ट होती है जो माङ्क्रोवेव रोफ ग्लारा युटेंरिल्या को कीटाणुमुक्त कर देता है और फलस्वरूप स्वारथ्म प्रदान करता है और बर्तनों/खांह की राफाई करता है। |
Fermentation
| Menu Weight Limit Utensil Instructions | ||||
| FE1 | Yoghurt | 0.3 kg | Low rack & Microwave safe glass bowl | For 0.3 kgMilk 300 mlCurd 2 tbspSugar 3 tbspPink food colour 1/4 tspStrawberry essence 1/4 tspMethod: 1. Put lukewarm milk in MWS glass bowl. Add curd, sugar, colour, essence to it. Stir it very well. Select menu and press start. 2. When it gives a beep put the bowl in lower rack. Press start. Remove and cool. Refrigerate it. |
| FE2 | Masala Paneer | 0.5 kg | Microwave safe glass bowl | For 0.5 kgMilk 500 mlCurd 2 tbspCoriander 1 tbspJeera 1 tspMethod: 1. In MWS glass bowl add milk. Select menu and press start. 2. When it gives a beep, remove and add curd, coriander and jeera. Press start. 3. When beeps, remove and strain and press in a muslin cloth. |
| FE3 | Yeast dough | 0.25 kg | Microwave safe glass bowl | For 0.25 kgMaida 250 mlYeast 1 tbspSalt 1.2 tspSugar 1 tspWater As requiredMethod: 1. In MWS glass bowl add maida, yeast, salt and sugar. Mix well, add water and make a soft dough. 2. Select menu and press start. When beeps, rest for 3 minutes. Now remove. |
Fermentation
| Menu Weight Limit Utensil Instructions | ||||
| FE4 | Pizza base | 0.2 kg | Low rack & Multi cook tawa | For 0.2 kg |
| Maida 200 g | ||||
| Yeast 1 tbsp | ||||
| Salt 1/2 tsp | ||||
| Sugar 1 tsp | ||||
| Water As required | ||||
| Method: 1. In a bowl add maida, yeast, salt and sugar. Mix well, add water and make a soft dough. Keep for half hour.Roll a roti, prick with a fork and rest for 5 mins. Select menu and press start.When beeps, keep the pizza base on tawa & on low rack.Press start. Remove when it gives a beep. | ||||
Soins du corps
Soins du corps
- Soins du corps (bC)
| Menu Weight Limit Utensil Instructions | ||||
| bC1 | Lip Gloss | 0.2 kg | Microwave Safe Glass Bowl | Alovera gel 100 mlRose water 1/2 cupAlmond oil 1/4 cupMethod: 1. In MWS bowl add all the ingredients. Mix well. Select menu and press start. When it gives a beep, remove and mix well. Again put in microwave. Press start. Remove when it gives a beep. Store it in a clean glass bottle. विधि: 1. माइक्रोवेव सेफ बाउल में सामी सामग्री लेकर अच्छी तरह मिला लें। मौनू तुनकर स्टार्ट दबाए। बीप सुनाई देने पर बाहर निकालें और अख्छी तरह मिलाए। दुबरा ओदन के अन्दर रख्छे और स्टार्ट दबाए। बीप सुनाई देने पर बाहर निकालें और साफ-सुभरी कॉच की बोतल में रख्छ दें। |
| Body Massage Oil | 0.2 kgbC2 | Microwave Safe Glass Bowl | Garlic 10 podsAjwain 1/2 tspCloves 2-3 Nos.Almonds 3-4 Nos.Mustard oil 1 cupMethod: 1. In MWS bowl put all the ingredients. Select menu and press start. Remove when it gives a beep. Keep it for 2 hours. Strain and store in a glass jar. विधि: 1. माइक्रोवेव सेफ बाउल में सामी सामग्री झालें। मौनू तुनकर स्टार्ट दबाए। बीप सुनाई देने पर बाहर निकाल लें। दी घंटे तक रख्खा रहने दें। निचोड़कर कॉच के जार में रख्छ दें। | |
| Hair Oil | 0.3 kgbC3 | Microwave Safe Glass Bowl | Coconut oil 200 mlAmla 100 gmsJasmin flowers 5-6 Nos.Hibiscus flowers 3-4 Nos.Bhahmi leaves 1/2 cupMethod: 1. In MWS bowl put all the ingredients. Select menu and press start. Remove when it gives a beep. Keep it for 2 hours. Strain and store in a glass jar. विधि: 1. माइक्रोवेव सेफ बाउल में सामी सामग्री लें। मौनू तुनकर स्टार्ट दबाए। बीप सुनाई देने पर बाहर निकालें और पो घंटे तक रख्खा रहने दें। निचोड़कर कॉच के जार में रख्छ दें। | |
Consignes de sécurité importantes - Lisez attentivement et conservez pour référence future
AVERTISSEMENT
Veuillez vous assurer que les temps de cuisson sont correctement réglés, car une cuisson excessive peut provoquer un INCENDIE et des DOMMAGES ultérieurs au FOUR.
1. Ne tentez pas de modifier, d'ajuster ou de réparer la porte, le panneau de commande, les interrupteurs de verrouillage de sécurité ou toute autre pièce du four. Il est dangereux pour quiconque d'effectuer une opération d'entretien ou de réparation qui implique le retrait d'un capot protégeant contre l'exposition aux micro-ondes. Les réparations doivent être effectuées uniquement par un technicien qualifié. 2. Ne faites pas fonctionner le four vide. Il est préférable de laisser un verre d'eau dans le four lorsqu'il n'est pas utilisé. L'eau absorbera en toute sécurité toute l'énergie des micro-ondes si le four est démarré accidentellement. 3. N'utilisez pas le four pour déshumidifier. Cela peut causer de graves dommages à la sécurité (par exemple, faire fonctionner le four à micro-ondes avec des journaux humides, des vêtements, des jouets, des animaux domestiques ou des appareils électroniques portables, etc.). 4. Ne faites pas cuire des aliments enveloppés dans des serviettes en papier, sauf si votre livre de recettes contient des instructions pour l'aliment que vous cuisinez. 5. N'utilisez pas de journaux à la place de serviettes en papier pour la cuisson. 6. N'utilisez pas de récipients en bois. Ils peuvent chauffer et se carboniser. N'utilisez pas de récipients en céramique avec des incrustations métalliques (par exemple, or ou argent). Retirez toujours les attaches métalliques. Les objets métalliques dans le four peuvent provoquer des arcs électriques, ce qui peut causer des dommages graves.
N'utilisez pas d'ustensiles en bois pour cuisiner, ils peuvent chauffer et brûler. N'utilisez pas d'ustensiles en métal ni de récipients en céramique avec une couche métallique. Retirez toujours les fils métalliques avant de mettre les aliments au four, car le métal peut provoquer des arcs électriques. 7 Ne faites pas fonctionner le four avec un torchon de cuisine, une serviette ou tout autre obstruction entre la porte et les bords avant du four, ce qui pourrait provoquer une fuite d'énergie micro-ondes. Ne placez pas de torchon de cuisine, de serviette ou d'autres objets entre la surface avant du four et la porte, car cela pourrait provoquer une fuite de micro-ondes. 8 N'utilisez pas de produits en papier recyclé car ils peuvent contenir des impuretés qui peuvent provoquer des étincelles et/ou des incendies lors de la cuisson. N'utilisez pas de papier recyclé car il peut contenir des impuretés qui peuvent provoquer des étincelles ou un incendie pendant la cuisson. 9 Ne rincez pas le plateau tournant en le plaçant dans l'eau juste après la cuisson. Cela pourrait le casser ou l'endommager. Ne plongez pas le plateau en verre dans l'eau immédiatement après la cuisson, car il pourrait se briser. 10 De petites quantités d'aliments nécessitent un temps de cuisson ou de réchauffage plus court. Si vous utilisez les temps normaux, ils peuvent surchauffer et brûler. Les petites quantités d'aliments nécessitent moins de temps. Avec un temps normal, ils peuvent surchauffer et brûler. 11 Assurez-vous de placer le four de manière à ce que l'avant de la porte soit à 8 cm ou plus du bord de la surface sur laquelle il est posé, pour éviter tout basculement accidentel de l'appareil. Assurez-vous que la porte est à 8 cm en retrait de la surface avant pour éviter que l'appareil ne bascule.
12 Avant la cuisson, percez la peau des pommes de terre, des pommes ou de tout autre fruit ou légume de ce type. Avant la cuisson, percez les pommes de terre, les pommes et autres aliments similaires. 13 Ne faites pas cuire les œufs dans leur coquille. La pression s'accumulera à l'intérieur de l'œuf et le fera éclater. Ne faites pas cuire les œufs dans leur coquille. La pression à l'intérieur peut augmenter et l'œuf peut éclater. 14 N'essayez pas de faire de la friture dans votre four. N'essayez pas de faire de la friture dans le four. 15 Retirez l'emballage en plastique des aliments avant la cuisson ou la décongélation. Notez cependant que dans certains cas, les aliments doivent être recouverts d'un film plastique pour le chauffage ou la cuisson. Retirez l'emballage en plastique avant de cuire ou de décongeler. Certains aliments peuvent être cuits couverts, comme indiqué dans le guide de cuisson. 16 Si la porte du four ou les joints de la porte sont endommagés, le four ne doit pas être utilisé tant qu'il n'a pas été réparé par un technicien qualifié. Si la porte du four est endommagée, ne l'utilisez pas tant qu'un technicien qualifié ne l'a pas réparée. 17 Si de la fumée est observée, éteignez ou débranchez le four de l'alimentation électrique et gardez la porte du four fermée afin d'étouffer les flammes. Si vous voyez de la fumée dans le four, fermez la porte, éteignez et débranchez le four de l'alimentation. 18 Lorsque les aliments sont chauffés ou cuits dans des récipients jetables en plastique, en papier ou en d'autres matériaux combustibles, vérifiez fréquemment le four en raison de la possibilité de
détérioration du récipient alimentaire.
Lorsque les aliments sont cuits ou chauffés dans des récipients en plastique jetables, vérifiez-les constamment pour vous assurer qu'ils ne se détériorent pas.
19. Ne laisser les enfants utiliser le four sans surveillance que si des instructions adéquates leur ont été données afin qu'ils soient capables d'utiliser le four en toute sécurité et qu'ils comprennent les dangers d'une mauvaise utilisation.
20. Les liquides ou autres aliments ne doivent pas être chauffés dans des récipients scellés car ils risquent d'exploser.
Les liquides ou aliments ne doivent pas être chauffés dans des récipients fermés, car ils risquent d'exploser.
21. Ne pas faire fonctionner le four si les joints de la porte et les parties adjacentes du four à micro-ondes sont défectueux, jusqu'à ce que le four ait été réparé par un technicien qualifié.
22. Vérifier que les ustensiles sont adaptés à une utilisation dans un four à micro-ondes avant de les utiliser. 23. Ne pas toucher la porte du four, le boîtier extérieur, le boîtier arrière, la cavité du four, les accessoires et les plats pendant les modes gril et cuisson automatique, sauf si vous portez des gants de four épais, car ils deviennent chauds. Avant de nettoyer, assurez-vous qu'ils ne sont pas chauds.
Vérifiez que les ustensiles choisis sont adaptés à l'utilisation du four. Ne touchez pas la porte du four, le boîtier extérieur, le boîtier arrière, la cavité du four, les accessoires et les plats lorsque le four est en mode gril, à moins d'avoir mis des gants épais, car ces éléments deviennent chauds. Avant de nettoyer, assurez-vous qu'ils ne sont pas chauds.
Spécifications techniques / Deux recettes pour débutants
Avertissement
Cet appareil doit être mis à la terre.
Les fils de ce cordon d'alimentation sont colorés conformément aux codes suivants :
BLEU ~ Neutre, MARRON ~ Phase, VERT et JAUNE ~ Terre
Comme les couleurs des fils du cordon d'alimentation de cet appareil peuvent ne pas correspondre aux marques colorées identifiant les bornes de votre prise, procédez comme suit :
Le fil de couleur BLEUE doit être connecté à la borne marquée de la lettre N ou de couleur NOIRE.
Connexion du fil BLEU/NOIR à la broche 'N' de la prise.
Le fil de couleur MARRON doit être connecté à la borne marquée de la lettre L ou de couleur ROUGE.
BROWN/ROUGE : connecter le fil au plot « L » de la fiche.
Le fil de couleur VERT et JAUNE ou VERT doit être connecté à la borne marquée de la lettre E ou du symbole de terre. Connecter le fil VERT/JAUNE ou VERT au plot « E » de la fiche.
Spécifications techniques
| MC-8082PRR | |
| Power Input/पावर इनपुट | 230 V AC 50Hz |
| Output/आउटपुट | 900 W (IEC60705 rating standard) |
| Microwave Frequency/माइकोवेव फ्रिवर्वसी | 2450 MHz |
| Outside Dimension/बाहरी माप | 530 mm(W) X 322 mm(H) X 530 mm(D) |
| Power Consumption/पावर कंजम्पशन | |
| Microwave/माइकोवेव | 1350 Watts |
| Grill/ग्रिल | 1250 Watts |
| Combination/कॉन्बीनेशन | 2650 Watts |
| Convection/कन्चैक्षन | 1350 Watts |
Deux recettes pour débutants
REMARQUE : Le temps de cuisson varie selon les ingrédients, la méthode utilisée et le type d'aliment.
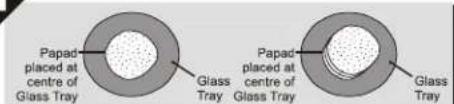
1. PAPAD RÔTI
Procédure
Papad :
- Placez le papad cru au centre du plateau en verre, comme indiqué sur l'image ci-dessus.
- Sélectionnez le niveau de puissance Micro-100 % et le temps de cuisson.
- Après la cuisson du papad, laissez reposer 30 à 45 secondes.
Pour cuire plusieurs papads
*Placez plusieurs papads les uns sur les autres, comme indiqué sur l'image ci-dessus.
Papad croustillant :
- Appuyez sur Quick Start sans papad.
- Saupoudrez un peu d'eau ou d'huile sur le papad.
- Après le bip, placez le papad au centre et appuyez sur Start.
*Remarque : Le temps de cuisson peut varier –
a. Selon la composition du matériau du papad.
b. Selon la quantité de papad utilisée.
1. Papad grillé
Méthode
Papad :
- Placez le papad cru au centre du plateau en verre, comme indiqué dans l'image ci-dessus.
- Réglez le micro-ondes à 100% de puissance et le temps de cuisson.
- Après la cuisson du papad, laissez-le reposer pendant 30 à 45 secondes.
Pour cuire plus de papads :
*Placez plusieurs papads les uns sur les autres, comme indiqué dans l'image ci-dessus. Pour chaque papad :
- Avant de placer le papad, appuyez sur le bouton de redémarrage.
- Vaporisez un peu d'eau ou d'huile sur le papad.
- Après le bip, placez le papad au centre du plateau en verre, comme indiqué dans l'image ci-dessus.
*Remarque : Le temps de cuisson varie selon :
a. La texture de la pâte du papad.


- POP CORN : Place the pop corn bag on the glass tray properly as instructed on packing. Use Quick Start to set 3~4 minutes. Remove the bag after popping sound has stopped. Take care that bag corners do not touch sides while rotating.
Note : Attend popping process carefully. Do not overheat as cause flash fire.
- Pop corn : selon les instructions sur l'emballage, placez correctement le sachet de pop corn sur le plateau en verre. Utilisez Quick Start pour régler 3 à 4 minutes. Retirez le sachet après que le bruit d'éclatement se soit arrêté. Veillez à ce que les coins du sachet ne touchent pas les parois pendant la rotation.
Remarque : surveillez attentivement le processus de cuisson. Ne chauffez pas excessivement, car cela pourrait provoquer un incendie.


- MANUEL DE L'UTILISATEUR
- SOMMAIRE
- PRECAUTIONS TO AVOID POSSIBLE EXPOSURE TO EXCESSIVE MICROWAVE ENERGY. / PRÉCAUTIONS POUR ÉVITER UNE EXPOSITION POSSIBLE À UNE ÉNERGIE MICRO-ONDES EXCESSIVE
- PRECAUTIONS / PRÉCAUTIONS
- AVERTISSEMENT
- PRÉCAUTIONS
- UN APPAREIL TRÈS SÛR
- PRÉCAUTIONS DE SÉCURITÉ
- DÉBALLAGE ET INSTALLATION
- VERROUILLAGE ENFANT
- CUISSON À PUISSANCE MICRO-ONDES
- NIVEAU DE PUISSANCE MICRO-ONDES
- CUISSON AU GRIL
- CUISSON COMBINÉE GRIL
- EZ CLEAN
- SPEED HOT AIR COOKING
- CUISSON COMBINÉE CONVECTION
- PRÉCHAUFFAGE PAR CONVECTION
- CUISSON PAR CONVECTION
- DIVERSES FONCTIONS DE CUISSON
- REMARQUE
- NUTRI CARE
- STEAM COOK
- HEALTH PLUS
- HEALTH FLUSH
- SOUP
- CONTINENTAL
- INDIAN RASOI
- CUISINE INDIENNE भारतीय व्यंजन
- CUISINE INDIENNE
- भारतीय व्यंजन
- SWEETS' CORNER
- CHATPAT CORNER
- HOURS
- BREAKFAST
- PETIT-DÉJEUNER
- EN-CAS
- PRÉFÉRÉ DES ENFANTS
- BOULANGERIE
- JUST 4 U
- JUSTE POUR TOI
- ALIMENTS POUR BÉBÉS
- GÂTEAU
- FRUITS DE MER
- COIN UTILITAIRES
- COIN PRATIQUE
- FERMENTATION
- SOINS DU CORPS
- CONSIGNES DE SÉCURITÉ IMPORTANTES - LISEZ ATTENTIVEMENT ET CONSERVEZ POUR RÉFÉRENCE FUTURE
- SPÉCIFICATIONS TECHNIQUES / DEUX RECETTES POUR DÉBUTANTS
- CET APPAREIL DOIT ÊTRE MIS À LA TERRE
- DEUX RECETTES POUR DÉBUTANTS
- PAPAD RÔTI
- PAPAD GRILLÉ
Marque : LG
Modèle : MC-8082PRR
Catégorie : Four à micro-ondes