
VOLAR - Refroidisseur pour processeur ordinateur GIGABYTE - Notice d'utilisation et mode d'emploi gratuit
Retrouvez gratuitement la notice de l'appareil VOLAR GIGABYTE au format PDF.


| Marque | GIGABYTE |
| Modèle | VOLAR |
| Type de produit | Refroidisseur pour processeur d'ordinateur |
| Sockets compatibles | Intel LGA775, AMD AM2 / K8 |
| Matériau du radiateur | Base en cuivre avec ailettes en aluminium |
| Caloducs | Caloducs omnidirectionnels à haute conductivité |
| Ventilateur | 120 mm avec câble de contrôle de vitesse |
| Vitesse du ventilateur | 2000 tr/min (1500 tr/min avec contrôle de vitesse) |
| Connecteur | 3 broches pour prise CPU fan sur la carte mère |
| Dimensions (approx.) | 120 x 120 x 80 mm (estimé) |
| Poids (approx.) | 600 g (estimé) |
| Dissipation thermique | Conception conique angulaire pour refroidissement MOSFET |
| Pâte thermique fournie | Oui |
| Système de montage | Clip AMD et bracket LGA775 inclus |
| Installation | Simple et rapide, sans outil pour AMD |
| Précautions | Retirer le film protecteur avant installation |
| Garantie | Standard constructeur |
| Entretien | Dépoussiérer régulièrement le ventilateur et les ailettes |
| Niveau sonore | Faible, ventilateur silencieux à basse vitesse |
FOIRE AUX QUESTIONS - VOLAR GIGABYTE
Questions des utilisateurs sur VOLAR GIGABYTE
0 question sur cet appareil. Repondez a celles que vous connaissez ou posez la votre.
Poser une nouvelle question sur cet appareil
Téléchargez la notice de votre Refroidisseur pour processeur ordinateur au format PDF gratuitement ! Retrouvez votre notice VOLAR - GIGABYTE et reprennez votre appareil électronique en main. Sur cette page sont publiés tous les documents nécessaires à l'utilisation de votre appareil VOLAR de la marque GIGABYTE.
MODE D'EMPLOI VOLAR GIGABYTE
Installation Guide

The cooler fan speed levels provided are for reference use only
Please refer to the motherboard BIOS to verify actual fan speed levels.
CAUTION
The followings are not covered by the warranty :
- Use the product incorrectly or in a manner other than the designed purpose.
- Nonobservance of the proper operation. (e.g. over-clocking)
- Malfunction due to interference from other devices.
- Unauthorized modification of the product.
- Malfunction due to unfit specifications on Motherboard.
- Malfunction arising from casualties ( earthquake, thunder, fire, and flood).
- The product's warranty label has been removed or damaged.
- The devices inside, including power supply, hard disk, CD-ROM drive, motherboard, computer and network card, are connected to the computer system by a computer product, resulting in damage to the cooler or computer-related devices.
- Any damage caused by nonobservance of the installation instruction contained in this manual.
Features
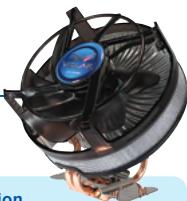
- Universal design for all LGA775 and AMD AM2 / K8 platforms.
- Copper core with Aluminum fins provide large heat dissipation.
- Angular conical airflow ensures maximum cooling of MOSFET areas.
- Spiraling fin design for increased surface volume ventilation.
- Omni-directional high-conducting heat pipe for maximum dissipation in any mounted position.
- Large 120mm fan with fan speed control cable, for a quiet and effective operation.
- Easy installation.
Accessories
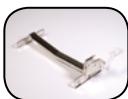
1) AMD K8 / AM2 Clip x 1
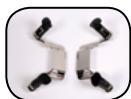
2) 775 Bracket x 2
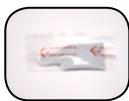
3) Thermal Grease x 1
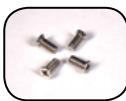
4) 775 Bracket screws x 4
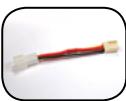
5) Fan Speed control Cable x 1
LGA 775 Platform Installation
STEP1
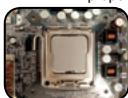
Apply some thermal grease on the CPU properly.
Caution :
Before installation, please turn off the power, unplug the power cord, and be sure to remove the sticker from the bottom of the cooler unit.
STEP2
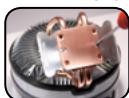
Unlock screws on the AMD bracket and remove the bracket.
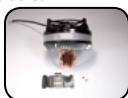
STEP3
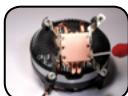
Place the two 775 brackets between the copper base and the cooler unit.
Align the holes of the bracket with the holes of the copper base. Secure the 775 brackets with supplied bracket screws. Make sure the screws are evenly and firmly fastened.
STEP4
Before installation, please make sure the pin is on the right direction (as Figure A).
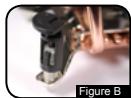
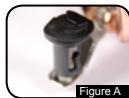

To remove the cooler, turn the four pins to the removing direction (as Figure B) and pull them up.
STEP5
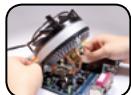
Align the pin of the cooler with the hole of the CPU on the motherboard and push down the pin diagonally. Please make sure the four pins are firmly secured.
STEP6
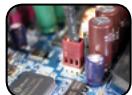
Plug the 3-pin connector of the cooler into the motherboard's CPU fan socket.

If fan speed control is required, please refer to Installation of Fan Speed control Cable.
AMD K8 / AM2 Platform Installation
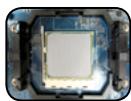
Apply some grease on the CPU properly.
STEP1
Caution: Before installation, please turn off the power, unplug the power cord, and be sure to remove the sticker from the bottom of the cooler unit.
STEP2
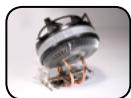
Mount the AMD K8 / AM2 clip on the AMD bracket of the cooler.
STEP3
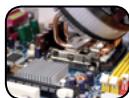
Lock the tab on one side of AMD K8 / AM2 clip in the salient point of the CPU cooler.
STEP4
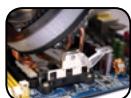
Lock the tab on the other side of AMD K8 / AM2 clip in the salient point of the CPU cooler bracket; push down and secure the bar on the clip firmly.
STEP5
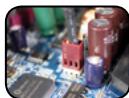
Plug the 3-pin connector of the cooler into the motherboard's CPU fan socket.

If fan speed control is required, please refer to Installation of Fan Speed control Cable.
Installation of Fan Speed control Cable
STEP1
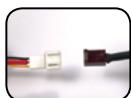
STEP2
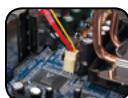
Connect the other side of the cable to the CPU fan connector located on the motherboard. The original fan speed of 2000 rpm will than drop down to 1500 rpm.
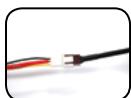
Connect the 3-pin cooler connector to the white connector of the fan speed control cable.
- Installation Guide
- The cooler fan speed levels provided are for reference use only
- Please refer to the motherboard BIOS to verify actual fan speed levels.
- CAUTION
- The followings are not covered by the warranty :
- Features
- Accessories
- LGA 775 Platform Installation
- STEP1
- Caution :
- STEP2
- STEP3
- STEP4
- Before installation, please make sure the pin is on the right direction (as Figure A).
- STEP5
- STEP6
- AMD K8 / AM2 Platform Installation
- Installation of Fan Speed control Cable
Marque : GIGABYTE
Modèle : VOLAR
Catégorie : Refroidisseur pour processeur ordinateur