
V-POWER - Refroidissement informatique GIGABYTE - Notice d'utilisation et mode d'emploi gratuit
Retrouvez gratuitement la notice de l'appareil V-POWER GIGABYTE au format PDF.


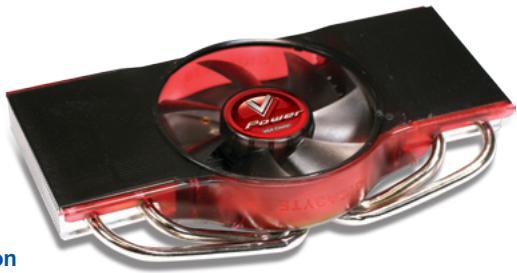
| Type de produit | Refroidisseur pour carte graphique (VGA Cooler) |
| Marque | GIGABYTE |
| Modèle | V-POWER |
| Dimensions du dissipateur | 188 x 105 x 34 mm |
| Dimensions du ventilateur | 90 x 90 x 25 mm |
| Matériau de la base | Cuivre |
| Matériau des ailettes | Aluminium |
| Tension d'alimentation | 12 V |
| Courant nominal | 0,38 A |
| Vitesse du ventilateur | 0 - 2 000 tr/min (contrôlable) |
| Niveau sonore | 0 - 25 dBA |
| Type de roulement | À billes |
| Durée de vie du ventilateur | 40 000 heures |
| Compatibilité | nVIDIA GeForce 6800/7800/7900, ATI RADEON X1800/X1900/X1950 |
| Fonctions principales | Support SLI/CrossFire, 4 caloducs, dissipateur mémoire inclus, contrôleur de vitesse, LED blanche |
| Accessoires inclus | Boîtier de contrôle, support PCI, connecteurs, dissipateurs mémoire, graisse thermique, etc. |
| Sécurité | Utilisation conforme aux instructions, ne pas modifier, risque de dommages en cas de retrait du dissipateur d'origine |
| Entretien | Nettoyer régulièrement la poussière avec un chiffon non abrasif |
| Garantie | Couverture limitée, voir notice pour détails |
| Instructions d'installation | Suivre les étapes dans le manuel : retirer le refroidisseur d'origine, appliquer la graisse, fixer avec vis à ressort, connecter le contrôleur |
FOIRE AUX QUESTIONS - V-POWER GIGABYTE
Questions des utilisateurs sur V-POWER GIGABYTE
0 question sur cet appareil. Repondez a celles que vous connaissez ou posez la votre.
Poser une nouvelle question sur cet appareil
Téléchargez la notice de votre Refroidissement informatique au format PDF gratuitement ! Retrouvez votre notice V-POWER - GIGABYTE et reprennez votre appareil électronique en main. Sur cette page sont publiés tous les documents nécessaires à l'utilisation de votre appareil V-POWER de la marque GIGABYTE.
MODE D'EMPLOI V-POWER GIGABYTE


Caution
The following are not covered by the warranty :
- Incorrect use or use of the product for any purpose other than its intended use.
- Nonobservance of the proper operation provided. (e.g. overlapping)
- Malfunction due to interference from other devices. 4. Fail to install due to the specification of the VGA card or other components that are not supported by the product.
-
Unauthorized modification of the product
-
Malfunction arising from casualties (earthquake, thunder, fire, and flood).
- The warranty label of the product has been removed or damaged.
- Any loss due to the removing of the original heat sink on the VGA card.
- Any loss caused by failure to follow the installation process contained in the user manual.
Features
- Support nVIDIA SLi and ATi CrossFire
- Universal design supports various high performance VGA cards with easy insti
- Four heat pipes and large fin design enhance the heat conduction
- Better airflow and low noise working environment 5. Fan speed controller fits various needs.
- Delicate white light LED
- 90 × 90 × 25 mm fan and exquisite design base provide the thermal circulation for surrounding components.
- Ball bearing fan extends cooler expectancy
- Heat sink for memory is included
Specification
Heat Sink Dimension : 188 x 105 x 34 mm
Fan Dimension : 90 x 90 x 25 mm
Base material : Copper
Fin Material : AluminiumRated Voltage : 12 V
Rated Current : 0 . 38 AmpFem Speed : 0 - 2 000 rpm
Noise:0\~25dBA
Bearing Type : Ball bearing
Fan Life Expectancy : 40,000 hrSupport :
nVIDIA GeForce 6800 series nVIDIA GeForce 7800 series nVIDIA GeForce 7900 series ATI RADEON X1800 series ATI RADEON X1900 series
ATI RADEON X1950 series
Accessories
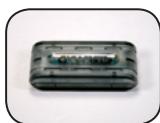
1) Speed control box x 1
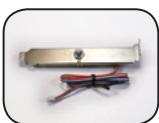
2) PCI rear bracket fan controller x 1
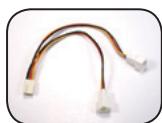
3) 1 to 2 connector x 1
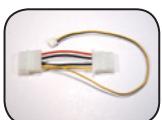
4) 4pin connector x 1

5) Knob x 1
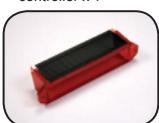
6) Fan duct cover x 1

7) Spring screw x 4
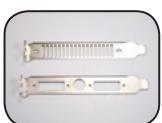
8)PCIbracketx2

9) Washer x 2

10) Screw x 2
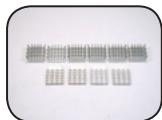
11) Heat sink (big x6, small x4)

12)Grease x 1
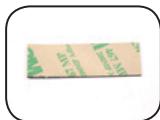
13) Speed control box sticker x 1

14) PCI bracket screw x 3
Speed control box accessories installation Guide
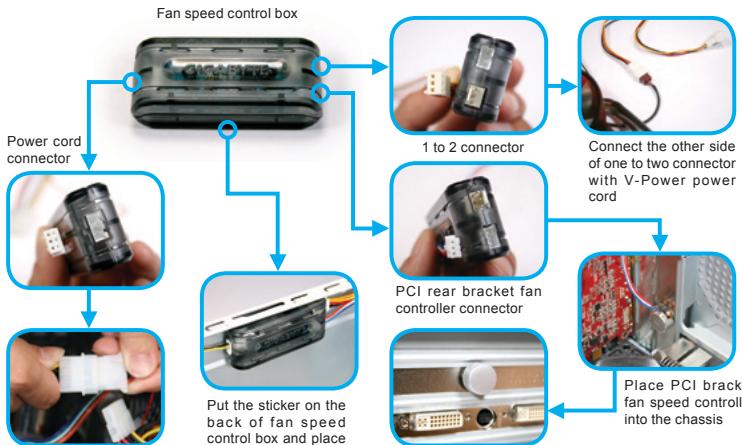
Connect the other side of one to two connector with V-Power power cord
Connect the other side of the power cord connector with 4-pin connector
it into the chassis
Place the knob on the PCI rear bracket fan controller
Place PCI bracket fan speed controller into the chassis
PCI rear bracket fan speed controller user introduction

Silent Mode - Noise Free Environment
Controllable fan speed for different system working environment.
Turn the controller anti-clockwise to stop fan running. Turn clockwise to adjust the fan speed from 0 rpm to 2,000 rpm.
Accessories
Installation Guide
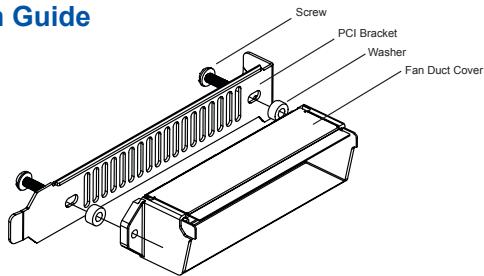
| VGA Model | PCI Bracket | Screw | Washer | Fan Duct Cover |
| ATi RADEON X1800 series | ○ | ○ | × | ○ |
| ATi RADEON X1900 series | ○ | ○ | ○ | ○ |
| ATi RADEON X1950 series | ○ | ○ | ○ | ○ |
| nVIDIA GeForce 6800 series | ○ | ○ | × | ○ |
| nVIDIA GeForce 7800 series | ○ | ○ | × | ○ |
| nVIDIA GeForce 7900 series | ○ | × | × | × |
Installation Instruction
STEP1
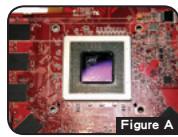
Remove the original cooler on the VGA card and clean the grease. (as Figure A)

Remove heat sinks on the memories if any.
Caution: Please be careful while removing the original heat sink on the VGA card. GIGABYTE is not responsible to any loss caused during the removal process.
STEP2
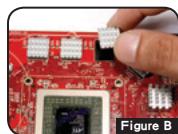
According to the number of the memories on the VGA card, to remove the sticker on the back of the heat sinks and paste on the memories. (as Figure B)

With the limited space on the top of the VGA card, please paste on smaller heat sinks.
STEP3
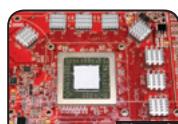
Apply the grease on the VGA chip appropriately. (as Figure C)
STEP4

Tear off the sticker on the copper base. (as Figure D)
STEP5
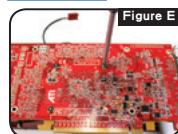
Place the cooler on the table and align the holes for the screws on the VGA card to the screws on the cooler and use the screw driver to lock the VGA cooler with spring screws. (as Figure E)
To avoid the damage on the chip, please lock the nuts diagonally.
STEP6
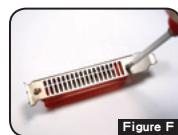
Place the fan duct cover on the PCI rear panel with screw driver and screws. (as Figure F)

Please refer to Accessories Installation Guide.
STEP7

Slide the fan duct front cover to the cooler. (as Figure G)
STEP8

Place the VGA card with V-Power into the system and connect the power cord of the fan with the available 1 to 2 connector from the speed control box. (as Figure H)

For ATI Crossfire or nVIDIA SLI, please connect the power cord of each fan with the 1 to 2 connector from the speed control box dividedly.
Marque : GIGABYTE
Modèle : V-POWER
Catégorie : Refroidissement informatique