
CUX120 - évier FRANKE - Notice d'utilisation et mode d'emploi gratuit
Retrouvez gratuitement la notice de l'appareil CUX120 FRANKE au format PDF.


| Type de produit | Évier de cuisine |
| Marque | Franke |
| Modèle | CUX120 |
| Matériau | Acier inoxydable |
| Finition | Brossé |
| Nombre de cuves | 1 |
| Dimensions (L x l x P) | 1000 mm x 500 mm x 200 mm |
| Diamètre de la bonde | 3 1/2 pouces (90 mm) |
| Type d'installation | À encastrer (dessus de plan) |
| Poids | 15 kg |
| Profondeur de cuve | 200 mm |
| Volume de cuve | Environ 40 litres |
| Égouttoir intégré | Non (cuve unique sans égouttoir) |
| Position de la bonde | Centrée |
| Raccordement | Eau et évacuation standard |
| Accessoires fournis | Bonde, kit de fixation, joints |
| Entretien | Nettoyage avec eau savonneuse et chiffon doux; éviter produits abrasifs |
| Sécurité | Bords arrondis, anti-rayures |
| Garantie | 2 ans (selon conditions) |
| Pièces détachées disponibles | Oui (bonde, siphon, joints, etc.) |
| Réparabilité | Indice de réparabilité : 8/10 |
| Normes | Conforme aux normes européennes |
FOIRE AUX QUESTIONS - CUX120 FRANKE
Questions des utilisateurs sur CUX120 FRANKE
0 question sur cet appareil. Repondez a celles que vous connaissez ou posez la votre.
Poser une nouvelle question sur cet appareil
Téléchargez la notice de votre évier au format PDF gratuitement ! Retrouvez votre notice CUX120 - FRANKE et reprennez votre appareil électronique en main. Sur cette page sont publiés tous les documents nécessaires à l'utilisation de votre appareil CUX120 de la marque FRANKE.
MODE D'EMPLOI CUX120 FRANKE
INSTALLATION MANUAL
STAINLESS STEEL AND GRANITE SINKS
For best results, Franke recommends this unit be mounted by a professional installer. This sink is specifically designed to be under mounted in a solid surface countertop only. Do not install a damaged sink. Inspect carefully.
NOTE: The template included (or. dxf le downloaded from website) is only a guide. The actual sink and accessories should ALWAYS be present to ensure a perfect cut. FRANKE IS NOT RESPONSIBLE FOR AN IMPROPERLY CUT COUNTERTOP OR IMPROPER INSTALLATION
- Create the cut-out in the desired locaon of the moung surface using this template (or the .dxf le downloaded from our website). Make sure to compare the actual sink with the template being used to ensure a perfect t. The size of the cut-out should be exact as this sink uses coordinang accessories which t precisely with the cut out. Also be aware of the spacing requirements of any other products that will be mounted to the countertop next to the sink such as faucets or soap dispensers.
- It will be the responsibility of the countertop supplier/installer to decide the ideal anchoring method based on the applicaon and countertop material being used. Determine best placement of the clip brackets provided, ideally they should be evenly spaced around the sink ledge on all sides. Pre-drill holes and install anchors. Mounng screws and/or other hardware associated with anchoring not included. Aach clip brackets loosely to the countertop using selected anchor.
- Apply a bead of silicone evenly along the bowl rim and/or along the underside of countertop.
- Posion and align sink evenly over the opening of the cut out. Press sink into silicone seal and parally ghten the clip brackets against the sink so it stays in place.
- Check alignment one nal me to ensure the sink opening is evenly aligned with the countertop cut out as outlined in the image below. Make adjustments as necessary to obtain perfect alignment.
- Once sasfactory alignment is achieved, fully ghten clip brackets against the rim of the sink and remove excess silicone.
HINT: Aer silicone cures, wipe inside edge with denatured alcohol. This will smooth out any rough areas.
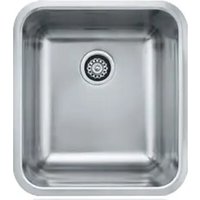



Marque : FRANKE
Modèle : CUX120
Catégorie : évier