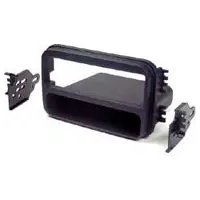
99-7311 - Kit d'encastrement Metra - Notice d'utilisation et mode d'emploi gratuit
Retrouvez gratuitement la notice de l'appareil 99-7311 Metra au format PDF.


| Type de produit | Kit d'encastrement pour autoradio |
| Marque | Metra |
| Modèle | 99-7311 |
| Compatibilité véhicules | Sélection de véhicules (années 2000-2010, consulter le guide) |
| Forme de montage | Double DIN (standard) |
| Dimensions | Environ 180 x 100 x 20 mm |
| Poids | Environ 0,2 kg |
| Matériau | Plastique ABS moulé |
| Couleur | Noir mat |
| Contenu du kit | Plaque de montage, supports latéraux, vis, notice d'installation |
| Fonction principale | Permet l'installation d'un autoradio après-vente dans le tableau de bord |
| Installation | Facile, nécessite des outils de base (tournevis, clés) |
| Entretien et nettoyage | Nettoyer avec un chiffon doux et sec, éviter les produits abrasifs |
| Sécurité | Débrancher la batterie avant installation pour éviter les courts-circuits |
| Pièces détachées et réparabilité | Pièces spécifiques disponibles auprès de Metra ou revendeurs agréés |
| Garantie | 1 an (selon revendeur) |
| Informations générales | Kit conçu pour un ajustement parfait et une finition d'origine |
FOIRE AUX QUESTIONS - 99-7311 Metra
Questions des utilisateurs sur 99-7311 Metra
0 question sur cet appareil. Repondez a celles que vous connaissez ou posez la votre.
Poser une nouvelle question sur cet appareil
Téléchargez la notice de votre Kit d'encastrement au format PDF gratuitement ! Retrouvez votre notice 99-7311 - Metra et reprennez votre appareil électronique en main. Sur cette page sont publiés tous les documents nécessaires à l'utilisation de votre appareil 99-7311 de la marque Metra.
MODE D'EMPLOI 99-7311 Metra
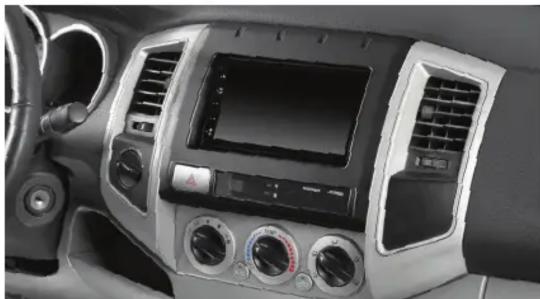
Toyota Tacoma 2005-2011
Visit MetraOnline.com for more detailed information about the product and up-to-date vehicle specific applications
KIT FEATURES
- DDIN provision
• DIN radio provision with pocket sold separately - Painted scratch resistant matte black
KIT COMPONENTS
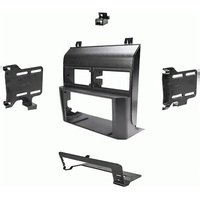
• A) Radio housing • B) Radio brackets • C) Hazard switch bracket • D) Panel clips (5) • E) #4 x 3/8"Phillips screws (5) • F) #8 x 3/8"Phillips screws (4)
A

B
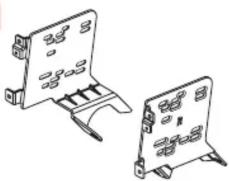
C

D

E
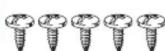
F

TABLE OF CONTENTS
Dash Disassembly....2
Kit Preparation....2
Kit Assembly....3
WIRING & ANTENNA CONNECTIONS
Wiring Harness: Visit metraonline.com and axxessinterfaces.com for audio/video and steering wheel control interface options. Antenna Adapter: Not required
TOOLS REQUIRED
- Panel removal tool • Phillips screwdriver
- Socket wrench
Attention! With the key out of the ignition, disconnect the negative battery terminal before installing this product. Ensure that all installation connections are secure before cycling the ignition to test this product.
DASH DISASSEMBLY
- Unclip, unplug and remove the climate control panel. (Figure A)
- Remove the (4) 10mm screws securing the bottom of the radio/clock/hazard assembly. (Figure B)
- Unclip, unplug, and remove the radio/ clock/hazard assembly. (Figure C)
Continue to Kit Preparation
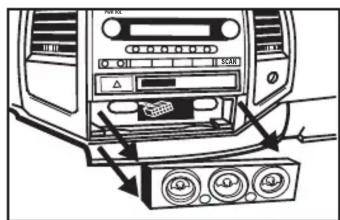
(Figure A)
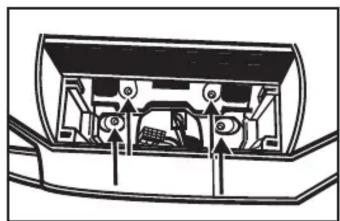
(Figure B)

(Figure C)
KIT PREPARATION
From the factory radio/clock/hazard assembly:
- Unclip and remove the clock/hazard switch assembly. (Figure A)
Continue to Kit Assembly
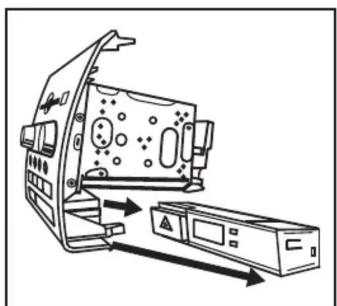
(Figure A)
KITASSEMBLY
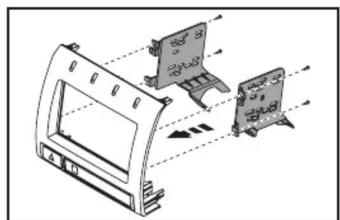
- Attach the hazard switch bracket to the radio housing using the (5) #4 x 3/8" Phillips screws supplied. (Figure A) WARNING: DO NOT OVERTIGHTEN THE SCREWS.
- Clip the factory hazard switch assembly into the hazard switch bracket/radio housing assembly. (Figure B)
- Attach the radio brackets to the radio housing using the (4) #8 x 3/8" Phillips screws supplied (Figure C)


- Attach the radio to the radio brackets using screws supplied with the radio. (Figure D)
- Attach the (5) panel clips to the radio housing assembly. (Figure E)
- Locate the factory wiring harness and antenna connector in the dash, and complete all necessary connections to the radio. Metra recommends using the proper mating adapter from Metra and/or AXXESS. Re-connect the negative battery terminal and test the radio for proper operation.
- Snap the radio housing assembly into the dash and reassemble the dash in reverse order of disassembly.

(Figure D)(Figure A)
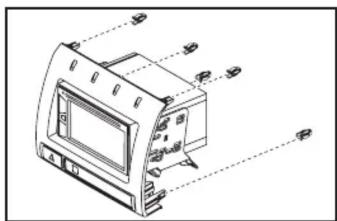
(Figure E)(Figure B)
(Figure C)
Having difficulties? We're here to help.

ur Tech Support line at:
386-257-1187

ail at: techsupport@metra-autosound.com
Tech Support Hours (Eastern Standard Time)
Monday - Friday: 9:00 AM - 7:00 PM
Saturday: 10:00 AM - 5:00 PM
Sunday: 10:00 AM - 4:00 PM

Metra recommends MECP certified technicians


Marque : Metra
Modèle : 99-7311
Catégorie : Kit d'encastrement