
K102 - Thermostat KING - Notice d'utilisation et mode d'emploi gratuit
Retrouvez gratuitement la notice de l'appareil K102 KING au format PDF.


| Type de produit | Thermostat programmable |
| Marque | King |
| Modèle | K102 |
| Dimensions (L x H x P) | 85 x 30 x 85 mm |
| Poids net | 120 g |
| Alimentation | 2 piles AA (1.5 V) ou 24 VAC |
| Fonctions principales | Programmation hebdomadaire, modes Confort et Éco, détection de fenêtre ouverte, gel protection, réglage du différentiel |
| Entretien et nettoyage | Nettoyer avec un chiffon doux et sec. Ne pas utiliser de produits abrasifs. |
| Sécurité | Indicateur de batterie faible, verrouillage enfant, arrêt automatique en cas de surchauffe |
| Pièces détachées et réparabilité | Piles de rechange standard, support mural fourni |
| Informations générales | Thermostat digital compatible avec la plupart des systèmes de chauffage et de climatisation (24 V ou piles) |
FOIRE AUX QUESTIONS - K102 KING
Questions des utilisateurs sur K102 KING
0 question sur cet appareil. Repondez a celles que vous connaissez ou posez la votre.
Poser une nouvelle question sur cet appareil
Téléchargez la notice de votre Thermostat au format PDF gratuitement ! Retrouvez votre notice K102 - KING et reprennez votre appareil électronique en main. Sur cette page sont publiés tous les documents nécessaires à l'utilisation de votre appareil K102 de la marque KING.
MODE D'EMPLOI K102 KING
INSTALLATION AND MAINTENANCE

king
K101/K102
Thermostat

DANGER

ELECTRIC SHOCK OR
READ ALL WIRE SIZING, VOLTAGE REQUIREMENTS AND SAFETY DATA TO AVOID PROPERTY DAMAGE AND

natural_image
White industrial air conditioner unit with rotary dial (no visible text or symbols)Specifications:
Thermostat is suitable for electric heating systems.
Power Supply AC 120V / 208V / 244V / 277V
Maximum Power:
2640W @ 120VAC (22A)
4576W @ 208VAC (22A)
5280W @ 240VAC (22A)
6094W @ 277VAC (22A)
Sensing Element: Bimetal
Temperature Operating Range:
41°F-95°F (5°C—35°C)
cETL us listing.


WARNING

READ CAREFULLY - These instructions will help prevent difficulties that might arise during thermostat installation. Studying the instructions first may save considerable time and money later. Observing the following procedures will keep installation time to a minimum. Save these instructions for future use.
FUNCTIONS AND FEATURES
• 120/208/240/277 Volts
• Both °C & °F control dials included
• Wall mount design—Sits flush against wall
• Single Pole and Double Pole models available
• Fully vented cover allows air sensing in all directions
• Large knob allows easy adjustment to all temperatures
- Beveled face gives modern appearance
• 95°F (35°C) maximum setting
INSTALLATION INSTRUCTIONS
Warning: Turn OFF the power at the circuit breaker before Installing. Installation should be performed by a qualified electrician.
Refer to thermostat and heater load specifications before installation of the thermostat to see if it can handle the amp load. The maximum this thermostat can run is 6094 Watts at 277 Volts, 5820 Watts at 240 Volts, 4576 Watts at 208 Volts and 2640 Watts at 120 Volts.
Install unit in a grounded metal or plastic wall junction box, indoors 4 ½' to 5' above the floor. Avoid any area where it can come in contact with external sources of heat and cold. This includes plumbing pipes, direct sunlight, a T.V. set, lamps, and drafts from a door or window, as this may cause inaccurate temperature readings. The most convenient place is above the light switch. Not for Outdoor use.
INSTALLATION CON'T

The installation of the thermostat must comply with the applicable local and/or national electrical code and utility requirements. This installation should be performed by a qualified electrician where required by law. Ensure that all wiring connections to the thermostat are correct and tight to prevent electrical shorts. Use the appropriate wire to meet local and national electrical codes for rated power consumption.
WIRING INSTRUCTIONS
Single Pole Thermostat Installation
- Disconnect power supply to prevent electrical shock or damage to the product.
- Run line voltage wiring to the location of thermostat.
- Connect the red LINE lead on the thermostat to L1 line from the power supply panel.
- Connect the black LOAD lead from the thermostat to the line lead on the heater.
- Connect N Neutral (L2) line to the remaining line of the heater.
- Secure the ground wire to the ground screw provided in the junction box.
- Make sure wire connections are tight.
- Insert wires into the junction box, making sure not to damage wiring.
- Remove the thermostat cover by grabbing the cover from the sides and pulling it away from base.
- Mount the thermostat base onto the junction box and secure using the provided screws.
Single Pole Installation

Double Pole Thermostat Installation
- Disconnect power supply to prevent electrical shock or damage to product.
- Run line voltage wiring to the thermostat location.
- Connect the black LOAD leads on the thermostat to the leads on the heater.
- Connect the red LINE leads on the thermostat to the line leads from the power supply panel.
- Make sure all connections are tight.
- Insert wires into the junction box, making sure not to damage wiring.
- Secure the ground wire to the ground screw provided in junction box.
- Remove the thermostat cover by grabbing the cover from the sides and pulling it away from base.
- Mount the thermostat into the junction box and secure using the provided screws.
- Replace thermostat cover.
Double Pole Installation

GENERAL INFORMATION

king
K101/K102
Thermostat


natural_image
White portable air conditioner unit with circular dial and rotary knob (no text or symbols visible)PRODUCT SETUP AND SETTINGS
To adjust the temperature to your requirements, turn the dial on the thermostat clockwise all the way to turn heater on. When the room reaches the desired temperature, turn the thermostat knob counter clockwise until you hear the click. Leave in this position to maintain the room temperature at this setting. For additional heat, turn clockwise until you the click and the heater will turn on.
- Single pole models—Turning knob fully counter clockwise will set the temperature rating to 41^ .
- Double pole models—Turning knob fully counter clockwise will disconnect the power to the heater.
Changing °C and °F control dials
Use a small flathead screwdriver to pry off the control dial. Insert into one of the slots on the dial and gentle apply pressure to remove. To install the new control dial, line up the pins on the dial with the holes on the thermostat knob. Push together until secured into place.

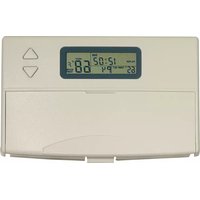
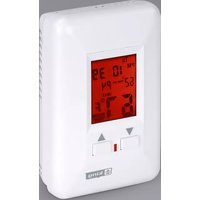
Marque : KING
Modèle : K102
Catégorie : Thermostat