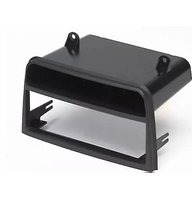
99-3105 - Kit d'encastrement Metra - Notice d'utilisation et mode d'emploi gratuit
Retrouvez gratuitement la notice de l'appareil 99-3105 Metra au format PDF.


| Type de produit | Kit d'encastrement pour autoradio |
| Marque | Metra |
| Modèle | 99-3105 |
| Compatibilité véhicule | Toyota Camry (1998-2002), Toyota Solara (1999-2002) |
| Format de l'autoradio | Double DIN |
| Matériau du cadre | Plastique ABS |
| Couleur | Noir |
| Dimensions du cadre | Environ 180 x 100 x 20 mm (L x H x P) |
| Poids du kit | Environ 500 g |
| Contenu de l'emballage | Cadre de montage, faisceau de fils ISO, adaptateur d'antenne, vis, instructions |
| Type de faisceau inclus | Faisceau d'adaptation ISO pour Toyota (Metra 70-1761) |
| Type d'adaptateur d'antenne | Metra 40-LE10 (adaptateur d'antenne Lexus/Toyota) |
| Fonction principale | Permet l'installation d'un autoradio après-vente dans les véhicules compatibles |
| Installation | Facile, sans modification du tableau de bord |
| Entretien et nettoyage | Nettoyer avec un chiffon doux légèrement humide. Ne pas utiliser de produits abrasifs. |
| Sécurité | Aucun risque particulier. Suivre les instructions d'installation. |
| Pièces détachées et réparabilité | Pièces détachées disponibles sur demande auprès de Metra ou revendeurs agréés. |
| Garantie | 1 an |
| Normes | Conforme aux normes en vigueur |
FOIRE AUX QUESTIONS - 99-3105 Metra
Questions des utilisateurs sur 99-3105 Metra
0 question sur cet appareil. Repondez a celles que vous connaissez ou posez la votre.
Poser une nouvelle question sur cet appareil
Téléchargez la notice de votre Kit d'encastrement au format PDF gratuitement ! Retrouvez votre notice 99-3105 - Metra et reprennez votre appareil électronique en main. Sur cette page sont publiés tous les documents nécessaires à l'utilisation de votre appareil 99-3105 de la marque Metra.
MODE D'EMPLOI 99-3105 Metra
KIT FEATURES
▶ DIN head unit provisions
▶ Pocket (holds 2 jewel cases)
KIT COMPONENTS
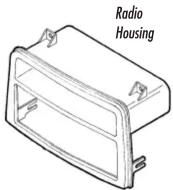
(2) Captive Studs
(2) Pal Nuts
TOOLS REQUIRED

Phillips screwdriver

Socket wrench

99-3105
INSTALLATION
INSTRUCTIONS
APPLICATIONS
CAR PAGE
SATURN
(All models) 1995-99....1-2

1-800-221-0932 www.metraonline.com © COPYRIGHT 2001 METRA ELECTRONICS CORPORATION
ALL VEHICLES
1
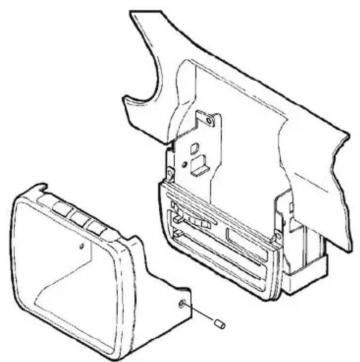
Disconnect the negative battery terminal to prevent an accidental short circuit. Remove (2) pop-clips from the sides of the radio trim bezel. Unclip the radio trim bezel, disconnect the switch wiring and remove the bezel. Remove (2) 7mm hex-head screws securing the top of the factory head unit and disconnect the wiring.
2

Mount the Radio Housing to the sub-dash with (2) 7mm hex-head screws previously removed in step #1.
3
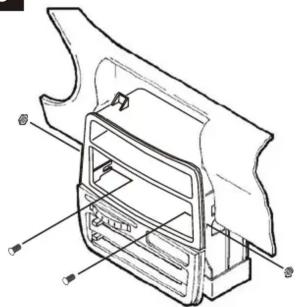
Reach through the Radio Housing and mount the lower Housing tabs to the sub-dash with (2) Captive Studs and (2) Pal Nuts supplied.
4
![graph TD A["A"] --> B["B"] B --> C["C"] C --> D["D"] style A fill:#f9f,stroke:#333 style B fill:#f9f,stroke:#333 style C fill:#ccf,stroke:#333 style D fill:#cfc,stroke:#333](/content/2026/06/1363906/images/3c61a627d822ace907a9483ff56bd84223f6e44c0d8e725896730990c20ea769.jpg)
A) Strip wire ends back 1/2 "
B) Twist ends together
C) Solder
D) Tape
Locate the factory wiring harness in the dash. Metra recommends using the proper mating adaptor and making connections as shown. (Isolate and individually tape off the ends of any unused wires to prevent electrical short circuit).
5
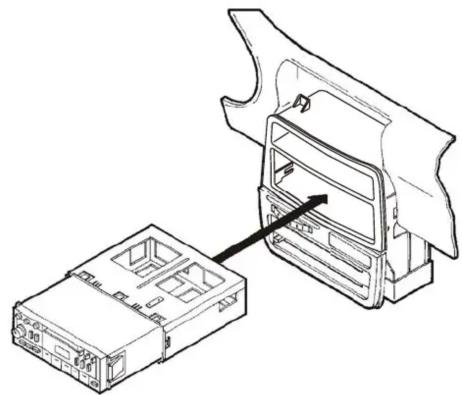
Slide the DIN cage into the kit and secure by bending the metal locking tabs down. Slide the aftermarket head unit into the cage until secure. Re-connect the battery terminal and test the unit for proper operation.


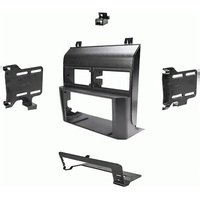
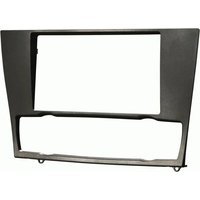
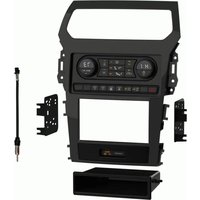
Marque : Metra
Modèle : 99-3105
Catégorie : Kit d'encastrement