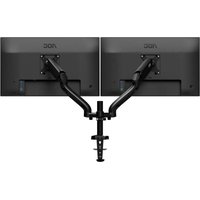
AD110D0 - Support d'écran AOC - Notice d'utilisation et mode d'emploi gratuit
Retrouvez gratuitement la notice de l'appareil AD110D0 AOC au format PDF.


| Type de produit | Moniteur LED |
| Taille de l'écran | 21,5 pouces (54,6 cm) |
| Résolution | 1920 x 1080 pixels (Full HD) |
| Taux de rafraîchissement | 60 Hz |
| Temps de réponse | 5 ms |
| Angle de vision | 178° / 178° |
| Connectivité | 1 x VGA, 1 x HDMI |
| Dimensions (avec pied) | 504 x 387 x 160 mm |
| Poids (avec pied) | 3,55 kg |
| Alimentation | AC 100-240 V, 50/60 Hz, consommation typique 25 W |
| Fonctions principales | Réglage de l'inclinaison, mode Économie d'énergie, filtre lumière bleue |
| Entretien et nettoyage | Nettoyer avec un chiffon doux et sec, éviter les solvants |
| Sécurité | Ventilation adéquate, ne pas exposer à l'humidité, fixation murale possible (norme VESA 100x100 mm) |
| Pièces détachées et réparabilité | Indice de réparabilité : 7,2/10, pièces disponibles (alimentation, carte mère) |
| Informations générales | Marque AOC, modèle AD110D0, année de sortie 2020 |
FOIRE AUX QUESTIONS - AD110D0 AOC
Questions des utilisateurs sur AD110D0 AOC
0 question sur cet appareil. Repondez a celles que vous connaissez ou posez la votre.
Poser une nouvelle question sur cet appareil
Téléchargez la notice de votre Support d'écran au format PDF gratuitement ! Retrouvez votre notice AD110D0 - AOC et reprennez votre appareil électronique en main. Sur cette page sont publiés tous les documents nécessaires à l'utilisation de votre appareil AD110D0 de la marque AOC.
MODE D'EMPLOI AD110D0 AOC
AOC
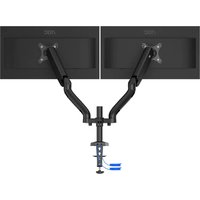
AOC Ergonomic Monitor Arm
Model: AD110D0

natural_image
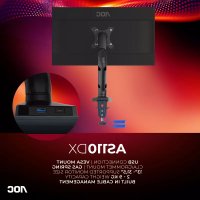
Technical line drawing of a robotic arm with articulated joints and mounting brackets (no text or symbols)Monitor Size: 13\~32"
Weight Capacity: 2\~9kg (4.09\~19.84 LB)
VESA Size: 75x75mm, 100x100mm
Installation Manual
A:Clamp-Mounting
B:Hole-Mounting
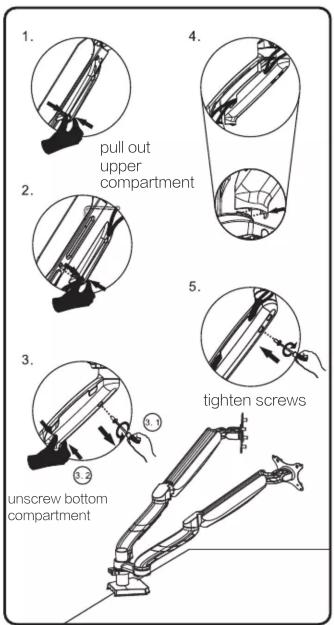
C:Cable-Management
D: VESA Mount installation
E:Monitor angles adjustment
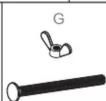
Packaging List





A Clamp-Mounting Procedures:
Step 1

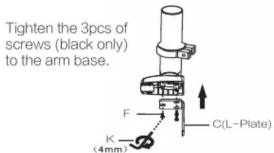
2.
Once you have secured the L-Shaped bracket to the base, attach the turner apparatus to the bracket.

Step 2
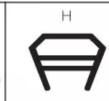
Place (H) plastic plate on the desk surface before placing arm base


Step 3
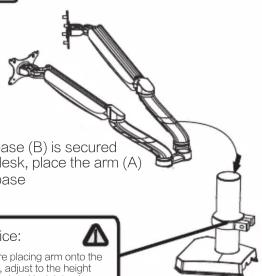
Notice:
Before placing arm onto the base, adjust to the height desired and lock into place by tightening security screws
B :Hole-Mounting Procedure
Step 1

Insert screws from(G) into(J) Plate, tighten the 3 screws(F) onto the arm base.

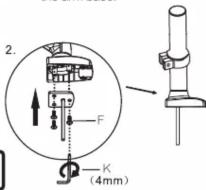
Step 2
Place piece (I) onto the long screw (G) first, then utilize the wingnut provided to secure the base to the surface you are attaching the arm(s) to.


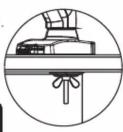
Step 3


C:Cable Management.
D: Installing VESA Mount
Step 1
VESA:75x75mm,100x100mm

Monitor Weight Adjustment
"+" Increase holding capacity
"-" Decrease holding capacity

Noted: Please ensure monitor is within 2–9kg weight range
Condition 1: After attached monitor, your monitor is freely moveable in any direction without adjustment.
Condition 2: After monitor is attached, if screen will bounce up, pls use rench provided and turn "-" clockwise direction until stabilized.
Condition 3: After monitor is attached, if screen will sink, pls use rench provided and turn "+" clockwise direction until stabilized.
E: Adjust Monitor angles
Step 2


AFTER INSTALLATION,
ADJUST GAS-SPRING POWER

1. Ensure Monitor is tighten to Monitor Arm
2. Ensure Monitor is not over-weighted (2-9kg)

Reduce Arm Weight Capacity
Increase Arm Weight Capacity
Warning

natural_image
Silhouette of a person holding a knife with an arrow, under a warning sign (no text or symbols present)Envision Peripherals, Inc.
490 N.Mcarthy Blvd. Suite #120
Milpitas, CA 95035
www.aoc.com
Made in China

Marque : AOC
Modèle : AD110D0
Catégorie : Support d'écran