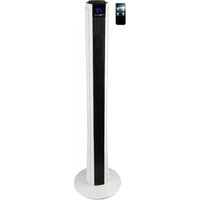
NVR-VT46-BDM - Contrôle climatique NEVIR - Notice d'utilisation et mode d'emploi gratuit
Retrouvez gratuitement la notice de l'appareil NVR-VT46-BDM NEVIR au format PDF.


| Type de produit | Thermostat électronique programmable |
| Marque | Nevir |
| Modèle | NVR-VT46-BDM |
| Catégorie | Contrôle climatique |
| Dimensions (L x H x P) | 80 x 80 x 30 mm |
| Poids | 150 g |
| Alimentation | 2 piles AA (1,5 V) |
| Affichage | Écran LCD rétroéclairé |
| Température de fonctionnement | 0 °C à 50 °C |
| Précision de mesure | ± 0,5 °C |
| Programmation | Quotidienne et hebdomadaire |
| Modes de fonctionnement | Manuel, Automatique, Hors gel |
| Fonction hors gel | Maintien à 7 °C pour éviter le gel |
| Verrouillage enfant | Oui, pour éviter les modifications accidentelles |
| Compatibilité | Chaudière, pompe à chaleur, climatiseur |
| Entretien | Nettoyer avec un chiffon doux et sec |
| Piles de rechange | Piles AA standard disponibles dans le commerce |
| Garantie | 2 ans |
FOIRE AUX QUESTIONS - NVR-VT46-BDM NEVIR
Questions des utilisateurs sur NVR-VT46-BDM NEVIR
0 question sur cet appareil. Repondez a celles que vous connaissez ou posez la votre.
Poser une nouvelle question sur cet appareil
Téléchargez la notice de votre Contrôle climatique au format PDF gratuitement ! Retrouvez votre notice NVR-VT46-BDM - NEVIR et reprennez votre appareil électronique en main. Sur cette page sont publiés tous les documents nécessaires à l'utilisation de votre appareil NVR-VT46-BDM de la marque NEVIR.
MODE D'EMPLOI NVR-VT46-BDM NEVIR
nevir
VENTILADOR DE TORRE
NVR-VT32-BDM
NVR-VT46-BDM
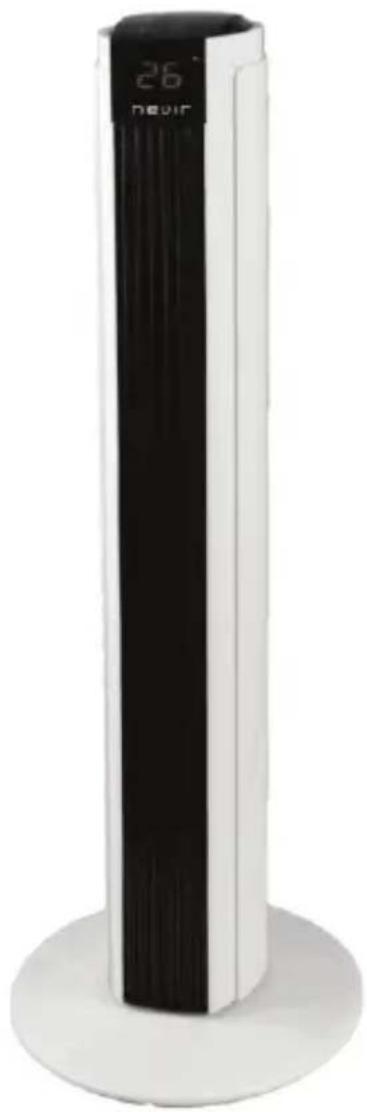
natural_image
Modern vertical digital temperature range meter with black and white casing, no visible text or symbols on the device itself.MANUAL DE INSTRUCCIONES
Directrices de Seguridad importantes
- Advertencia: El interruptor ON/OFF no debe utilizarse como el único medio de poder de desconexión. Siempre desenchufe el cable de alimentación antes de mover la unidad o limpiarla.
- Siempre desconectar el ventilador de la fuente de alimentación cuando se mueve de un lugar a otro.
- El ventilador no está diseñado para su uso en lugares mojados o húmedos. Nunca coloque el ventilador donde puede caer en una bañera o cualquier otro recipiente de agua.
- No coloque el ventilador cerca de una fuente de fuego o calor.
- Mantener el ventilador limpio para su buen estado y conservación (consulte la sección de mantenimiento para obtener más información)
- Si el cable de alimentación presenta algún daño, debe reemplazarse por el fabricante, agente de servicio o persona cualificada por otro similar para evitar cualquier riesgo.
Instalación de la Base
-
Coloque el cable de corriente en el hueco entre los dos semicírculos de la base y encájelos juntos.
-
Fije y asegúrese de que la base está perfectamente ajustada.
-
Alinee el cable siguiendo la guía en la base.

natural_image
Technical line drawing of a mechanical component with no visible text or symbolsMando a Distancia
-
Las funciones en el mando a distancia son las mismas que en el panel de control del ventilador de torre. Remítase a la sección de Ajustes en este manual.
-
Instalar una pila de Litio de 3V para accionarlo.
AJUSTES
-
Coloque el ventilador sobre una superficie estable y plana. Enchufe el cable de corriente a una toma de corriente eléctrica de 220V.
-
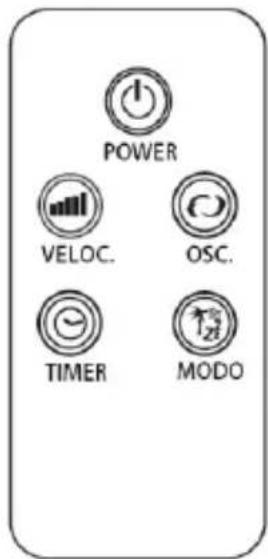
Puesta en marcha: Encienda el ventilador accionando el botón de Encendido (POWER), el ventilador comenzará a funcionar a baja velocidad.
-
VELOCIDAD: Mediante el selector de velocidad (VELOC.) usted puede ajustar el nivel de aire y velocidad del ventilador a la potencia deseada: Baia, Meida, Alta.
-
MODO: Puede elegir entre modo Normal, Natural o Modo Sueño.
-
OSC: Presione el botón de Oscilación (OSC.) en el mando a distancia o el panel de control para que el ventilador gire de forma oscilante. Para detener la oscilación, vuelva a pulsar el mismo botón.
-
TEMPORIZADOR: Pulse el botón Timer en el mando a distancia o el panel de control para establecer un tiempo hasta el Auto-apagado. Hay 7.5 intervalos de tiempo, desde 0.5 horas hasta 7.5 horas.

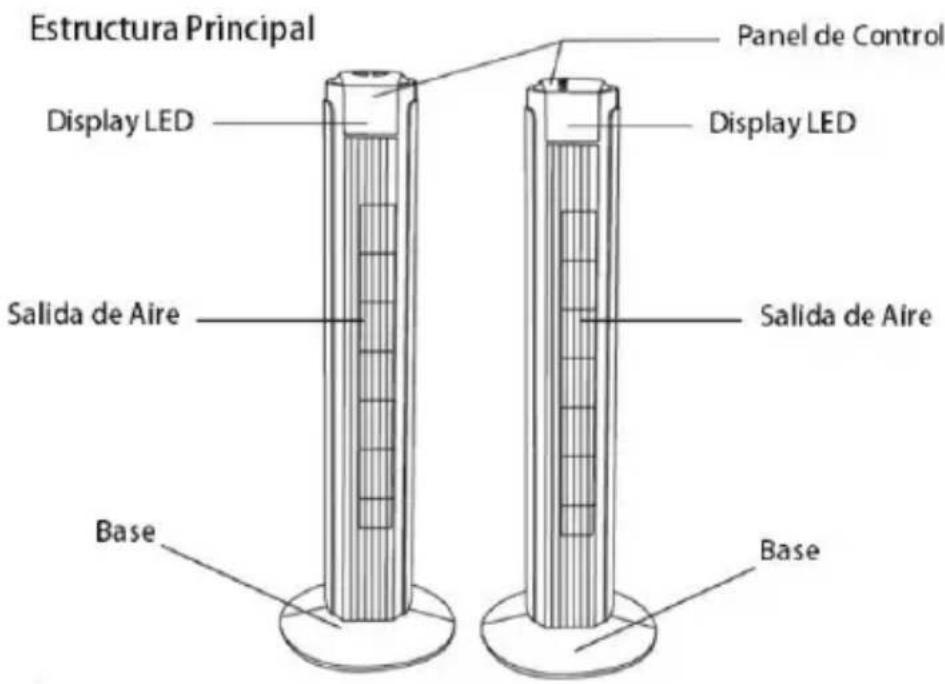
Partes del ventilador
Proceso correcto de desecho de este producto
Según la directiva Waste of Electrical and Electronic Equipment (WEEE), los residuos WEEE han de recogerse y tratarse por separado. Si, en el futuro, necesita desprenderse de este producto, NO lo ponga en los residuos domésticos, envielo a los puntos de recogida WEEE si existen
Para dar cumplimiento a la Norma UNE EN-60335, indicamos que si el cable flexible se daña, únicamente puede ser sustituido por un taller de reparación reconocido por el fabricante NEVIR, S.A., ya que se necesitan herramientas especiales
Instructions Manual
SAFETY GUIDELINES
● Warning: The ON/OFF switch should not be used as the sole means of disconnection power. Always unplug the power cord before servicing or moving the unit
● Always disconnected the Fan from the power supply when moving it from one location to another.
● The Fan is not intended for use in wet or damp locations. Never locate the Fan where it may fall into a bathtub or other water container.
● Do not place the Fan near a source of heart or fire.
- Keep the Fan clean to maintain in good condition (refer to maintenance section for details)
- If the power cord damage, it must be replaced by the manufacturer, service agent or similar qualified person in order to avoid a hazard.
Base installation
- Also get through the power cord in the central of two parts of semicircle base and insert two semicircle bases together.
- Secure the base.
- Align the power cord to the power cord base holder.

natural_image
Pure mechanical diagram of a wheel or gear assembly without any text, numbers, or symbolsREMOTE CONTROL
- The operation of remote control is same as the operation of the control panel on the fan. Please refer to Function settings in this manual.
- Battery replacement: Install one 3V Lithium battery.

FUNCTION SETTINGS
- Place the Fan on a stable and flat surface. Plug the Power Cord into an A.C.220V electrical outlet.
- POWER: Turn the Fan ON, the fan will start at low speed.
- VELOC ITY: Adjust the Fan Speed to the desired level: Low, Medium or High
- MODE: Set the Fan as Normal, Natural or Sleep mode.
- OSC: Press the remote control's button to allow the Fan to oscillation the wind direction. To stop the oscillation, press the button again.
- TIMER: Press the remote control's button to set desired auto power off time. There are 7.5 time intervals, from 0.5-hour to 7.5-hour.

Main parts

Warning: in order to reduce the risk of fire or electric shock, never use the appliance together with an electronic timer.

According to Waste of Electrical and Electronic Equipment (WEEE) directive, WEEE should be separately collected and treated. If at any time in future you need to dispose of this product please do NOT dispose of this product with household waste. Please send this product to WEEE collecting points where available.
In order to fulfill ruling UNE EN-60335, we indicate that if the flexible wire is damaged, it can only be substituted by a technical service recognized by NEVIR, S.A., as per special tooling is required
DECLARACIÓN DE CONFORMIDAD
NEVIR, S.A. Declara bajo su responsabilidad que el aparato indicado cumple los requisitos de las siguientes directivas:
DIRECTIVA EMC
LOW VOLTAGE DIRECTIVA EEC
EN 55014-1:2006+A1:2009+A2:2011
EN 600335-2-80:2003+A1:2009+A2:2011
EN61000-3-2:2014
EN600335-1:2012+A11:2014
EN61000-3-3:2013
EN55014-2:2015
Descripciones del aparato: VENTILADOR DE TORRE
Modelo(s) NEVIR: NVR-VT32/46-BDM
Importador: NEVIR, S.A.
Dirección del importador:
NEVIR, S.A.
C/ Canteros, 14
Parque Empresarial Puerta de Madrid
28830 San Fernando de Henares, Madrid
Marque : NEVIR
Modèle : NVR-VT46-BDM
Catégorie : Contrôle climatique