
RT510RF+ - Thermostat Salus - Notice d'utilisation et mode d'emploi gratuit
Retrouvez gratuitement la notice de l'appareil RT510RF+ Salus au format PDF.


| Type de produit | Thermostat d'ambiance sans fil |
| Marque | Salus |
| Modèle | RT510RF+ |
| Catégorie | Thermostat |
| Dimensions (L x H x P) | 85 x 85 x 30 mm |
| Poids | 150 g (avec piles) |
| Alimentation | 2 piles alcalines AA |
| Affichage | Écran LCD rétroéclairé |
| Plage de température | 5 °C à 35 °C |
| Précision de température | 0,5 °C |
| Programmation | Hebdomadaire, jusqu'à 4 périodes par jour |
| Fonctions principales | Contrôle de température, programmation, modes manuel/automatique, protection antigel, verrouillage enfant |
| Compatibilité | Chaudière gaz, fioul, électrique, pompe à chaleur (contact sec) |
| Fréquence radio | 868 MHz |
| Portée radio | Jusqu'à 30 m en intérieur |
| Entretien et nettoyage | Nettoyer avec un chiffon doux sec, ne pas utiliser de produits chimiques |
| Sécurité | Protection antigel, verrouillage enfant, sécurité surchauffe |
| Pièces détachées et réparabilité | Piles, support mural, vis de fixation (disponibles en ligne) |
| Informations générales | Fabricant: Salus; Garantie: 2 ans; Usage domestique |
FOIRE AUX QUESTIONS - RT510RF+ Salus
Questions des utilisateurs sur RT510RF+ Salus
0 question sur cet appareil. Repondez a celles que vous connaissez ou posez la votre.
Poser une nouvelle question sur cet appareil
Téléchargez la notice de votre Thermostat au format PDF gratuitement ! Retrouvez votre notice RT510RF+ - Salus et reprennez votre appareil électronique en main. Sur cette page sont publiés tous les documents nécessaires à l'utilisation de votre appareil RT510RF+ de la marque Salus.
MODE D'EMPLOI RT510RF+ Salus


Introduction
RT510+/-/RT510TX+ / RT510RF+ is a programmable room thermostat used to control room temperature. Device launching heating system by shorting terminal blocks, simultaneously informing the action and showing this information on the LCD display. Extended features allows us to use various operating modes - automatic (time schedules), manual, frost protection or holiday. Before use please read this manual carefully. Use only AA 1.5 V alkaline batteries in the thermostat. Place the batteries into the battery slot located under the cover. Do not use rechargeable batteries.
Product compliance
This product complies with the essential requirements and other relevant provisions of the following EU Directives: EMC 2014/30/EU, LVD 2014/35/EU, RED 2014/53/EU and RoHS 2011/65/EU. Full text of the EU Declaration of Conformity is available on www.salus-controls.com/uk


Safety Information
Use in accordance to national and EU regulations. Use the device as intended, keeping it in dry condition. Product for indoor use only. Installation must be carried out by a qualified person in accordance to national and EU regulations.
Technical specification
| RT510+ Thermostat RTS | OTX+ Thermostat | |
| Thermostat supply 2 x AA alkaline batteries 2 x AA alkaline batteries | ||
| Thermostat rating max 3 (1) A - | ||
| Outputs | Voltage-freeNO / COM / NC terminals | - |
| Temperature range | 5 - 35°C - 35°C | |
| Temperature accuracy | 0.1°C or 0.5°C | 0.1°C or 0.5°C |
| Control algorithm | ITLC / SPAN | ITLC / SPAN |
| Radio frequency | - | 868 MHz |
| Dimension [mm] | 120x96x27 | 120x96x27 |
| RXRTS10 Receiver | |
| Receiver supply | 230 V AC |
| Receiver rating max | 16 (5) A |
| Outputs | Voltage free NO / COM terminals |
| Radio frequency | 868 MHz |
| Dimension [mm] | 96x96x27 |
Button functions
RT510+/RT510TX+ Thermostat RXRT510+ Receiver

- Boost function
- Manual Mode
- Frost protection / Holiday Mode
- Increase button
- Decrease button
- When in Manual Mode,
ON will turn the boiler on. - When in Manual Mode,
OFF will turn the boiler off - Receiver operates in autom according to the thermostat
- Receiver output is controlled
by the On/Off slide switch.
LCD Icon description

1. Day of the week
2. Program number
3. Program indicato
4. Settings
4. Settings
5. Summary
5. Temperature measured / set 6. Boost function
7. Low battery status
8. Wireless connection with the receiver
9. Heating Mode On
10. Manual Mode On
11. Holiday Mode Of 12. Frost Protection
12. Trust Protection Mode On
13. Temperature unit
14. AM / PI

RT510+ Terminals description
| Terminal | Description |
| 1 - COM | Common Terminal |
| 2 - NC | Switched Live OFF |
| 3 - NO | Switched Live ON |
RT510+ (Thermostat) Dip Switch Settings
The DIP Switches can be found on the rear of your thermostat.

Control feature ITLC
2017年1月1日
Operation ITLC Internal Temp
Load Compensation
| Load compensation improved efficiency
SPAN
1.2.1.1
re When Span is selected on DIP switch N° 2, the
on DIP switch N° 2, the DIP switch N° 1 is not
RXRT510 Receiver terminals description
| Terminal | Description |
| NO | Switch Terminal |
| COM | Common Switch Terminal |
| L, N | Supply (230 V AC) |
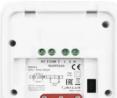
RT510TX+ & RT510RF (Thermostat) DIP Switch Settings
The DIP Switches can be found on the rear of your thermostat
For all plug-in boiler receiver applications ensure SW1 is set to RAD.

| Control feature | ITLC | SPAN |
| Operation | When ITLC is selected on DIP switch No 2, the DIP switch No 1 is functional. You can choose between radiator or electric heater. | When Span is selected on DIP switch No 2, the DIP switch No 1 is not functional. |
RT510+ Wiring diagram

RT510TX+ Wiring diagram

Note: If you are using the RTS10RF pack, the pairing between the thermostat and the receiver is already done.


Setting the time

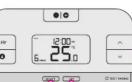


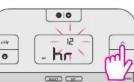
Press ∧ or ∨ to select the hour format.

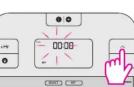
Press ∧ or ∨ to set the hour.


Press ∧ or ∨ to set the minutes.


Press ∧ or ∨ to set day of the week.


Thermostat will return to the main screen.
Programming - automatic mode
In this mode, user can set the schedules for thermostat (temperature setpoints for specific periods of time). To do this, firstly choose programming mode: "5-2" (business days + weekend) or "24h" (each day separately) using parameter d04 from Installer mode. Programmed schedules should use all time periods.


Press the SET button to start programming

Use the ∧ or ∨ button to select day / days from which you want to start programming.


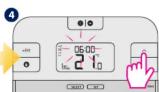
Use the ^ or ▼ button to set the hour to start the program #1.


Use the ^ or ▼ button to set the minutes to start the program #1.


Use the ^ or ∨ button to set the temperature for program #1.

Press SELECT to confirm.

Follow steps 4-9, to define programs 2-6. Press SET button to end programming.
Temporary Override Mode
This function is available only in automatic mode (schedule). If a new setpoint temperature will be set during the schedule - it will be maintained until next time interval starts according to programmed schedule.

Using ∧ or ∨ buttons set new setpoint temperature.
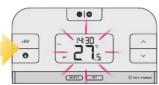
After new setpoint temperature set, thermostat will return to the main screen.

Temporary Override mode will be disabled when new schedule will be set.
Manual Mode and setting setpoint temperature
In this mode thermostat does not work according to the programmed schedule but it will maintain selected temperature.


ess 🔒 button to activate the Manual Mode.
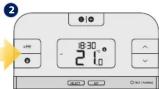

After new setpoint temperature set, thermostat will return to the main screen


Using ∧ or ∨ buttons set new setpoint temperature.

After new setpoint temperature set, thermostat will return to the main screen

To turn off the Manual Mode press ⏻ button. Once the manual mode is off, the hand icon ⏻ on the thermostat will disappear.
Hourly temperature Override Mode (+Hr)
This function is available in Automatic and Manual Mode. It is used to change the setpoint temperature for a specified number of hours (up to 9 hours). Once that time is over, thermostat returns to previous mode.


Press +Hr button to set number of hours for temperature override (e.g. to set up override for 3 hours, press the button 3 times).

Using ∧ or ∨ button set a new setpoint temperature for override.

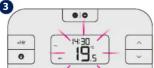


Turning off hourly temperature override mode before time's up
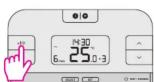
Press the + Hr button until number of hours disappears from display.
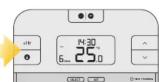
Frost Protection

Temperature of the Frost Protection mode is set as default at 5°C. This temperature can be changed in Installer Mode in d03 parameter.

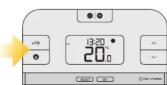
Press button 🙏 | ➕ to turn On Frost Protection mode.
[Non-Text]
Turning Off the Frost Protection Mode

Press button 🙏 | 🕒 again to turn Off Frost Protection mode.

[Non-Text]
Sleep mode

Hold ∧ and ∨ buttons simultaneously for 3 seconds to start the sleep mode.

Thermostat is in sleep mode

When the sleep mode is activated, all thermostat functions are paused.

Press any key to deactivate sleep mode. Thermostat will return to the previous mode.
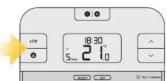
mostat will return to the previous mode.
Holiday Mode
In this mode the "frost protection" temperature is maintained for a specific number of days.


Hold down 🙏 | ➕ button for 3 seconds to activate the Holiday Mode.

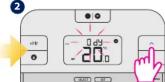
Use ∧ or ∨ button to set the number of days for Holiday Mode.

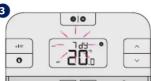


To turn off the Holiday Mode, hold down ⚙ | ➕ button for 3 seconds. The airplane icon ➕ should disappear from the display.
RT510TX thermostat pairing with the receiver Installer Mode

Note: If you are using the RT510RF+ pack, the pairing between the thermostat and the receiver is already done.

If you bought the RTS10TX+ and RXRT510+ separately or if you want to re-pair thermostat with the receiver, make sure that the device is disconnected from the power supply and the switches on the receiver have been set to AUTO and ON. Then connect the receiver to the power supply and wait for the red LED to light steadily. Then switch to the OFF position and again to ON position quickly. The red flashing LED will confirm entering the pairing mode.
Begin the pairing process


Press and hold TEST/PAIRING button for 3 seconds.

(the pairing process takes up to 9 minutes)
End the pairing process


Once devices are successfully paired, LED on the receiver will go solid red. Press and hold TEST / PAIRING button for 3 seconds to end the pairing process.


Test the pairing process


Press TEST / PAIRING button to check the connection with the receiver.


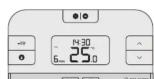

Press TEST / PAIRING button again to return to the main screen.


Press three buttons at the same time for 3 seconds.

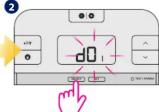
Using SELECT button choose the parameter.


Using ∧ or ∨ buttons set a parameter value.


Press SELECT to confirm.

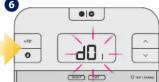
Follow steps 2-5, to set next parameters. To exit the installer mode, wait 10 seconds - thermostat will return automatically to the main screen.
| dxx | Function | Parameter | Default value |
| d01 Temperature display increments 0.1°C or 0.5°C | 0.5°C | ||
| d02 Temperature offset +/- 3.0°C 0.0°C | |||
| d03 Frost Protection setpoint temperature 5.0°C - | 7.0°C 5.0°C | ||
| d04 Programmer selection | 5/9 or 24 hr (7d) 5zd | ||
Reset of the RT510+ thermostat
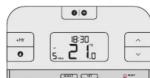

Press the RESET button once. You can use a paper clip. Your thermostat will be reset and will start up automatically.
Reset of the RT510TX+ thermostat

Remove the batteries without pressing any button. Wait 2 minutes and insert the batteries again. Your device will be restarted.
When you want to change the batteries your device will use the internal memory to backup your settings. You have 30 seconds to change the batteries before losing your settings.
NOTE:
If you do not notice the "low battery" symbol displayed on the screen in time, it will shut down. In this case, after removing the old batteries, it is necessary to wait 5 minutes before inserting the new batteries. Otherwise, it is possible that a condenser will remain partially discharged and it can prevent the thermostat from restarting.
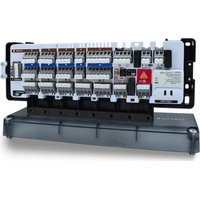
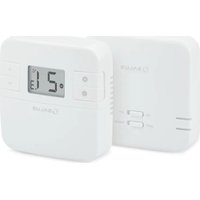
- Introduction
- Product compliance
- Button functions
- LCD Icon description
- RT510+ Terminals description
- RT510+ (Thermostat) Dip Switch Settings
- RXRT510 Receiver terminals description
- RT510TX+ & RT510RF (Thermostat) DIP Switch Settings
- RT510+ Wiring diagram
- RT510TX+ Wiring diagram
- Setting the time
- Programming - automatic mode
- Temporary Override Mode
- Manual Mode and setting setpoint temperature
- Hourly temperature Override Mode (+Hr)
- Frost Protection
- Holiday Mode
- RT510TX thermostat pairing with the receiver Installer Mode
Marque : Salus
Modèle : RT510RF+
Catégorie : Thermostat