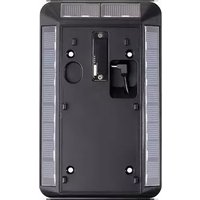
Solar Charger - Maison intelligente RING - Notice d'utilisation et mode d'emploi gratuit
Retrouvez gratuitement la notice de l'appareil Solar Charger RING au format PDF.


| Type de produit | Chargeur solaire pour caméra Ring |
| Marque | Ring |
| Modèle | Solar Charger |
| Catégorie | Maison intelligente |
| Alimentation | Énergie solaire |
| Puissance du panneau | 5,5 W |
| Tension de sortie | 5 V DC |
| Courant de sortie | 1 A (max) |
| Dimensions | 170 x 120 x 20 mm |
| Poids | 280 g |
| Indice de protection | IP65 (résistant aux intempéries) |
| Câble | USB-A vers micro-USB, 4 m |
| Fonctions principales | Recharge continue de la batterie de la caméra Ring |
| Installation | Fixation murale incluse |
| Matériau | Panneau solaire en silicium monocristallin |
| Compatibilité | Ring Stick Up Cam (2e génération), Ring Spotlight Cam |
| Conditions d'utilisation | Extérieur, ensoleillement direct |
| Entretien et nettoyage | Nettoyer avec un chiffon doux et de l'eau |
| Sécurité | Utiliser uniquement avec des appareils Ring compatibles ; ne pas exposer à des températures extrêmes |
| Pièces détachées et réparabilité | Aucune pièce réparable par l'utilisateur |
FOIRE AUX QUESTIONS - Solar Charger RING
Questions des utilisateurs sur Solar Charger RING
0 question sur cet appareil. Repondez a celles que vous connaissez ou posez la votre.
Poser une nouvelle question sur cet appareil
Téléchargez la notice de votre Maison intelligente au format PDF gratuitement ! Retrouvez votre notice Solar Charger - RING et reprennez votre appareil électronique en main. Sur cette page sont publiés tous les documents nécessaires à l'utilisation de votre appareil Solar Charger de la marque RING.
MODE D'EMPLOI Solar Charger RING
ring
Solar Charger
for Ring Video Doorbell 2

natural_image
Close-up of a white ring-shaped device with a circular button and ventilation grille (no visible text or symbols)Installation Manual
Here's how it all goes together!
Note: Wall anchors are optional, and are only needed when mounting to a hard surface, such as brick or stucco.

natural_image
Technical line drawing of an electronic device with exploded view and internal components (no text or symbols)Step 1 (optional)
If your Ring Video Doorbell 2 is already installed, uninstall it now.
You'll need to remove the security screw, pop off the faceplate, then remove the mounting screws.

natural_image
Diagram showing screw fasteners interacting with a device panel, no text or symbols presentStep 2
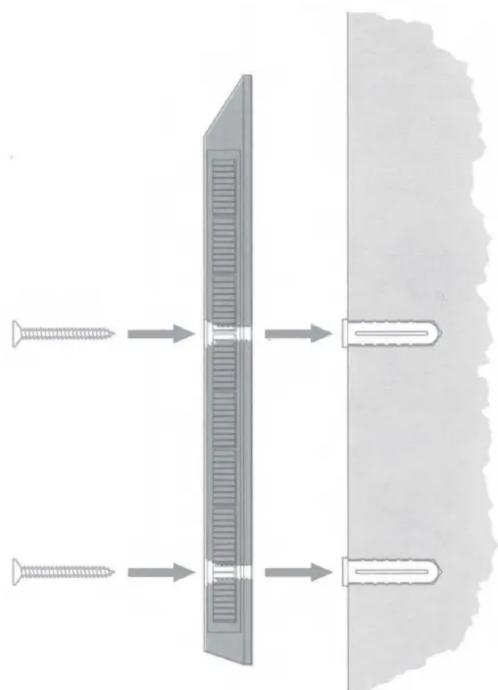
Using the provided screws, mount your new Solar Charger to your wall.
Note: Use wall anchors if mounting on brick or stucco.
natural_image
Diagram showing two screw fasteners passing through a grating or grating structure, with no text or symbols present.Step 3
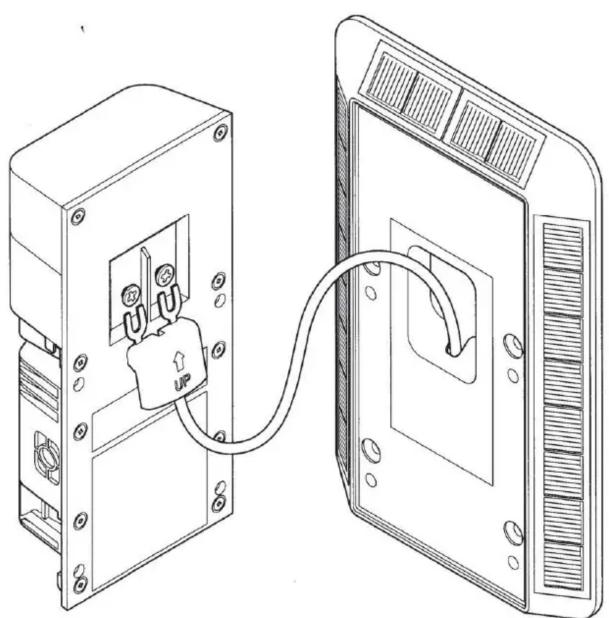
Loosen the screw terminals on your Ring Doorbell. Insert the wire connector from the Solar Charger under both terminals, then re-tighten.
natural_image
Technical line drawing of a device showing two connected components with a cable (no text or symbols)Step 4
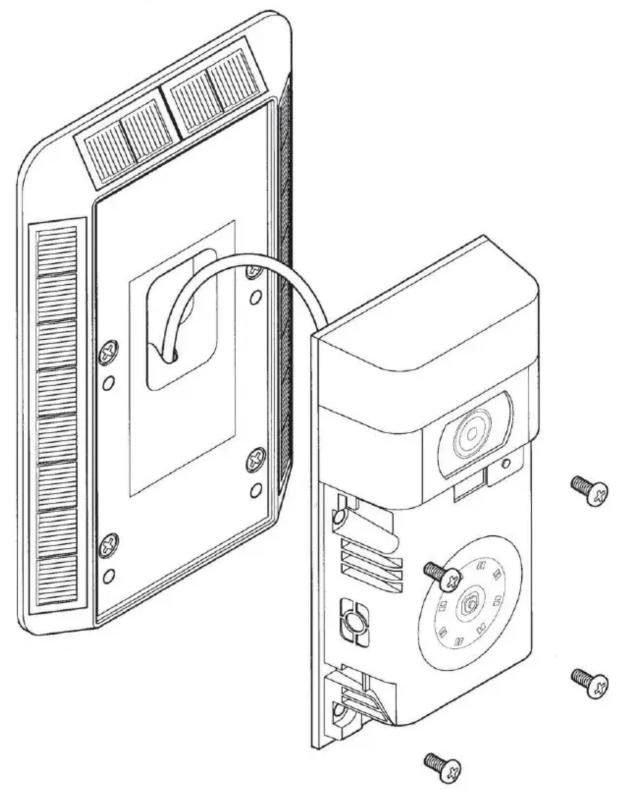
Fit your Ring Doorbell into the Solar Charger, taking care to feed the retractible wire back into the charger.
Then, secure your Ring Doorbell to the charger with the provided bolts.
natural_image
Technical line drawing of an open and closed electronic device with screw holes and a curved internal component (no text or symbols)Step 5
Re-attach the faceplate to your Doorbell & install the security screw.

natural_image
Line drawing of a portable air conditioner unit with labeled 'ring' and ventilation grille (no text beyond label)
ring.com/help
+1 310 929 7085
01727 263045
O +80087009781
+80087009781
1 300 205 983
+64 9 887 9871
52 55 8526 5445

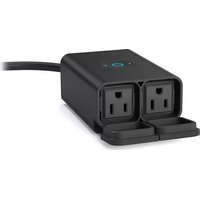

Marque : RING
Modèle : Solar Charger
Catégorie : Maison intelligente