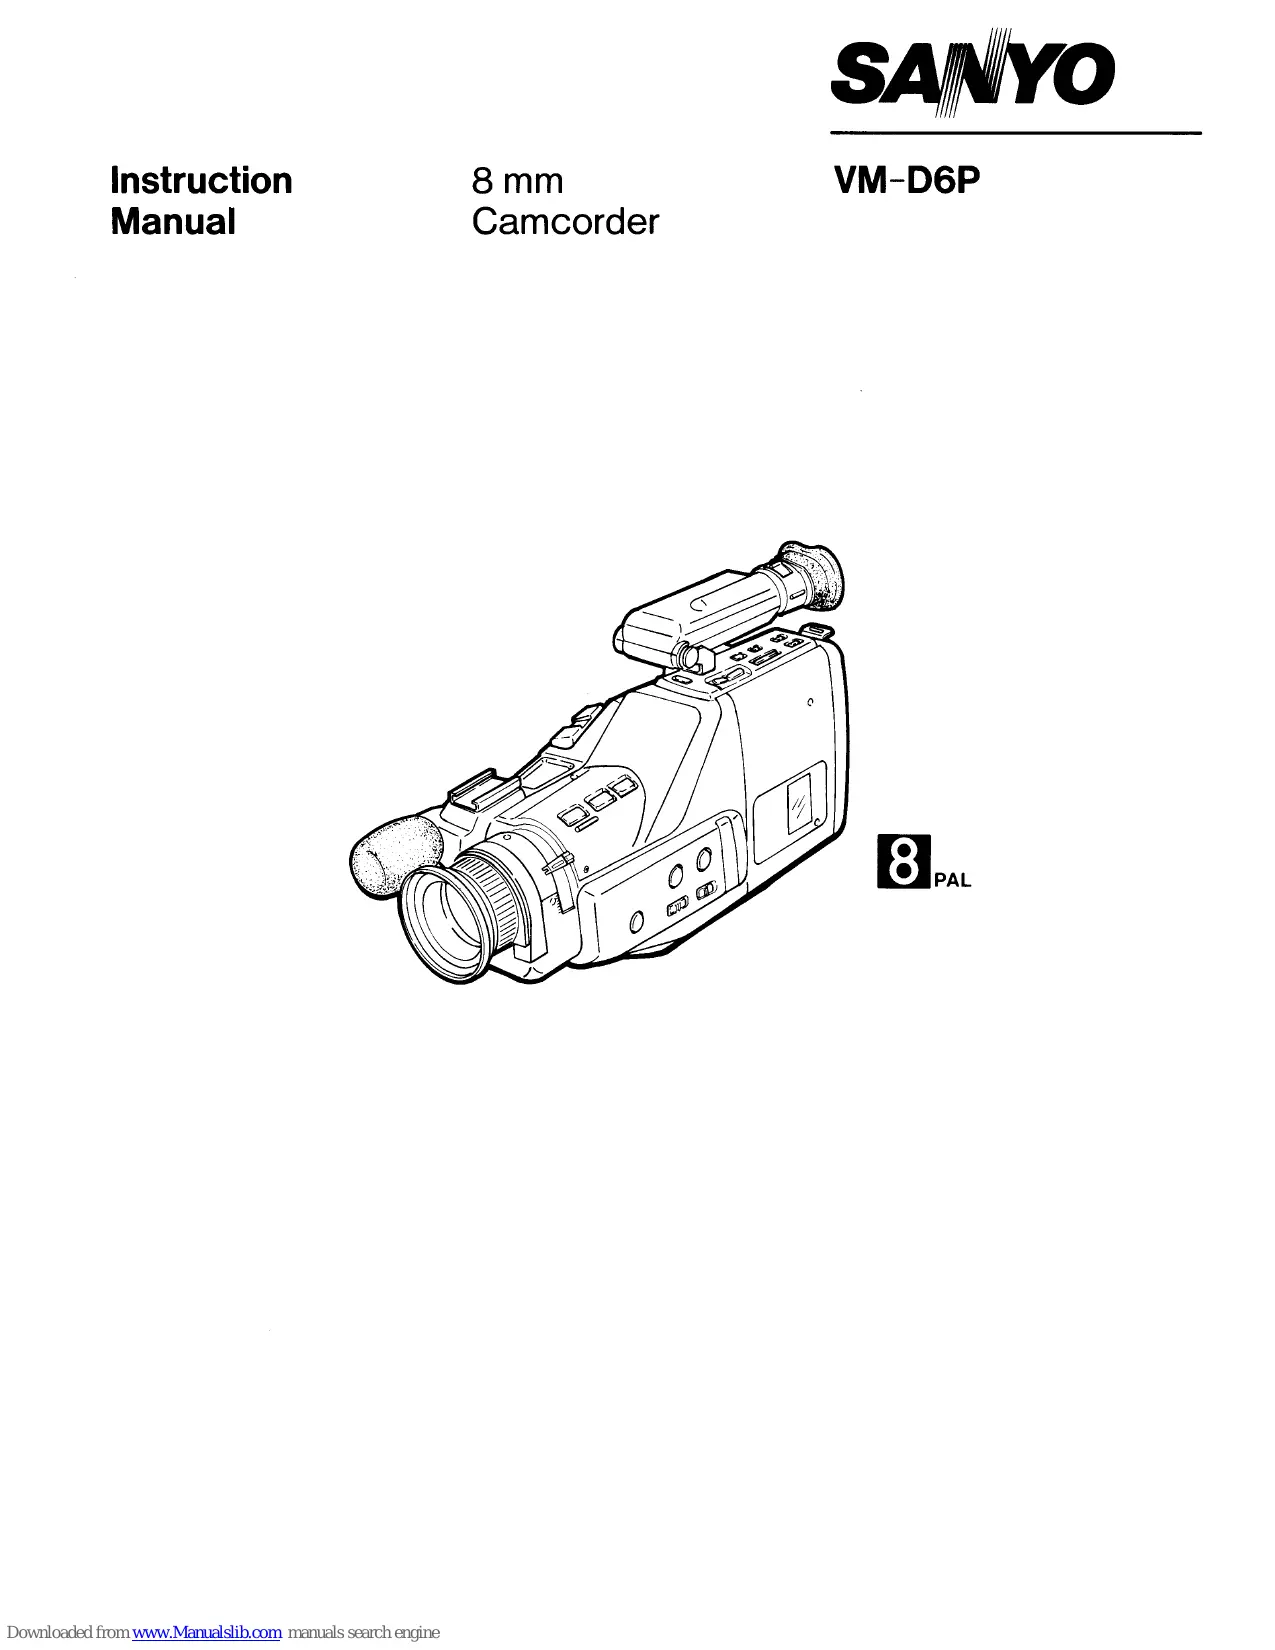
MODE D'EMPLOI VM-D6P SANYO
Manuel d'instructions
Caméscope 8 mm
VM-D6P
CARACTÉRISTIQUES 1
ACCESSOIRES 1
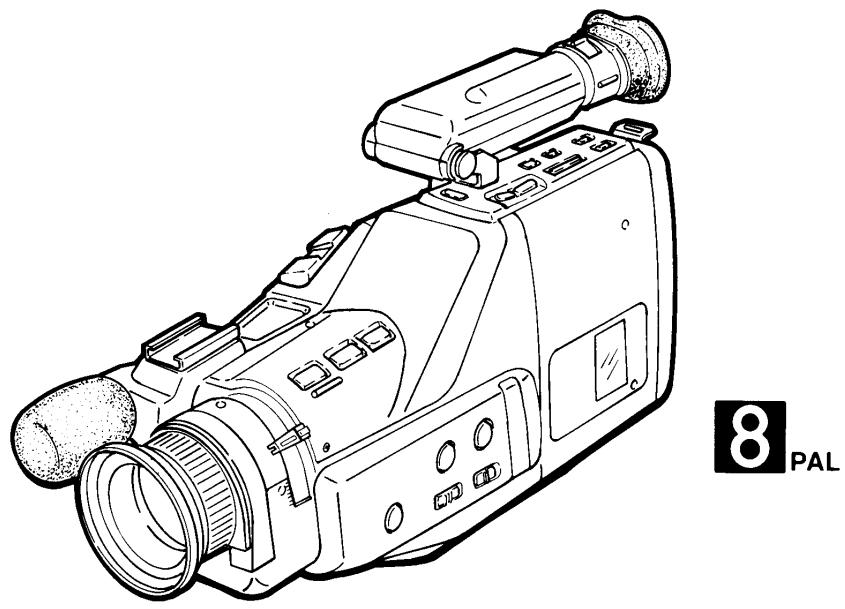
NOMENCLATURE DES PIÈCES 2
PRÉPARATIFS 4
COMPTEUR DE BANDE LINÉAIRE 10
TENUE DU CAMÉSCOPE 11
ENREGISTREMENT CAMÉRA 12
LECTURE 13
ENREGISTREMENT FLUIDE/MONTAGE INSERTION 15
RÉVISION D'ENREGISTREMENT 16
ZOOM 16
MISE AU POINT MACRO (PROCHE) 17
VITESSE D'OBTURATEUR ÉLEVÉE 18
BALANCE DES BLANCS AUTOMATIQUE 19
INSERTION DE TITRE 20
MISE AU POINT AUTOMATIQUE 21
IRIS AUTOMATIQUE 23
IMPRESSION DATE/HEURE 24
COPIE DE BANDE 25
CONNEXION 26
NOTES IMPORTANTES 27
PRISES DE VUE DE BASE 28
PANORAMIQUE/INCLINAISON 30
ZOOM 31
CONDITIONS D'ÉCLAIRAGE ET LUMIÈRE 31
LA TOUCHE PERSONNELLE 33
AVANT DE DEMANDER UNE RÉPARATION 34
SPÉCIFICATIONS 36
CARACTÉRISTIQUES
- Caméra intégrée / magnétoscope cassette 8 mm Mise au point automatique Obturateur à grande vitesse
- Insertion de titre (incrustation)
- Recherche de scène
- Impression de la date/heure Enregistrement en macro (gros plan) Zoom avant/arrière huit puissances — motorisé ou manuel Viseur électronique pour lecture immédiate Contrôle d'enregistrement pour vérifier la dernière partie d'un enregistrement
- Image fixe / recherche d'image
- Compteur de bande à temps linéaire (compteur temps réel) Durée d'enregistrement maximale : 180 minutes LP/SP
- Montage par insertion
① Adaptateur secteur VAR-30B ou VAR-30C 1 ② Batterie NP-55 1 ③ Sangle d'épaule 1 ④ Pile au lithium (CR2025) 1 5 Cordon d'alimentation 1 6 Adaptateur RF VRF-300 1 ⑦ Câble coaxial 1 8 Housse souple 1
①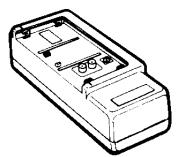
2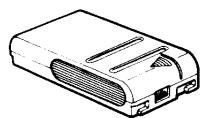
③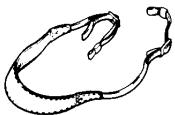
4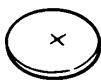
5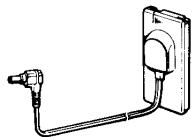
7 8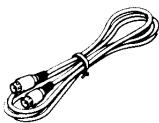
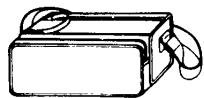
ACCESSOIRES EN OPTION
Batterie NP-55 (environ 45 min) Batterie NP-77 (environ 90 min) VCL-80 Kit de filtres standard VCL-85 Kit de filtres créatifs VCL-T20 Lentille de téléconversion VCL-W7 Objectif grand angle VBF-85 Bloc-batterie pour voiture VBF-90 Chargeur de batterie pour voiture VP-90 Microphone ultra VDL-20 Projecteur vidéo VDC-80 Kit de nettoyage VCW-82 Cordon AV VCE-212 Adaptateur péritel AV
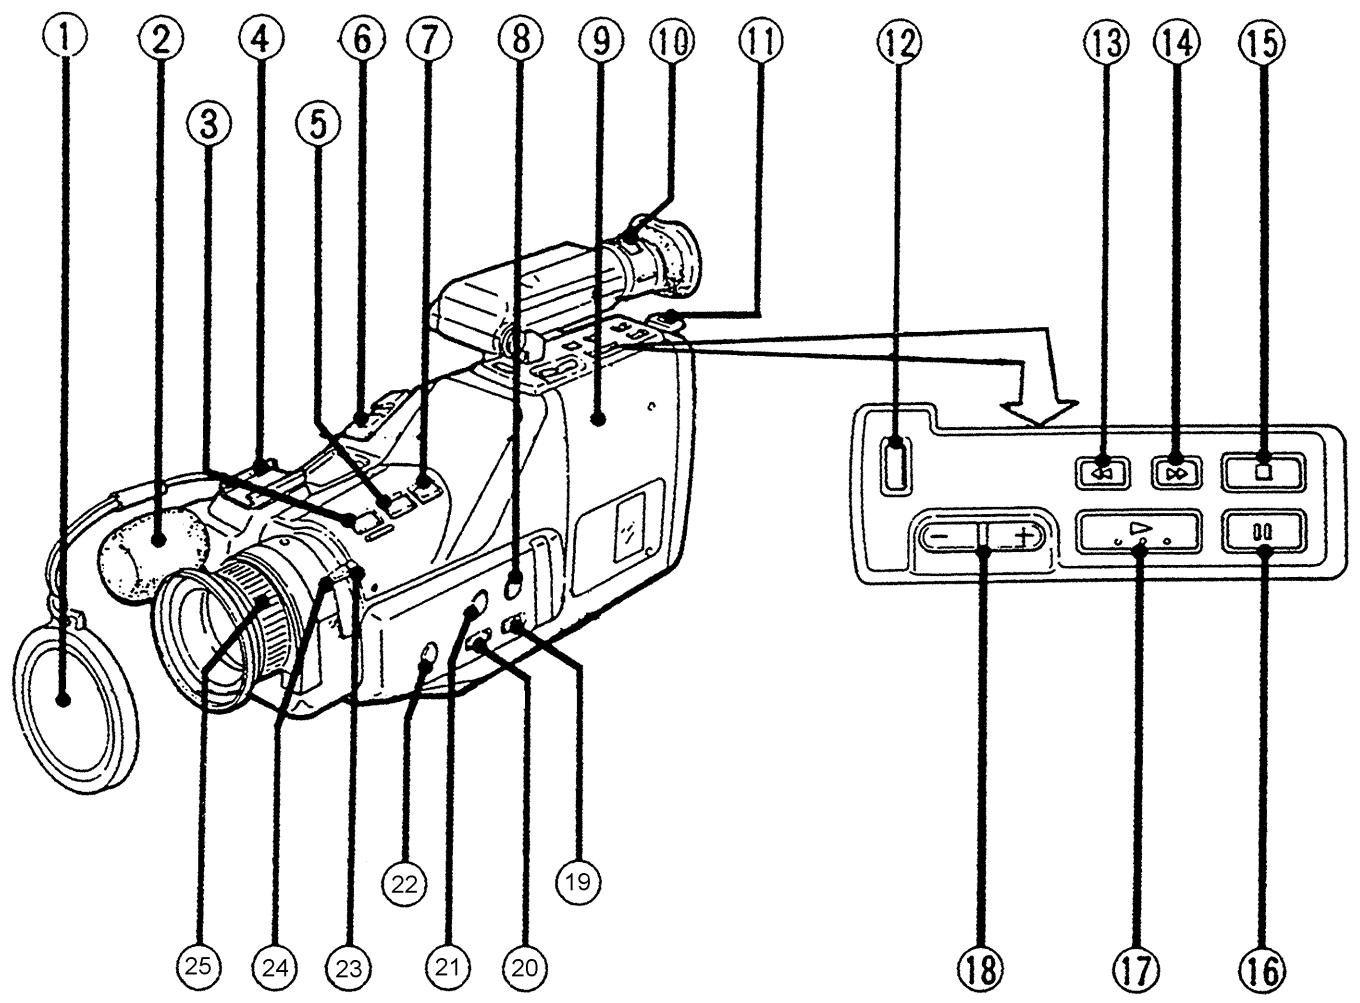
| No. | Name |
| ① | Lens cap |
| ② | Microphone |
| ③ | TITLE ON/OFF button |
| ④ | Accessory shoe |
| ⑤ | TITLE MEMO button |
| ⑥ | Power zoom button |
| ⑦ | TITLE COLOR button |
| ⑧ | HIGH SPEED SHUTTER button |
| ⑨ | Cassette holder |
| ⑩ | Eyesight compensation lever |
| ⑪ | Shoulder belt hook |
| ⑫ | REC button |
| ⑬ | REW button |
| No. | Name |
| 14 | FF button |
| 15 | STOP button |
| 16 | STILL button |
| 17 | PLAY button |
| 18 | SCENE SEARCH button |
| 19 | WHITE BALANCE switch |
| 20 | FOCUS switch |
| 21 | IRIS switch |
| 22 | FOCUS REV button |
| 23 | MACRO SET button |
| 24 | Zoom lever |
| 25 | Focus ring |
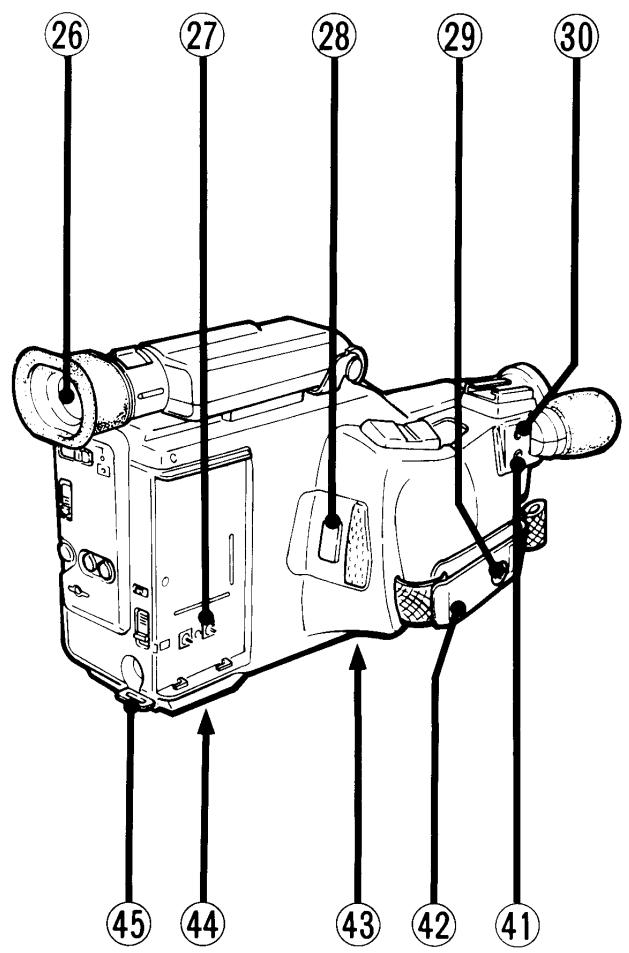
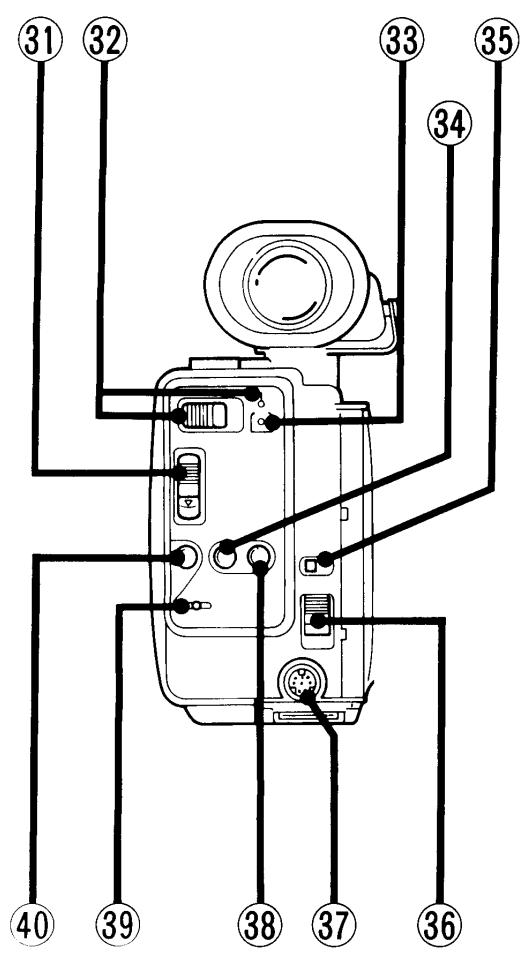
| No. | Name |
| 26 | Viewfinder |
| 27 | Battery holder |
| 28 | REC START/STOP button |
| 29 | Lens cap snap |
| 30 | EARPHONE jack |
| 31 | EJECT switch |
| 32 | POWER switch and lamp |
| 33 | REC/PAUSE lamp |
| 34 | RESET button |
| 35 | REC MODE/EDIT switch |
| No. | Name |
| 36 | Battery eject lever |
| 37 | AUDIO·VIDEO terminal |
| 38 | MEMORY button |
| 39 | DATE/TIME ADJ button |
| 40 | DATE/TIME button |
| 41 | EXT. MIC jack |
| 42 | Grip belt |
| 43 | Tripod screw mount |
| 44 | Lithium battery cover |
| 45 | Shoulder belt hook |
SOURCE D'ALIMENTATION
Utilisation en extérieur :
Pour un enregistrement en extérieur, utilisez la batterie fournie NP-55.
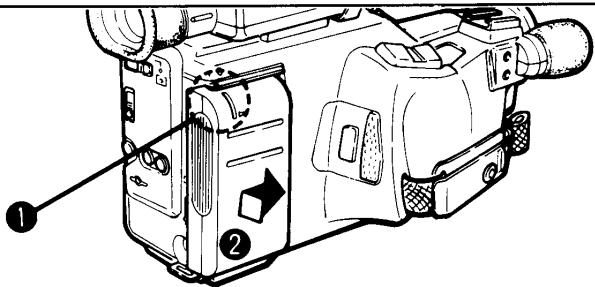
Fixation de la batterie
- Alignez la ligne de la batterie avec celle de l'appareil.
- Appuyez doucement sur la batterie vers l'appareil, puis faites-la glisser vers la droite jusqu'à ce qu'elle s'enclenche avec un clic (flèche 2).
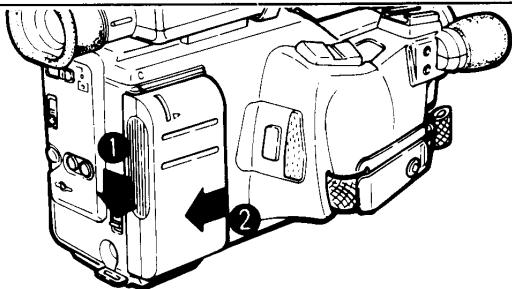
Retrait de la batterie
- Maintenez enfoncé le levier d'éjection de la batterie (flèche ●).
- Faites glisser la batterie vers la gauche (flèche ②).
Utilisation en intérieur :
Pour un enregistrement en intérieur, utilisez l'adaptateur secteur fourni VAR-30B ou VAR-30C.
a) Branchez (ou débranchez) le cordon d'alimentation en suivant les procédures des étapes 1 et 2 ci-dessus « Fixation de la batterie » (ou « Retrait de la batterie »). b) Branchez la fiche de l'adaptateur secteur sur une prise de courant. Le voyant d'alimentation vert s'allume. c) Une fois l'enregistrement ou la lecture terminé, débranchez la fiche de l'adaptateur secteur de la prise murale.
L'adaptateur secteur peut être utilisé dans les pays où la tension secteur est comprise entre 100 V et 240 V.
Cordon d'alimentation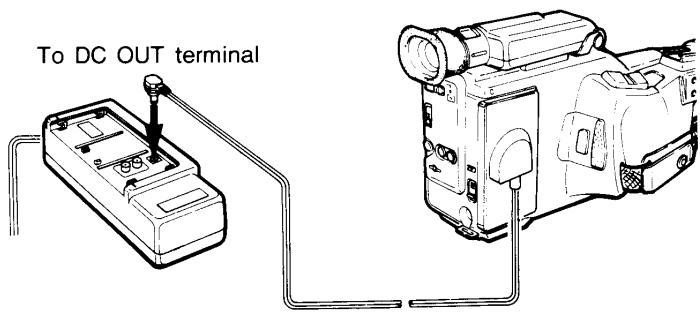
IMPORTANT
Les fils de ce cordon d'alimentation sont colorés selon le code suivant :
Bleu :
Marron :
Neutre
Phase
Comme les couleurs des fils du cordon d'alimentation de cet appareil peuvent ne pas correspondre aux marquages colorés identifiant les bornes de votre prise, procédez comme suit. Le fil de couleur bleue doit être connecté à la borne marquée de la lettre N ou de couleur bleue ou noire. Le fil de couleur marron doit être connecté à la borne marquée de la lettre L ou de couleur marron ou rouge.
Remarques :
La batterie fournie avec cet appareil n'est pas chargée. Chargez-la avant la première utilisation. (Voir page 5) - N'utilisez pas l'adaptateur secteur VAR-30B ou VAR-30C pour alimenter un autre appareil que le caméscope 8 mm VM-D6P. - Lors du retrait de la batterie ou du cordon d'alimentation, l'appareil doit être éteint.
CHARGE
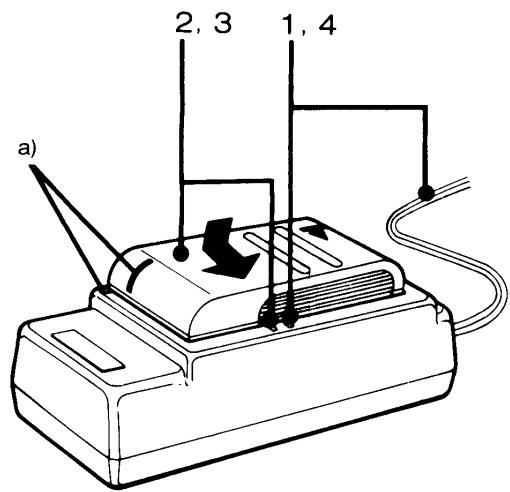
Utilisez l'adaptateur secteur VAR-30B ou VAR-30C pour charger la batterie.
- Branchez l'adaptateur secteur sur une prise de courant. Le voyant d'alimentation vert s'allume.
- Fixez la batterie.
a) Alignez les repères. b) Appuyez doucement sur la batterie. Faites-la glisser en place comme indiqué par la flèche.
Le voyant de charge s'allume et la charge commence.
Lorsque la batterie est complètement chargée, le voyant de charge passe au jaune. La batterie NP-55 peut être chargée en environ une heure. (La batterie NP-77 en option prend environ 2 heures.)
- Faites glisser la batterie dans la direction opposée.
- Débranchez la fiche de l'adaptateur secteur de la prise de courant.
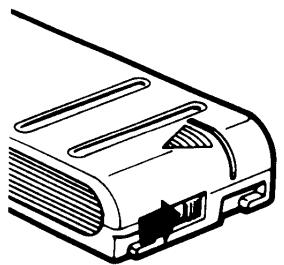
Après la charge :
Faites glisser le cache sur la batterie comme indiqué pour couvrir le cercle rouge.
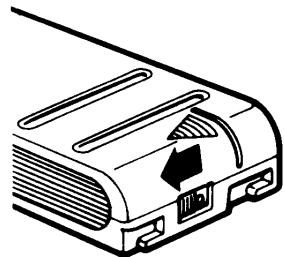
Lorsque la batterie est déchargée :
Faites glisser le cache sur la batterie comme indiqué pour révéler le cercle rouge.
Remarques :
- À température normale, une batterie complètement chargée fournit suffisamment d'énergie pour enregistrer pendant environ 45 minutes. Elle fournit beaucoup moins de temps d'enregistrement dans les endroits froids.
- N'utilisez pas l'adaptateur secteur VAR-30B ou VAR-30C à d'autres fins que la charge des batteries NP-55 ou NP-77.
- Ne continuez pas à charger une batterie complètement chargée, car cela affecterait négativement ses performances.
- Bien que la charge soit possible dans une plage de température de 5°C à 35°C, pour de meilleurs résultats, une plage de température de 10°C à 30°C est suggérée.
CASSETTE VIDÉO 8 mm
Seules les cassettes vidéo 8 mm peuvent être utilisées dans cet appareil.
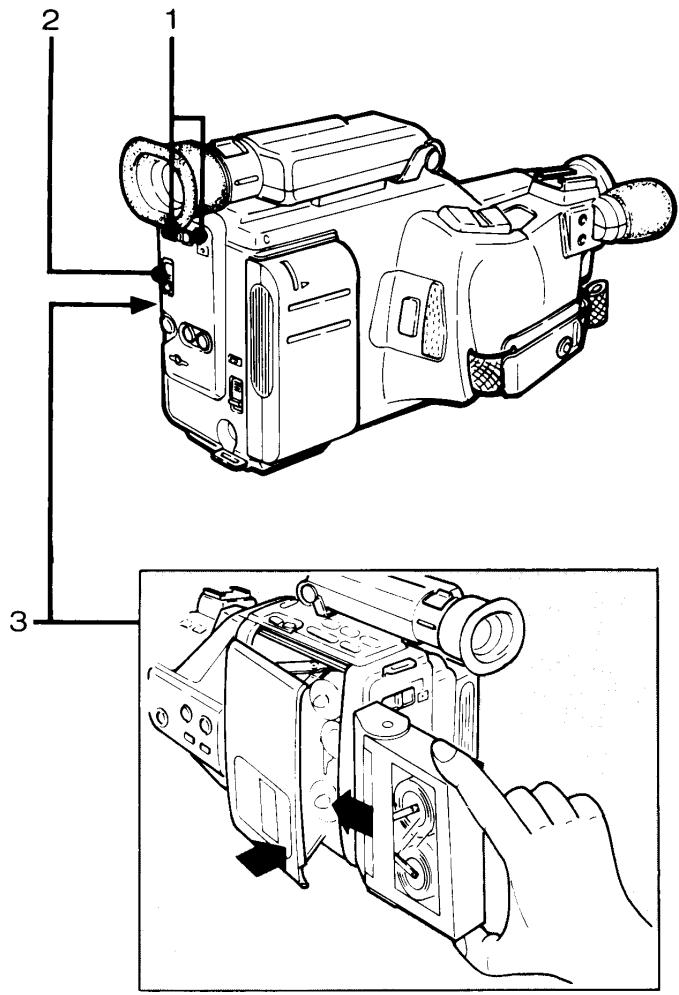
Chargement de la cassette
- Mettez l'appareil sous tension. Le voyant POWER s'allume.
- Faites glisser l'interrupteur EJECT. Le logement de la cassette s'ouvre.
- Insérez une cassette. Appuyez doucement sur le logement de la cassette (section indiquée par "PUSH").
Éjection de la cassette
Faites glisser l'interrupteur EJECT.
Durée d'enregistrement/lecture de la cassette vidéo
| Recording mode | Recording time |
| P5-15 | P5-30 | P5-60 | P5-90 |
| SP | 15 min | 30 min | 60 min | 90 min |
| LP | 30 min | 60 min | 120 min | 180 min |
Interrupteur de protection contre l'effacement
Pour éviter tout effacement accidentel du contenu enregistré, placez l'interrupteur sur le dos de la cassette en position rouge. L'enregistrement sur cette cassette est alors impossible. Pour enregistrer ultérieurement, remettez l'interrupteur dans sa position d'origine.
Mode SP : vitesse de défilement de la bande environ 20,051 mm/s.
Mode LP : vitesse de défilement de la bande environ 10,025 mm/s.
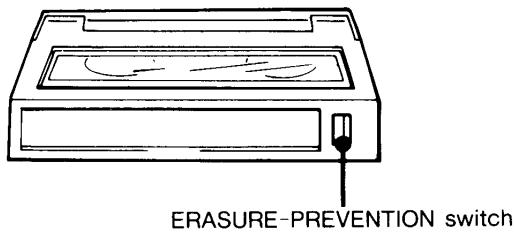
Remarques :
- Ne portez jamais cet appareil en le tenant par le logement de la cassette.
- Ne couvrez pas les trous situés sous la cassette. Ces trous servent à déterminer le type et la longueur de la bande, ainsi que la possibilité d'enregistrement.
- Rangez chaque cassette vidéo dans sa boîte, debout (à la verticale). Cela évite l'entrée de poussière et un enroulement inégal de la bande.
PILE AU LITHIUM
La fonction d'impression de la date/heure de cet appareil nécessite une pile au lithium pour éviter la perte de la mémoire de la date/heure lorsque l'appareil est éteint.
La pile au lithium a une durée de vie d'environ 1 an en usage normal.
Installation de la pile au lithium
Utilisez la même procédure pour remplacer une pile usée. (Pile au lithium : CR2025 [3V])
- Ouvrez le couvercle du compartiment de la pile au lithium.
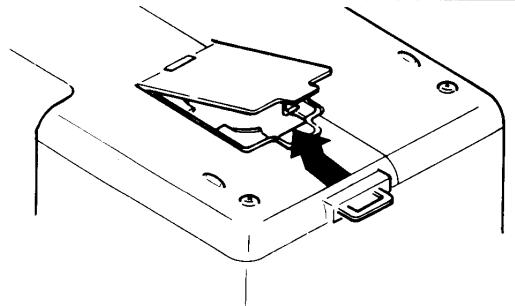
- Insertion de la pile au lithium.
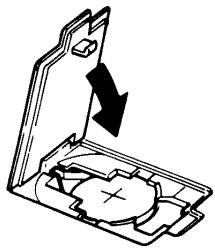
a) Essuyez la pile avec un chiffon sec pour éviter tout mauvais contact. b) Insérez la pile correctement, le côté + vers le haut. c) Fermez le couvercle du compartiment de la pile au lithium.

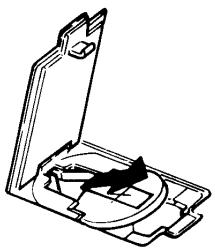
- Pour éjecter la pile au lithium, appuyez dessus puis faites-la glisser hors du logement en diagonale vers le haut.
Après avoir remplacé la pile, réglez la DATE/HEURE. (Voir RÉGLAGE DE LA DATE/HEURE.)
Remarques :
- Gardez la pile au lithium hors de portée des enfants.
- Ne saisissez pas la batterie avec des pinces métalliques, etc., car cela risque de provoquer un court-circuit.
- Ne démontez pas, n'exposez pas à la chaleur et ne placez pas la batterie dans l'eau en raison du danger d'explosion. Lors de la mise au rebut, traitez la batterie comme un déchet non incinérable.
- LORS DU REMPLACEMENT DE LA BATTERIE, UTILISEZ UNIQUEMENT LE MÊME TYPE.
COMPENSATION DE LA VISION
a) Allumez l'appareil. b) Regardez à travers le viseur et observez les indications visibles (voir page 9). c) Tournez le levier de réglage (voir la flèche) vers la gauche ou la droite pour obtenir l'image la plus nette possible des indications. d) L'image du sujet peut maintenant être mise au point avec précision à l'aide des commandes de mise au point du caméscope.
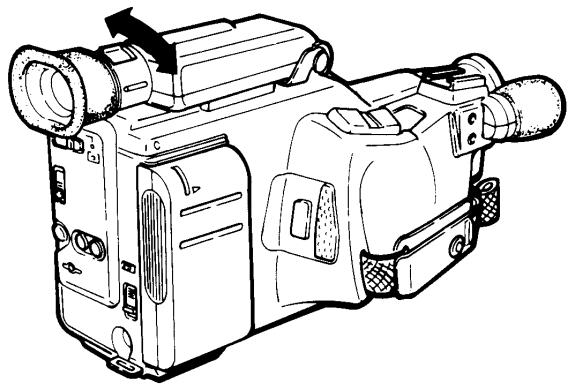
MICROPHONE
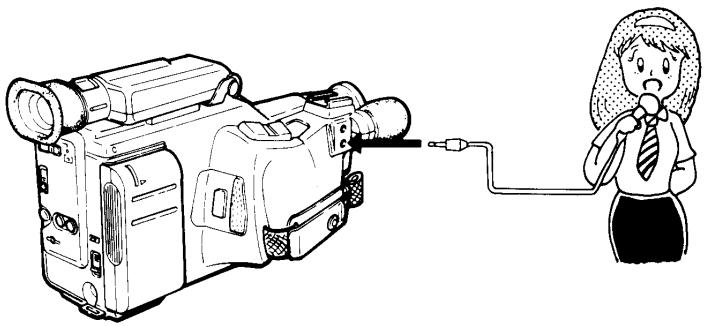
Le microphone omnidirectionnel intégré capte le son de manière plus ou moins uniforme dans toutes les directions, ce qui rend le son enregistré naturel à la lecture. Cependant, la large zone de captation du support omnidirectionnel signifie que vous pourriez avoir besoin d'un microphone externe pour obtenir un meilleur résultat si vous souhaitez capter un son plus faible à distance ou si vous vous trouvez dans un endroit suffisamment calme pour entendre le moteur tourner à l'intérieur de l'appareil.
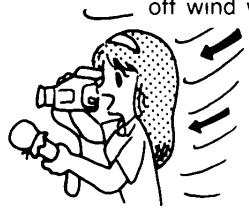
- ENREGISTREMENT PAR VENT FORT
Un bruit de souffle sera produit. Utilisez un mouchoir et enveloppez la tête du microphone avec pour la protéger du vent.
Enveloppez la tête du microphone avec un mouchoir.
Protégez le microphone du vent avec votre corps.

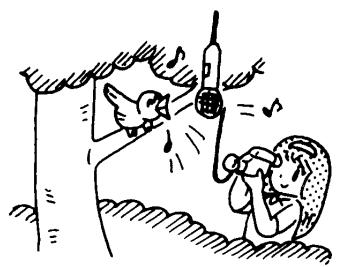
- ENREGISTREMENT D'UN SUJET ÉLOIGNÉ
Placez un microphone externe près du sujet pour obtenir un son clair.
Remarque :
- Le microphone intégré ne fonctionnera pas lorsqu'un microphone externe est connecté.
DANS LE VISEUR
| This indication appears during the recording pause mode. |
| This indication appears during the recording mode. |
| This indication appears about 5 minutes before the tape reaches its end. |
| This indication will appear and flash when dew has condensed inside the unit. |
| This indication will appear and flash when the battery becomes weak. |
| If one or more of the following conditions exist, this indication will flash when the recording mode is selected:
1. No cassette has been loaded into the camcorder
2. If the cassette has been set for erase prevention
3. The tape has been wound to its end
4. If there is moisture on the tape
5. The unit cannot record normally |
| Real time tape counter and memory (M) indications (see page 10). | 2000 | Shutter speed indication (see page 18). |
| DATE/TIME indication (see page 24). | AF | FOCUS indication (see page 21). |
| Color indication of the title insert function (see page 20). | | |
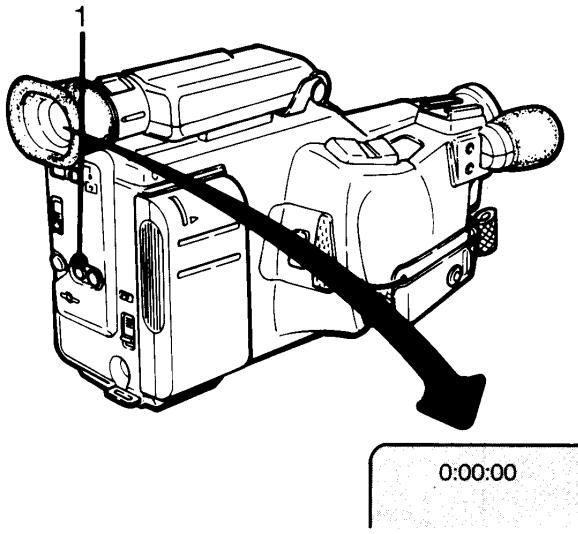
Le compteur de bande à temps linéaire indique le temps de défilement de la bande en heures, minutes et secondes. Réinitialisez le compteur (0:00:00) au début de l'enregistrement ou de la lecture et vous pourrez facilement déterminer le reste de la bande ou rechercher la scène enregistrée que vous souhaitez voir.
RÉINITIALISATION
- Appuyez sur le bouton RESET.
Le compteur de bande reviendra à "0:00:00" dans le viseur. Réinitialisez le compteur au début de la bande et vous pourrez facilement calculer la longueur restante de la bande, pendant que la bande défile. (Soustrayez les compteurs actuels du temps d'enregistrement nominal de la bande.)
FONCTION DE MÉMOIRE DU COMPTEUR
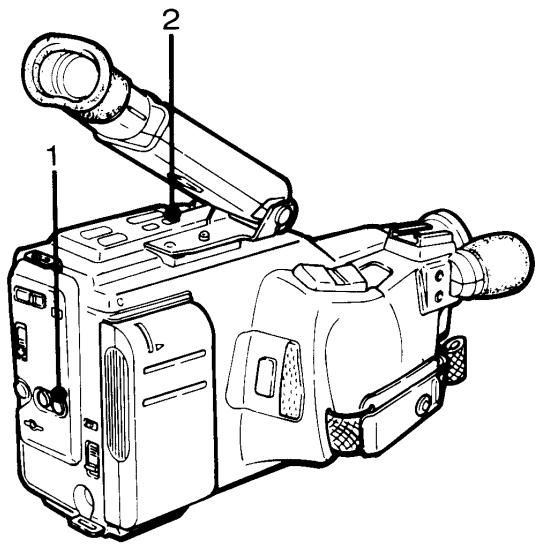
En utilisant cette fonction, vous pouvez trouver la position de la bande où vous avez réinitialisé le compteur. Réinitialisez le compteur, pendant l'enregistrement ou la lecture, lorsque vous rencontrez une scène que vous souhaitez revoir.
- Appuyez sur le bouton MEMORY.
Le compteur mémorise la position de la bande que vous avez réinitialisée.
La lettre "M" apparaîtra dans le viseur.
Pour annuler le mode mémoire, appuyez à nouveau sur le bouton MEMORY.
- Appuyez sur le bouton REW.
La bande se rembobine et s'arrête automatiquement à proximité de la lecture du compteur "0:00:00".
Si le compteur indique une valeur négative, appuyez sur le bouton FF.
M 0:46:27

Notes :
Il peut y avoir un léger écart entre la lecture du compteur et la durée réelle de la bande. Le compteur indiquera une lecture négative si la fonction REW ne s'arrête pas à la lecture 0:00:00.
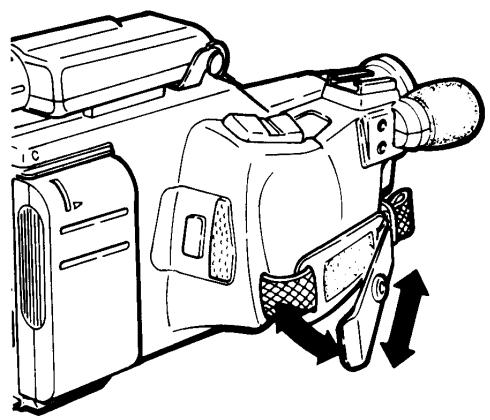
Si la dragonne ne s'adapte pas à votre main, des mouvements indésirables de la caméra peuvent se produire pendant l'enregistrement. Ajustez la longueur de la dragonne comme vous le souhaitez.
Tenez l'appareil horizontalement.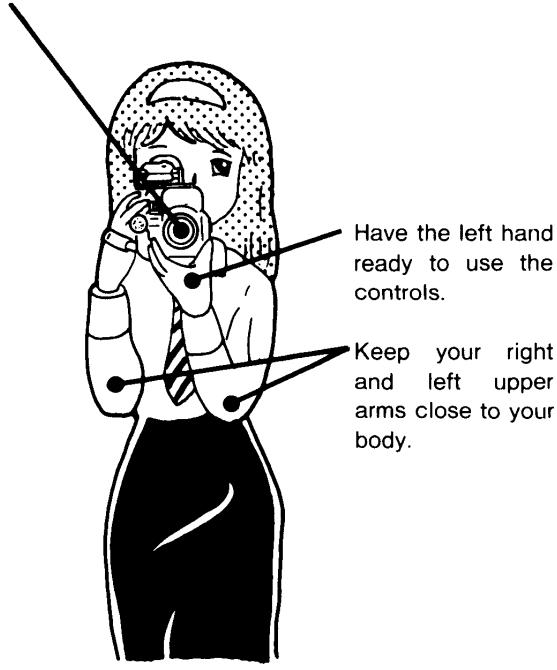
Gardez la main gauche prête à utiliser les commandes.
Gardez vos bras gauche et droit près de votre corps.
Gardez vos mains stables en vous appuyant sur un mur ou une table pour des images sans tremblement.
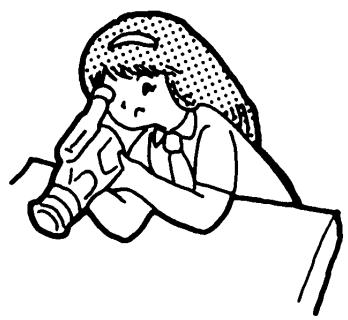
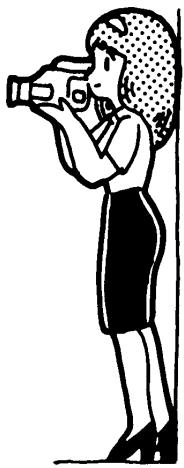
Lors d'un enregistrement à faible angle, utilisez un trépied pour une image plus stable.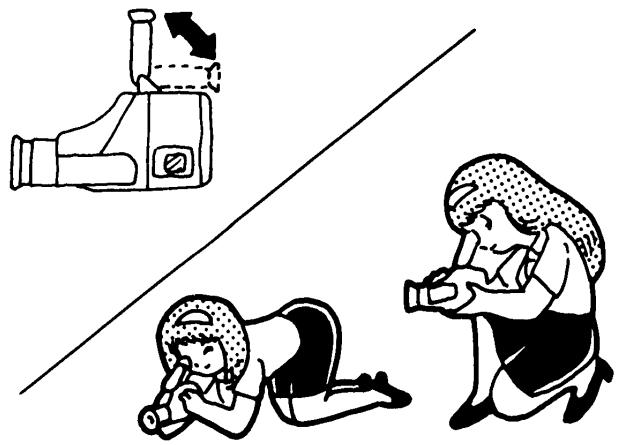
Alignez le trou de montage du trépied et le trou de butée de cet appareil avec la vis de montage et la butée du trépied. Serrez fermement la vis de montage.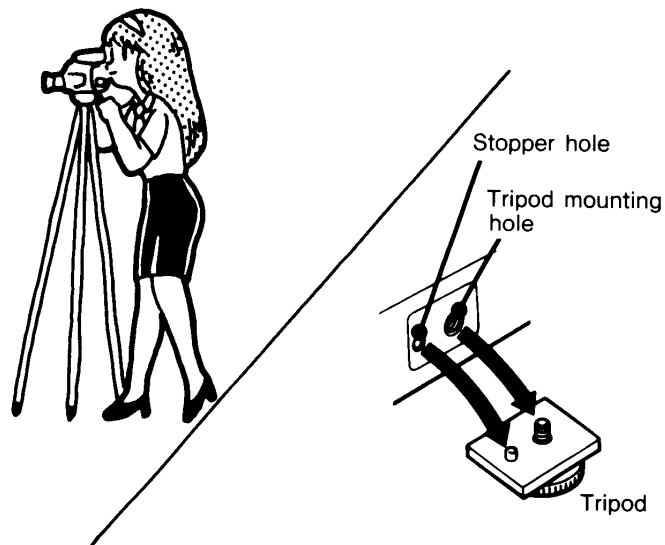
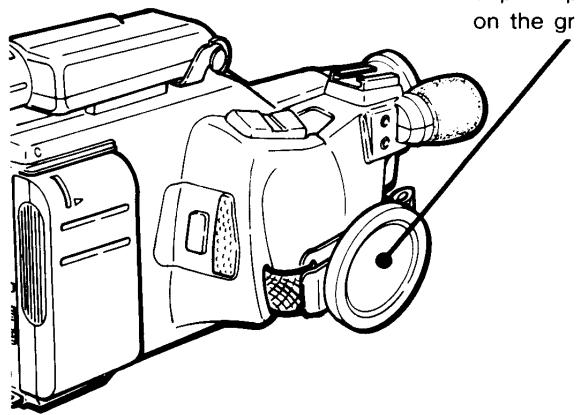
Fixez le capuchon d'objectif sur l'attache du capuchon située sur la dragonne.
- Réglez le commutateur FOCUS sur la position AUTO. La mise au point est automatique.
- Réglez le commutateur WHITE BALANCE sur la position AUTO. La balance des blancs est automatique.
- Réglez le commutateur REC MODE/EDIT sur la position SP ou LP.
- Allumez l'appareil. Le voyant POWER s'allume.
- Faites glisser l'interrupteur EJECT.
- Insérez une cassette. Appuyez doucement sur le porte-cassette (section indiquée par "PUSH"). L'appareil passera en mode pause d'enregistrement.
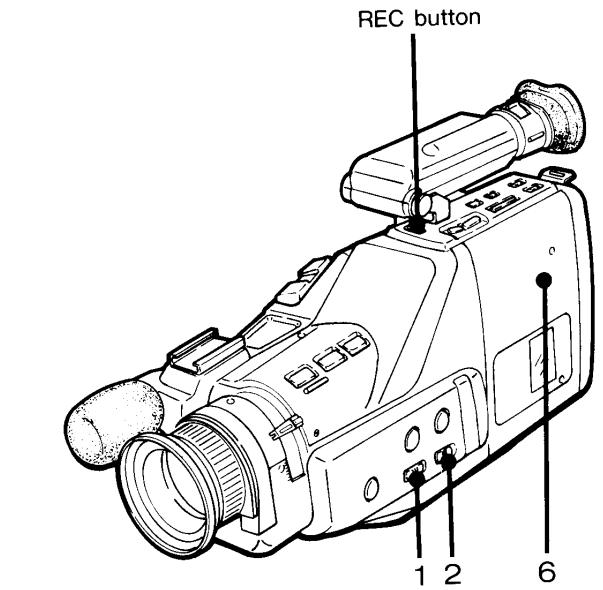
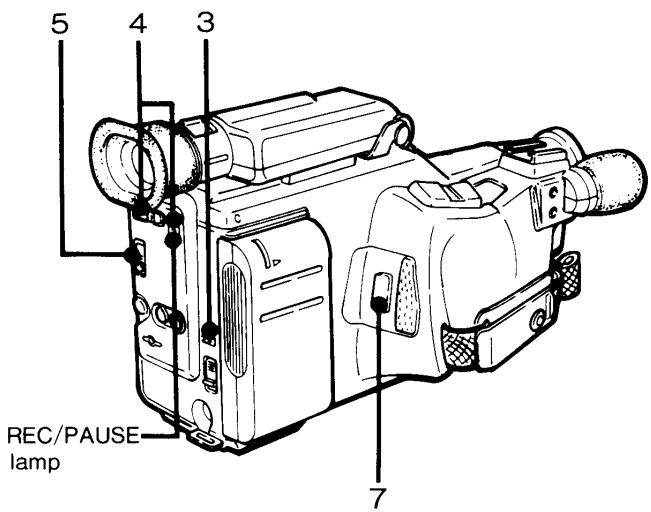
- a) Appuyez une fois sur le bouton REC START/STOP. Le témoin REC/PAUSE cessera de clignoter, restera allumé et l'enregistrement commencera. b) Appuyez une deuxième fois sur le bouton REC START/STOP. Le mode pause d'enregistrement commencera et le témoin REC/PAUSE clignotera. c) Répétez les étapes a) et b) pour continuer l'enregistrement. d) Après l'enregistrement, éjectez la cassette et éteignez l'appareil.
Enregistrement à partir du mode STOP
a) Pour commencer l'enregistrement à partir du mode stop, appuyez sur le bouton REC pour passer en mode pause d'enregistrement. Ensuite, appuyez sur le bouton REC START/STOP. b) Appuyez sur le bouton REC START/STOP ou sur le bouton STOP pour arrêter l'enregistrement.
Remarques :
Si vous laissez l'appareil en pause en mode enregistrement pendant plus de 90 secondes environ, il est recommandé d'éteindre le caméscope pour économiser la batterie.
DURÉES DE DÉCHARGE NOMINALES
NP-55 45 min
NP-77 90 min
Ces durées varient selon le type d'utilisation, par exemple si le zoom est utilisé fréquemment, ou si la plage de mise au point et le niveau de lumière changent souvent, chacun de ces facteurs... Par conséquent, nous recommandons de transporter une batterie de rechange pour éviter toute déception à un moment crucial lors de l'enregistrement.
Remarques :
Des rayures verticales peuvent apparaître si l'enregistrement est effectué à la lumière d'une bougie ou dans d'autres conditions de faible luminosité. Cela n'indique pas un dysfonctionnement. a) Fonctionnement sur batterie : Si le mode pause d'enregistrement se poursuit pendant environ 5 minutes, l'alimentation sera coupée automatiquement. Après environ 5 minutes en mode stop, l'alimentation sera coupée automatiquement. b) Fonctionnement sur secteur : Si le mode pause d'enregistrement se poursuit pendant environ 5 minutes, l'appareil passera en mode stop. - Lorsque des lampes fluorescentes ou à vapeur de mercure sont utilisées pour l'éclairage, les images enregistrées scintilleront.
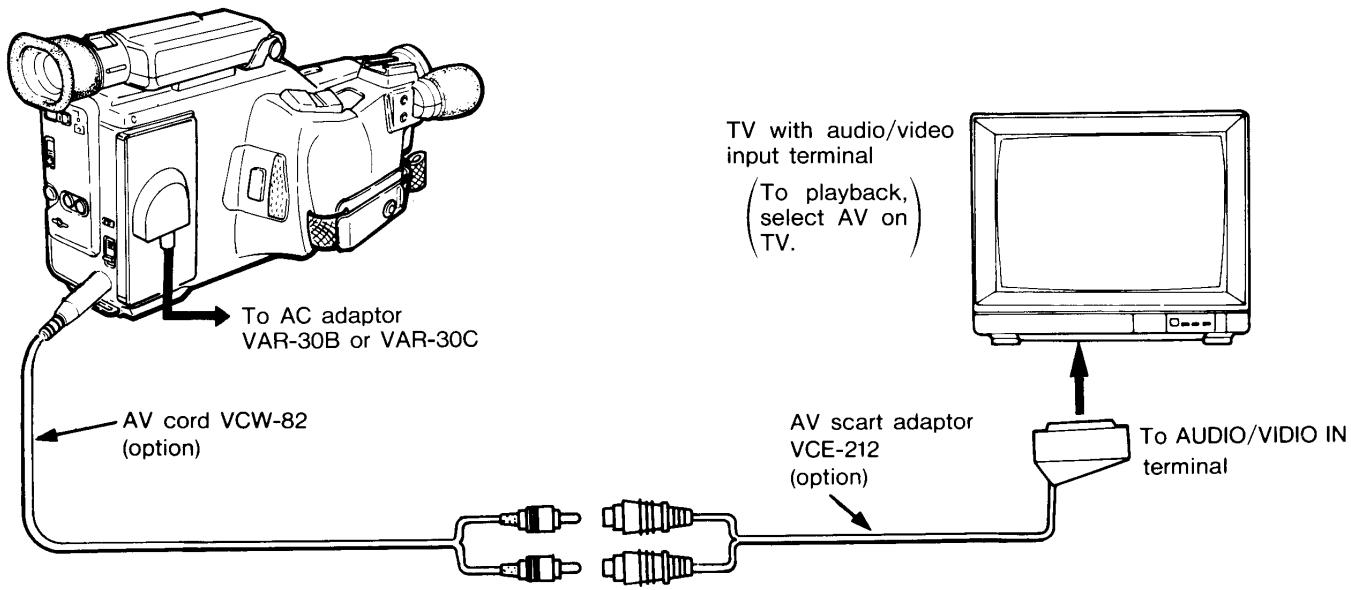
La bande enregistrée par ce caméscope peut être visionnée sur un écran de télévision ou dans le viseur de cet appareil. Voir page 26 pour les schémas de connexion TV.
- Allumez l'appareil.
- Faites glisser l'interrupteur EJECT.
- Insérez une cassette enregistrée. Appuyez doucement sur le porte-cassette (section indicateur "PUSH"). L'appareil passera en mode pause d'enregistrement.
Sautez l'étape 4 (appuyez sur le bouton STOP), si la cassette a déjà été protégée contre l'effacement accidentel.
- Appuyez sur le bouton STOP.
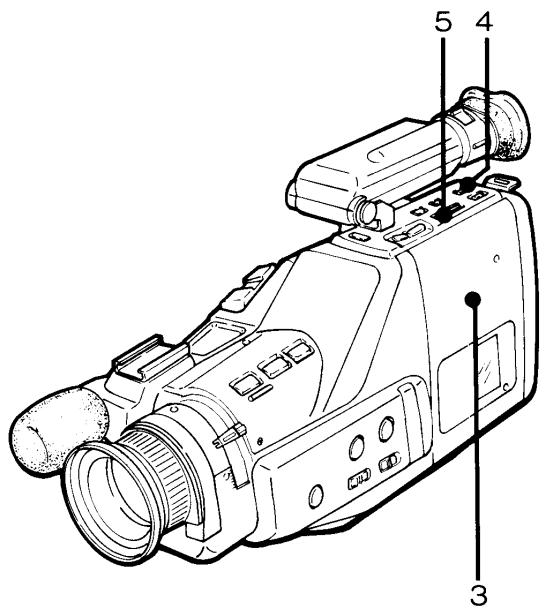
- Appuyez sur le bouton PLAY. La lecture commencera.
Pour arrêter la bande, appuyez sur le bouton STOP.
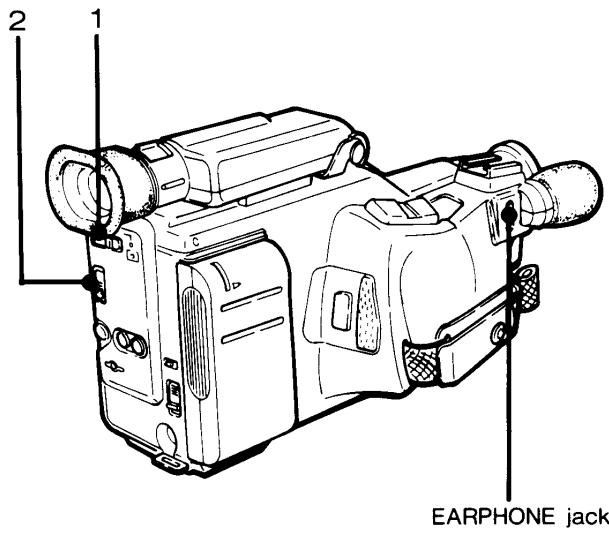
Si vous souhaitez écouter le son enregistré pendant la lecture dans le viseur, connectez un écouteur disponible dans le commerce à la prise EARPHONE.
Remarque :
- Si la bande a été enregistrée sur un autre magnétoscope 8 mm, le début de la bande peut ne pas être reproduit correctement en raison de la différence de mécanisme (système de chargement).
MODES DE LECTURE SPÉCIAUX
Recherche d'image
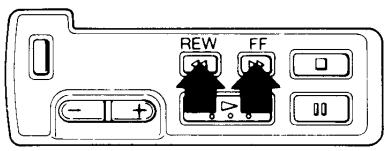
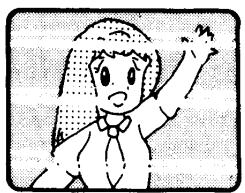
Appuyez sur le bouton FF ou REW pendant la lecture. La bande se déplacera rapidement en avant ou en arrière respectivement. Pour revenir à la lecture normale, appuyez sur le bouton PLAY. Notez que des lignes horizontales apparaîtront dans l'image pendant la recherche d'image.
Recherche de scène
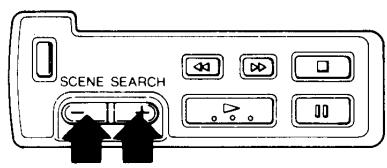
Maintenez enfoncé le bouton SCENE SEARCH pendant la lecture sur image fixe.
La fonction de recherche de scène fonctionnera pendant que le bouton est enfoncé.
Appuyez sur « + » ... La lecture reprend à la vitesse normale.
Appuyez sur « - » ... La lecture s'effectue en sens inverse.
(Notez que du bruit apparaîtra à l'image.)
Lecture image par image
Appuyez sur la touche STILL pendant la lecture pour afficher une image fixe. Pour reprendre la lecture normale, appuyez sur la touche PLAY.
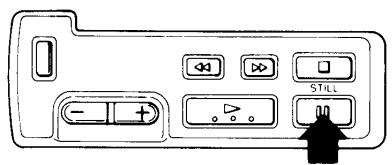
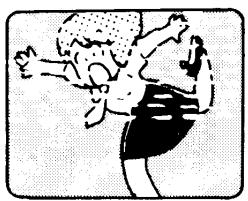
Remarques :
- Si le mode image fixe dure environ 5 minutes, l'appareil passe automatiquement en mode arrêt.
- L'image en mouvement rapide peut trembler.
Si vous trouvez que des scènes que vous venez d'enregistrer ne sont pas souhaitées, elles peuvent être remplacées par de nouvelles scènes en utilisant la fonction d'enregistrement en continu.

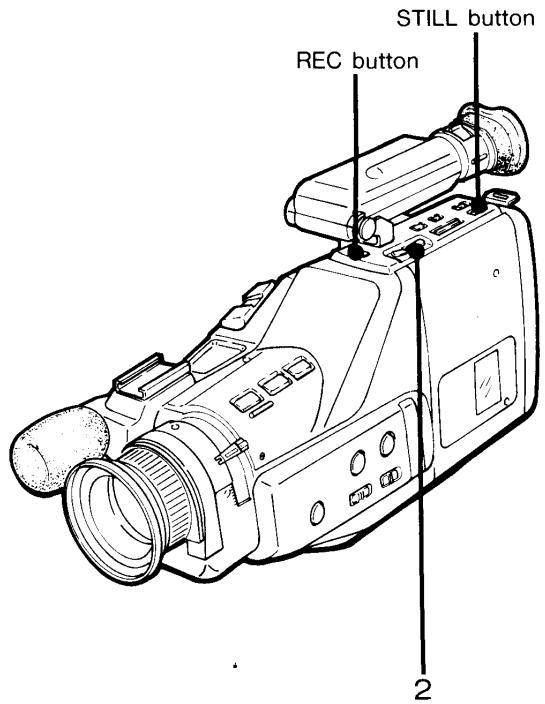
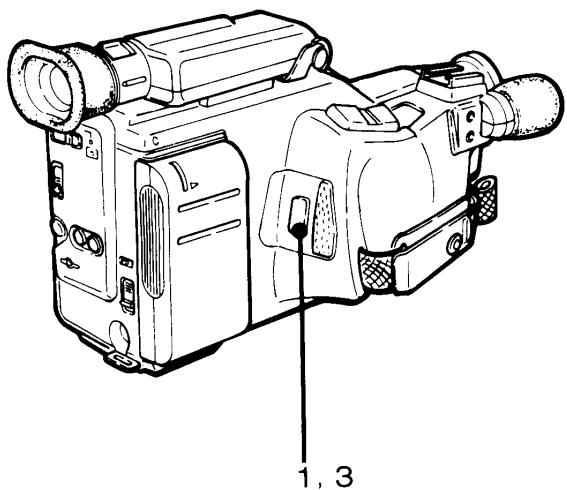
- Appuyez sur la touche REC START/STOP pour passer en mode pause d'enregistrement.
- Appuyez sur la touche SCENE SEARCH, regardez dans le viseur et localisez le début de la scène à réenregistrer.
Appuyez sur « + » ... La lecture reprend à la vitesse normale. Appuyez sur « - » ... La lecture s'effectue en sens inverse. Relâchez la touche au début de la scène. (L'appareil revient en mode pause d'enregistrement.) 3. Commencez l'enregistrement en appuyant sur la touche REC START/STOP.
Pour ajouter une nouvelle scène à la fin d'une scène enregistrée, lisez d'abord la cassette et appuyez sur la touche STILL au moment où vous atteignez le point de raccordement. Appuyez sur la touche REC pour mettre l'image en pause. Commencez l'enregistrement en appuyant sur la touche REC START/STOP.
Remarque :
- Pendant la recherche de scène en enregistrement en continu, du bruit peut apparaître dans le viseur, quel que soit le sens de lecture, normal ou inverse.
Appuyez sur le bouton PLAY pendant le mode pause d'enregistrement immédiatement après avoir enregistré un nouveau sujet. La dernière partie du nouvel enregistrement sera lue dans le viseur, puis l'appareil reviendra en mode pause d'enregistrement.
ZOOM
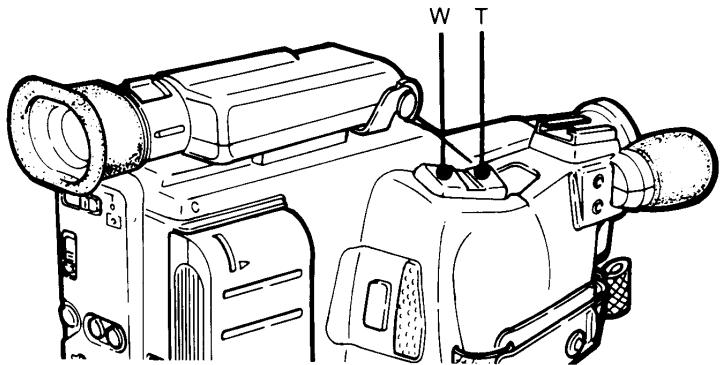
Zoom motorisé
Appuyez sur le côté « W » de la commande pour un enregistrement grand angle, et sur le côté « T » pour un enregistrement téléobjectif. La vitesse du zoom est proportionnelle à la pression exercée sur la commande.
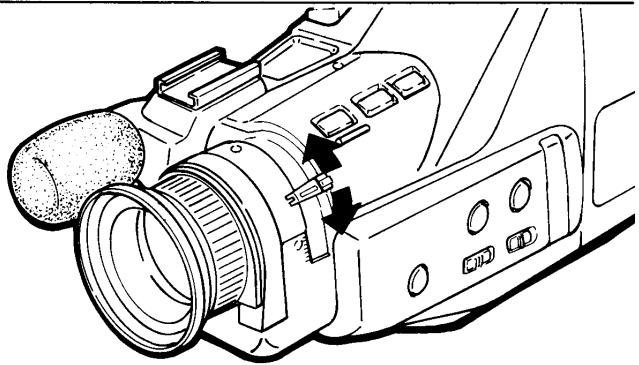
Zoom manuel
Utilisez cette méthode pour sélectionner la vitesse de zoom souhaitée. Tournez le levier de zoom vers la droite ou la gauche, vu de l'arrière du caméscope, pour effectuer un zoom avant (enregistrement téléobjectif) ou un zoom arrière (enregistrement grand angle) respectivement.
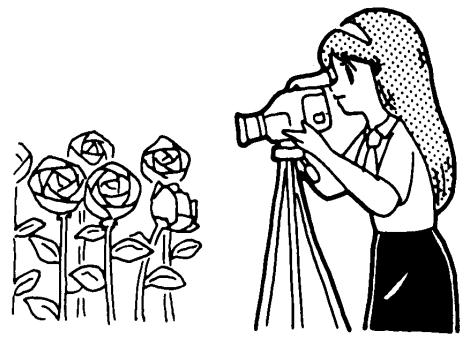
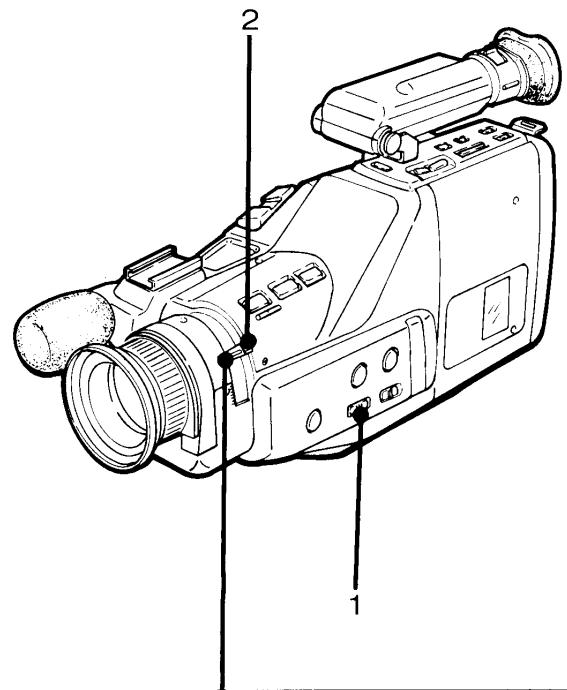
Dans des conditions normales, l'image d'un sujet ne peut pas être mise au point dans le viseur si le sujet se trouve à moins d'environ 1,2 m du caméscope. La mise au point macro peut être utilisée pour faire la mise au point sur des sujets plus proches (de 1,2 m à environ 15 mm du caméscope).
- Réglez le commutateur FOCUS sur MAN.
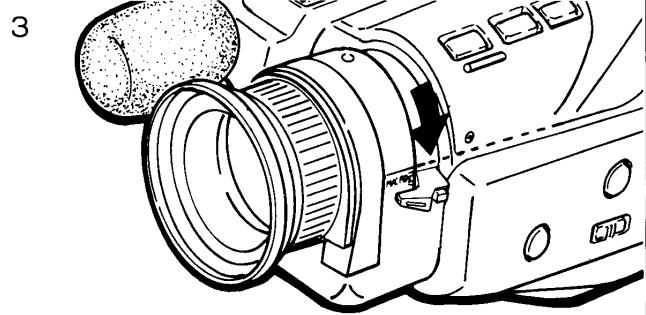
- Maintenez enfoncé le bouton MACRO SET.
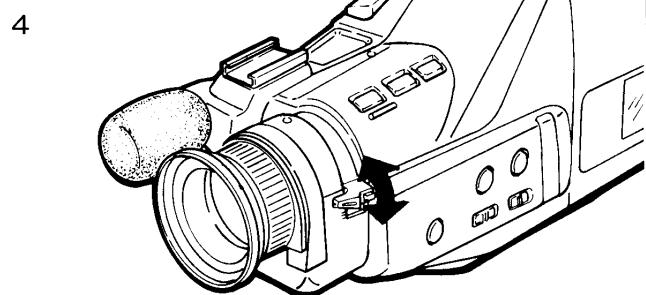
- Déplacez le levier de zoom manuel dans la plage MACRO.
- Approchez-vous du sujet et ajustez le levier de zoom dans la plage MACRO (zone à l'intérieur du cadre vert) pour faire la mise au point sur l'image du sujet dans le viseur.
Pour revenir à une prise de vue normale, tournez manuellement le levier de zoom ou maintenez enfoncé le zoom motorisé jusqu'à ce que le levier s'enclenche en position télé.
- Un mouvement involontaire du caméscope réduira la qualité des enregistrements macro. L'utilisation d'un trépied ou d'un support pour maintenir le caméscope fixe pendant l'enregistrement macro est recommandée.
Remarque :
- La fonction zoom ne peut pas être utilisée pendant l'enregistrement macro. Pour réduire la taille de l'objet dans le viseur, la caméra et l'objet doivent être éloignés l'un de l'autre.
Après avoir enregistré un objet en mouvement à grande vitesse, si vous souhaitez regarder le mouvement très lentement, par exemple pour étudier un swing au golf, le mouvement peut être vu en image claire grâce à la lecture image par image sans flou.
Lecture image par image
Sans obturateur à grande vitesse.
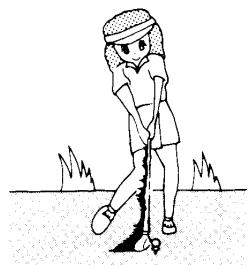
L'image est floue.
Avec obturateur à grande vitesse.
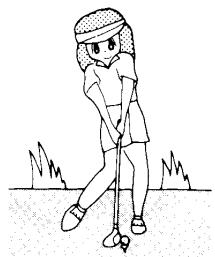
L'image est nette, sans flou.
Il peut y avoir du bruit vidéo causé par la fonction image par image de cet appareil.
- Appuyez sur le bouton HIGH SPEED SHUTTER et sélectionnez la vitesse d'obturation à 1/2000 s.
L'indication de vitesse d'obturation apparaîtra et changera à chaque pression sur le bouton.
120→ 2000→ Aucune indication
(1/120) (1/2000)
- Commencez l'enregistrement.
- Pour revenir à l'enregistrement normal, appuyez sur le bouton HIGH SPEED SHUTTER et faites disparaître l'indication de vitesse d'obturation.
1.3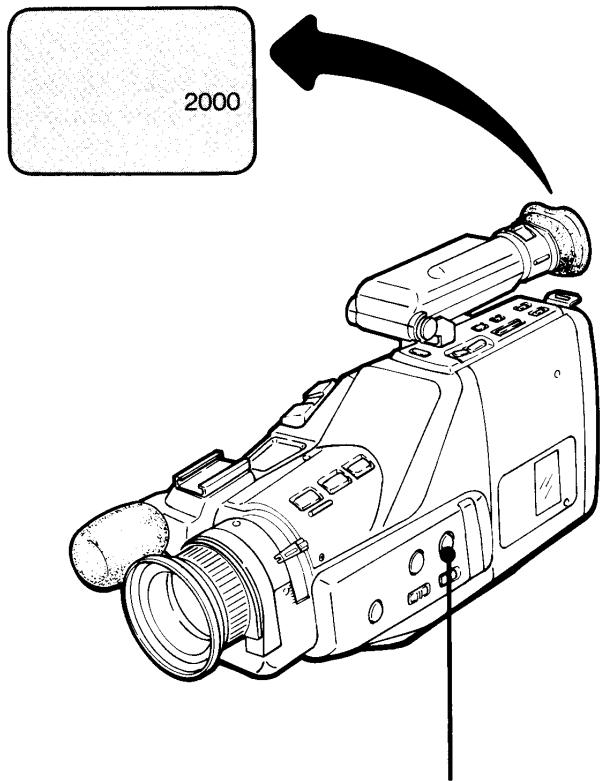
Des scintillements peuvent se produire lors d'un enregistrement en intérieur si un éclairage fluorescent est utilisé. Réglez la vitesse d'obturation sur 1/120 s pour réduire cet effet.
Notes :
- Si l'obturateur rapide est utilisé pour filmer dans des endroits peu éclairés, comme à l'intérieur, l'écran sera plus sombre que d'habitude. Filmez dans un endroit lumineux, comme à l'extérieur par temps clair.
- Utilisez efficacement l'obturateur rapide. Lors de la lecture normale, les mouvements dans les images filmées avec l'obturateur rapide ne sembleront pas fluides.
Cet appareil photo est conçu pour effectuer automatiquement le réglage de la balance des blancs. Normalement, réglez le commutateur BALANCE DES BLANCS sur la position AUTO.
Qu'est-ce que la balance des blancs ?
Le réglage de la balance des blancs est nécessaire pour que les sujets blancs soient enregistrés en blanc et que les couleurs des autres sujets paraissent naturelles.
Commutateur BALANCE DES BLANCS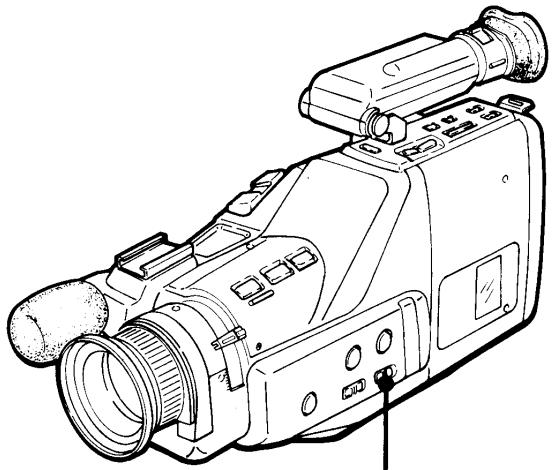
La balance des blancs ne peut pas être ajustée automatiquement dans les cas suivants. Réglez le commutateur sur la position ou .
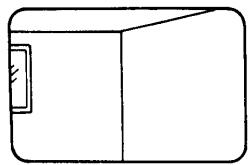
Lorsque la plus grande partie du sujet est occupée par une seule couleur.
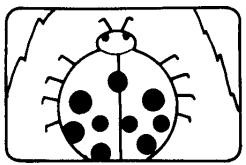
Lors d'un enregistrement en gros plan (macro) ou avec téléobjectif :
Réglage manuel
Réglez sur ou selon la source de lumière du sujet.
| Sunlight, fluorescent lamp illumination, night views, fireworks. | Incandescent lamp, halogen lamp, candle illumination. |
| AUTO | | AUTO |
Un titre ou une illustration en couleur peut être superposé pendant l'enregistrement pour rendre la scène mémorable.
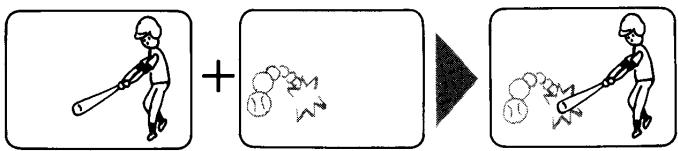
Si vous souhaitez créer votre propre dessin de titre, utilisez du papier blanc et un feutre (l'idéal est le noir). Dessinez avec un trait épais. L'image enregistrée peut également être utilisée comme titre en la mémorisant pendant la lecture. (Appuyez sur le bouton TITLE MEMO pendant la lecture.)
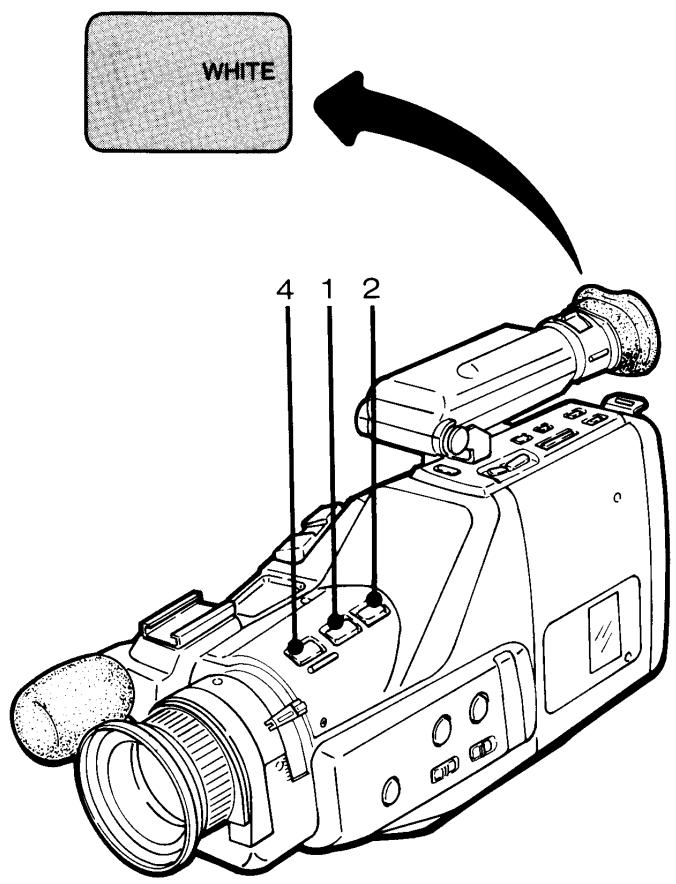
- Prenez la photo du titre et appuyez sur le bouton TITLE MEMO. L'image de titre mémorisée apparaîtra avec une indication de couleur. L'image précédemment mémorisée sera effacée à chaque fois qu'une image est mémorisée.
- Appuyez sur la touche TITLE COLOR et sélectionnez la couleur correspondante. L'indication de couleur change à chaque pression sur la touche. Blanc → Bleu → Rouge → Jaune → Noir → Blanc
- Faites la mise au point sur l'objet et commencez l'enregistrement.
- Pour terminer le titre, appuyez sur la touche TITLE ON/OFF. Pour réafficher le titre, appuyez à nouveau sur la même touche.
L'IMAGE MÉMORISÉE PEUT ÊTRE INVERSÉE (NÉGATIF)
Maintenez enfoncée la touche TITLE COLOR pendant environ 2 secondes.
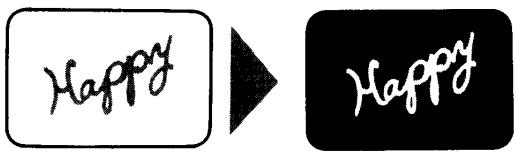
- Supposons que la couleur du titre soit bleue, elle est inversée lorsqu'elle passe à la couleur suivante, le rouge. Appuyez sur la touche TITLE COLOR pour revenir au bleu.
Effectuez la même opération pour revenir à l'image précédente.
Remarques :
- L'image mémorisée peut être conservée même après la coupure de l'alimentation, grâce à la batterie au lithium. L'image du titre peut être mémorisée plus clairement si l'intensité de la lumière est augmentée.
Le caméscope fera automatiquement la mise au point sur le sujet au centre de l'image du viseur lorsque le commutateur FOCUS est réglé sur AUTO.
C'est la position normale de ce commutateur.
L'indication de mise au point sera toujours visible dans le viseur.
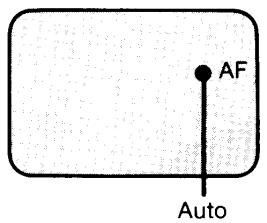
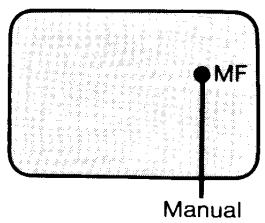
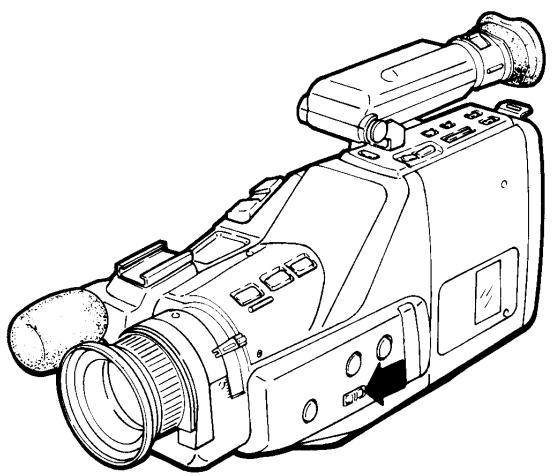
La fonction de mise au point automatique ne fonctionnera pas normalement dans les circonstances suivantes. Réglez le commutateur FOCUS sur MAN et ajustez la mise au point manuellement.
a) Il n'est pas possible de faire la mise au point sur un sujet proche et un sujet éloigné en même temps.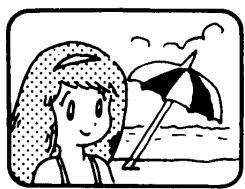
b) Lors de la prise de vue d'un sujet à travers une vitre sur laquelle il y a quelque chose de visible (par exemple, de la saleté, des gouttes d'eau, etc.), la mise au point automatique se fera sur les objets sur la vitre, au lieu du sujet souhaité.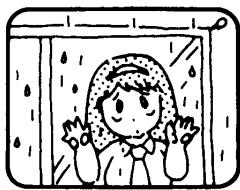
c) Lors de la prise de vue d'un sujet sombre.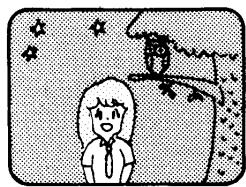
d) Lors de la prise de vue de sujets sans contraste, comme un mur blanc, le ciel, etc.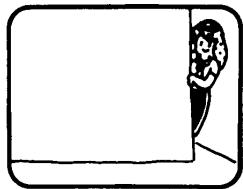
e) Lors de la prise de vue d'un sujet avec des rayures latérales.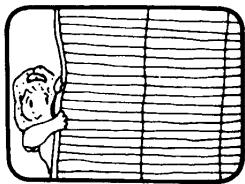
f) Lors de la prise de vue d'un sujet extrêmement lumineux.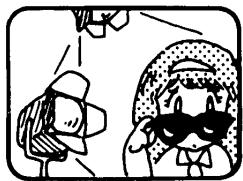
Remarques :
- Pendant le fonctionnement de la mise au point automatique, ne pas essayer de tourner ou de bloquer la bague de mise au point.
- Si un filtre spécial est utilisé (pour vari-cross, mirages, etc.), la mise au point automatique peut ne pas fonctionner normalement. La mise au point manuelle est recommandée. Faites la mise au point manuellement lors de la prise de vue de sujets en mouvement rapide, lors de déplacements de la caméra (panoramique rapide, inclinaison, etc.), ou lorsque des objets passent entre la caméra et le sujet enregistré.
MISE AU POINT MANUELLE
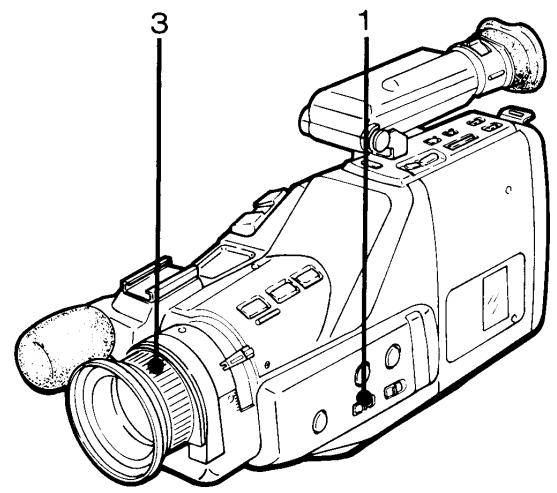
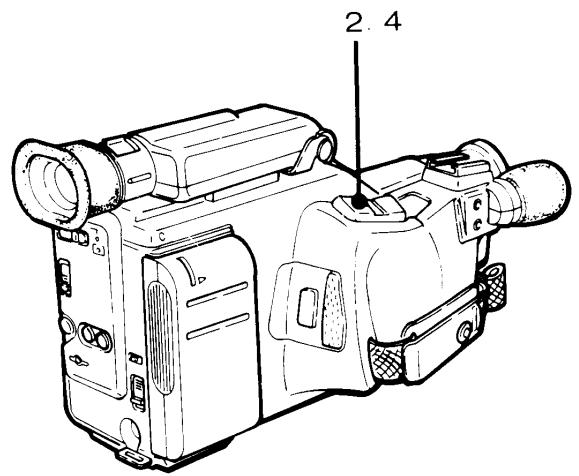
- Réglez le commutateur FOCUS sur MAN.
- Appuyez sur la touche de zoom motorisé pour obtenir une vue rapprochée du sujet.
- Tournez la bague de mise au point jusqu'à ce que l'image du sujet soit nette et claire.
- Appuyez sur la touche de zoom motorisé pour obtenir l'image souhaitée.
INVERSION DE LA MISE AU POINT
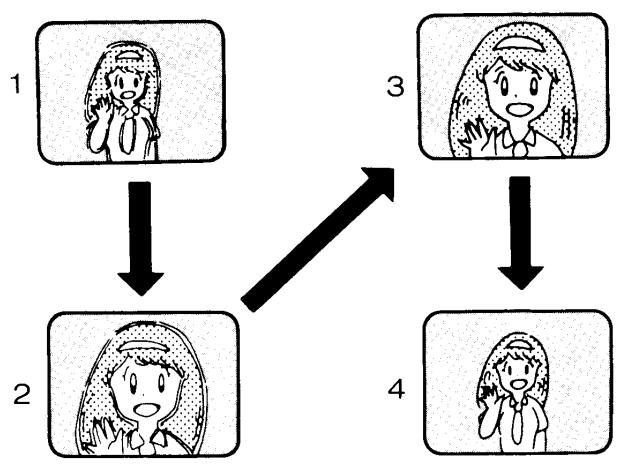
- Lorsque le commutateur FOCUS est réglé sur AUTO, maintenez enfoncée la touche FOCUS REV pendant le panoramique. La mise au point restera fixe en mode MANUEL pendant le panoramique, produisant une image fluide lors du passage d'un sujet à un autre. Relâchez la touche pour revenir au mode de mise au point automatique.
- Lorsque le commutateur FOCUS est réglé sur MAN
Pour changer de sujet, maintenez enfoncé le bouton FOCUS REV pour faire automatiquement la mise au point sur l'image du nouveau sujet. Relâchez le bouton pour revenir en mode de mise au point manuelle.
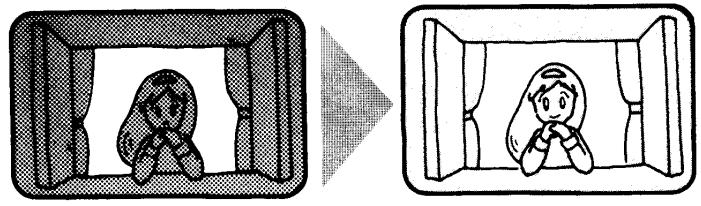
Le système d'iris de l'appareil dispose d'un auto-iris numérique qui ajuste automatiquement la quantité de lumière provenant de l'objectif de la caméra. Avec ce système, une image claire est obtenue lorsque la lumière derrière l'objet n'est pas trop forte. Si la lumière est suffisamment forte, l'image enregistrée deviendra déformée ; le système d'auto-iris peut nécessiter une compensation manuelle.
- Appuyez sur le bouton IRIS.
L'écran normal revient dans le viseur quelques secondes après avoir relâché le bouton.
La date et l'heure de l'enregistrement peuvent être imprimées sur votre enregistrement. Voir "RÉGLAGE DE LA DATE/HEURE" sur cette page.
IMPRESSION DE LA DATE
- Appuyez sur le bouton DATE/TIME
L'indication de la DATE apparaîtra dans le viseur
IMPRESSION DE L'HEURE
- Appuyez à nouveau sur le bouton DATE/TIME.
L'indication de la DATE change en indication de l'HEURE.
Pour arrêter l'impression de la date/heure, appuyez à nouveau sur le bouton DATE/TIME.
Remarque importante :
Si "88 : 88" clignote lorsque vous appuyez sur le bouton DATE/TIME, c'est parce que soit la date a été effacée en raison de l'épuisement de la pile au lithium, soit la date n'a pas encore été réglée (état initial). Réglez la date en suivant la procédure de "Réglage de la date" décrite ci-dessous. (Remplacez la pile au lithium si c'est la source du problème. Voir page 7)
RÉGLAGE DE LA DATE/HEURE
Exemple : 14:10, 24 décembre 1990
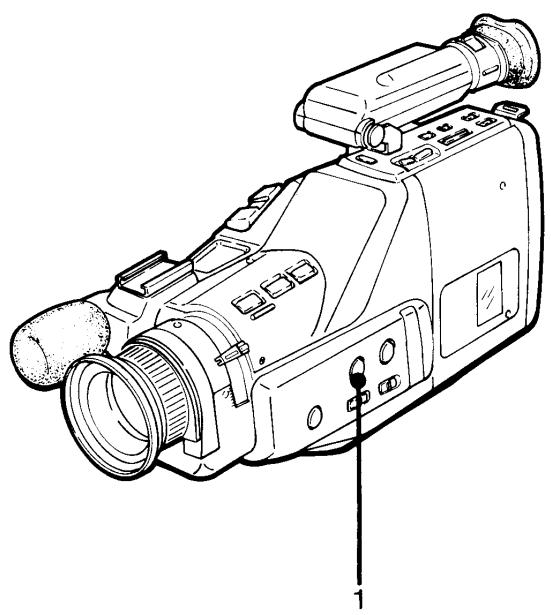
- Maintenez enfoncé le bouton DATE/TIME ADJ pendant environ une seconde.
L'indication de date apparaît dans le viseur.
- Maintenez enfoncé le bouton DATE/TIME jusqu'à ce que l'indication du jour approche de la valeur souhaitée.
Relâchez le bouton, puis appuyez à plusieurs reprises pour modifier lentement l'indication du jour (par exemple, réglez sur "24").
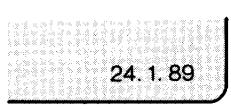
- Appuyez sur le bouton DATE/TIME ADJ et relâchez-le, puis appuyez sur le bouton DATE/TIME pour régler l'indication du mois (par exemple, réglez sur "12").
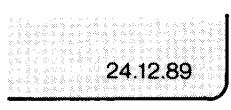
- Appuyez sur le bouton DATE/TIME ADJ et relâchez-le, puis appuyez sur le bouton DATE/TIME pour régler l'indication de l'année (par exemple, réglez sur "90").
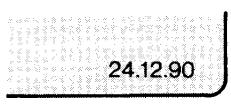
Bouton DATE/TIME ADJ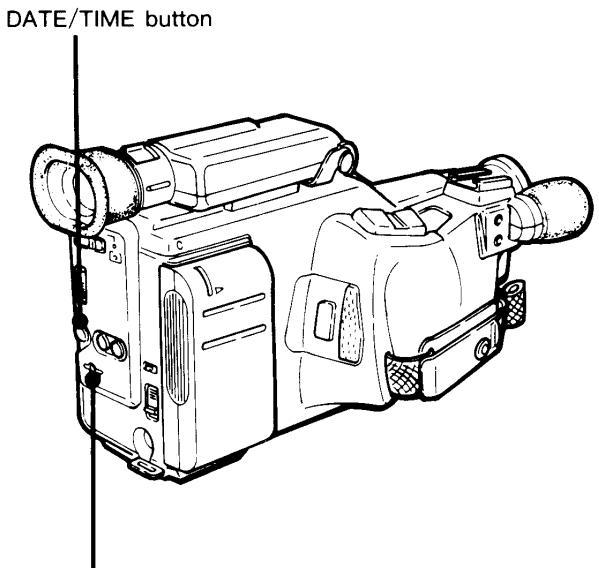
- Appuyez sur le bouton DATE/TIME ADJ et relâchez-le, puis appuyez sur le bouton DATE/TIME pour régler l'indication de l'heure (par exemple, réglez sur "14").
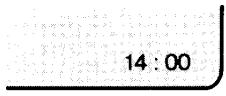
- Appuyez sur le bouton DATE/TIME ADJ et relâchez-le, puis appuyez sur le bouton DATE/TIME pour régler l'indication des minutes (par exemple, réglez sur "10").
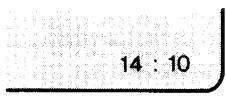
- Appuyez sur le bouton DATE/TIME ADJ et relâchez-le.
L'indication de l'heure disparaît du viseur.
Remarque :
La date et l'heure ne peuvent pas être réglées pendant l'enregistrement ou la lecture. Réglez la date et l'heure en mode STOP, PAUSE, FF ou REW.
Pour copier la cassette du caméscope vers votre magnétoscope domestique, reportez-vous au schéma de connexion ci-dessous.
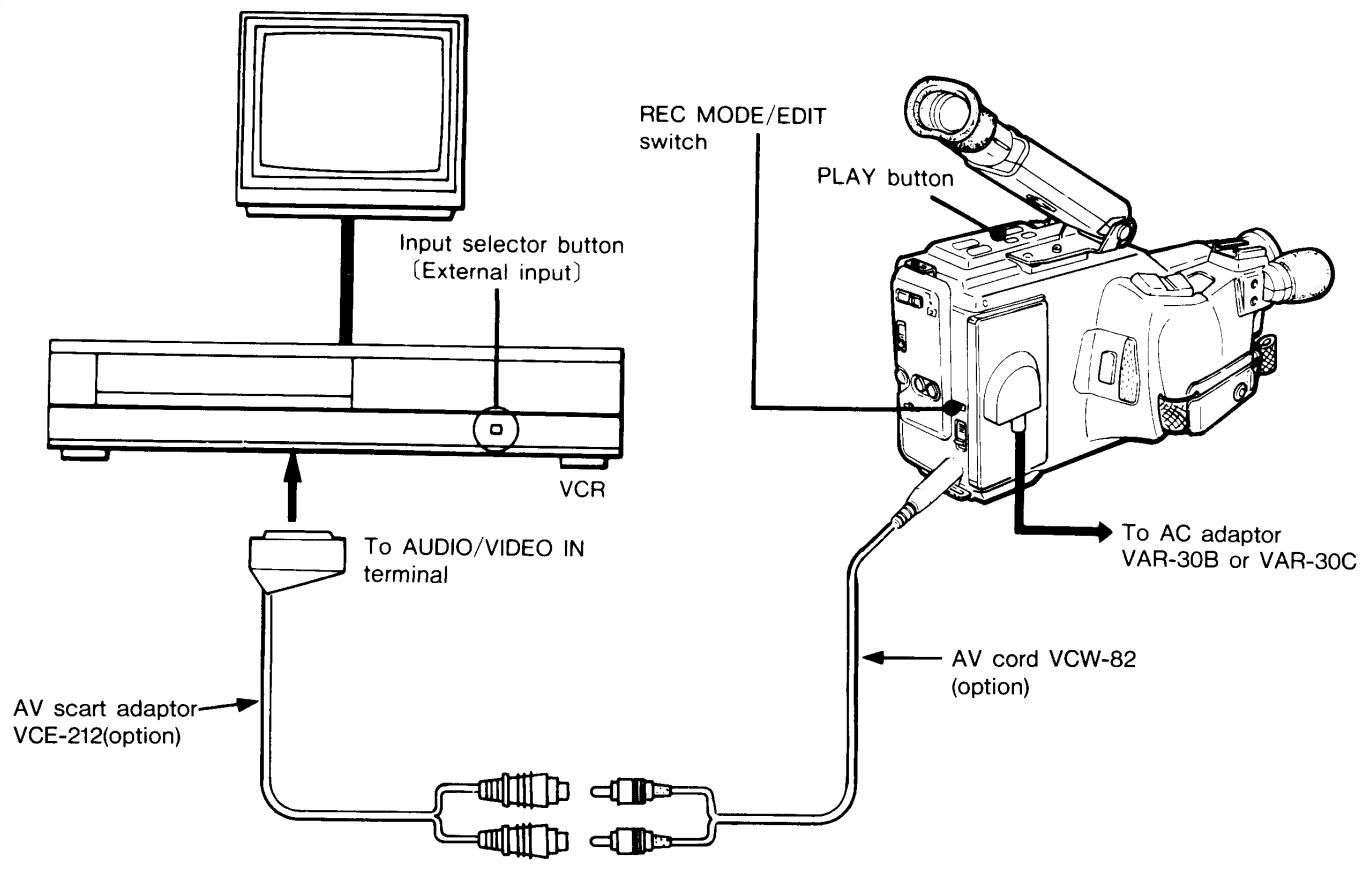
COPIE DE BANDE
- Réglez le commutateur REC MODE/EDIT de l'appareil sur ON. (Cela évitera la détérioration de la qualité d'image.)
- Mettez le magnétoscope en position de pause d'enregistrement.
- Mettez le caméscope en position de lecture.
- Mettez le magnétoscope en mode d'enregistrement.
- Lorsque la copie de bande est terminée, réglez le commutateur REC MODE/EDIT sur OFF.
Remarque : La copie ou le doublage de bandes vidéo n'est autorisé que dans la mesure où cela ne porte pas atteinte aux droits d'auteur ou à d'autres droits de tiers.
Adaptateur RF VRF-300 Vis de canal RF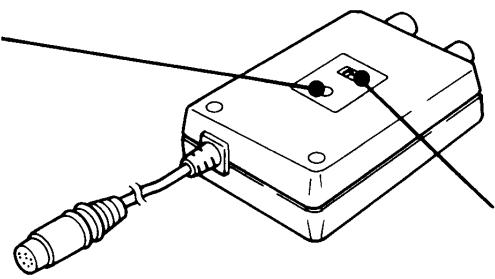
Pour la lecture via un téléviseur.
Mettez le caméscope en mode lecture.
Sélectionnez une position de programme libre sur le téléviseur. Réglez
la syntonisation pour réserver l'image de lecture. Si
des interférences sont visibles sur l'image, réglez la vis
de canal RF sur le VRF-300 et resyntonisez le téléviseur.
(Vue de dessous)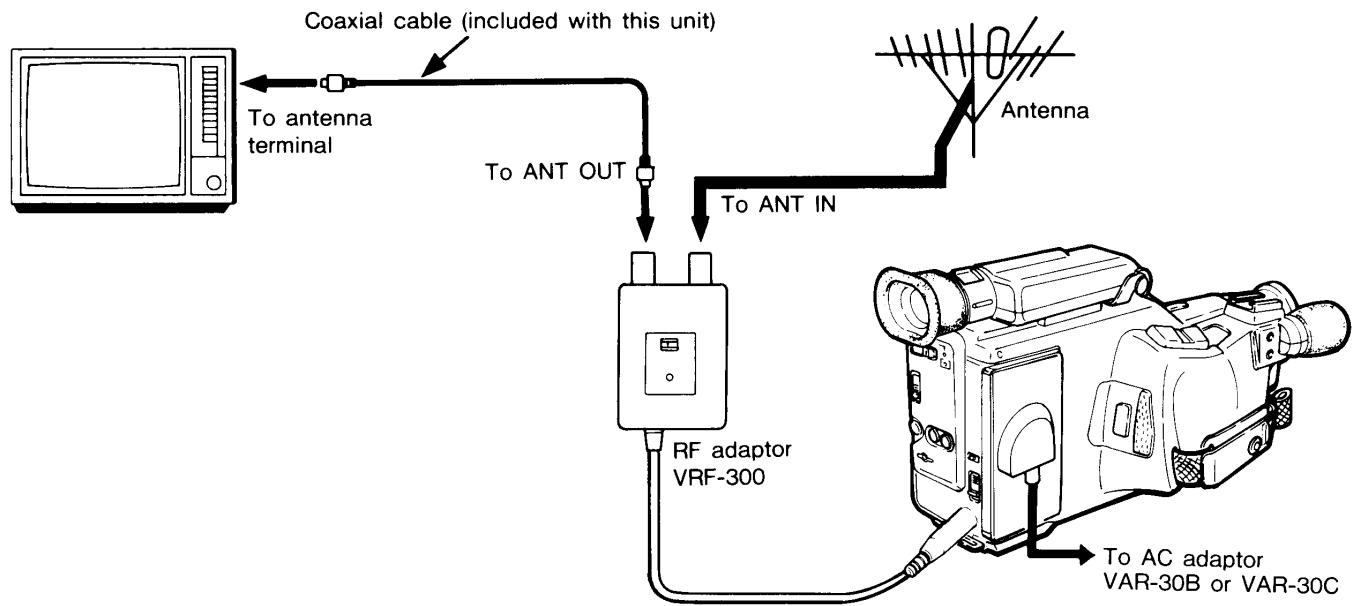
1. N'exposez pas cet appareil à des températures élevées.
Une chaleur excessive peut endommager l'appareil.
- Ne placez pas cet appareil près d'une source de chaleur (radiateurs, etc.).
- Ne laissez pas cet appareil dans une voiture fermée par temps chaud ou lors de journées chaudes.
2. Fonctionnement anormal.
Si vous remarquez quelque chose d'inhabituel (fumée, bruit étrange ou odeur, etc.), éteignez immédiatement l'appareil. Consultez le revendeur où l'appareil a été acheté, ou contactez un centre de service agréé Sanyo.
3. Humidité et objets étrangers.
- Ne laissez pas l'humidité (pluie, vapeur, rosée, eau salée, etc.) pénétrer dans l'appareil.
- Ne laissez pas d'objets étrangers (sable, objets métalliques, articles inflammables, etc.) pénétrer dans l'appareil.
- Ne placez rien d'autre que des cassettes et les blocs d'alimentation dans l'appareil.
4. Lumières fortes.
- Ne dirigez pas le caméscope directement vers des sources de lumière vive.
- Ne placez pas l'appareil près de sources de lumière vive, car la chaleur pourrait l'endommager.
5. N'utilisez pas cet appareil dans les conditions suivantes :
Dans un endroit très humide. Dans des zones soumises à de fortes vibrations. - Là où il y a une poussière ou une saleté excessive. - Près de champs magnétiques puissants (par exemple, près d'antennes émettrices, de moteurs, de lampes fluorescentes).
6. N'utilisez pas l'appareil uniquement pour la surveillance.
Si l'appareil est utilisé pour enregistrer le même sujet pendant une longue période, par exemple pour des applications spéciales telles que la surveillance, la qualité de l'image se détériorera.
7. N'enveloppez pas l'appareil dans un tissu, etc.
S'il est enveloppé dans un tissu pendant le fonctionnement, la température à l'intérieur de l'appareil augmentera excessivement, ce qui provoquera un dysfonctionnement.
Têtes vidéo
Lorsque les têtes vidéo ont été utilisées pendant une longue période, l'image de lecture peut devenir floue et, finalement, il peut n'y avoir aucune image du tout.
Cela est dû à des têtes vidéo sales et indique qu'elles doivent être nettoyées.
Pour nettoyer les têtes, Sanyo recommande de les faire nettoyer par du personnel autorisé Sanyo.
- Notez que les têtes vidéo peuvent être endommagées si une cassette de nettoyage est utilisée incorrectement.
Les têtes vidéo s'usent de la même manière qu'un stylet de phonographe.
Si l'image n'est pas claire même après le nettoyage des têtes, il est possible que les têtes elles-mêmes soient usées. Si c'est le cas, elles doivent être remplacées.
Pour des informations détaillées et de l'assistance, veuillez consulter votre revendeur.
Inspectez à intervalles de 1000 heures
Cet appareil requiert une très grande précision pour enregistrer les images de la caméra vidéo sur la bande magnétique, puis pour reproduire correctement ces images. En particulier, les têtes vidéo et les pièces mécaniques qui manipulent la bande sont particulièrement susceptibles de se salir et de s'user après une utilisation prolongée.
Pour un fonctionnement continu sans problème, Sanyo recommande que l'appareil soit inspecté (y compris le nettoyage, la lubrification et le remplacement éventuel de certaines pièces) toutes les 1000 heures d'utilisation (environ).
Pour des informations détaillées et de l'assistance, veuillez consulter votre revendeur.
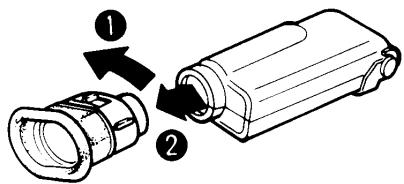
Viseur
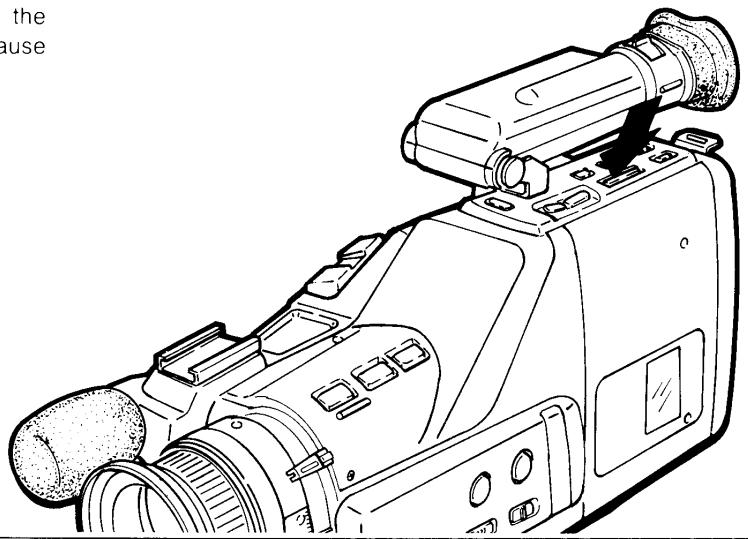
- Le viseur peut être retiré en le tournant dans le sens inverse des aiguilles d'une montre.
Pour enlever la poussière accumulée à l'intérieur du viseur, débranchez-le de cette manière.
Suivez l'ordre inverse pour le réinstaller.
Utilisation dans d'autres pays
Tout ce dont vous avez besoin pour enregistrer dans un pays étranger est une (des) batterie(s) chargée(s) et une (des) cassette(s). Si vous souhaitez lire la bande dans ce pays, vous devrez utiliser un téléviseur qui utilise le système de couleurs PAL et qui dispose de prises d'entrée audio/vidéo.
Principaux pays utilisant le système NTSC
Canada, Japon, Corée, Mexique, Philippines, Taïwan, États-Unis.
Principaux pays utilisant le système PAL :
Angleterre, Italie, Autriche, Australie, Allemagne de l'Ouest, Hollande, Koweït, Singapour, Suisse, Suède, Espagne, Thaïlande, République populaire de Chine, Danemark, Nouvelle-Zélande, Norvège, Belgique, Portugal, Hong Kong
Principaux pays utilisant le système SECAM :
Iran, Irak, URSS, Hongrie, France, Bulgarie, Pologne, Monaco, Luxembourg
Si un dysfonctionnement survenait de manière inattendue dans un autre pays, contactez le revendeur auprès duquel l'appareil a été acheté.
TECHNIQUES D'ENREGISTREMENT DE BASE
Avec un peu de pratique, vous pouvez acquérir les techniques de base pour obtenir de bons résultats d'enregistrement. Avec cet appareil, vous pouvez enregistrer une scène encore et encore jusqu'à ce que vous soyez satisfait.
PLANS DE BASE
Utilisez les angles et les plans spéciaux de manière efficace pour rendre vos enregistrements plus intéressants.
Sujets humains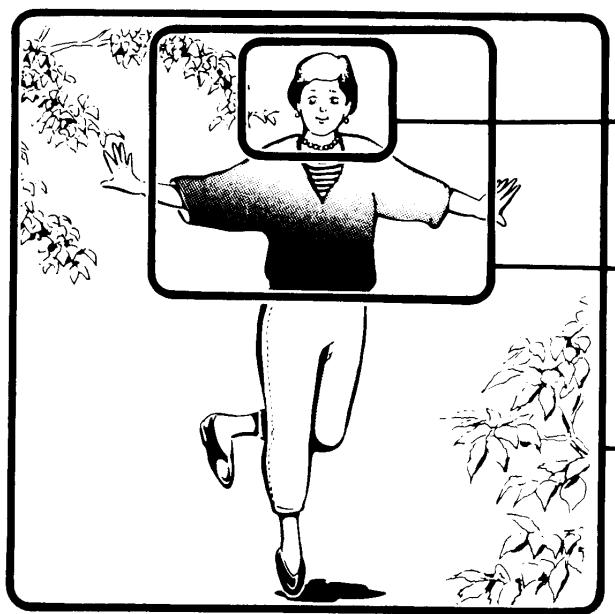
Gros plan
Les gros plans mettent l'accent sur une partie précise du sujet.
Plan moyen
Excellent pour montrer à la fois les expressions du visage et les vêtements.
Plan en pied
Pour montrer le sujet entier, ainsi qu'une vue claire de l'arrière-plan.
Plans de paysage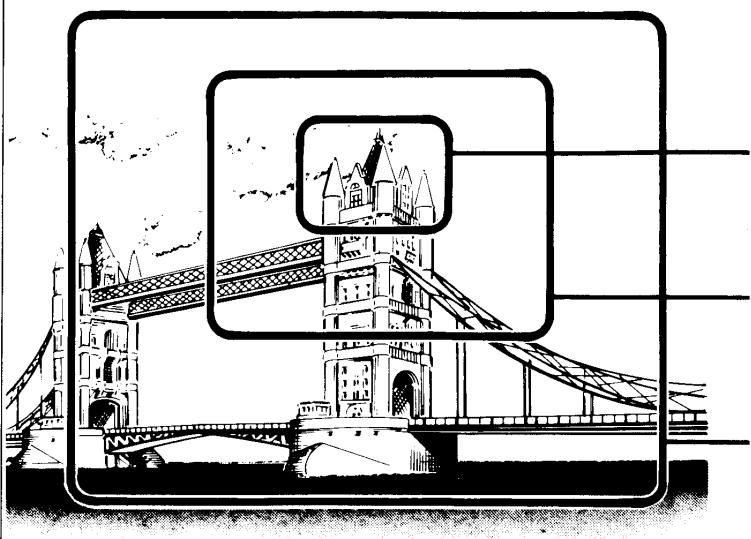
Gros plan
Pour rapprocher le sujet afin de le mettre en valeur.
Moyenne portée
La plage de base à partir de laquelle vous effectuez un zoom avant ou arrière pour les plans grand angle.
Longue portée
La plage la plus efficace pour montrer les conditions environnantes et exprimer une sensation de distance.
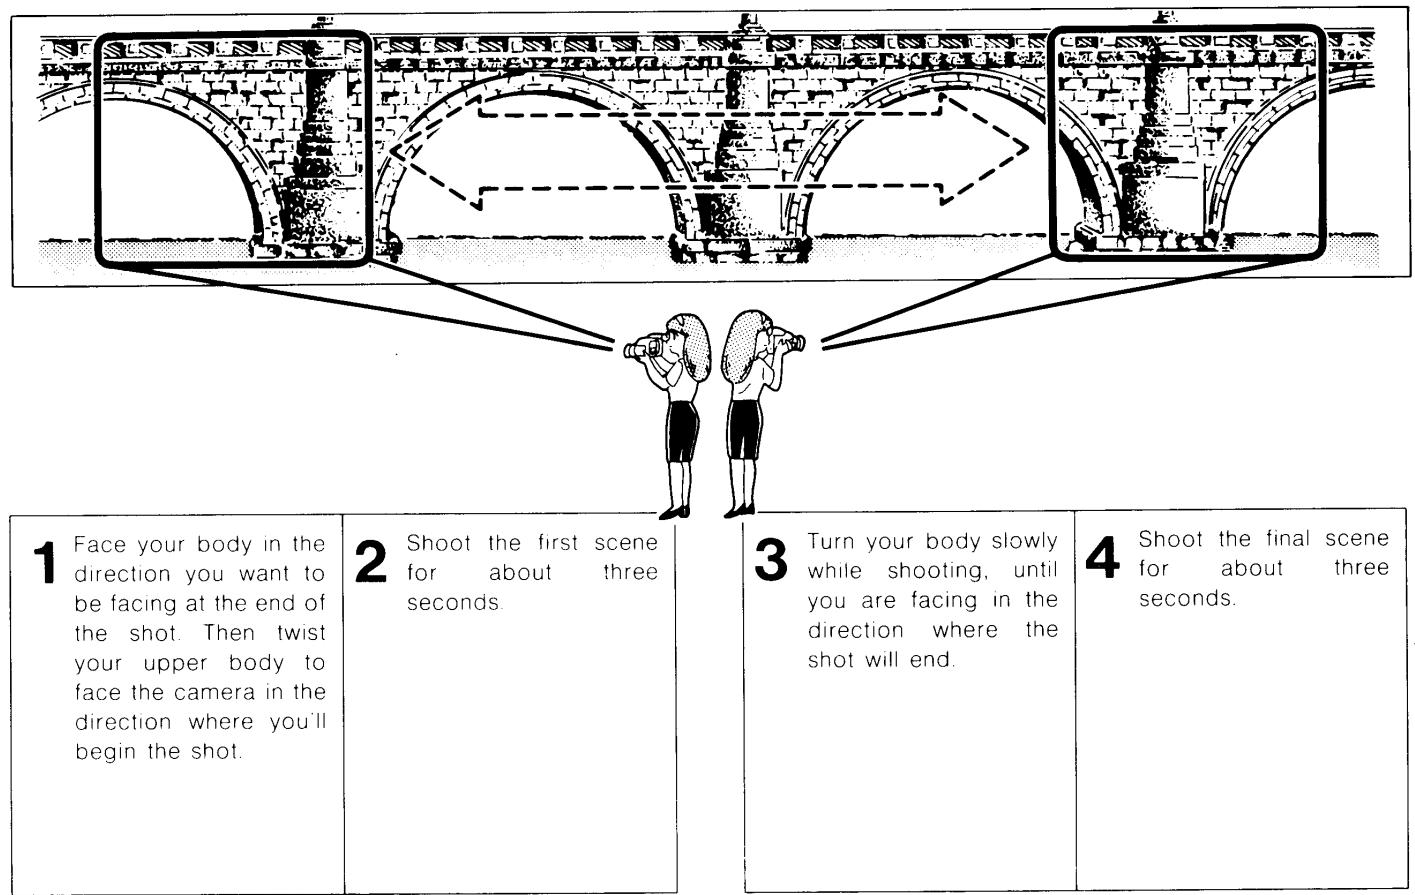
Panoramique
Déplacement latéral ... pour filmer la vue d'ensemble et exprimer la largeur dimensionnelle. Une position stable de la caméra est importante pour les plans grand angle afin d'éviter les vibrations de l'image.
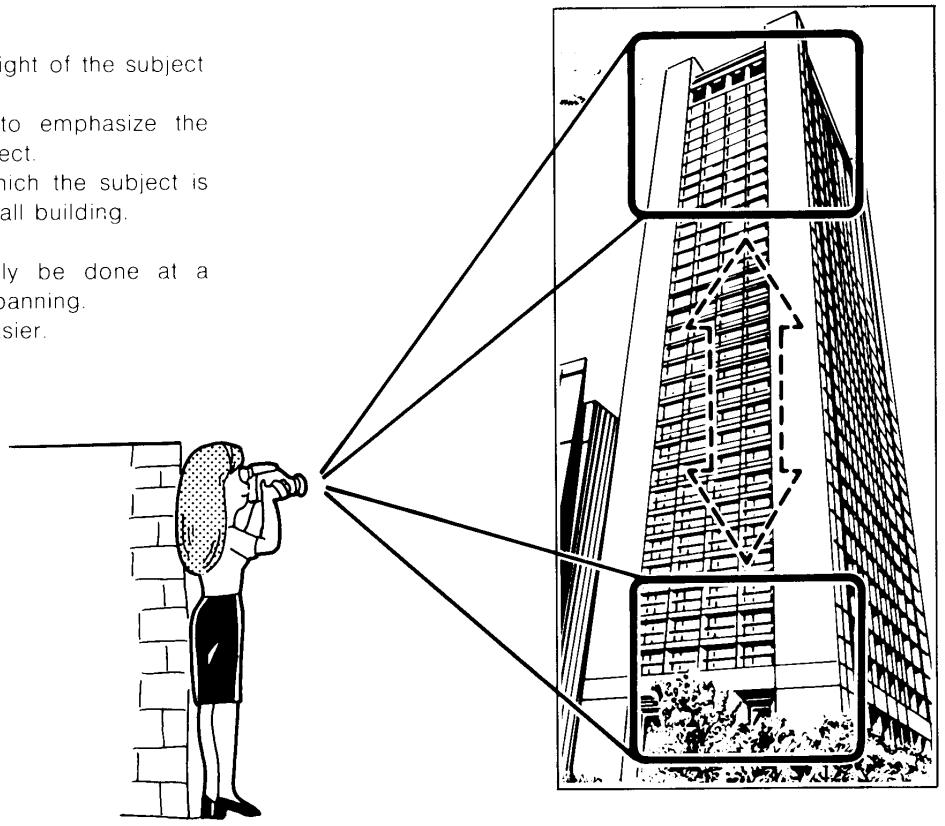
Inclinaison
Mouvement vertical ... pour montrer la hauteur du sujet.
Inclinez (panoramique) vers le haut lorsque vous souhaitez souligner la hauteur du sujet. Inclinez (panoramique) vers le bas pour une scène où le sujet sort d'un immeuble de grande hauteur.
L'inclinaison (panoramique vertical) doit généralement être effectuée à une vitesse un peu plus rapide que le panoramique horizontal. Soutenez votre dos pour faciliter la prise de vue.
Utilisez la fonction zoom pour passer en douceur d'un plan grand angle incluant la zone entourant le sujet à un plan rapproché mettant l'accent sur le sujet. Vous pouvez également effectuer un zoom arrière d'un plan rapproché à un plan grand angle.
Zoom avant ... pour attirer l'attention sur un point spécifique.
Grand angle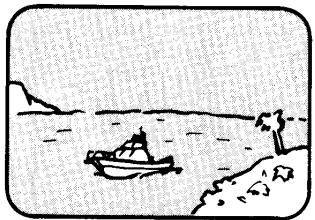


Téléobjectif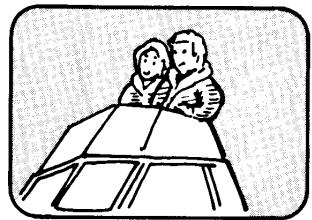
Zoom arrière ... pour inclure un plan final de la scène environnante.
Téléobjectif

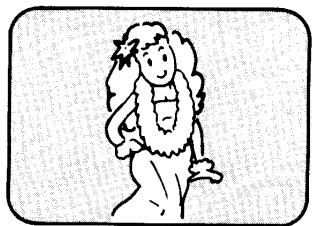

Grand angle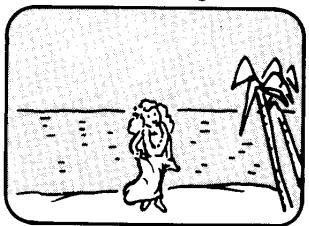
Remarques :
- Les vibrations sont plus perceptibles en prise de vue téléobjectif (lorsque vous zoomez pour un gros plan), veillez donc à maintenir le caméscope stable.
- Lorsque vous utilisez la mise au point manuelle pour la fonction zoom, réglez la mise au point en position téléobjectif (gros plan), revenez en position grand angle (vue éloignée), puis zoomez en position téléobjectif pendant l'enregistrement. La mise au point sera floue en position téléobjectif si elle est réglée en position grand angle.
CONDITIONS D'ÉCLAIRAGE ET LUMIÈRES
Un éclairage correct est important. Utilisez le tableau ci-dessous comme référence pour choisir les conditions d'éclairage les plus adaptées.
| ND filter is recommended | Unit (lux) | Snow-covered mountains
Ski slopes
Beach on clear summer day
Clear-sky sunlight at noon (100,000)
Clear-sky sunlight at 3 PM (35,000)
Cloudy-sky sunlight at noon (32,000) |
| Usable range | 100,000 | |
| 10,000 | |
| 1,000 | |
| 500 | |
| More lighting is suggested | 100 | |
| 10 | |
| More lighting is needed | | |
Lors d'une prise de vue en extérieur (lumière naturelle)
Placez la caméra comme si vous portiez le soleil sur votre dos.
Ainsi, le soleil éclaire le sujet uniformément.


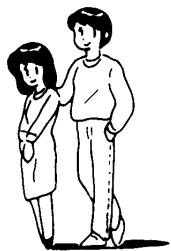
Types de lumières
Lampe réflecteur plate
La lumière sera diffusée sur une grande surface. C'est un type de lumière facile à utiliser et pratique pour les débutants.
Lampe réflecteur spot
Ce type de lumière peut être utilisé pour mettre en valeur un point précis et créer des effets d'éclairage spéciaux.
Note :
- Ne placez pas cet appareil près d'une source de lumière ou à un endroit où il sera directement exposé à la lumière. La chaleur de la lumière pourrait endommager le boîtier du caméscope.
Pour une scène avec une lumière excessive, comme une plage ou un paysage enneigé par temps clair, la scène apparaîtra trop blanche. Un filtre ND doit être utilisé pour réduire la quantité de lumière. Le filtre ND-4 donnera généralement des résultats satisfaisants dans la plupart des situations (taille du filtre : 49 mm).
Lors de prises de vue en intérieur (éclairage artificiel)
Il est possible de filmer avec uniquement des lampes fluorescentes, mais des images plus nettes sont obtenues si des éclairages supplémentaires sont utilisés.
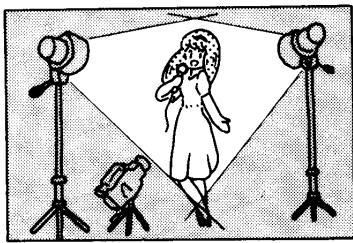
Orientation des éclairages
Pour un seul éclairage :
L'éclairage doit être dirigé en diagonale depuis l'avant. Avec un seul éclairage, le contraste sera toujours fort. Utilisez un autre éclairage si vous voulez éliminer les ombres.
Pour deux éclairages :
Dirigez un éclairage en diagonale depuis l'avant, et placez l'autre éclairage sur le côté du sujet, pour éliminer les ombres.
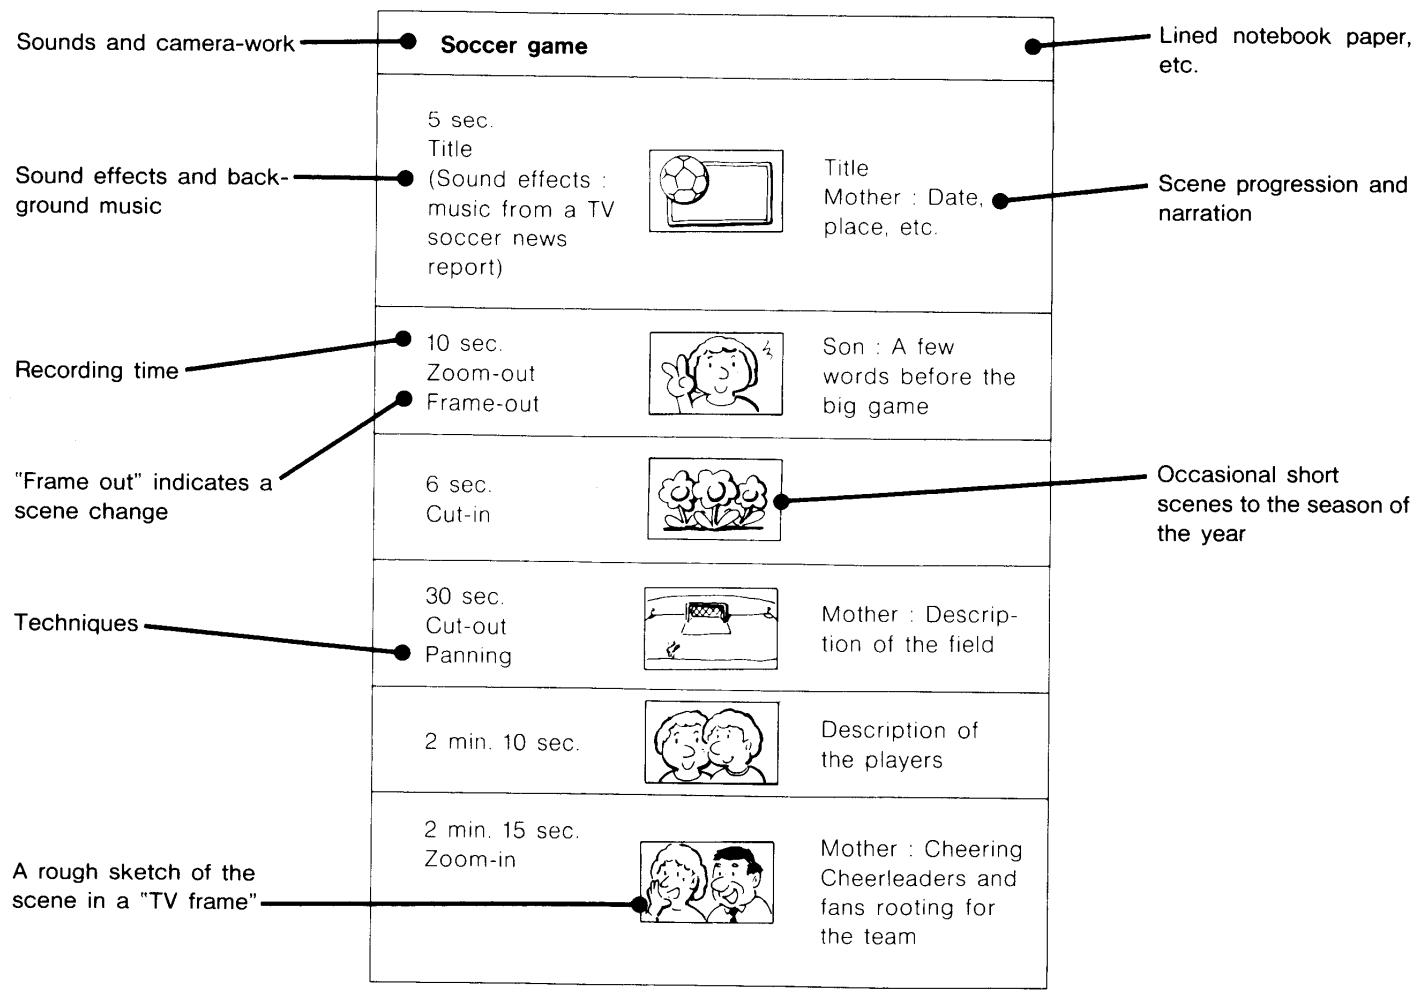
Une fois que vous maîtrisez les techniques de la caméra vidéo, vous pouvez créer des œuvres qui portent votre touche personnelle.
1. Planification d'un scénario
Si une histoire est impliquée, le travail est mieux réalisé avec l'aide d'un scénario. Préparez-le à l'avance, en planifiant chaque étape et chaque séquence. Une liste de 6 questions simples (Qui, Quoi, Quand, Où, Pourquoi, Comment) vous aide à planifier le déroulement de votre histoire. Un scénario sous forme de story-board, qui comprend des croquis, est présenté ci-dessous. Le story-board est un outil de planification précieux.
2. Création de titres
Utilisez les titres de la même manière que dans les films projetés en salle ou à la télévision, car les titres ajoutent un intérêt supplémentaire, une saveur et la "touche professionnelle".
3. Démarrer l'enregistrement
Commencez à filmer les scènes en vous basant sur votre script préparé.
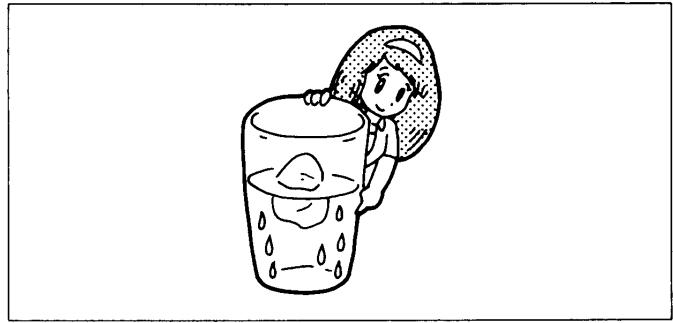
Condensation d'humidité ("BUÉE")
La même humidité qui se forme sur les fenêtres par temps froid peut également apparaître à l'intérieur de cet appareil dans certaines conditions. C'est ce qu'on appelle la condensation, ou "BUÉE".
Une attention particulière doit être portée si cela se produit.
Indication de condensation ("BUÉE")
La condensation à l'intérieur de l'appareil peut, si la bande se déplace, endommager la bande ainsi que les pièces internes du caméscope.
Pour éviter cela, cet appareil est équipé d'un dispositif de sécurité spécial.
Lorsque de la condensation se produit, le symbole DEW (clignotant) apparaît dans le viseur. L'appareil n'acceptera aucune commande même si l'alimentation est activée, à l'exception de l'éjection de la cassette.
Le logement de cassette ne permettra pas l'insertion de la cassette.
Si de la condensation se produit
Appuyez sur le bouton EJECT pour éjecter la cassette.
Le symbole DEW disparaîtra lorsque l'humidité ne sera plus présente.
Le temps nécessaire dépendra de la température ambiante.
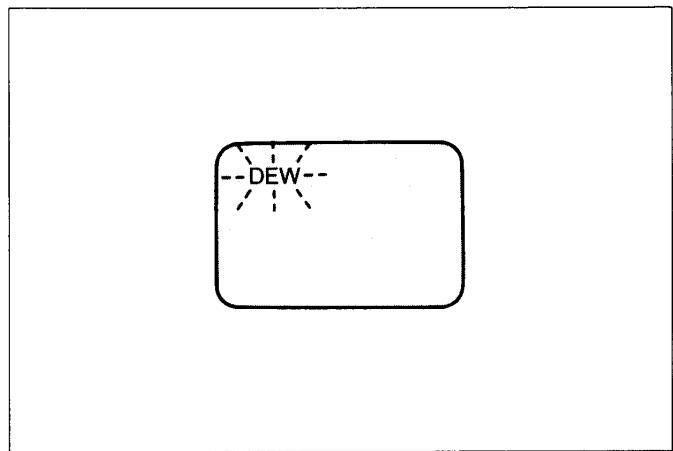
Remarque :
- Il arrive parfois que le symbole DEW ne s'allume pas immédiatement, même en présence de condensation interne. N'utilisez pas l'appareil pendant un court moment s'il a été soumis à un changement soudain de température.
Humidité sur une cassette
De l'humidité peut se condenser sur une cassette lorsqu'elle est déplacée d'un endroit froid à un endroit chaud. Si une cassette présentant ce problème est insérée, l'indication CASSETTE clignotera lorsque l'un des boutons de commande (bouton PLAY, etc.) sera enfoncé, et seul le bouton EJECT fonctionnera. Notez que le symbole DEW n'apparaîtra pas dans ce cas.
Retirez la cassette et laissez-la sécher naturellement.
Guide de dépannage
Vérifiez d'abord les points ci-dessous. Si le fonctionnement semble toujours anormal, consultez le revendeur auprès duquel l'appareil a été acheté pour obtenir de l'aide.
| Symptom | Probable cause | Remedy | Page |
| No power. | Battery pack is exhausted. | Replace with a charged battery pack. | 5 |
| AC adaptor is turned off. | Turn on the power. | 4 |
| Battery being charged. | Stop charging or wait for charging to be completed. | - |
| Nothing happens even with batteries attached. | Moisture exists. | Wait for DEW symbol to disappear. | 34 |
| Power is suddenly turned off during use. | Battery pack is exhausted. | Replace with a charged battery pack. | 5 |
| Stop mode or pause mode is continued for 5 minutes or longer. | Turn on the power again. | - |
| Can't record. | No cassette. | Insert a cassette | 6 |
| Cassette is set for erase prevention. | Reset cassette's switch, or insert another cassette. | 6 |
| Tape has been wound to its end. | Rewind the tape, or insert another cassette. | - |
| Can't focus. | The subject is difficult to focus. | Adjust the focus manually. | 21, 22 |
| Distance to subject is less than 1.2 m. | Move away, or use macro feature. | 17 |
| No picture on the TV | Wrong connection. | Correct the connection. | 26 |
| Playback picture flickers or blurs. | Video heads are dirty. | Clean them. (If this does not help, heads may need to be replaced.) | - |
| Television system | PAL, CCIR | Power supply
voltage | Battery holder input 6V/7.5V/9V |
| Video recording system | Rotating 2-head helical-scan FM, color under system | Power consumption | 6.5W during camera recording |
| Audio recording system | Rotating head FM system | Operation
temperature range | 0℃ ~ 40℃
(32°F ~ 104°F) |
| Cassette type | 8 mm video tape cassette | Storage temperature
range | -20℃ ~ +60℃
(-4°F ~ 140°F) |
| Tape speed | SP: 20.051 mm/sec.
LP: 10.025 mm/sec. | External dimensions
(W × H × D) | 118 mm × 152 mm × 302 mm |
| Recording/playback time | 180 minutes (P5-90 cassette) |
| Fast forward/rewind time | Approx. 8 minutes
(P5-90 cassette) |
| Pickup element | CCD solid-state type |
| Viewfinder | Electronic (0.7 inch type, black and white) |
| Lens | Electro-powered-8X zoom lens f =8.5 mm ~ 68 mm
F1.6
Close-up function (15mm~1.2m)
Automatic focus
Filter diameter 49 mm | Weight (approximately)
(not including battery pack and cassette) | 1.1 kg |
| Microphone | Electret condenser type (omnidirectional) |
| White balance adjustment | Automatic or set | AUDIO·VIDEO
terminal | Video output 1 Vp-p. 75Ω unbalanced, negative sync
Audio output -6 dBs, 2.2kΩ or less |
| Minimum subject illumination | 7 lux |
| Microphone jack | Mini jack, -68dB
For low-impedance microphone |
| Subject illumination range | 7 lux ~ 100,000 lux |
| Recommended subject illumination | 300 lux or more | Earphone jack | Mini jack, for 8Ω earphone |
- En raison de l'amélioration continue de ses produits, Sanyo se réserve le droit de modifier les conceptions et spécifications des produits sans préavis et sans encourir aucune obligation.
GARANTIE AU CLIENT
Sanyo Marubeni (UK) Ltd. (la Société) garantit à l'acheteur initial au détail que si cet équipement est ou devient défectueux et que, de l'avis de la Société, le défaut est dû à un matériau ou à une main-d'œuvre défectueux, la Société, pendant une période de 12 mois calendaires à compter de la date de vente à l'acheteur d'origine, réparera ou remplacera, à sa seule discrétion, gratuitement, tout composant défectueux de l'équipement, à condition que :
- L'équipement ait été utilisé à tout moment conformément aux instructions d'utilisation émises par la Société et n'ait pas été connecté à une alimentation secteur pour laquelle il n'a pas été réglé.
- Les dommages accidentels ou causés par la négligence ou l'utilisation abusive de l'utilisateur, y compris les fuites de piles usées, sont expressément exclus.
- Les réparations non autorisées ou toute modification de l'équipement qui n'a pas été expressément approuvée par la Société rendront cette garantie nulle et non avenue.
- Les défaillances dues à l'usure normale de tout élément, telles que les piles, les saphirs de lecture, et les têtes d'enregistrement, de lecture et d'effacement de bande, sont expressément exclues.
Cette garantie n'est pas transférable et ne s'applique qu'au Royaume-Uni (et en République d'Irlande).
Aucune disposition de cette garantie expresse n'affecte les droits statutaires disponibles pour l'acheteur de cet équipement.
Remarque : Cette garantie remplace toute autre forme de garantie qui aurait pu être jointe ou attachée au produit par inadvertance. (Août 1978).
Merci d'avoir choisi Sanyo. Cet appareil devrait vous apporter de nombreuses années de plaisir et de service fidèle, mais en cas de panne, les notes suivantes pourront vous être utiles :
- VEUILLEZ CONSERVER VOTRE REÇU D'ACHAT, QUI SERA EXIGÉ POUR TOUTE INTERVENTION SOUS GARANTIE.
- Si votre appareil Sanyo s'avère défectueux pendant la période de garantie, rapportez-le ou renvoyez-le au revendeur qui vous l'a vendu, accompagné de cette garantie et de la preuve d'achat. Nous avons pris des dispositions avec nos revendeurs agréés pour qu'ils effectuent les réparations sous garantie en notre nom. Ainsi, nous espérons réduire au minimum le temps pendant lequel vous serez privé de votre appareil.
- Si, pour une raison quelconque, il est impossible de retourner l'appareil au fournisseur d'origine, veuillez contacter notre service après-vente à l'adresse ci-dessous pour obtenir des conseils supplémentaires.
- Si l'appareil nécessite une révision après l'expiration de la période de garantie, apportez-le ou envoyez-le au fournisseur d'origine ou à tout autre revendeur Sanyo. Il se fera un plaisir de vous établir un devis pour la réparation. En cas de doute sur la marche à suivre, écrivez-nous à l'adresse ci-dessous ou téléphonez :
Services après-vente,
Sanyo Marubeni (UK) Limited,
Sanyo House
Otterspool Way, Watford,
Hertfordshire WD2 8JX
Tél. : Watford 46363