
Airless HEA Control Series 350M - Pistolet à peinture WAGNER - Notice d'utilisation et mode d'emploi gratuit
Retrouvez gratuitement la notice de l'appareil Airless HEA Control Series 350M WAGNER au format PDF.


| Type de produit | Pistolet à peinture airless |
| Marque | Wagner |
| Modèle | Airless HEA Control Series 350M |
| Technologie | HEA (High Efficiency Airless) |
| Type d'alimentation | Électrique (230V) |
| Pression maximale | 200 bar (2900 psi) |
| Débit de peinture | Jusqu'à 1,2 L/min |
| Capacité du réservoir | 1,5 L (intégré) |
| Poids | Environ 5,5 kg |
| Dimensions (L x l x h) | 35 x 25 x 30 cm |
| Longueur du flexible | 9 m |
| Buses incluses | 3 buses interchangeables (313, 515, 617) |
| Utilisation | Peinture, lasure, vernis (intérieur/extérieur) |
| Fonctionnalités | Contrôle de pression électronique, arrêt rapide, système sans air |
| Entretien | Nettoyage du système après chaque utilisation avec de l'eau ou solvant |
| Nettoyage | Démonter la buse, rincer le flexible et le pistolet |
| Sécurité | Verrouillage de sécurité du gâchette, protection contre les surpressions |
| Garantie | 2 ans (pièces et main-d'œuvre) |
| Réparabilité | Pièces détachées disponibles (buses, joints, filtres) |
| Accessoires | Nettoyeur de buse, clé de démontage, tube d'aspiration |
FOIRE AUX QUESTIONS - Airless HEA Control Series 350M WAGNER
Questions des utilisateurs sur Airless HEA Control Series 350M WAGNER
0 question sur cet appareil. Repondez a celles que vous connaissez ou posez la votre.
Poser une nouvelle question sur cet appareil
Téléchargez la notice de votre Pistolet à peinture au format PDF gratuitement ! Retrouvez votre notice Airless HEA Control Series 350M - WAGNER et reprennez votre appareil électronique en main. Sur cette page sont publiés tous les documents nécessaires à l'utilisation de votre appareil Airless HEA Control Series 350M de la marque WAGNER.
MODE D'EMPLOI Airless HEA Control Series 350M WAGNER
HEA SPRAYING TIPS & TRICKS
MASKING AND COVERING
✗ If possible, empty the room completely. Alternatively, place all the furniture in the middle of the room and cover it with a dust sheet.
× Cover the floor with a dust sheet, painter fleece or cardboard.
× Use masking tape with an integrated drop sheet to cover up large surfaces such as windows and doors.
× In addition test that the dust sheet does not flutter when you get close to it by just using the paint sprayer to blow air.
At WAGNER we have got you covered and have put together different masking kits with all you need for a wide range of painting applications.
SET-UP
× Make sure to set up the Wagner unit properly (see manual).
CHOOSING THE CORRECT SPRAY TIP AND FILTER
× For very thick materials, e.g. wall paints, we suggest using a 515, 517 or 619 tip with white filter.
× For thin materials, such as lacquers and stains, we recommend a 311 tip with red filter.
PREPARING COATING MATERIAL
Before putting the suction hose into the material, you need to prepare it:
✗ Most of the units can spray material straight from the container without diluting. However, with some more viscous materials, diluting by 5-10 % can give a better result (e.g. for a 10 L bucket 10 % dilution means 1 L of water).
✗ If working with paint, make sure that it is approximately at room temperature. Warm materials have more viscosity and are easier to work with. However, do not go below or above the min./max. temperature advised by the paint supplier.
✗ If there are any small particles in the paint such as dry paint from the bucket, it is helpful to filter the paint to get rid of them.
× Dilute the paint with warm water (not hot!) or solvent for solvent-based paints in accordance with manufacturer's instructions.
Stir the material thoroughly with a stirring stick for at least 2 minutes. In the case you are working with a bigger volume, e. g. 10 L bucket, it is better to use a drill and a mixer therefor. Stir well, and always make sure that there are no lumps in the paint, especially at the bottom of the bucket. Some of the heavier materials in the paint can sink to the bottom when the bucket has been standing for a longer time on the shelf. When not mixed well, the lumps in the paint can clog the paint sprayer.
DOING A SPRAY TEST BEFORE STARTING YOUR PROJECT
Before taking on your project simply take a piece of cardboard and do a couple of spray tests. This will help you to achieve the right settings on the paint sprayer:
× After installing the correct spray tip in the holder, try different spray directions (e.g. vertical or horizontal) as shown by the arrow on the tip.
× Adjust the pressure on the unit. While thicker materials (e.g. wall paint) require more pressure, thinner ones (e.g. wood stains) need less pressure.
✗ If your pattern is tailing, your spray tip might be incorrect, your spray gun filter might be clogged or the paint is not diluted enough (for further instructions see manual).
SPRAYING TIPS FOR EVEN COVERAGE
× Spray at a constant speed and at an even distance from the surface. The best distance is 20 to 30 cm between the spray tip and the surface. For ceilings and hard to reach places WAGNER offers a wide variety of accessories like extensions, longer hoses, etc.
✗ Make sure you are spraying at right angles to the surface. It is important to move your entire arm back and forth rather than just flexing your wrist, otherwise one end of the pattern will be thicker than the other and will cause overspray.
✗ The spray gun should be triggered by turning it on and off with each stroke. Do not trigger the gun during the middle of a stroke. This will result in an uneven spray and patchy coverage.
× Overlap each stroke by about 30 % for a smooth coating.
OTHER HELPFUL TIPS
✗ If you accidentally sprayed too much paint on one area, dab the paint with a cloth or kitchen roll and spray another thin coat over it.
During a break of several hours, it is not necessary to clean the entire unit. The gun can be simply placed in a bucket with water to prevent the paint in the tip from drying out. You should also cover up the paint container to prevent the paint from drying out.
HEA
HIGH EFFICIENCY
AIRLESS.
For more information, please read the relevant product manual or visit our FAQs:
go.wagner-group.com/faqs-airless

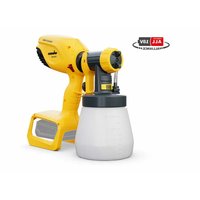
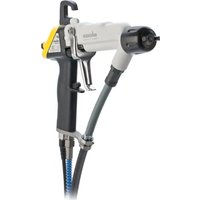
Marque : WAGNER
Modèle : Airless HEA Control Series 350M
Catégorie : Pistolet à peinture