
HST-D107 - Système Hi-Fi SONY - Notice d'utilisation et mode d'emploi gratuit
Retrouvez gratuitement la notice de l'appareil HST-D107 SONY au format PDF.


| Type de produit | Système Hi-Fi micro-chaîne |
| Marque | Sony |
| Modèle | HST-D107 |
| Dimensions (L x H x P) | 260 x 120 x 270 mm |
| Poids | 3,2 kg |
| Alimentation | Secteur 220-240 V, 50/60 Hz |
| Consommation électrique | 35 W |
| Puissance de sortie | 2 x 15 W RMS |
| Platine CD | Compatible CD, CD-R/RW |
| Platine cassette | Stéréo, auto-stop |
| Tuner | FM/AM avec 30 présélections |
| Haut-parleurs | 2 voies, baffles séparés |
| Entrées auxiliaires | Prise mini-jack 3,5 mm |
| Sortie casque | Prise mini-jack 3,5 mm |
| Télécommande | Oui, infrarouge |
| Affichage | Écran LCD |
| Fonctions horloge et minuterie | Oui |
| Accessoires inclus | Télécommande, antenne AM, mode d'emploi |
| Entretien | Nettoyer avec un chiffon doux et sec |
| Sécurité | Débrancher avant nettoyage |
| Indice de réparabilité | 7,5 / 10 |
FOIRE AUX QUESTIONS - HST-D107 SONY
Questions des utilisateurs sur HST-D107 SONY
0 question sur cet appareil. Repondez a celles que vous connaissez ou posez la votre.
Poser une nouvelle question sur cet appareil
Téléchargez la notice de votre Système Hi-Fi au format PDF gratuitement ! Retrouvez votre notice HST-D107 - SONY et reprennez votre appareil électronique en main. Sur cette page sont publiés tous les documents nécessaires à l'utilisation de votre appareil HST-D107 de la marque SONY.
MODE D'EMPLOI HST-D107 SONY
Compact Hi-Fi Stereo System
Operating Instructions
LBT-D107
HST-D107
Warning
Owner's Record
The model and serial numbers are located at the rear. Record these numbers in the space provided below. Refer to these numbers whenever you call upon your Sony dealer regarding this product.
Model No. ____ Serial No. ____
To prevent fire or shock hazard, do not expose the unit to rain or moisture.

CAUTION
RISK OF ELECTRIC SHOCK DO NOT OPEN

CAUTION: TO REDUCE THE RISK OF ELECTRIC SHOCK.
DO NOT REMOVE COVER (OR BACK).
NO USER-SERVICEABLE PARTS INSIDE.
REFER SERVICING TO QUALIFIED SERVICE PERSONNEL.
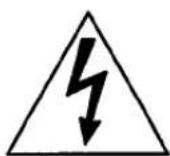
This symbol is intended to alert the user to the presence of uninsulated "dangerous voltage" within the product's enclosure that may be of sufficient magnitude to constitute a risk of electric shock to persons.
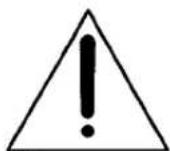
This symbol is intended to alert the user to the presence of important operating and maintenance (servicing) instructions in the literature accompanying the appliance.
Note to CATV system installer:
This reminder is provided to call the CATV system installer's attention to Article 820-40 of the NEC that provides guidelines for proper grounding and, in particular, specifies that the cable ground shall be connected to the grounding system of the building, as close to the point of cable entry as practical.
INFORMATION
This equipment generates and uses radio frequency energy and if not installed and used properly, that is, in strict accordance with the manufacturer's instructions, may cause interference to radio and television reception. It has been type tested and found to comply with the limits for a Class B computing device on accordance with the specifications in Subpart J of Part 15 of FCC Rules, which are designed to provide reasonable protection against such interference in a residential installation. However, there is no guarantee that interference will not occur in a particular installation. If this equipment does cause interference to radio or television reception, which can be determined by turning the equipment off and on, the user is encouraged to try to correct the interference by one or more of the following measures:
Relocate the receiving antenna
Relocate the equipment with respect to the receiver
Move the equipment away from the receiver
Plug the equipment into a different outlet so that
equipment and receiver are on different branch circuits.
If necessary, the user should consult the dealer or an experienced radio/television technician for additional suggestions. The user may find the following booklet prepared by the Federal Communications Commission helpful:
"How to Identify and Resolve Radio-TV Interference Problems". This booklet is available from the U.S.
Government Printing Office, Washington, DC 20402, Stock No. 004-000-00345-4.
Configuration
This manual covers the system in the chart below. The system number is shown on the carton box.
| Component\System number | LBT-D107 | HST-D107 |
| Stereo deck receiver | HST-D107 | HST-D107 |
| Turntable | PS-LX49P | |
| CD player | CDP-C322M | |
| Speakers | SS-D117 | SS-D117 |
For the instructions for the CDP-C322M, refer to the operating instructions supplied with it.
Table of Contents
Getting Started
Configuration 2
Precautions 3
Preparations 3
Connections 4
Using Your Stereo
Turning on the power 6
Basic sound adjustments 6
Playing records 8
Receiving broadcasts 9
Playing back tapes....11
Recording on tapes 12
Dubbing tapes....14
General
Maintenance 15
Location of controls 16
Specifications....17
Troubleshooting guide 18
Precautions
Before operating the system, read the following precautions carefully
- Operate the unit only on 120 V AC, 60 Hz.
- Unplug the system from the wall outlet if it is not to be used for an extended period of time. To disconnect the cord, pull it out by grasping the plug. Never pull the cord itself.
- Should any solid object or liquid fall into the unit, unplug the unit and have it checked by qualified personnel before any further operation.
- The nameplate indicating operation voltage, power consumption, etc. is located at the rear.
- AC power cord must be changed at a qualified service shop.
If you have any questions or problems concerning your system, please consult your nearest Sony dealer.
For detailed precautions, see the leaflet "IMPORTANT SAFEGUARDS".
Preparations
You can control the system (except the cassette deck) with the supplied remote commander.
Remote Commander
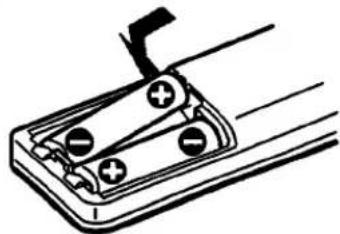
Insert two size AA (R6) batteries with the correct polarity.
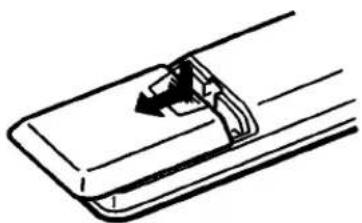
1 Slide the cover in the direction of the arrow to remove it.
natural_image
Pure technical line drawing of a mechanical component without any text, numbers, or symbols2 Insert two size AA (R6) batteries correctly so that the + and - polarities match the polarity diagrams inside the battery compartment.
natural_image
Simple line drawing of a mechanical clamp or bracket with no text or symbolsBattery life
About half a year of normal operation can be expected when using Sony SUM-3 (NS) batteries.
When the batteries are exhausted, the commander can no longer operate the unit. Replace both batteries with new ones.
To avoid battery leakage
When the commander is not to be used for a long period of time, remove the batteries to avoid damage caused by battery leakage and corrosion.
To avoid malfunction of the remote commander, avoid keeping the commander in extremely hot or humid locations.
Connections
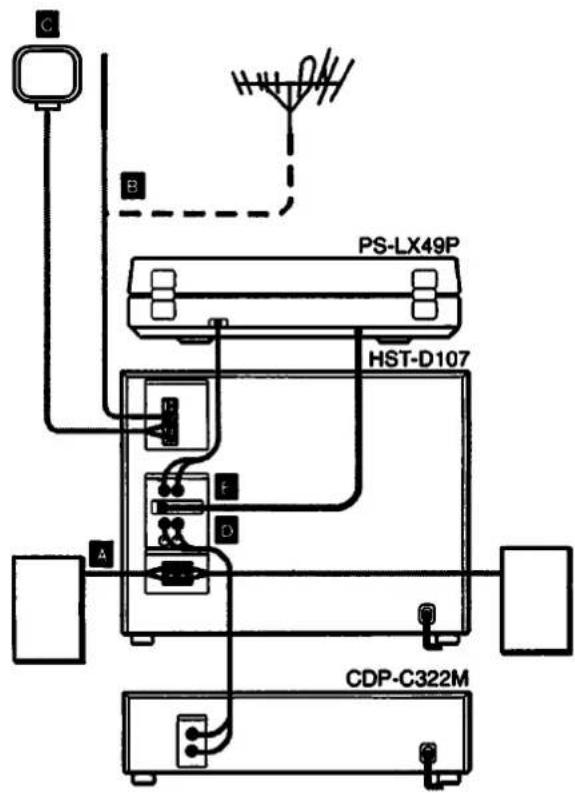
Turn all the power off before making any connections The diagram below shows the system connection. The letters in the diagram correspond to those in the text.
How to attach a wire to the terminal
1 Press down on the button.
2 Insert the wire.
3 Push up the button.

Notes on Connection
- Connect the AC power cord last.
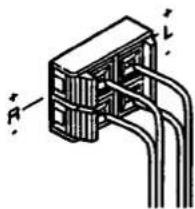
- Cord plugs and jacks are color coded. Red plugs and jacks are for the right channel (R) and white ones are for the left channel (L).
Speaker Cord Connection

1 Strip 15 mm of the speaker cord coating from the end of the cord.
2 Connect the right speaker to the R (right) speaker terminal, and the left speaker to the L (left) speaker terminal.
natural_image
Pure electrical circuit lines without any symbolsFM Antenna Connection

Connect the supplied FM wire antenna to the FM 75 Ω terminal and extend horizontally.

For better reception
Connect to an outdoor antenna.
AM Antenna Connection

Connect the supplied loop antenna to the AM and m terminals.
You can attach the loop antenna on the wall using the commercially available screws.

For better reception
Connect an insulated wire of 6 to 15 meters (20- to 50- feet) to the AM terminal.
Turntable

Connect the turntable (PS-LX49P) to the HST-D107 stereo deck receiver. To listen to analog discs, press the PHONO button.

CD Player

Connect the CD player (supplied only HST-D107) to the HST-D107 stereo deck receiver with a connecting cord. To listen to compact discs, press the CD button.

Adding Another Component to the System
You can connect a VCR to the VIDEO jacks respectively. To select the VCR, press the VIDEO button.
AC Power Cord
Connect the AC power cords of the HST-D107 stereo deck receiver and CD player to a wall outlet.
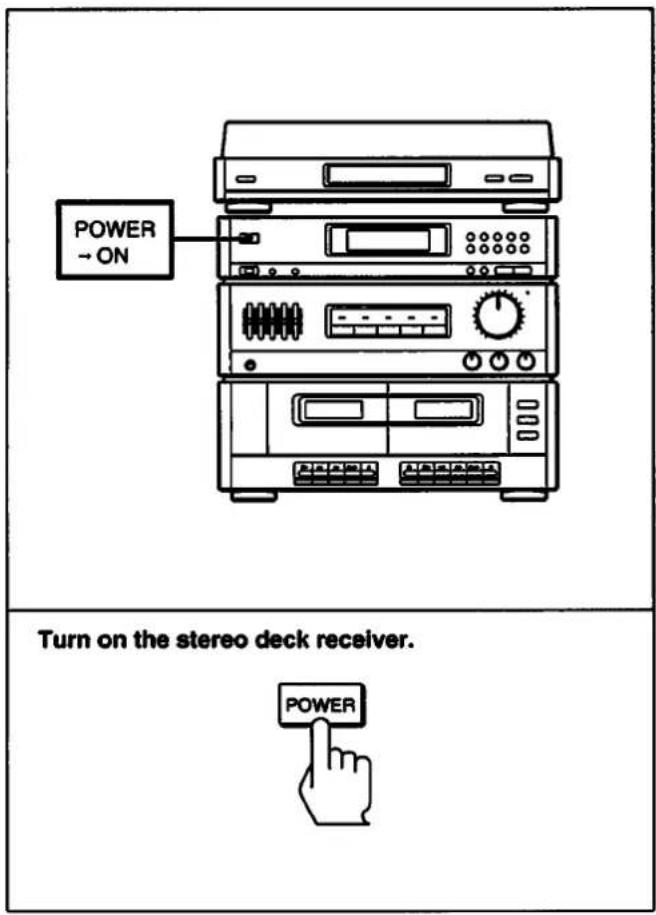
Turning on the Power
Turn on the power after completing all connections.
Note on the connected CD player
Turn off the CD player when you listen to the tuner; otherwise, you may hear noise while receiving radio broadcast.
Basic Sound Adjustments
The following operations apply only to reproduced sound. The letters in the illustration below correspond to those in the text.

Adjusting the Volume

To increase the volume, turn the VOLUME control clockwise. To decrease it, turn the control counterclockwise.
- Turn down the volume before switching on the unit. This prevents damage to speakers.

Adjusting the Sound Quality

Adjust the following 5 BAND GRAPHIC EQUALIZER controls.
100 Hz: Boosts or cuts heavy bass.
330 Hz: Adjusts the power, spaciousness and warmth of the sound.
1 kHz: Accentuates or dims vocals.
3.3 kHz: Boosts to a brighter sound or reduces stridency.
10 kHz: Adjusts tape hiss noise.

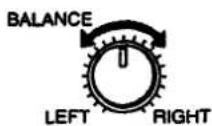
Adjusting the Balance

When the position of the speakers is not symmetrical, the relative strength of the right and left speaker outputs will be unbalanced.
Adjust the balance with the BALANCE control.
Reinforcing the Bass

Adjust the DBFB control.

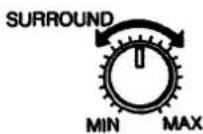
Enjoying the Surround Effect

Adjust the SURROUND control.
- The surround effect does not function when the sound source is monaural.
For private listening
Connect a pair of headphones to the HEADPHONES jack. No sound is heard from the speakers
Playing Records
You can listen to analog discs with the turntable PS-LX49P which turns on/off when you turn on/off the HST-D107.
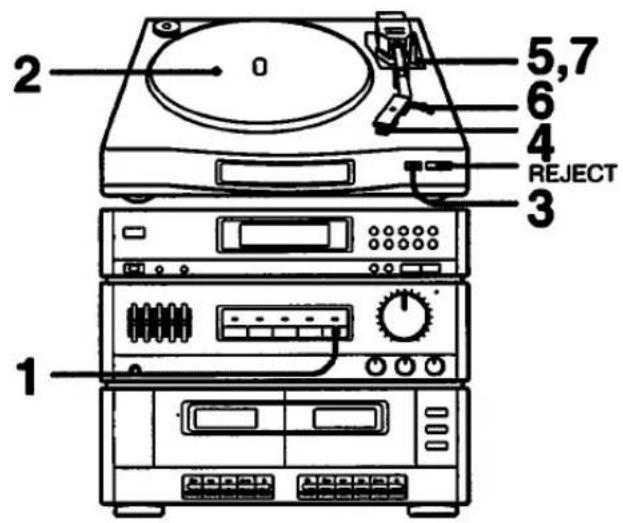
1 Press the PHONO button.
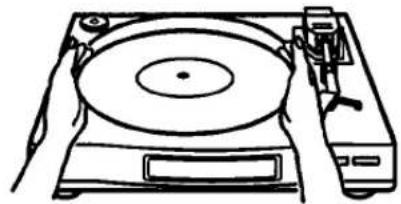
2 Place a record on the turntable.
natural_image
Line drawing of a hand operating a CD or DVD disc with a rotary switch (no text or symbols)3 Select the speed with the SPEED button.

4 Remove the stylus cover from the cartridge, and release the stopper from the tone arm.
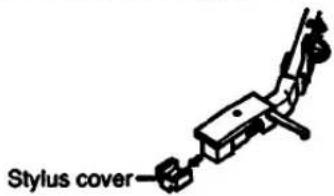
5 Set the cuing lever to ▼.

6 Move the tone arm by hand to the desired point on the record.
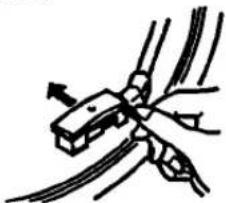
natural_image
Diagram of a mechanical or electrical component with multiple wires and a central component, no visible text or symbols7 Set the cuing lever to ▼.
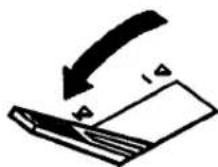
When the record is played to the end, the tone arm returns to the armrest and the turntable stops.
To stop during play, press the REJECT button.
To play a different part of the record
Lift the tone arm by setting the cuing lever to ▼, move the tone arm by hand to the desired point, then set the cuing lever to ▼.
To play a 17-cm record
Use the supplied adaptor.
If the tone arm moves outward when you move it close to the centre
Do not resist this movement, as it may damage the automatic return mechanism.
Receiving Broadcasts
You can listen to FM and AM stations.

1 Press the TUNER button.

2 Press the BAND SELECT button repeatedly until the desired band appears.
BAND SELECT

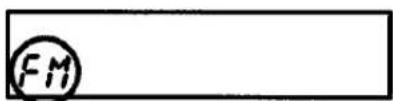
3 Keep the DUAL MODE TUNING + or - button pressed for over 2 seconds so that "AUTO" blinks.
The unit starts scanning frequencies and stops when it tunes into a station. Repeat this step until the desired station is tuned in.
DUAL MODE TUNING


For receiving FM stations in stereo
Press the ST/MUTE button as many times as "MUTING" appears.
If you cannot tune in a desired station
A station with a weak signal may be skipped. In this case, tune in the station manually.
- Press the DUAL MODE TUNING + or - button again to stop scanning.
- Press the DUAL MODE TUNING + or - button repeatedly and tune in the exact frequency.
When an FM stereo program is noisy or hard to receive
Press the ST/MUTE button so that "MUTING" disappears from the display. There will be no stereo effect, but the reception will be improved. Press it again to restore the stereo effect.
The "TUNED" indication appears
When a station of sufficient signal strength is tuned in.
The "STEREO" indication appears
When an FM stereo program of sufficient signal strength is tuned in.
Receiving Broadcasts
You can store station frequencies in the unit's memory for quick recall later on. Up to 30 frequencies in any band can be stored by specifying a code for each frequency. The code is a combination of a letter - A, B or C - and a number - 0 to 9: A-1, A-2, ..., A-9, A-0, B-1, ..., C-1, ..., C-0.
Storing Stations

4 Press a numeric button to select a number (0 - 9). A code is specified and the setting of the ST/MUTE button is also stored.
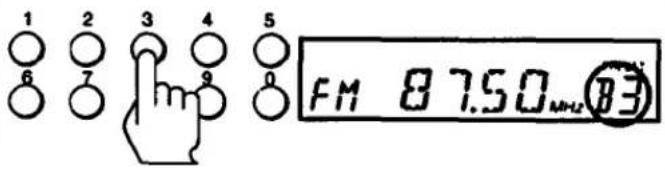
If you cannot store a station successfully
Be sure to press the buttons for the code while the
"MEMORY" indication is displayed. If the indication has gone off, press the MEMORY button again.
To erase a stored station
Storing a new station on a used code erases the previously stored one.
Tuning into a Stored Station Directly
Press the SHIFT button and the numeric button to specify the code for the desired station.
Playing Back Tapes
You can use tapes of type I and II for playback.
Playing Deck A or B

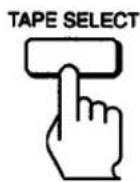
4 Press the TAPE SELECT button to select tape type.
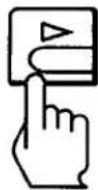
5 Press the ▶ button. Playback starts.
When the tape is played to the end, the deck stops.
To stop during playback, press the ■ ▲ button.
To fast forward or rewind, press the ▶▶ or ◀◀ button.
To pause, press the II PAUSE button. To resume, press the II PAUSE button again.
To play a tape recorded with the Dolby NR* effect.
Set the DOLBY NR switch to ON. The setting is operated on both decks. This unit is provided with DOLBY B NR system.
When both decks are set to play mode
Only the sound from deck B will be heard.
• Dolby noise reduction manufactured under license from Dolby Laboratories Licensing Corporation.
"DOLBY" and the double-D symbol are trademarks of Dobly Laboratories Licensing Corporation.
Playing from Deck to Deck—Relay Play
1 Insert tapes into deck A and B.
2 Press the ▶ button on deck B.
Deck B starts playing.
3 Press the II PAUSE button and the ▶ button on deck A.
When the tape in deck B ends, the tape in deck A starts playing.
Recording on Tapes
You can use tape type I and II for recording.
Recording a Tape
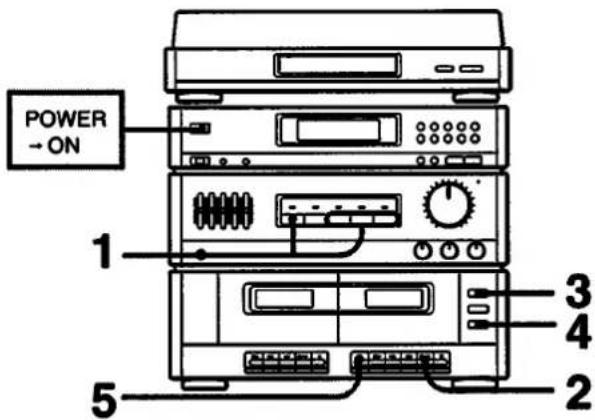
1 Select a source (except TAPE) with the function selectors. You can also select the audio sources of equipment connected to the VIDEO jacks.


2 Insert a blank tape into deck B.

natural_image
Simple line drawing of an oven with a rack and fan (no text or symbols)3 Press the TAPE SELECT button to select tape type.

4 Set the DOLBY NR switch to ON or OFF. DOLBY NR
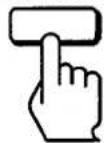
The Dolby NR (noise reduction) system reduces tape hiss noise in low-level, high-frequency signals by boosting the signals during recording and then lowering them during playback.
5 Press the ● REC button and start the selected source. Recording starts.
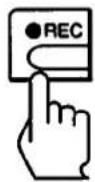
When the tape is recorded to the end, the deck stops. To stop during recording, press the ■ ▲ button.
To start recording more precisely
1 After steps 1 to 4 above, press the III PAUSE button.
2 Press the ● REC button.
3 Press the II PAUSE button again to start recording.
Protecting Your Recording
Break off the tab of the side to be protected. For side A, break off the right-hand tab facing the side A up. This prevents further recording on that side.
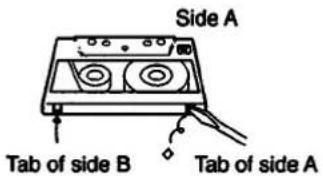
To record on a protected tape, cover the opening with plastic tape.
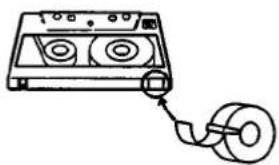
natural_image
Simple line drawing of a cassette tape with a coiled cable (no text or symbols)When using type II (CrO₂) tape, take care not to cover the slots used for tape type detection.

Dubbing Tapes
You can dub a tape in deck A onto a tape in deck B.


To stop dubbing, press the ■ ▲ button on deck A, then press the ■ ▲ button on deck B.
You need not designate the Dolby NR system
The tape in deck B is recorded with the same recording level and Dolby NR system as the original tape in deck A.
You can listen to other program sources during dubbing Select the program source with the function selectors.
Maintenance
Keeping your system in good condition will allow you to enjoy good sound.
Cleaning the Cabinet
Use a soft cloth lightly moistened with a mild detergent solution.
Demagnetizing the Heads
Remove magnetism built up on the heads after every 20 to 30 hours of use. Turn off the power unit before demagnetizing the heads. Use any commercially available demagnetizer.
Cleaning Heads and Tape Path
Clean after every 10 hours of use and before recording.
1 Press the ▪ ▲ button to open the cassette holder.
2 Moisten a cotton swab slightly with cleaning fluid or alcohol.
3 Wipe heads, pinch rollers and capstans.
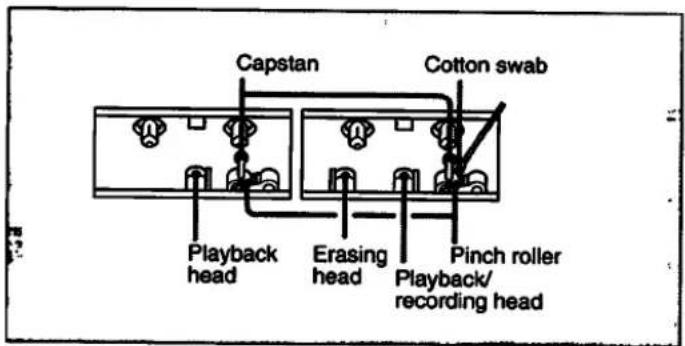
Do not insert a cassette until cleaned areas are completely drv.
Location of Controls
Refer to the pages indicated in parentheses for details.

Stereo Deck Receiver HST-D107

Tuner section
1 POWER switch (page 6)
2 Remote sensor
③ MEMORY button (page 10)
4 ST/MUTE button (page 9)
5 Display window
6 SHIFT button (page 10)
7 BAND SELECT button (page 9)
8 Numeric buttons (page 10)
9 DUAL MODE TUNING +/- buttons (pages 9,10)
Amplifier section
10 5 BAND GRAPHIC EQUALIZER controls (page 7)
11 HEADPHONES jack (page 7)
12 FUNCTION INDICATOR
13 Function selectors
14 VOLUME control (page 6)
15 BALANCE control (page 7)
16 DBFB (dynamic bass feedback) control (page 7)
17 SURROUND control (page 7)
Cassette deck section
18 Cassette holders
19 Tape operating buttons
▶ (play) button, ■ △ (stop / eject) button, ▶▶ (rightward fast winding) button, ◀◀ (leftward fast winding) button. ■ PAUSE button, ●REC button (only for deck B)
20 TAPE SELECT button (pages 11,12,14)
21 DUBBING SPEED (HIGH / NORMAL) button (page14)
22 DOLBY NR (noise reduction) switch (pages 11, 12)
Turntable PS-LX49P (only for LBT-D107) B
1 45-rpm adaptor
2 Center spindle
③ Cueing lever
4 Tone arm
5 Armrest
6 Cartridge
⑦ REJECT button
8 SPEED button
Remote Commander RM-S171

① Function selectors
② CD operating buttons
The DISC skip button functions only on a CD player with multiple disc trays.
3 SHIFT button (page 10)
④ Tuner operating buttons and numeric buttons for CD player
⑤ VOL (volume) +/- buttons (page 6)
Specifications
AUDIO POWER SPECIFICATIONS
POWER OUTPUT AND TOTAL HARMONIC DISTORTION:
with 6 ohm loads both channel driven, from 40 - 20,000 Hz; rated 15 watts per channel minimum RMS power, with no more than 0.5% total harmonic distortion from 250 milliwatts to rated output.
Tuner
| System | FM stereo |
| FM/AM superheterodyne tuner | |
| FM tuner section | |
| Tuning range | 87.5 to 108 MHz |
| Antenna | 300 ohms balanced |
| 75 ohms unbalanced | |
| Intermediate frequency | 10.7 MHz |
| AM tuner section | |
| Tuning range | 530 to 1,710 kHz |
| Antenna | AM loop antenna |
| External antenna terminal | |
| Intermediate frequency | 450 kHz |
Amplifier
| Input | Jack type | Sensitivity | Impedance |
| CD | Phono | 300 mV | 47 kilohms |
| VIDEO | Phono | 300 mV | 47 kilohms |
| PHONO | Phono | 3 mV | 47 kilohms |
| Output | Jack type | Impedance |
| HEADPHONES | Stereo phone | Accepts headphones of 8 ohms or more |
Frequency response CD: 15 Hz to 50 kHz _-3^+0 dB
Cassette deck
| Recording system | 4-track 2-channel stereo |
| Frequency response | DOLBY NR OFFWith Type II cassette (Sony UX-S)40 Hz to 14 kHz ( ± 3 dB)With Type I cassette (Sony HF-S)40 Hz to 13 kHz ( ± 3 dB) |
| Wow and flutter | 0.1% (WRMS) |
General
| Power requirements | 120 V AC, 60 Hz |
| Power consumption | 60 W |
| Weight | Approx. 6.7 kg (14 lb 12 oz) |
| Dimensions | Approx. 355 x 290 x 325 mm(14 x 11 12 x 12 ^7 / _8 inches)(w/h/d, including projections) |
Turntable (only for LBT-D107)
| Platter | 30 cm |
| Tone arm type | Dynamically balanced |
| Cartridge type | Moving magnet type |
| Stylus | CN-234 (0.6 mil diamond) |
| Weight | Approx. 2.3 kg (5 lb 1 oz) |
| Dimensions | Approx. 355 X 95 X 345 mm(14 x 3^3/_4 x 13^5/_8 inches)(w/h/d, including projections) |
Speaker systems
| Speaker system | 3-way |
| Weight | Approx. 4.3 kg (9 lb 7 oz ), per speaker |
| Dimensions | Approx. 260 x 441 x 175 mm (10^1/_4 × 17^3/_8 × 7 inches)(w/h/d) |
Accessaries supplied
| 45-rpm adaptor | (1) (only for LBT-D107) |
| Remote commander RM-S171 | (1) |
| Batteries Sony SUM-3 (NS) | (2) |
| FM wire antenna | (1) |
| AM loop antenna | (1) |
Design and specifications are subject to change without notice.
Troubleshooting Guide
Before going through the check list below, first refer back to the connections and operating procedures.
Should any problem persist after you have made these checks, consult your nearest
General
| Symptom | Cause | Remedy |
| No power | AC power cord is not connected securely. | Connect the AC power cord securely. |
| No sound | The VOLUME control is not turned up. | Turn up the volume. |
| Reversed left and right sound | Wrong connection | Connect the speakers correctly. |
| Severe hum and noise | Wrong connection | Connect the speakers correctly. |
| Loose connections | Make connections securely. | |
| The unit is located near TV/VCR. | Move TV/VCR away from the unit. |
Tuner
| Symptom | Cause | Remedy |
| The"TUNED"or"STEREO"indication blinks. | Antenna is not aimed in the right direction. | Adjust the location and direction of the antenna. |
| Received signals are weak. | Connect to an external antenna if the indication still blinks even after adjusting the antenna. | |
| Severe hum or noise | Antenna is not aimed in the right direction. | Adjust the location and direction of the antenna. |
| Received signals are weak. | Connect to an external antenna if hum or noise still interferes with reception. |
Cassette Deck
| Symptom | Cause | Remedy |
| You can not record on a tape. | The tab has been removed from the cassette. | Cover it with a piece of adhesive tape. |
| You cannot dub tapes. | The tab of the cassette in deck B has been removed. | Cover it with a piece of adhesive tape. |
| Unbalanced tone in higher frequencies | The DOLBY NR switch is not in the correct position. | Set the DOLBY NR switch to ON or OFF as was set for recording. |
| Unclear recording or playback | Dirty head | Clean and demagnetize the recording/ playback heads. |
| Excessive wow or flutter, or sound dropout | Dirty capstans and pinch rollers | Clean the capstan and pinch roller. |
| Incomplete erasure. | Magnetized erasing head | Demagnetize the erasing head. |
Remote Commander
| Symptom | Cause | Remedy |
| The remote commander does not function. | The batteries are run down. | Replace both batteries. |
| The remote commander is not pointed at the remote sensor. | Point the remote commander at the sensor. | |
| There is an obstacle between the remote commander and the unit. | Remove the obstacle. | |
| The remote commander is too far from the unit. | Move closer. |
Turntable (only for LBT-D107)
| Symptom | Cause | Remedy |
| Tone arm skips, skates or does not advance | Not properly positioned | Place the turntable on a level surface |
| Poor sound quality | Dirty stylus | Clean or replace the stylus |
| Rumble or low frequency howl | Turntable is near speakers | Move speakers away from the turntable |
| The tone arm does not return to its armrest | — | Press the REJECT button |
- Compact Hi-Fi Stereo System
- Warning
- Owner's Record
- To prevent fire or shock hazard, do not expose the unit to rain or moisture.
- CAUTION
- Note to CATV system installer:
- INFORMATION
- Configuration
- Table of Contents
- Getting Started
- Using Your Stereo
- General
- Precautions
- Preparations
- Remote Commander
- Battery life
- To avoid battery leakage
- Connections
- How to attach a wire to the terminal
- Notes on Connection
- Speaker Cord Connection
- FM Antenna Connection
- AM Antenna Connection
- For better reception
- Turntable
- CD Player
- Adding Another Component to the System
- AC Power Cord
- Turning on the Power
- Basic Sound Adjustments
- Adjusting the Volume
- Adjusting the Sound Quality
- Adjusting the Balance
- Reinforcing the Bass
- Enjoying the Surround Effect
- Playing Records
- Receiving Broadcasts
- Keep the DUAL MODE TUNING + or - button pressed for over 2 seconds so that "AUTO" blinks.
- For receiving FM stations in stereo
- If you cannot tune in a desired station
- When an FM stereo program is noisy or hard to receive
- The "TUNED" indication appears
- The "STEREO" indication appears
- Tuning into a Stored Station Directly
- Playing Back Tapes
- Playing from Deck to Deck—Relay Play
- Recording on Tapes
- Recording a Tape
- Protecting Your Recording
- Dubbing Tapes
- Maintenance
- Cleaning the Cabinet
- Demagnetizing the Heads
- Cleaning Heads and Tape Path
- Location of Controls
- Stereo Deck Receiver HST-D107
- Tuner section
- Amplifier section
- Cassette deck section
- Turntable PS-LX49P (only for LBT-D107) B
- Remote Commander RM-S171
- Specifications
- AUDIO POWER SPECIFICATIONS
- POWER OUTPUT AND TOTAL HARMONIC DISTORTION:
- Cassette deck
- Troubleshooting Guide
Marque : SONY
Modèle : HST-D107
Catégorie : Système Hi-Fi