
CFD-440 - Système Hi-Fi SONY - Notice d'utilisation et mode d'emploi gratuit
Retrouvez gratuitement la notice de l'appareil CFD-440 SONY au format PDF.


| Type de produit | Système Hi-Fi portable avec lecteur CD, cassette et radio |
| Marque | Sony |
| Modèle | CFD-440 |
| Dimensions (L x H x P) | Environ 400 x 250 x 150 mm |
| Poids | Environ 3,0 kg |
| Alimentation | Secteur 230 V ~ 50 Hz ou 8 piles LR14 (taille C) |
| Fonctions principales | Lecteur CD, platine cassette stéréo, tuner FM/AM, haut-parleurs stéréo intégrés, égaliseur, prise écouteurs |
| Puissance de sortie | 2 x 2 W (RMS) |
| Entrées / Sorties | Prise écouteurs (mini-jack 3,5 mm), entrée auxiliaire (mini-jack 3,5 mm) |
| Entretien et nettoyage | Nettoyer avec un chiffon doux et sec. Ne pas utiliser de solvants ni de liquides abrasifs. Éviter l'humidité. |
| Sécurité | Ne pas exposer à l'eau ou à l'humidité. Ne pas ouvrir le boîtier. Utiliser uniquement l'adaptateur secteur fourni. |
| Pièces détachées et réparabilité | Pièces détachées disponibles auprès des revendeurs agréés Sony. Consulter le site support Sony pour les manuels et pièces. |
| Informations générales | Appareil conçu pour une utilisation domestique. Fonctionne sur secteur ou piles. Garantie constructeur 2 ans. |
FOIRE AUX QUESTIONS - CFD-440 SONY
Questions des utilisateurs sur CFD-440 SONY
0 question sur cet appareil. Repondez a celles que vous connaissez ou posez la votre.
Poser une nouvelle question sur cet appareil
Téléchargez la notice de votre Système Hi-Fi au format PDF gratuitement ! Retrouvez votre notice CFD-440 - SONY et reprennez votre appareil électronique en main. Sur cette page sont publiés tous les documents nécessaires à l'utilisation de votre appareil CFD-440 de la marque SONY.
MODE D'EMPLOI CFD-440 SONY
CD Radio Cassette-Corder
CFD-440
Operating Instructions
Before operating the unit, please read this manual thoroughly and retain it for future reference.
Owner's Record
The model number and serial number are located at the rear. Record the serial number in the space provided below. Refer to these numbers whenever you call upon your Sony dealer regarding this product.
Model No. CFD-440 Serial No. ____


natural_image
Line drawing of a Sony portable radio with two front speakers and a central digital display (no text or symbols)MEGA BASS
FILE COPY
PROPERTY OF THE NATIONAL TECHNICAL DEPT.
WARNING
To prevent fire or shock hazard, do not expose the unit to rain or moisture.

CAUTION
RISK OF ELECTRIC SHOCK DO NOT OPEN

CAUTION: TO REDUCE THE RISK OF ELECTRIC SHOCK,
DO NOT REMOVE COVER (OR BACK).
NO USER-SERVICEABLE PARTS INSIDE.
REFER SERVICING TO QUALIFIED SERVICE PERSONNEL

This symbol is intended to alert the user to the presence of uninsulated "dangerous voltage" within the product's enclosure that may be of sufficient magnitude to constitute a risk of electric shock to persons.

This symbol is intended to alert the user to the presence of important operating and maintenance (servicing) instructions in the literature accompanying the appliance.
CAUTION
The use of optical instruments with this product will increase eye hazard.
IMFORMATION
This equipment generates and uses radio frequency energy and if not installed and used properly, that is, in strict accordance with the manufacturer's instructions, may cause interference to radio and television reception. It has been type tested and found to comply with the limits for a Class B computing device in accordance with the specifications in Subpart J or Part 15 of FCC Rules, which are designed to provide reasonable protection against such interference in a residential installation. However, there is no guarantee that interference will not occur in a particular installation. If this equipment does cause interference to radio or television reception, which can be determined by turning the equipment off and on, the user is encouraged to try to correct the interference by one or more of the following measures:
Reorient the receiving antenna
Relocate the equipment with respect to the receiver
Move the equipment away from the receiver
Plug the equipment into a different outlet so that equipment and receiver are on different branch circuits.
If necessary, the user should consult the dealer or an experienced radio/television technician for additional suggestions. The user may find the following booklet prepared by the Federal Communications
Commission helpful:
"How to Identify and Resolve Radio-TV Interference Problems" This booklet is available from the U.S. Government Printing Office, Washington, DC 20402, Stock No. 004-000-00345-4.
For the customers in Canada
This aparatus complies with the Class B limits for radio noise emissions set out in Radio Interference Regulations.
Table of Contents
Features 3
Precautions 3
Power sources 4
Attaching and connecting speakers 4
Playing a disc 6
Adjusting the sound 10
Playing back a tape 10
Listening to the radio 12
Recording 12
Microphone mixing 14
Specifications 14
Troubleshooting guide 15
Features
8-times over-sampling and digital filter
Signal process frequency of 8 times the reference frequency means CD playback with less distortion.
Dual D/A conversion system
High-fidelity CD playback with less phase shift is accomplished by the dual converter which works for the left and right channels independently.
High quality sound
• The SonyMEGA BASS system produces a powerful bass.
- A 3-band rotary equalizer to adjust the tone quality to your preference.
A high performance CD player with many functions
- Three-inch disc can be played without an adaptor.
- While recording a disc, the CD synchronized starting system makes it possible to start CD palying automatically when the deck is in recording mode.
- Repeat function for playing either the entire disc or a single selection and also for program play or shuffle play.
- Program play for playing selections in the order desired (up to 34 selections)
- Shuffle play for playing selections repeatedly in random order
• The beginning of the selections can be scanned for 10 seconds.
Notes on power sources
- For AC operation (240 V AC for Australian model, 120 V AC for other countries), use the supplied AC power cord; do not use any other type. For battery operation, use six size D (R20) batteries.
- When the internal batteries will not be used, remove them to avoid damage caused by battery leakage and corrosion.
- Unplug the unit from the wall outlet when it is not to be used for an extended period of time.
Notes on handling the unit
- As the laser beam used in the CD player section is harmful to the eyes, do not attempt to disassemble the casing. Refer servicing to qualified personnel only.
- If moisture condenses on the lenses inside the CD player section, the player will not operate properly. In this case, remove the disc and leave the unit turned on for about an hour.
- Avoid exposure to temperature extremes, direct sunlight, dust, or mechanical shock.
- Should any solid object or liquid fall into the unit, unplug the unit, remove the batteries, and have the unit checked by qualified personnel before operating it any further.
- Be careful not to lift the handle while the telescopic antenna is in a raised position.
• After long storage, set the unit in playback mode and warm it up for a few minutes before inserting a cassette.
Note on cassette longer than 90 minutes
The use of those cassettes is not recommended except for long continuous recording or playback.
If you have any question or problem concerning your unit that is not covered in this manual, please consult your nearest Sony dealer.
Power Sources
The OPR/BATT indicator lights up during operation.
House Current

Attaching and Connecting Speakers
Attaching the Speakers

Batteries
The unit cannot be operated on the internal batteries when the AC power cord is connected to the unit.

For critical recording or disc playing
Operating the unit on AC power is recommended.
When to replace the batteries
If the batteries become weak while the unit is in operation, the OPR/BATT indicator will glow faintly. In this case, replace all the batteries with new ones.
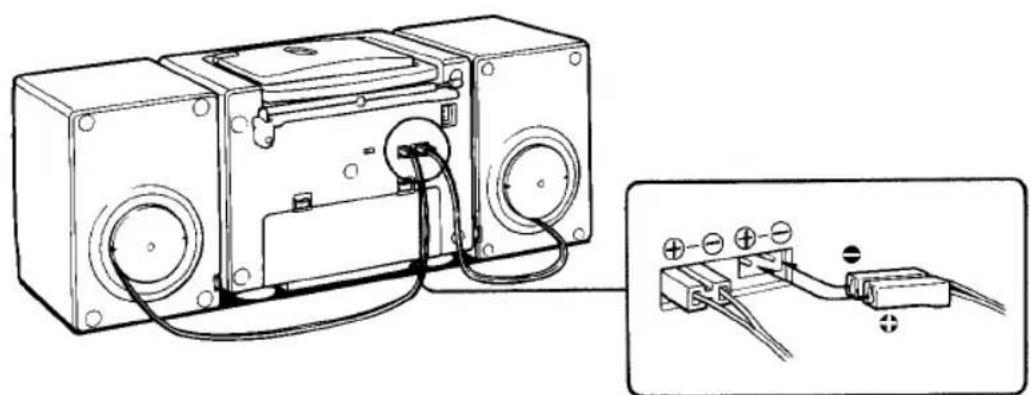
Connecting the Speakers
natural_image
Technical line drawing of an electronic device with wiring and a close-up inset showing its wiring connections (no text or symbols)Notes on connection
- Turn off the power before connecting or disconnecting the speaker cords.
- Connect the speaker cord of the right speaker to the R connectors and left speaker to the L connectors.
Playing a Disc
— An 8 cm (3 inch) CD can be played without an adaptor.
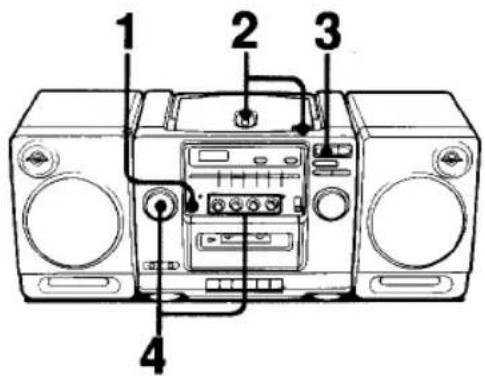
1 Set to CD.
2 Place a disc


To pause: Press II.
To resume play, press Ⅱ again.
To stop: Press ■.
To eject a disc: Press OPEN.
To turn off the unit: Set FUNCTION to TAPE (CD/RADIO OFF).
Do not press OPEN during playing
Otherwise, the disc will be damaged. Be sure to stop the disc first.
For private listening
Connect stereo headphones to the PHONES jack.
Notes on compact discs

To Display Remaining Time
The selection being played Press REMAIN/ENTER once.

The disc being played Press REMAIN/ENTER twice.

For normal display, press REMAIN/ENTER again.
Notes
- The remaining time of the selection from the 21st selection appears as “----”. Elapsed playing time is displayed during playing.
- During repeat, shuffle or program play, remaining time of the disc is not displayed even if REMAIN/ENTER is pressed.

The number of selections in the disc and the total playing time will appear in the display window.
3
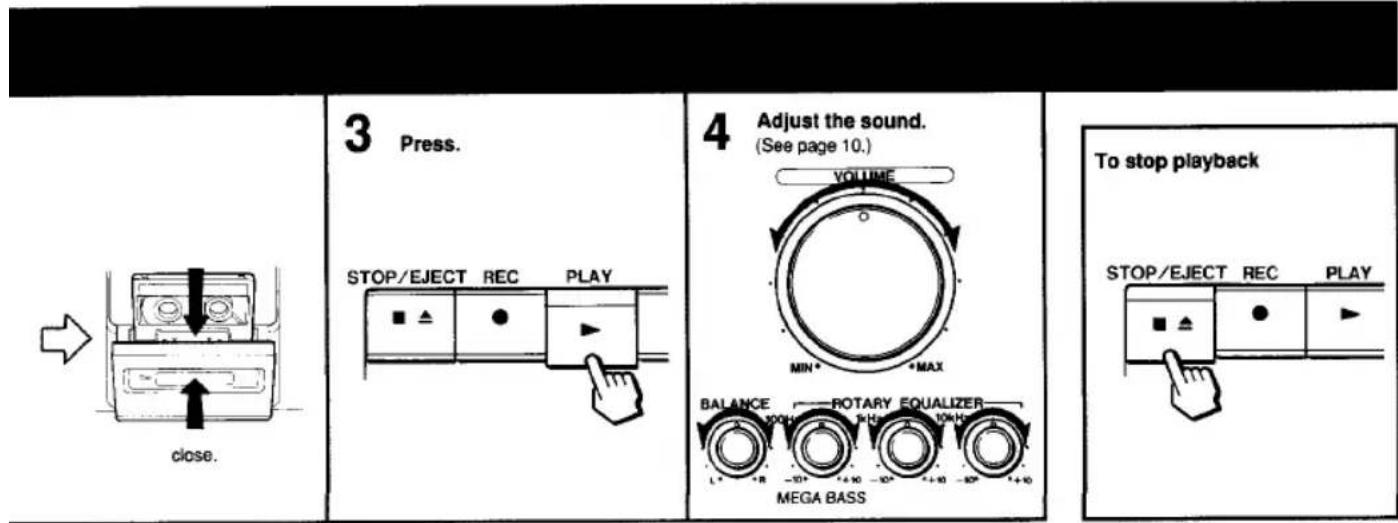
Press.

4
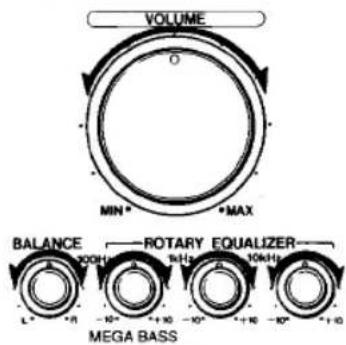
Adjust the sound.
(See page 10.)

To stop play

Information Display
During playing

While CD player is set in pause

Between selections
Remaining time for the next selection is displayed.

Locating a Particular Portion
Locating a particular selection (AMS\*)
To locate the beginning of the current selection
To locate the next selection


Press once.
Press once.
Locating a particular point in a selection (SEARCH)
To go back at high speed
To go ahead at high speed


Keep pressed.
Keep pressed.
* AMS is the abbreviation of Automatic Music Sensor
Notes on the AMS function
- The player pauses at the beginning of the located selection when you press or in the pause mode.
- If you press repeatedly, the player locates the previous selections.
- If you press ▶▶I repeatedly, the player locates the next selections and stops at the last selection.
Selecting Various Playing Modes
Each time PLAY MODE is pressed, play mode changes as follows. To stop the disc, press ■.
When disc is not being played
| Play mode | Button to be pressed | Front display window | |
| Scanning all the selections— INTRO scan play* |  Press PLAY MODE once when disc is not being played.PLAY MODE Press PLAY MODE once when disc is not being played.PLAY MODE |  | |
[XKST]Press ▶. Scanning starts from the first selection. |  * Beginnings of selections are played for 10 seconds successively. * Beginnings of selections are played for 10 seconds successively. | ||
While listening to the disc
| Repeating one selection— REPEAT 1 | Press PLAY MODE once while listening to the desired selection.PLAY MODEPressorfor another selection. | 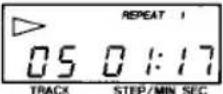 |
| Repeating all the selections— REPEAT ALL | Press PLAY MODE once more.When play reaches the end of the disc, it restarts from the first selection.PLAY MODE |  |
| Playing repeatedly in a random order— REPEAT SHUFFLE | Press PLAY MODE once more.PLAY MODE |  |
| Playing in the desired order repeatedly — REPEAT PGM MEM(program memory) | 1Press PLAY MODE once more.PLAY MODE |  |
| 2Choose the desired selection withor▶.AMS/SEARCH |  5t 5t | |
| 3Press REMAIN/ENTER.REMAIN/ENTERThe selection is stored. | 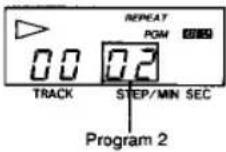 | |
| 4Repeat steps 2 and 3.(Up to 34 selections). | ||
| 5Press ▶.PLAYMEMdisappears and play starts. |  | |
| Playing in the desired order once — PGM MEM(program memory) | 1Press PLAY MODE once more.PLAY MODE | 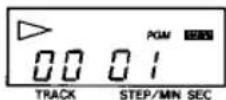 |
| 2Repeat steps 2 to 5 above. |
To return to normal play press PLAY MODE once more.
During REPEAT SHUFFLE play
To locate the beginning of the current selection
Press
You cannot locate a previous selection even if you keep pressing

To locate the next selection
Press▶▶
When you open the disc holder or you press ■.
All programmed selections are cleared.
If another selection is stored after 34 selections have been stored
The first selection will be cleared and the new one will be stored in its place. The program will be cleared when you press ■.
Adjusting the Sound
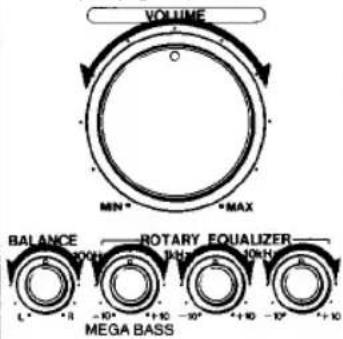
To Equalize the Reproduced Sound
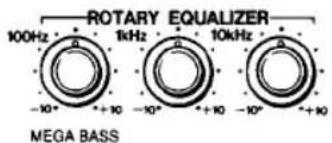
Frequency coverage of each equalizer control
MEGA BASS 100 Hz: Boost or cut heavy bass.
1 kHz: Provide more presence for vocals.
10 kHz: Adjust the brightness of the sound or reduce tape hiss.
Playing Back a Tape

1 Set to TAPE (CD/RADIO OFF).

2 Insert a cassette.

To pause: Press II.
To release pause, press Ⅱ again.
To rewind the tape: Press
To advance the tape rapidly (fast forward): Press ▶▶.
To Adjust the Balance of the Left and Right Channel Output Levels
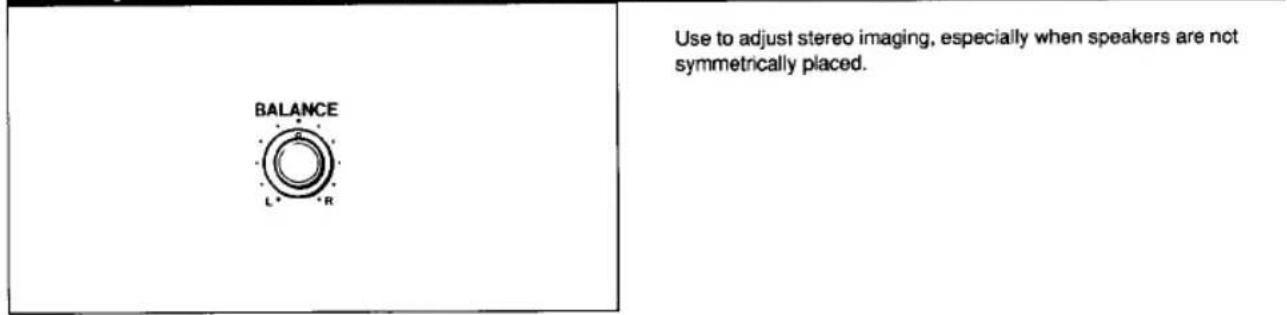
Listening to the Radio

When an FM stereo program is tuned in FM ST indicator lights up.
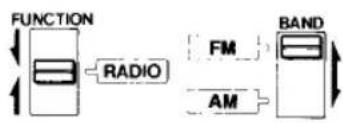
1 Set to RADIO.
2 Select the desired band.
If the received FM stereo is too weak
The reception becomes monaural, and the FM ST indicator will go off.
Recording — Use only a TYPE I (normal) cassette for recording.

1 Insert a blank cassette.

natural_image
Diagram of a device front panel with directional arrows indicating movement or force (no text or symbols)2 From a disc Set to CD.

2 From the radio Select the desired band.
flowchart
graph LR
    A["FUNCTION"] --> B["RADIO"]
    B --> C["FM"]
    C --> D["BAND"]
    D --> E["AM"]
On recording level
Recording level is automatically set. Volume and rotary equalizer adjustments will not affect recording level.
To reduce noise during AM recording
If a whistling noise is heard, which was inaudible before the ● REC button is pressed, set the ISS switch on the rear panel to 1, 2 or 3, depending on which one best reduces the noise.
To record in PGM (program) mode
1 Set FUNCTION to CD.
2 Select PGM play. (See "Selecting Various Playing Modes" on page 8.)
3 Press the ● REC button. Disc playing and recording will automatically start after approx. 8 seconds.
3 Tune in.

4 Adjust the sound.
(See page 10.)
To turn off the radio

For improved reception

AM

natural_image
Illustration of a double electronic device with two speakers and directional arrows indicating rotation (no text or symbols)3
Place a disc.

4
Press.

▶ is depressed automatically.
3

When you record a disc, press ● REC after the number of the selections in the disc and the total playing time are displayed. Disc playing will automatically start from the first selection after approx. 8 seconds.
To stop recording
Press ■ of the CD player and ■ ▲ of the cassette deck.
Set FUNCTION to TAPE (CD/RADIO OFF)
To prevent accidental erasure
Break off the tab corresponding to the side which has been recorded on. Recording on that side will be protected.

Microphone Mixing
—Use a monaural microphone equipped with a miniplug (optional).

1 Connect a microphone.

Turn on the power if it has a switch.
2 Choose the desired sound source with the FUNCTION selector.
| Sound source | FUNCTION selector |
| CD sound | CD |
| Radio program | RADIO (Select the desired band.) |
| Tape sound | TAPE (CD/RADIO OFF) |
To record the mixed sound
Insert a cassette into the deck and press ● REC.
You can record the sound of the microphone mixed with a CD or radio program.
Note
If a howling (acoustic feedback) occurs, move the microphone away from the speakers or turn down the volume.
Specifications
AUDIO POWER SPECIFICATIONS
POWER OUTPUT AND TOTAL HARMONIC DISTORTION
With 3.2-ohm loads, both channels driven from 150–15,000 Hz: rated 2.3 W per channel minimum RMS power, with no more than 10% total harmonic distortion in AC operation.
OTHER SPECIFICATIONS
CD player section
| System | Compact disc digital audio system |
| Laser diode properties | Material: GaAlAsWavelength 780 nmEmission duration: ContinuousLaser output: less than 44.6 μW* This output is the value measured at a distance of about 200 mm from the objective lens surface on the optical pick-up block. |
| Frequency response | 20 — 20,000 Hz ± dB |
| Wow and flutter | Below measurable limit |
| Radio section | |
| Frequency range | FM: 87.6–108 MHzAM: Australian model530–1,605 kHzModels for other countries530–1,710 kHz |
| Antennas | FM: Telescopic antennaAM: Built-in ferrite bar antenna |
Tape recorder section and general
| Recording system | 4-track 2-channel stereo |
| Frequency response | 80 — 10,000 Hz(with TYPE I (NORMAL) cassette) |
Speaker Woofer: 10 cm dia., cone type
Tweeter: 2 cm
Power output Full-range speakers: 2.3 W + 2.3 W (at 3.2 ohms. 10% harmonic distortion)
Inputs Mixing microphone input jack (minijack) Sensitivity 2.5 mV For low impedance microphone
Outputs Headphones jack (stereo minijack) For 16 — 68 ohms impedance headphones
Power requirements Australian model 240 V AC, 50 Hz Models for other countries 120 V AC, 60 Hz DC 9 V, 6 size D (R20) batteries
Power consumption AC 18 W
Battery life
(hours)
| FM recording | Playback | CD playing | |
| Sony SUM-1 (NS) | approx. 11 | approx. 8 | approx. 5 |
| Sony Alkaline AM 1 (N) | approx. 17 | approx. 12 | approx. 7 |
Dimensions 588 × 230 × 207 mm (w/h/d)
(23% × 9% × 8% inches)
incl. projecting parts and controls
Weight Approx. 5.7 kg incl. batteries (Approx. 12 lb 9 oz)
Supplied accessories AC power cord (1)
Design and specifications subject to change without notice.
OPTIONAL ACCESSORIES
Headphone MDR-E484
Microphone F-VX300
Head demagnetizer HE-5C
CD cleaner XP-CD4
Head cleaning kit KK-4
CD lens cleaning kit KK-9
3
Play the sound source and speak or sing into the microphone.
4
Adjust the sound. (See page 10.)
Troubleshooting Guide
General
No sound from speakers
- Improper polarity of the batteries
- Weak batteries Replace all the batteries with new ones.
- Improper FUNCTION selector setting
• The headphones are plugged in.
CD Operation
The unit does not operate
• The disc is inserted with the labeled surface down.
• The disc compartment lid is not closed.
- Dusty or defective disc → Clean the disc with an optional cleaning cloth. Wipe the disc from the center out.
- Moisture condensation See "Precautions".
- Improper FUNCTION selector setting
- When the CD operation buttons cannot be activated, turn off the unit and turn it on again.
Skipping of sound in CD operation
• Dusty or defective disc → Clean the disc.
- Dirty lens → Clean the lens with a commercially available biower.
• Strong vibrations
Tape Operation
No tape operation
• III PAUSE button is depressed. → Press again to release it.
● REC button cannot be depressed.
• The cassette inserted has the tabs removed. → Cover the slots.
Sound drop-outs, loss of high frequencies, or excessive noise
- Dirty heads → Clean the portions illustrated below with a cleaning tip slightly moistened with cleaning fluid or alcohol.
Recording or palyback cannot be made or there is a decrease in sound level.
- Dirty heads Clean the heads.
- Improper FUNCTION selector setting
Unsatisfactory erasing
- Dirty erase head Clean the head.

- CD Radio Cassette-Corder
- CFD-440
- Operating Instructions
- Owner's Record
- MEGA BASS
- FILE COPY
- WARNING
- To prevent fire or shock hazard, do not expose the unit to rain or moisture.
- CAUTION
- IMFORMATION
- Table of Contents
- Features
- 8-times over-sampling and digital filter
- Dual D/A conversion system
- High quality sound
- A high performance CD player with many functions
- Notes on power sources
- Notes on handling the unit
- Note on cassette longer than 90 minutes
- Power Sources
- Attaching and Connecting Speakers
- Batteries
- Notes on connection
- Playing a Disc
- To Display Remaining Time
- Notes
- Information Display
- Between selections
- Locating a Particular Portion
- Locating a particular selection (AMS\*)
- Locating a particular point in a selection (SEARCH)
- Notes on the AMS function
- Selecting Various Playing Modes
- During REPEAT SHUFFLE play
- When you open the disc holder or you press ■.
- If another selection is stored after 34 selections have been stored
- Adjusting the Sound
- Playing Back a Tape
- Listening to the Radio
- Recording — Use only a TYPE I (normal) cassette for recording.
- On recording level
- To reduce noise during AM recording
- To record in PGM (program) mode
- To stop recording
- To prevent accidental erasure
- Microphone Mixing
- —Use a monaural microphone equipped with a miniplug (optional).
- To record the mixed sound
- Note
- Specifications
- AUDIO POWER SPECIFICATIONS
- POWER OUTPUT AND TOTAL HARMONIC DISTORTION
- OTHER SPECIFICATIONS
- Tape recorder section and general
- OPTIONAL ACCESSORIES
- Troubleshooting Guide
- General
- No sound from speakers
- CD Operation
- The unit does not operate
- Skipping of sound in CD operation
- Tape Operation
- No tape operation
- ● REC button cannot be depressed.
- Sound drop-outs, loss of high frequencies, or excessive noise
- Recording or palyback cannot be made or there is a decrease in sound level.
- Unsatisfactory erasing
Marque : SONY
Modèle : CFD-440
Catégorie : Système Hi-Fi