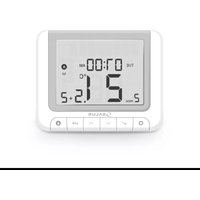
RT 520 TX - Thermostat Salus - Notice d'utilisation et mode d'emploi gratuit
Retrouvez gratuitement la notice de l'appareil RT 520 TX Salus au format PDF.


| Type de produit | Thermostat d'ambiance programmable |
| Marque | Salus |
| Modèle | RT 520 TX |
| Dimensions (H x L x P) | 86 x 86 x 25 mm |
| Poids | 150 g |
| Alimentation | 2 piles AA (1,5 V) |
| Affichage | Écran LCD avec rétroéclairage |
| Plage de température réglable | 5 °C à 35 °C |
| Précision de la mesure | ± 0,5 °C |
| Programmation | Hebdomadaire, 4 périodes par jour |
| Modes de fonctionnement | Confort, Économie, Hors gel, Manuel |
| Type de contact | Fermeture (NO) pour chaudière |
| Puissance de commutation max. | 230 V AC, 16 A (résistif) |
| Fonctions spéciales | Détection de fenêtre ouverte, verrouillage enfant |
| Entretien et nettoyage | Nettoyer avec un chiffon doux et sec. Ne pas utiliser de produits abrasifs. |
| Sécurité | Conforme aux normes CE (EN 60730) |
| Pièces détachées et réparabilité | Pas de pièces détachées disponibles. L'appareil n'est pas réparable par l'utilisateur. |
| Informations générales | Thermostat filaire pour le contrôle de la température ambiante. Utilisation en intérieur. |
FOIRE AUX QUESTIONS - RT 520 TX Salus
Questions des utilisateurs sur RT 520 TX Salus
0 question sur cet appareil. Repondez a celles que vous connaissez ou posez la votre.
Poser une nouvelle question sur cet appareil
Téléchargez la notice de votre Thermostat au format PDF gratuitement ! Retrouvez votre notice RT 520 TX - Salus et reprennez votre appareil électronique en main. Sur cette page sont publiés tous les documents nécessaires à l'utilisation de votre appareil RT 520 TX de la marque Salus.
MODE D'EMPLOI RT 520 TX Salus

Introduction
The RT520 and RT520RF are the latest additions to SALUS' tried and tested RT range of thermostat heating controls. With a new on-board load compensation feature, they offer the most cost effective fully compliant Boiler Plus solution on the market providing the homeowner with optimum efficiency and maximum heating control comfort. Available in both wired and wireless RF versions, the new RT520 series include all the features of the previous RT series with a larger more intuitive LCD display and a handy new suite of additional operational and efficiency functions.
Before use please read this manual carefully.
Product Compliance
This product complies with the essential requirements and other relevant provisions of the following EU Directives: EMC 2014/30/EU, LVD 2014/35/EU, RED 2014/53/EU and RoHS 2011/65/EU. Full text of the EU Declaration of Conformity is available on www.saluslegal.com
(○) 868.0-868.6MHz: <13dBm

Safety Information
Use in accordance to national and EU regulations. Use the device as intended, keeping it in dry condition. Product for indoor use only. Installation must be carried out by a qualified person in accordance to national and EU regulations.
Always ensure the AC mains power is switched off before installing or working on any components (this includes replacing the batteries). Use only AA 1.5 V alkaline batteries in the thermostat. Place the batteries into the battery slot located in the back of the thermostat. Do not use rechargeable batteries.
Technical Specification
| RT520 Thermostat RT | C20TX Thermostat | |
| Thermostat supply 2 x AA alkaline batteries 2 x AA | Alkaline batteries | |
| Thermostat rating max 3 (1) A - | ||
| OpenTherm terminals | A / B | - |
| Outputs | Voltage free NC / NO / COM terminals | - |
| Temperature range | 5°C ~ 33.5°C | 5°C ~ 33.5°C |
| Temperature accuracy | 0.1°C or 0.5°C | 0.1°C or 0.5°C |
| ErP control class | V | V |
| Radio frequency | - | 868 MHz |
| Dimension [mm] | 118 x 95 x 26 [mm] | 118 x 95 x 26 [mm] |
| RXRTS20 Receiver | |
| Receiver supply | 230 V AC |
| Receiver rating max | 16 (5) A |
| OpenTherm terminals | A / B |
| Outputs | Voltage free NO / COM terminals |
| Radio frequency | 868 MHz |
| Dimension [mm] | 96 x 96 x 26 [mm] |
Button Functions
RT520 / RT520RF Thermostat RXRT520 Receiver

- MENU - enter the menu options, press and
hold for 3 sec to return to main screen or to
deactivate Boost Mode. 2. SELECT - confirm char
- SELECT - confirm changes and enter the
- DOWN - decrease the temperature and
move through the menus.
- UP - increase the temperature and move
through menus.
- BOOST - activate Boost Mode.
-
MANUAL - activate /deactive
-
ON - When in Manual Mode, ON will
turn the boiler on.
- OFF - When in Manual Mode, OFF will turn the hail off.
will turn the boiler oil. 9. AUTO - Receiver operates in automatic
mode according to the thermostat.
- MANUAL - Receiver output is
controlled by the On/Off slide switch.
LCD Icon Description

1 Text Bar
2 Temperature Unit
3A Day of the week (numeric)
38 Day of the week (alphabetic) 4 Clock
4 CUCK
5 AM / PM
6 Cooling Mode On
7 Holiday Mode On
8 Manual Mode On
9 Heating Mode On
10 Low battery status
10 Low battery status
11 Wireless connection with the
1. Wireless connection with the receiver
12 Service Mode On
13 Temperature measured / set
14 Program number
15 Settings
16 Program indicator
17 Boost function
RT520 Thermostat Terminals Description
| Terminal | Description |
| B / A | OpenTherm Communication Wire |
| NC | Switched Live OFF |
| NO | Switched Live ON |
| COM | Common Terminal |
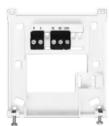
RXRT520 Receiver Terminals Description
| Terminal | Description |
| B / A | OpenTherm Communication Wire |
| NO | Switch Terminal |
| COM | Common Switch Terminal |
| L; N | Supply (230 V AC) |
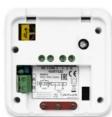
RT520 Wiring Diagram
TPI, SPAN

RT520TX Wiring Diagram
TPI, SPAN


OPENTHERM


OpenTherm Power Up and Configuration
OpenTherm Modulating Control is a method of control used by modern heating systems. Instead of switching a boiler on and off at intervals, modulating control allows the amount of heat provided by the boiler to be controlled to match the varying demand from the thermostat. This means the customer has greater system efficiency, energy saving and room comfort from our heating controls.
Please make the receiver connections and power the receiver before inserting the batteries into the thermostat.
1

After inserting the batteries, the thermostat will power up.
4
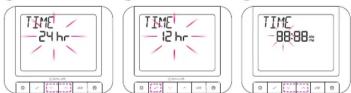
Using UP or DOWN, choose
the time format
7

10

Using UP or DOWN, set the day and then press SELECT.
11

Using UP or DOWN, select the week format.
Using UP or DOWN, choose your language and then press SELECT.
3
6

Using UP or DOWN, set the hour and then press SELECT.
9
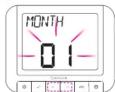
Using UP or DOWN, set the month and then press SELECT.
12
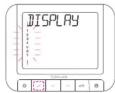
Press SELECT to confirm.
13

Using UP or DOWN, enable or disable DST (Daylight Saving Time
disable DST (daylight Saving Time)
14

Press SELECT to confirm.
15
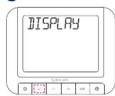
Press SELECT.
16

Using UP or DOWN, select your temperature accuracy.
temperature accuracy.
17

Press SELECT to confirm.
18

When OpenTherm is connected, the device software will automatically adjust to the OpenTherm settings.
OpenTherm - Hot Water
1
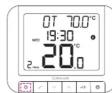
Press MENU.
2

Using UP or DOWN, navigate to
Hot Water submenu and
press SELECT.
3

Using UP or DOWN, adjust the
temperature and
press SELECT.
4

The thermostat will return to the main screen. Press any button.
5

The text bar indicates that hot water is in operation.
SALUS Controls plc
SALUS Controls
Units 8-10
Northfield Business Park
Forge Way
Parkgate
Rotherham
S601SD
Email: sales@salus-tech.com
www.salus-tech.com

Computime

SALUS Controls is a member of the Computime Group.
Maintaining a policy of continuous product development SALUS Controls plc reserve the right to change specification, design and materials of products listed in this brochure without prior notice.
Issue Date: July 2021
CE EAC
Standard Power Up and Configuration
1 Please follow steps 1 to 17 from section OpenTherm Power Up and Configuration.
NOTE: Using UP or DOWN, you can choose either TPI (step 2) or SPAN (step 6). Choosing one option excludes the other.
2
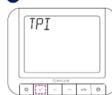
Press SELECT.
4

Using UP or DOWN, select the TPI type you want to use.
5

Press SELECT to confirm.
Span is the difference between the measured temperature and the set temperature.
6

Press SELECT.
Span value.
7

Using UP or DOWN, select the
Span value.
8
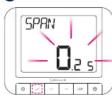
Press SELECT to confirm.
Optimum Start is a selectable function which, depending on the ambient room temperature, will start the boiler operation at the optimum time to achieve the set-point temperature. It saves energy by only firing the boiler for the minimum required time.
9
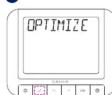
10A
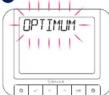
Press SELECT. Press SELECT.
11

Using UP or DOWN,
select ON or O
12

Press SELECT to confirm.
13A

Press SELECT.

Optimum Stop calculates how long the house will take to cool down, then turns off the boiler at the earliest possible moment, this means the system is not running when it's not actually necessary. If there is a sudden heat loss during this period, then Optimum Stop will be overridden to regain comfort conditions.
14

Using UP or DOWN
select ON or UP
15
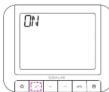
Press SELECT to confirm.
[Non-Text]
16

The thermostat will go to
the main screen.
Programming - Automatic Mode
The schedule has 6 time intervals for which different temperatures can be adjusted. You can set 2, 3 or up to 6 temperatures per day. You must define all time periods. Here is an example of setting a certain time with a certain temperature.
1

Press MENU.
2

Press SELECT
3A
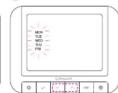
Using UP or DOWN, select the
program type between: 5
3B
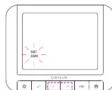
+2 (schedule for the working days
and for the weekend);
4

All (set one schedule for
the entire week)
5

Individual (set a daily schedule).
Press SELECT to confirm.
6

Using UP or DOWN, set the hour
and then press SELECT.
7

Using UP or DOWN, set the
minutes and then press SELECT
8

Using UP or DOWN, set the
temperature and then
① repeat the process for all time periods.
If you do not want to use the 6 temperature intervals / day (ex: 1 eco, 2 comfort), please see below how to delete one or more intervals.

Press the UP arrow on the interval
at which you want to remove the temperature, until lines appear

When lines appear, press SELECT
to confirm the removal of that specific interval
| TIME: | 6 temp / day- eco - | 2 temp / day- comfort - |
| 06.00 21 °C | 21 °C | |
| 10.00 14 °C | - | |
| 12.00 21 °C | - | |
| 14.00 14 °C | - | |
| 18.00 21 °C | - | |
| 21.00 14 °C | 14 °C |
!
This is an example for your weekly schedule. High temperature should be used for the ON times and low temperature for the OFF times.
Landlord Settings
Landlord settings is a pin code protected feature that allows the landlord to set a service reminder on the thermostat that will warn the tenant when the boiler is due its annual service.
1

Press MENU.
2

Using UP or DOWN, navigate to
Landlord submenu
and press SELECT.
3

Using UP or DOWN, enter the PIN
code number. Press SELECT to
4
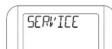
| | | |
C2. 请先注明
5

| | | |
TOMES
0 √ 1 × 2 → 6
Using UP or DOWN, select ON
and press SELECT.
6

| | | |
Genus
0 √ □ △ = 0
Using UP or DOWN, select the due
date and then press SELECT.
7

Using UP or DOWN, select
the warning period and
then press SELECT.
8

○ √ √ ∽ ← ○
Using UP or DOWN, select the
lock temperature an
then press SELECT.
9
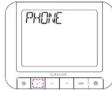
Press SELECT.
[Non-Text]
[Non-Text]
10

Using UP or DOWN, enter the
phone number. Press SELECT to confirm every digit
committively digit.
11
Now you can check your settings. If you want to make a change, press UP or DOWN on the relevant screen.
[Non-Text]
[Non-Text]
[Non-Text]
[Non-Text]
[Non-Text]
[Non-Text]
12

[Non-Text]
[Non-Text]
[Non-Text]
[Non-Text]
[Non-Text]
13

i
①
[Non-Text]
1
[Non-Text]
[Non-Text]
0
Onch
by
Doll
-
m = 311
[Non-Text]
[Non-Text]
[Non-Text]
[Non-Text]
[Non-Text]
[Non-Text]
[Non-Text]
[Non-Text]
[Non-Text]
[Non-Text]
[Non-Text]
[Non-Text]
[Non-Text]
[Non-Text]
[Non-Text]
[Non-Text]
[Non-Text]
[Non-Text]
[Non-Text]
[Non-Text]
[Non-Text]
[Non-Text]
[Non-Text]
[Non-Text]
[Non-Text]
[Non-Text]
[Non-Text]
[Non-Text]
[Non-Text]
[Non-Text]
[Non-Text]
[Non-Text]
[Non-Text]
[Non-Text]
[Non-Text]
[Non-Text]
[Non-Text]
[Non-Text]
[Non-Text]
[Non-Text]
[Non-Text]
[Non-Text]
[Non-Text]
[Non-Text]
[Non-Text]
[Non-Text]
[Non-Text]
[Non-Text]
[Non-Text]
[Non-Text]
[Non-Text]
[Non-Text]
[Non-Text]
llor
d sett
stat t
Pres: Press
UP or wamii en pr
IP or l umbe nfirm
Ono
by t
boil
[Non-Text]
[Non-Text]
[Non-Text]
[Non-Text]
[Non-Text]
[Non-Text]
[Non-Text]
[Non-Text]
[Non-Text]
[Non-Text]
[Non-Text]
[Non-Text]
[Non-Text]
[Non-Text]
[Non-Text]
[Non-Text]
[Non-Text]
[Non-Text]
[Non-Text]
[Non-Text]
[Non-Text]
[Non-Text]
[Non-Text]
[Non-Text]
[Non-Text]
[Non-Text]
[Non-Text]
[Non-Text]
[Non-Text]
[Non-Text]
[Non-Text]
[Non-Text]
1 + u1 - 1 = ( 1 + u) u1 < 1 = u
[Non-Text]
llors
more
[Non-Text]
ed sett
stat t
[Non-Text]
[Non-Text]
[Non-Text]
[Non-Text]
[Non-Text]
[Non-Text]
m = 311
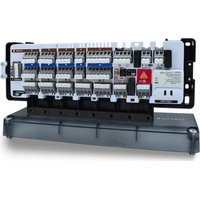
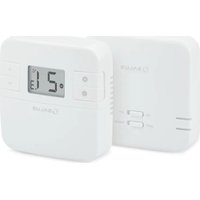
Marque : Salus
Modèle : RT 520 TX
Catégorie : Thermostat