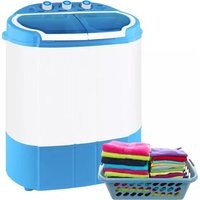
PUCWM22 - Lave-linge Pyle - Notice d'utilisation et mode d'emploi gratuit
Retrouvez gratuitement la notice de l'appareil PUCWM22 Pyle au format PDF.


| Type de produit | Lave-linge compact |
| Marque | Pyle |
| Modèle | PUCWM22 |
| Dimensions (L x P x H) | 60 x 55 x 85 cm |
| Poids net | 55 kg |
| Alimentation électrique | 220-240 V ~ 50 Hz |
| Consommation d'énergie | 0,75 kWh par cycle |
| Capacité de lavage | 6 kg |
| Vitesse d'essorage max | 1000 tr/min |
| Nombre de programmes | 15 |
| Programmes principaux | Coton, Synthétique, Délicat, Rapide, Lavage à la main, Rinçage + Essorage, Essorage seul |
| Fonctions spéciales | Départ différé, Sécurité enfants, Arrêt cuve pleine, Niveau d'eau réglable |
| Type d'installation | Libre ou encastrable |
| Entretien et nettoyage | Nettoyer le filtre après chaque cycle, détartrer tous les 3 mois |
| Sécurité | Verrouillage de porte, protection anti-débordement, anti-balourd |
| Réparabilité | Pièces détachées disponibles (courroie, pompe, résistance, carte électronique) |
| Classe énergétique | A++ |
| Niveau sonore (lavage/essorage) | 55 dB / 75 dB |
| Garantie | 2 ans |
FOIRE AUX QUESTIONS - PUCWM22 Pyle
Questions des utilisateurs sur PUCWM22 Pyle
0 question sur cet appareil. Repondez a celles que vous connaissez ou posez la votre.
Poser une nouvelle question sur cet appareil
Téléchargez la notice de votre Lave-linge au format PDF gratuitement ! Retrouvez votre notice PUCWM22 - Pyle et reprennez votre appareil électronique en main. Sur cette page sont publiés tous les documents nécessaires à l'utilisation de votre appareil PUCWM22 de la marque Pyle.
MODE D'EMPLOI PUCWM22 Pyle
If the spin dryer does not work, check if:
- The inner lid and outer spin bowl lids are closed.
- The spin dry timer is set.
If there is excessive noise, check if:
- Something is touching the pulsator as it rotates.
- The machine is not placed on a level surface.
- The wash load does not exceed more than the machine
can handle to ensure balance during the spin cycle. - Something is stuck between the spin bowl and tub.
Wash Day Maintenance
At the end of the day:
- Unplug the power cord from the outlet.
- Check that both timers are set to the OFF position "O"
- Wipe the inside and outside of the unit with damp clean cloth.
- Remove the hose from the water tap.

flowchart
graph TD
    A["Individual single-phase three-pin plug"] --> B["Blue"]
    B --> C["Washing and draining switch"]
    C --> D["Yellow and Green"]
    D --> E["Blue"]
    E --> F["Washing motor"]
    F --> G["Red and white"]
    G --> H["Dryer timer"]
    H --> I["Grey"]
    I --> J["White"]
    J --> K["Drying capacitor"]
    K --> L["Blue"]
    L --> M["Dryer motor"]
    M --> N["Blue"]
    N --> O["Yellow and White"]
    O --> P["Drying capacitor"]
    P --> Q["Blue"]
    Q --> R["Dryer motor"]
    R --> S["Blue"]
    S --> T["Yellow and White"]
    T --> U["Drying capacitor"]
    U --> V["Blue"]
    V --> W["Dryer motor"]
    W --> X["Blue"]
    X --> Y["Drying capacitor"]
    Y --> Z["Blue"]
    Z --> AA["Drying motor"]
    AA --> AB["Dryer motor"]
    AB --> AC["Blue"]
    AC --> AD["Drying capacitor"]
    AD --> AE["Blue"]
    AE --> AF["Drying motor"]
    AF --> AG["Dryer motor"]
    AG --> AH["Blue"]
    AH --> AI["Drying capacitor"]
    AI --> AJ["Blue"]
    AJ --> AK["Drying motor"]
PUCWM22
INSTRUCTION MANUAL
Pure Clean
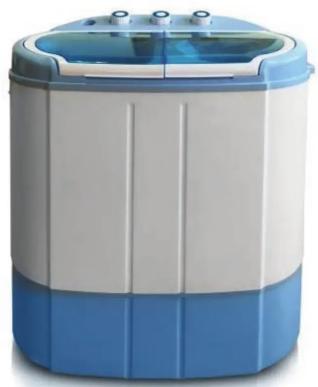
TWIN TUB WASHING MACHINE
natural_image
Exterior view of a blue and white washing machine (no text or symbols visible)
Please read the manual carefully before using the machine
TABLE OF CONTENTS
| Contents | Page |
| Parts Identification | 1 |
| Chief Technical Data | 1 |
| Installation | 2 |
| Operation Instruction | 2-4 |
| Laundry Guide | 4 |
| Cleaning After Use | 5 |
| Point To Remember | 5 |
| Before You Call For Service | 6 |
| Maintenance After Use | 6 |
CLEANING AFTER USE
- Always clean the washing machine after every use. Ensure the power switch is turned off and disconnected from the electrical outlet before performing this action.
POINTS TO REMEMBER
- Avoid using excessive amounts of bleach or detergent; use the amount of soap recommended by the manufacturer.
- For your safety, ensure that the ground connection is correct.
- Never put your hands into the spin tub while operating.
- When washing, the water temperature should be below 120^ . This is to prevent the plastic components from being deformed.
- Do not place the washing machine close to heat generating products such as gas or electric cookers.
- Use soft cloth when cleaning the washing machine to prevent damages on the surface of the cabinet.
- Do not place wet load on the control panel.
- Do not place washing machine outside or in a damp area.
BEFORE YOU CALL FOR SERVICE
- If you suspect the washing machine requires maintenance, follow these instructions to save unnecessary costs before calling the manufacturer or a technician.
- If the washing machine will not start, check if:
o The hose circuit breaker is tripped or a fuse is blown.
o The cord is firmly connected to the power point or the power is not switched "ON".
o Something is stuck and is preventing the pulsator from rotating.
o The wash timer is set.
Simultaneous Washing and Spin Drying
- The machine has two motors designed for washing and spin drying that allows the user to load, wash and spin dry all at the same time.
- Set the controls for both “wash” and “spin” modes (see “To Wash” and Spin Drying”).
CLEARING THE TUB
- First, set the selector knob to "DRAIN" mode.
- Wait until the machine empties completely.
- Then, set the selector knob to "WASH" mode.
- Lastly, unplug the power cord from the outlet.
LAUNDRY GUIDE
| Type of Fabric | Size of Wash Load | Water Level (Volume) | Degree of Soiling | Water Temperature Wash Cycle | Wash Period | Spin Period |
| Colored Cotton and Linens | Full Half & Less | High Low | Heavy Normal Light | Below 104°F | 5-10 mins. 3-5 mins | |
| Nylon and P.P | Full Half & Less | High Low | Normal Light | Below 104°F | 4-5 mins. 2-3 mins. | 2 mins. |
| Delicates | Half & Less | High | Normal to Light | Below 104°F | 2-3 mins. | 1-2 mins. |
PARTS IDENTIFICATION

- CONTROL PANEL
- WATER INLET
- PULSATOR
-
WASH TUB LID
-
HOUSING
- SPIN TUB LID
- SPIN TUB
-
POWER CORD
-
PLASTIC SPIN MAT
10.DRAIN HOSE
CHIEF TECHNICAL DATA
| Model | Rated Wash Capacity | Rated Input Power | Rated Power Source | Energy Efficiency Grade: 5Wash Cleaning Rate ≤slant 0.7 | Packaging Dimension | Net/Gross Weight | Input Water Pressure Area MPA | ||||
| Frequency/Voltage/Wash (kW/mCycle KG) | Consume Wash Spin (L/Lcycle KG) | Length/Width/Depth | |||||||||
| PUCWM22 | 3.5KG | 15KG | 250W | 120V | 110V | 60 Hz | ≤slant 0.032 | ≤slant 36 | 590x390x675(MM) | 11/13KG | 0.05~0.3 |
INSTALLATION
Electrical Connection
- The unit is designed to function under the recommended power settings mentioned in the rating label at the back of the washing machine.
- The power cord must be plugged into a grounded 3-pin outlet.
- If the power cord is damaged, it should be replaced by the manufacturer/distributor or a certified technician.
Connection of Water Inlet Hose
- Attach the water inlet hose to the water inlet (Please refer to the Parts Identification on page 1). Caution: Please use water BELOW 120^ .
- The drain hose should be placed so that the water can drain down without any obstruction.
OPERATION INSTRUCTION
Preparing the Wash
- The machine should be placed on a flat surface.
- Separate the laundry into different groups like: white clothes, color clothes, delicate clothes, lint-free and etc. Wash the laundry according to the washing guide.
- Clothes with worn patches or tears should be mended first. Empty all pockets and close all fasteners.
Prior to Wash
- Remove the plastic spin mat from the spin tub.
- Check if wash timer knob is set to position "0" and the selector switch is set to "Wash".
- Ensure that drain hose is placed properly to allow draining.
- Insert the power cord into a grounded 3-pin outlet.
To Wash
- Place the wash load and detergent in the wash tub.
- Set the selector switch to "Wash" mode.
- Fill the washing machine with water as recommended in the “Laundry Guide.”
- Set the wash timer to the wash period recommended in the laundry guide.
Your machine will now wash for the time selected. When the wash period expires, set the selector switch to "Drain" position to discharge the water.
WARNING
- When connecting the appliance to the water main, use a new hose, do not use an old hose.
- For washing machines with ventilation openings at the base, ensure that nothing is obstructing the openings.
- If the power cord is damaged, it must be replaced by the manufacturer/distributor or a certified technician.
- This appliance is not intended to be used by persons (including children) with reduced physical, sensory or mental capabilities, or lack of experience and knowledge, unless they have been given supervision or instruction concerning use of the appliance by a person responsible for their safety.
- Do leave children unattended and play near the appliance.
To Rinse In The Wash Tub
- Set the selector knob to "WASH" mode.
- Turn the water tap on.
- When the rinse water became clear, turn off the water tap.
- Set the selector switch "DRAIN" position to discharge the water.
Spin Drying
- To open the inner safety lid of the spin tub, lift up the outer spin cover and then lift up the safety lid.
- Transfer the wash load to the spin tub commencing with small articles. Ensure that the clothes are evenly distributed.
- Place the removable spin mat over the load to be dried and push lightly downward. (To contain delicate articles within the tub.)
- Set the spin timer to the time recommended in the Laundry Guide. The spin tub will spin for the time selected and then stop on (at the position "O").
Caution:
Ensure that the spin tub completely stops before reaching in to the wash load. Do not leave children unattended during this process.
- To remove or reposition clothes during the spin dry cycle, open the spin cover and inner lids. In this case, the spin tub will automatically stop as a brake is activated when the spin cover is opened. To restart, close both lids. If required, reset the spin timer.
- Turn off the spin drying and rearrange the clothes inside the tub if abnormal vibration is observed during spin drying.

- If the spin dryer does not work, check if:
- If there is excessive noise, check if:
- Wash Day Maintenance
- At the end of the day:
- PUCWM22
- INSTRUCTION MANUAL
- CLEANING AFTER USE
- POINTS TO REMEMBER
- BEFORE YOU CALL FOR SERVICE
- Simultaneous Washing and Spin Drying
- CLEARING THE TUB
- INSTALLATION
- Electrical Connection
- Connection of Water Inlet Hose
- OPERATION INSTRUCTION
- Preparing the Wash
- Prior to Wash
- To Wash
- WARNING
- To Rinse In The Wash Tub
- Spin Drying
- Caution:
- Ensure that the spin tub completely stops before reaching in to the wash load. Do not leave children unattended during this process.
Marque : Pyle
Modèle : PUCWM22
Catégorie : Lave-linge