
Africa - Chaise Habitat - Notice d'utilisation et mode d'emploi gratuit
Retrouvez gratuitement la notice de l'appareil Africa Habitat au format PDF.


| Type de produit | Chaise |
| Marque | Habitat |
| Modèle | Africa |
| Catégorie | Chaise design |
| Dimensions (H x L x P) | 85 x 45 x 55 cm environ |
| Hauteur d'assise | 46 cm environ |
| Poids | 4,5 kg environ |
| Matériaux | Bois massif (hêtre ou acacia) et contreplaqué |
| Finition | Vernis mat naturel ou teinté |
| Poids supporté max | 120 kg |
| Montage | Nécessite assemblage (notice incluse) |
| Entretien | Essuyer avec un chiffon doux légèrement humide |
| Utilisation | Intérieur sec, usage domestique |
| Garantie | 2 ans |
| Pièces détachées | Disponibles sur demande auprès du fabricant |
| Réparabilité | Réparable (visserie standard, collage possible) |
| Origine | Fabriqué en Europe |
FOIRE AUX QUESTIONS - Africa Habitat
Questions des utilisateurs sur Africa Habitat
0 question sur cet appareil. Repondez a celles que vous connaissez ou posez la votre.
Poser une nouvelle question sur cet appareil
Téléchargez la notice de votre Chaise au format PDF gratuitement ! Retrouvez votre notice Africa - Habitat et reprennez votre appareil électronique en main. Sur cette page sont publiés tous les documents nécessaires à l'utilisation de votre appareil Africa de la marque Habitat.
MODE D'EMPLOI Africa Habitat
Africa Folding Chair
Assembly Instructions - Please keep for future reference
AFRI-FC-04-A
Dimensions
Width - 54cm
Depth - 50cm
Height - 68cm
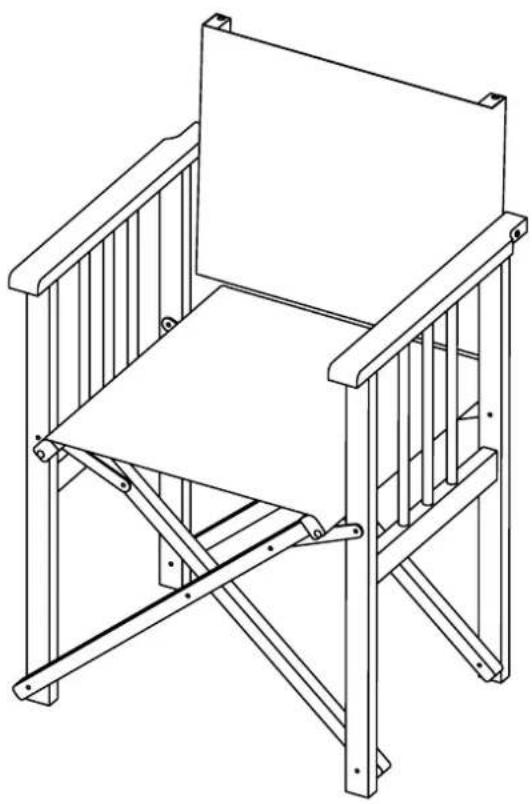
Please note - slings sold separately
Important- Please read these instructions before assembly
If you need help or have damaged or missing parts, email:
customerservices@habitat.co.uk or call: 0344 499 4686
habitat


Safety and Care Advice
Important – Please read these instructions fully before starting assembly
Keep children and animals away from the work area, small parts could choke if swallowed.
Make sure you have enough space to layout the parts before starting.
Do not stand or put weight on the product, this could cause damage.
Do not place furniture directly in front of radiators, fires or any other source of heat.
Assemble on a soft level surface to avoid damaging the unit or your floor.

We do not recommend the use of power drill/ drivers for inserting screws, as this could
damage the unit. Only use hand screwdrivers.
Dispose of all packaging carefully and responsibly.
General care and maintenance
Take care when moving furniture - dragging pieces across the floor will damage the joints.
Avoid exposing your furniture to direct and prolonged periods of sunlight and heat sources as fading and cracking may occur.
Take care to prevent sharp objects e.g. toys, buckles and heels from coming into contact with your furniture, and avoid contact with chemicals e.g. cosmetics or hairs products which may permanently mark the surface.

Cleaning and care for wooden frame
Dust regularly with a clean dry cloth. Wipe up any spills immediately with a damp cloth and then dry the surface with a clean dry duster. Repeat this procedure for periodic cleaning.
The use of furniture polish or spray is not necessary or recommended.
General information
If for any reason you should have problems with your Habitat product, please contact the store from which you purchased it.
Please retain your receipt as proof of purchase.
If you have any comments or suggestions regarding this product, assembly instructions or service
received, please contact the store or Habitat Head Office via its web site: www.habitat.co.uk
or write directly to: Habitat Retail Ltd. 489-499 Avebury Boulevard, Milton Keynes MK9 2NW
Please check you have all the panels listed below

Note: There are 'Batch Code' lables where shown on the indicated items, these should be retained.

- Chair frame

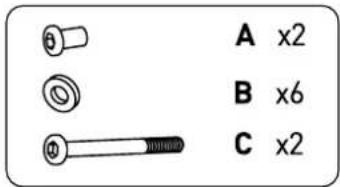
A. Treaded bolt x2

B. Washer x6
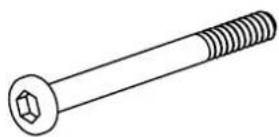
C. Long screw x2
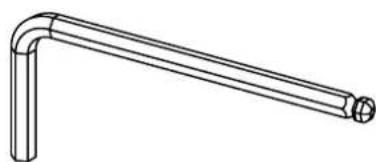
D. Allan key x2
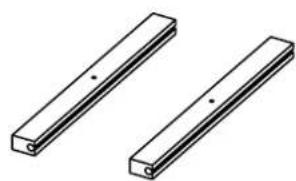
- Wooden batons x2

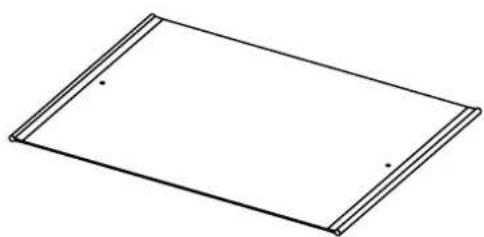
- Back sling

- Seat sling

5. Plastic rod x4
Assembly Instructions
Step 1
![graph TD A["Step 3: Take center node"] --> B["Step 5: Push plastic rod into side seams"] B --> C["Step 5: Push plastic rod to centre node"] C --> D["Step 5: Push plastic rod to edge"] D --> E["Step 5: Push plastic rod to chair frame"] style A fill:#f9f,stroke:#333 style B fill:#ccf,stroke:#333 style…](/content/2026/06/1333389/images/fb43047900aed41c6a6a869c444d71ecfba1442ef430738351718fb64b250e1b.jpg)
Step 2
![graph TD A["Seat Sling Without Eyelets"] --> B["Push plastic rods into sling seams. Take care to centre rods within seams so the ends are pushed back from the edge. This will make the slings easier to fit to the chair frame in the next steps."] B --> C["Step 4: Sliding on table"] C --> D["Step 5: Ou…](/content/2026/06/1333389/images/1c0903f4e2806f14047ff53651afb95ce118c9b3fbba5eb4a02986432699a3ec.jpg)
Assembly Instructions
Step 3

Step 4
step A

Back Sling With Eyelets
step B
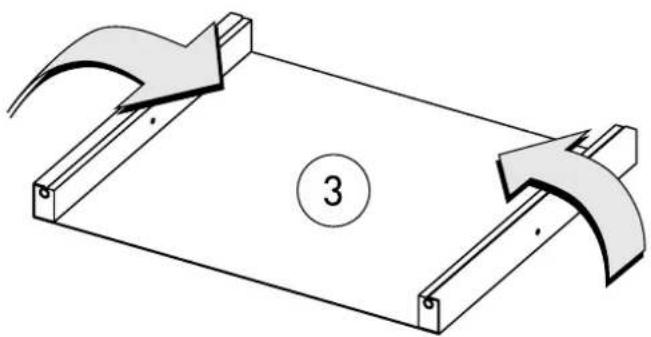
Turn wooden batons over toward the middle until eyelets in fabric slings are aligned with the holes in wooden battons.
Assembly Instructions
Step 5
BACK SLING
Please note that the chair frame must be partially folded to allow the back sling to be fitted. The sling CANNOT be fitted while the chair frame is fully extended.
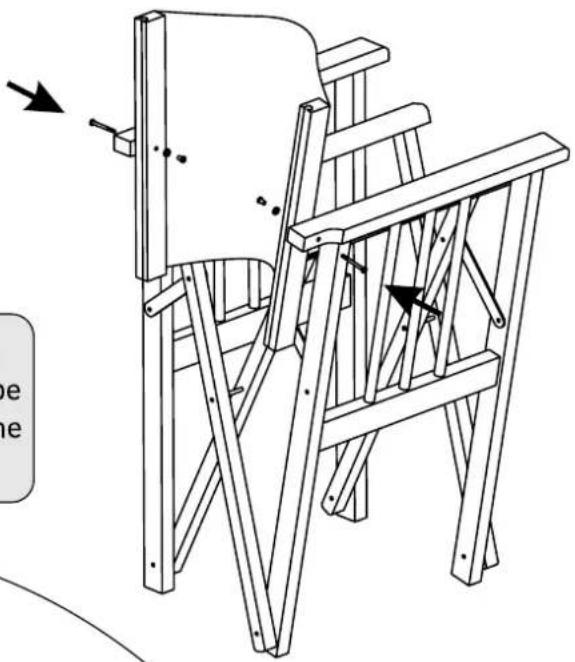

Use 1 Allan key to hold the bolt in place at one end, and the other Allan key to tighten the bolt from the end end.
Assembly Instructions
Step 6
SEAT SLING
Please note that the chair frame must be partially folded to allow the seat sling to be fitted. The sling CANNOT be fitted while the chair frame is fully extended.

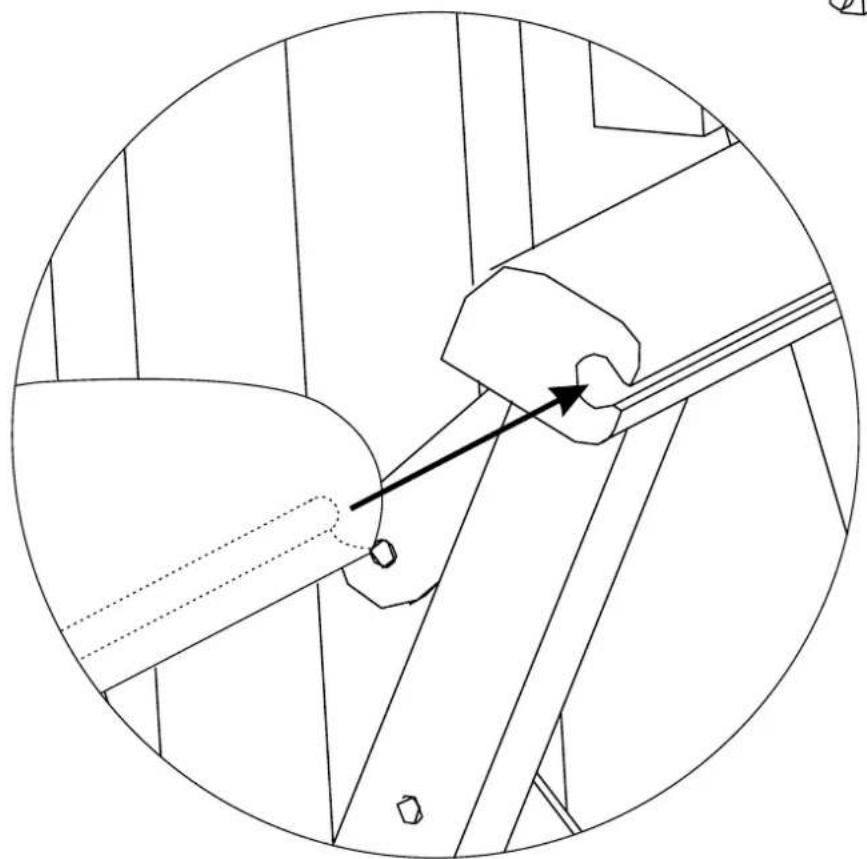
Assembly Instructions
Step 7
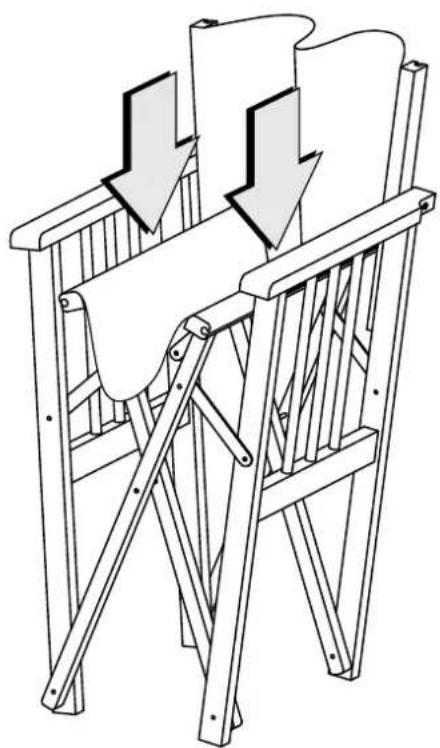
NOTE
Taking care not to trap fingers, press down firmly on the edges of the fitted seat sling to extend the chair into the open position.
IMPORTANT NOTE
The AFRICA slings have been purposefully sized to create a tight fit so that they are taught when the chair frame is opened. DO NOT BE AFRAID TO PUSH DOWN FIRMLY ON THE EDGES OF THE FITTED SEAT SLING UNTIL THE CHAIR IS FULLY OPENED.


- AFRICA FOLDING CHAIR
- SAFETY AND CARE ADVICE
- IMPORTANT – PLEASE READ THESE INSTRUCTIONS FULLY BEFORE STARTING ASSEMBLY
- GENERAL CARE AND MAINTENANCE
- CLEANING AND CARE FOR WOODEN FRAME
- GENERAL INFORMATION
- PLEASE CHECK YOU HAVE ALL THE PANELS LISTED BELOW
- ASSEMBLY INSTRUCTIONS
- STEP 1
- STEP 2
- STEP 3
- STEP 4
- STEP A
- STEP B
- STEP 5
- BACK SLING
- SEAT SLING
- NOTE
- IMPORTANT NOTE
Marque : Habitat
Modèle : Africa
Catégorie : Chaise